
Email Segmentation Strategies to Segment Your Leads
Email is one of the most versatile mediums for communication ever used by businesses. You see, it does so much more than a pamphlet or a billboard could ever hope to achieve. Email lets you communicate on a personal level no matter where your customers are or what they’re doing.
This touch of personalization in interacting with your customers depends on segmenting your marketing emails. It’s kind of the only way to make your point convincing enough. Better yet, now it’s easier than ever to segment contacts automatically for the best outcomes.
Why segment?
That’s a fair question. It’s not easy to carry out something without knowing its purpose. Segmentation for email marketing is necessary for mainly 3 reasons-
- Firstly, remember that you’re serving different buyers. Even if you’ve got a buyer’s persona to cater to in your email copy, obviously not everyone in your email list is going to be a perfect match. That means if you want to keep these people engaged with the content you share, you need to make sure it satisfies their specific needs.
- Secondly, marketing funnels are linear but the way your leads go through them is hardly so. To move your leads further into the journey of becoming your customer, you need to meet your leads where they are in your marketing funnel.
- And last but not least, you’ll find that using email segmentation can increase your email open rates and ultimately notch up your revenue.
Email marketing segmentation with FluentCRM
FluentCRM is a self-hosted email marketing plugin for WordPress that’s supporting more than ten thousand businesses. It offers a variety of ways to segment contacts, so you get the precision you want.
FluentCRM segments work using Lists and Tags that you assign to contacts to identify them. But its ability to completely automate the process makes it a rescue route for an average email marketer.
Dynamic segments
Dynamic segments allow you to automate the email segmentation process. To start out, you simply create the custom segment, to have your contacts automatically segmented. The segment updates continuously, so no contact is in a segment it’s not supposed to be in, ever.
Note: Dynamic Segments is a Pro feature in FluentCRM. Please make sure you have the Pro version to use these features.
To explain the use of Dynamic segments, we’ll look at some widely used email segmentation strategies. Mainly-
- Geography
- Contact source
- Contacts email activity
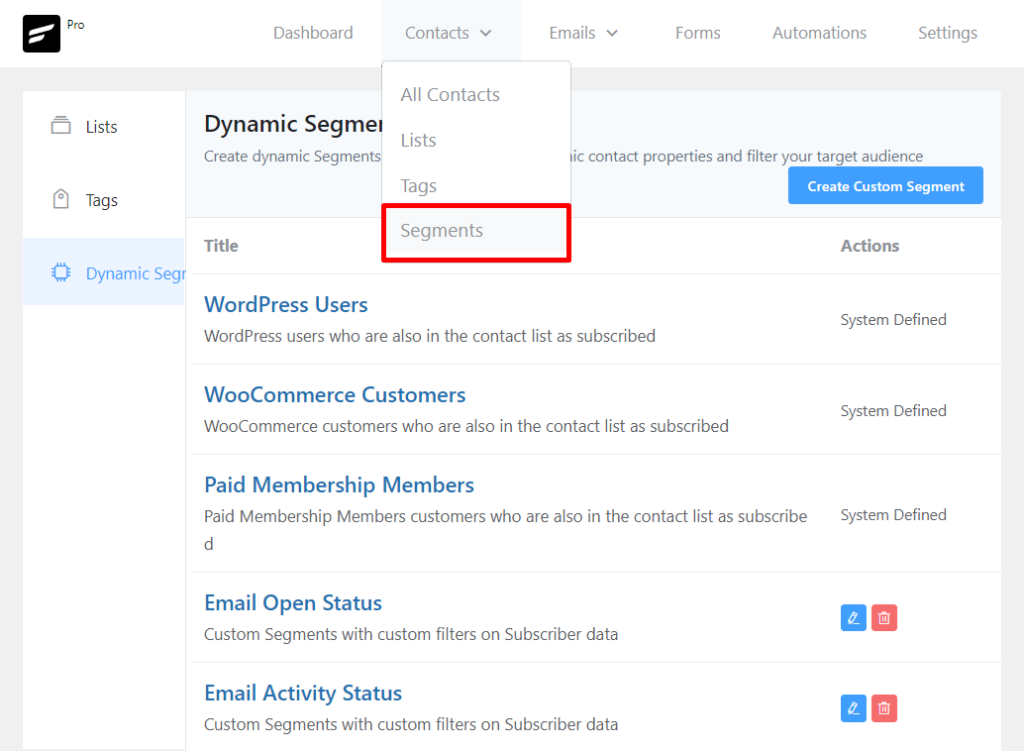
First off, head over to the “Segments” section in FluentCRM under “Contacts”. Next select “Dynamic segments” from the left-side panel.
Now hit “Create custom segment”.
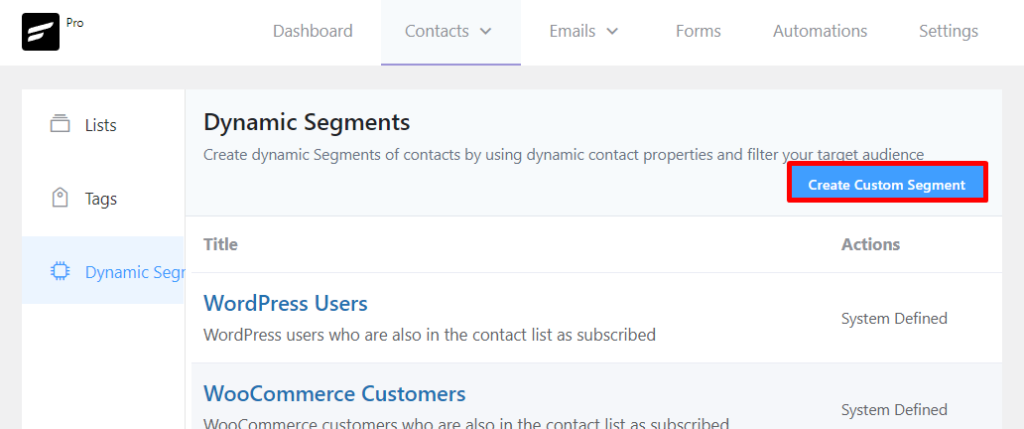
On the next page, fill out the segment’s name and you’re ready to set the segmentation conditions!
Geographic segmentation
If your market includes a global audience, knowing the “where” is as important as the “who”. Segmenting your contacts based on geographic location makes time-based email messages for optimum times in different time zones. You can also direct customers to physical store locations closest to them.
For segmenting contacts based on the country, select “Country” for the contact field in the Conditions section. Then select a condition and finally the target countries.
You can enter multiple countries in one condition to segment i.e., continent-wise locations and so on. That’s easy segmentation based on your audience’s country. Now if you want, you can also add another condition to filter contacts even more.
Let’s say you want to know how many of your US customers are from California. In that case, we’ll add another condition by clicking the blue Add Condition button:
And that’s how easy it is to set geographic segmentation with FluentCRM!
Segmentation Based on Contact Source
Segmenting based on contact source lets you track which of your efforts (web blog, social media, YouTube) brings in leads. This information opens up a whole new level of personalization because you can estimate what sort of prior interaction a contact has had with your brand. All you have to do is cater the content accordingly.
You can do the same to group contacts based on how they entered your email list. Simply select “Source” instead of “Country” in the conditions section. Select the options from the dropdowns to set your conditions.
Note: The “Source” field is not a default contact field in FluentCRM. You need to add it via the “Custom fields” option under General settings.
Contact activity-based segmentation
Looking at a contact’s activities tells you almost everything you need to know to evaluate it. Key metrics that represent contact activity are Open-rates and Click-rates. Tracking these helps you find contacts that are ready for sales pitches along with the ones that have gone cold. Optimize for sales potential while minimizing email cost, easy-peasy!
You just need to scroll down the custom segments page to segment contacts based on activities like email opens and email link clicks.
Now for targeting contacts that have opened emails, select “Last email open”. This condition checks for the email open action within or before a selected period of time.
So if you want to find contacts that have opened emails in the past week, select “Within” under “Last email open” and enter 7 days. That’s it! This custom segment will now show only the contacts that opened emails from you within the past seven days.
You can use the same rationale to segment based on link clicks. Just enter the same values under “Last Email Link Clicked”, and that will return contacts who clicked any of your email links within the past week.
Campaign reports
Aside from the customizable Dynamic segments, FluentCRM lets you segment using campaign reports as well. To make use of this, simply head to FluentCRM’s “All Campaigns” tab and select the “Reports” for your target campaign.
Next, scroll down and select the “Actions” tab. Here you’ll find “add tags” and “remove tags”.
Now let’s think about a use case scenario. Let’s say you want to find contacts that didn’t open any emails in a particular campaign.
You can find them by using the “Filters” at the bottom of the page. Choose the “Select subscribers who did not open email”. Use the add/remove tags to select what you want to do with the target contacts, and that’s it.
This lets you distinguish contacts engaged with your emails as opposed to those who aren’t. Similarly, you can use the “Select subscribers who click selected links” to target contacts that are engaged with your campaign.
Selecting this filter will show the links that have been clicked within your selected campaign. You can choose the links from this list to find out which of your leads clicked on a particular link. Not to mention, assign or remove tags based on this information.
Dynamic tags
The email segmentation strategies we’ve already talked about segment contacts after they’ve signed up. What if you could segment your contacts even before they submit?
Well, that’s exactly what contact segmentation using dynamic tags lets you achieve. Setting up Dynamic tags is a straightforward process with minimum technicalities involved.
Let’s say you want to segment your contacts based on age groups. You can assign them an age-based tag with dynamic tags as soon as they fill out their birthdate information in the subscription form.
With that kind of flexibility, complicated contact segments become much easier and, most importantly, automatic. The best part is Dynamic tagging is available in both the Free and Pro versions of FluentCRM. However, you’ll have to be using Fluent Forms to collect leads for Dynamic tags to work.
Wrapping up
So that is how you can use automatic email segmentation to improve your email marketing output. It’s good to remember that segmentation for email marketing doesn’t have to be remarkably detailed or unique.
Everyone is more or less using these same email segmentation strategies as we’ve discussed. How much it will affect your efficiency and returns depends on how well automated your system is. Automatic email segmentation strategies let you save time and tedious effort. Let us know how it works out for you here on our website and on Twitter. Until then, happy mailing!
Rasel Siddiqe
I write for WPManageNinja by day and code for Data analytics by night. Other than that, I’m mostly interested in sci-fi content and deep-founded music!



Leave a Reply