

How to Segment FluentCRM Contacts Using Dynamic Tags?

Summarize with


Just like most marketing channels, email marketing is constantly evolving. And with the evolved nature of this marketing channel, we simply can’t stress more on the importance of personalization in email marketing.
However, it’s not an easy task. You may know that contact segmentation is the key to sending personalized, targeted emails to the right audience. But if you don’t know how to use your tool to segment contacts efficiently, you will end up among the 70% of brands that fail to personalize emails.
Contact Segmentation in FluentCRM
FluentCRM allows you to segment your audience in several ways. You can create lists, and within those lists, you can create tag-based contact groups, aka segments of your contacts.
The first option is to assign tags or lists to contacts manually. But who’d want to do that in an email marketing automation tool, right?
So FluentCRM also lets you apply lists and assign tags in several automated ways. For example, you can assign tags or lists when you acquire contacts through form submissions, product purchases, student enrollments, and many more. Or, you can assign lists and tags in the middle of automation and after email campaigns.
There is another option named dynamic segments that can help you segment your existing contact database. All of these are great methods if you want to segment your contact database.
But today, we’re here to show you a unique way of segmenting contacts in FluentCRM.
So what is it all about?
Contact Segmentation Using FluentCRM Dynamic Tag
Imagine if you could segment your contacts as they fill out your contact forms with different kinds of information. For example, if the contact inputs 1970 into the date of birth field, assign them an age-based tag. Let’s say, “Age Group 50-60.”
Sounds brilliant, right?
With that kind of flexibility, you can easily pull off the more complicated contact segments. And that’s exactly what this tutorial is focused on, contact segmentation using dynamic tags!
And don’t worry if you’re using FluentCRM’s free version. Dynamic tagging is available in both the Free and Pro versions of FluentCRM.
But before you proceed, note that dynamic tagging is only for the users that are using Fluent Forms to collect leads. So if you don’t have Fluent Forms yet, install it now!
Ready?
Let’s see what kind of segments we’ll be pulling off:
The Scenario
Let’s say we’re offering a free course to collect leads. And before students get access to that course, we’d like to understand their level of expertise so that we can tailor relevant content later.
Here’s a form we’ve created using Fluent Forms:
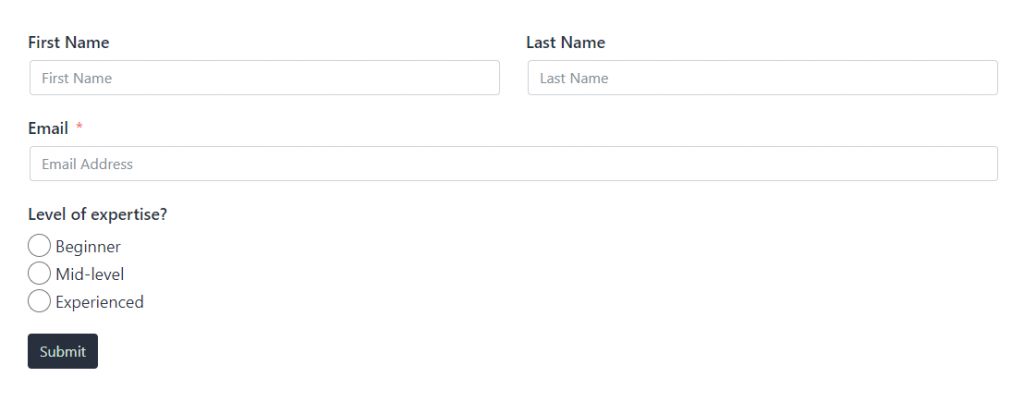
This is a simple contact form that we’ve slightly modified by adding a Radio Field so that we can collect additional data. Now, our goal is to segment the students into three contact groups based on their answers :
Here’s what our segment should look like:
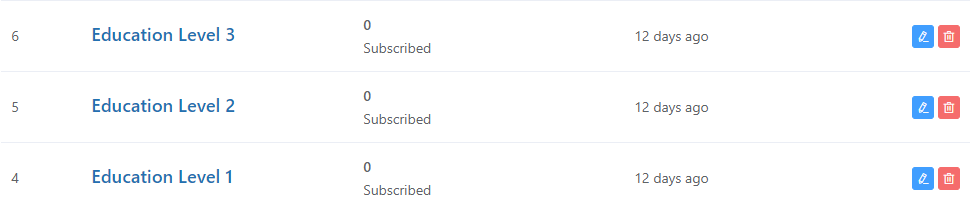
- If the contact says they have Beginner level expertise, we’d want to assign them an Education Level 1 tag.
- If the contact says they have Mid-level expertise, we’d want to assign them an Education Level 2 tag.
- If the contact says they are Experienced, we’d want to assign them an Education Level 3 tag.
Setting up FluentCRM Dynamic Tags
Generally, when creating a form using FluentCRM, we only get two fields. One of them allows us to select a list the contact will be added to, and the other lets us define the tags that’ll be assigned to the contact.
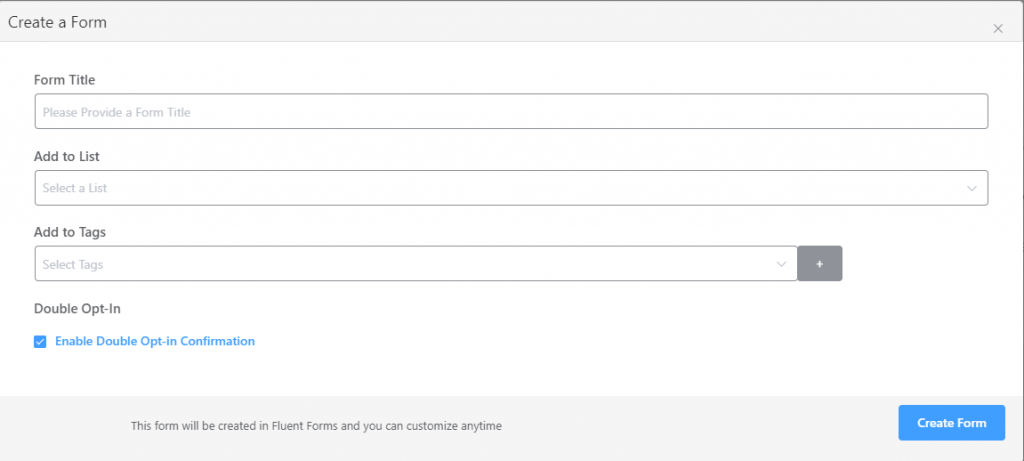
But with dynamic tagging, we can assign the correct tag to the contacts that join our contact list.
Here’s how to set up dynamic tagging:
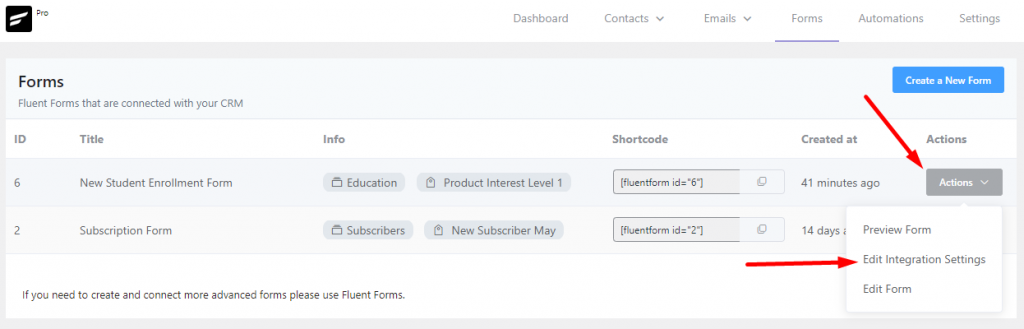
Go to the forms tab and hover over the Actions button of your form. Select Edit Integration Settings to go to the FluentCRM Integration Feed settings of Fluent Forms.
Scroll down to Contact Tags and check the Enable Dynamic Tag Selection checkbox. This brings up the conditions.

Here we’ll set the tag and the conditions. So when the conditions match, the tag will be assigned to the contacts. Since we’d like to assign the Education Level 1 tag to contacts that have Beginner level expertise, our condition would be like the following:
- Set Tag: Education Level 1
- If: Level of Expertise
- Condition: Equal
- Value: Beginner
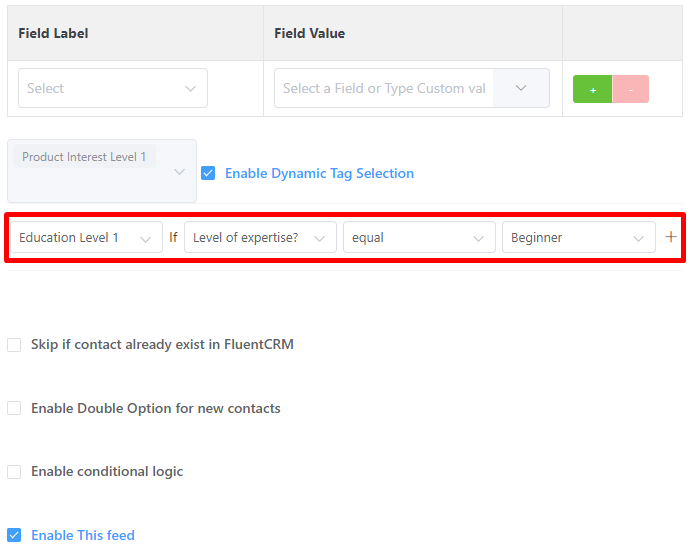
Did you notice that there’s a ‘+’ button with the value? You can click that ‘+’ button to add more dynamic tagging conditions!
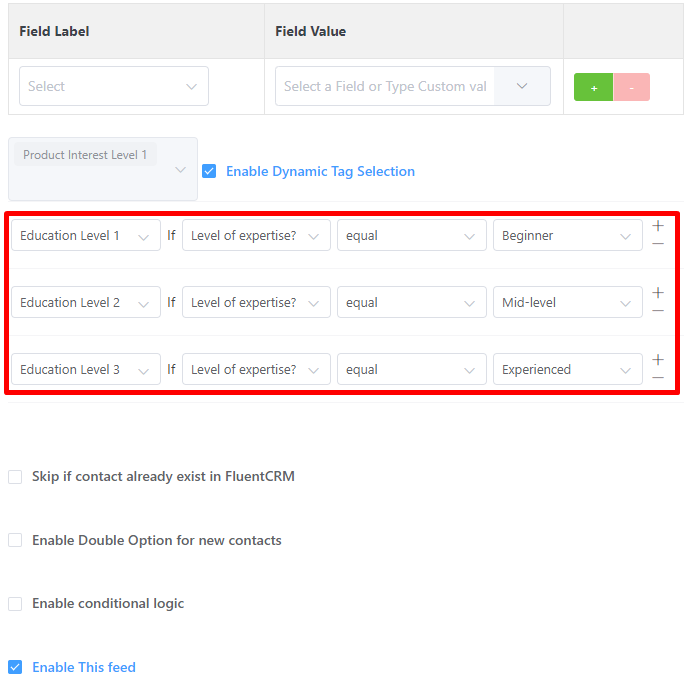
So we’ll go ahead and add two more similar conditions so that the contacts are assigned Education Level 2 and Education Level 3 tags.
Here’s what our dynamic tagging looks like:
Once you’re satisfied with the conditions, just click the Update FluentCRM Feed button on the bottom right.
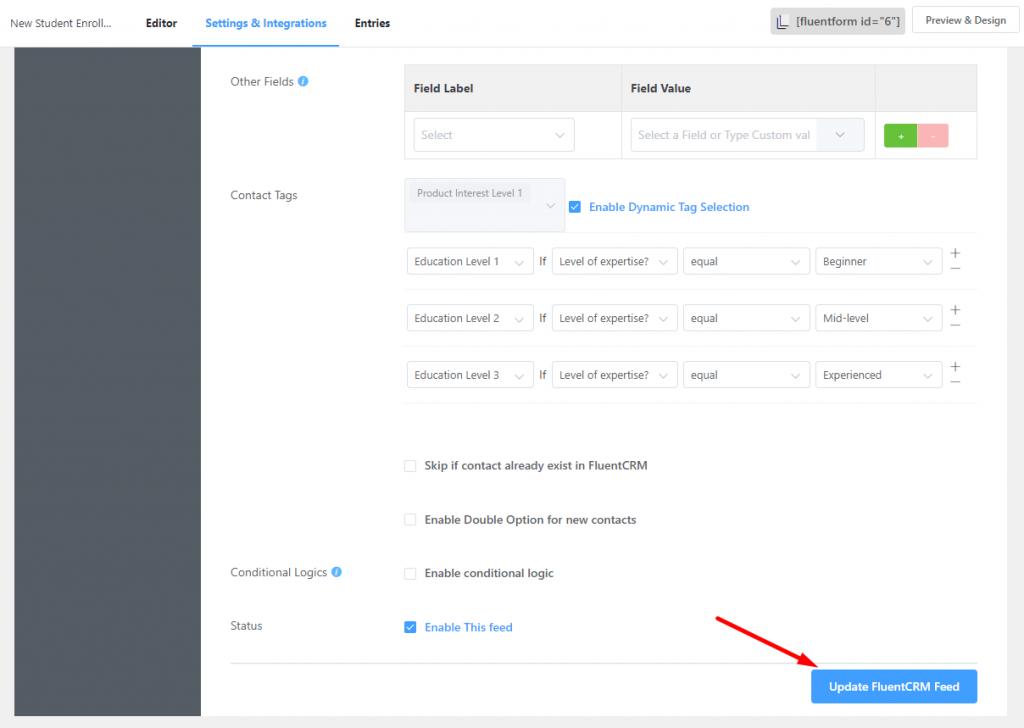
Now that you’ve created a dynamic tag-based condition, you’re ready to capture contacts with dynamic tags. Whenever someone fills out your form, FluentCRM will assign the tags to these contacts based on the dynamic conditions you’ve specified!
And with the dynamically assigned tags, you will open a wide range of automation possibilities with FluentCRM’s Tag Applied trigger. Initiate email marketing automation with personalized dynamic emails and relax on autopilot while the revenue keeps flowing in!
Segmentation Made Dynamic!
Often, people are too busy to put more effort into segmentation. But if you really want to excel in email marketing, there’s no alternative to creating the segments that’ll help you understand your customers and send them relevant, targeted messages.
To constantly impress and engage people with your emails, you need to keep segmenting them according to your business’s needs. And FluentCRM’s dynamic tagging will help you achieve your segmentation goals like never before.
Ready to segment contacts?
Start by checking out some of the best email personalization techniques and figure out what kinds of segments will ensure maximum engagement. If this tutorial has helped you, follow us on Twitter and subscribe to our newsletter to get more FluentCRM tutorials!

Nazir Himel
Product Marketing Lead
Hey! I’m an inbound marketing specialist focused on email marketing automation. I love turning complex features into clear, user-centric messaging and when I’m not shaping product stories, I’m experimenting with content frameworks, conversion journeys, and helping others communicate value without sounding salesy!
Table of Content
Related Articles and Topics
-

FluentCRM Email Signature Generator: Create Professional Signatures for Every Email
FluentCRM’s Email Signature Generator is a browser-based email signature builder that creates professional, HTML-formatted signatures…
-
How to Organize Contacts Using Lists, Tags & Custom Fields in FluentCRM
If you had to send an email right now to every contact who has shown…
Comments
-
Trying to add a dynamic tag based on date of birth, as per your example:
“For example, if the contact inputs 1970 into the date of birth field, assign them an age-based tag. Let’s say, “Age Group 50-60.””
In the FluentForms FluentCRM integration feed:
– I select the DOB field under Contact Tags
– there are only options for greater than, less than, equal, etc.
To assign an age group, it would have to be two conditions: greater than or equal to date, and less than or equal to another date.How do you assign age groups?
-
Hi Elaine, As per my understanding, there needs to be a specific condition (Between range). However, if I wanted to achieve that I would choose condition “Ends with” and add all the years for the age group.
-

Leave a Reply