
The Art of a Great First Impression: 12 Steps to Creating an Onboarding Email Sequence

Summarize with


We all know the importance of first impressions, which is even more important in this competitive digital marketing world. Imagine how you only go to that friend’s or relative’s house repeatedly, where you were welcomed with all the love and care you still can’t forget?
That’s what you need to show your audience through the first few emails you will send them. These first few emails make an onboarding email sequence, which ultimately dictates how your leads will engage with you in the future.
That’s why we discussed everything you need to know about onboarding email sequences in this blog. From the steps to creating an appealing onboarding email sequence to examples, importance, and best practices of writing them.
Keep reading to make your onboarding emails more effective than ever!
TL;DR:
- An onboarding email sequence is a series of timed, automated emails sent after signup or purchase to turn new users into loyal customers
- The 12 steps to building one: from identifying your goal to setting up full email automation
- Why segmentation, social proof, and a strong welcome email are the three non-negotiables
- How to build and automate the entire sequence inside FluentCRM using triggers and automation funnels
- What a real onboarding sequence looks like, broken down using Grammarly’s 4-email flow
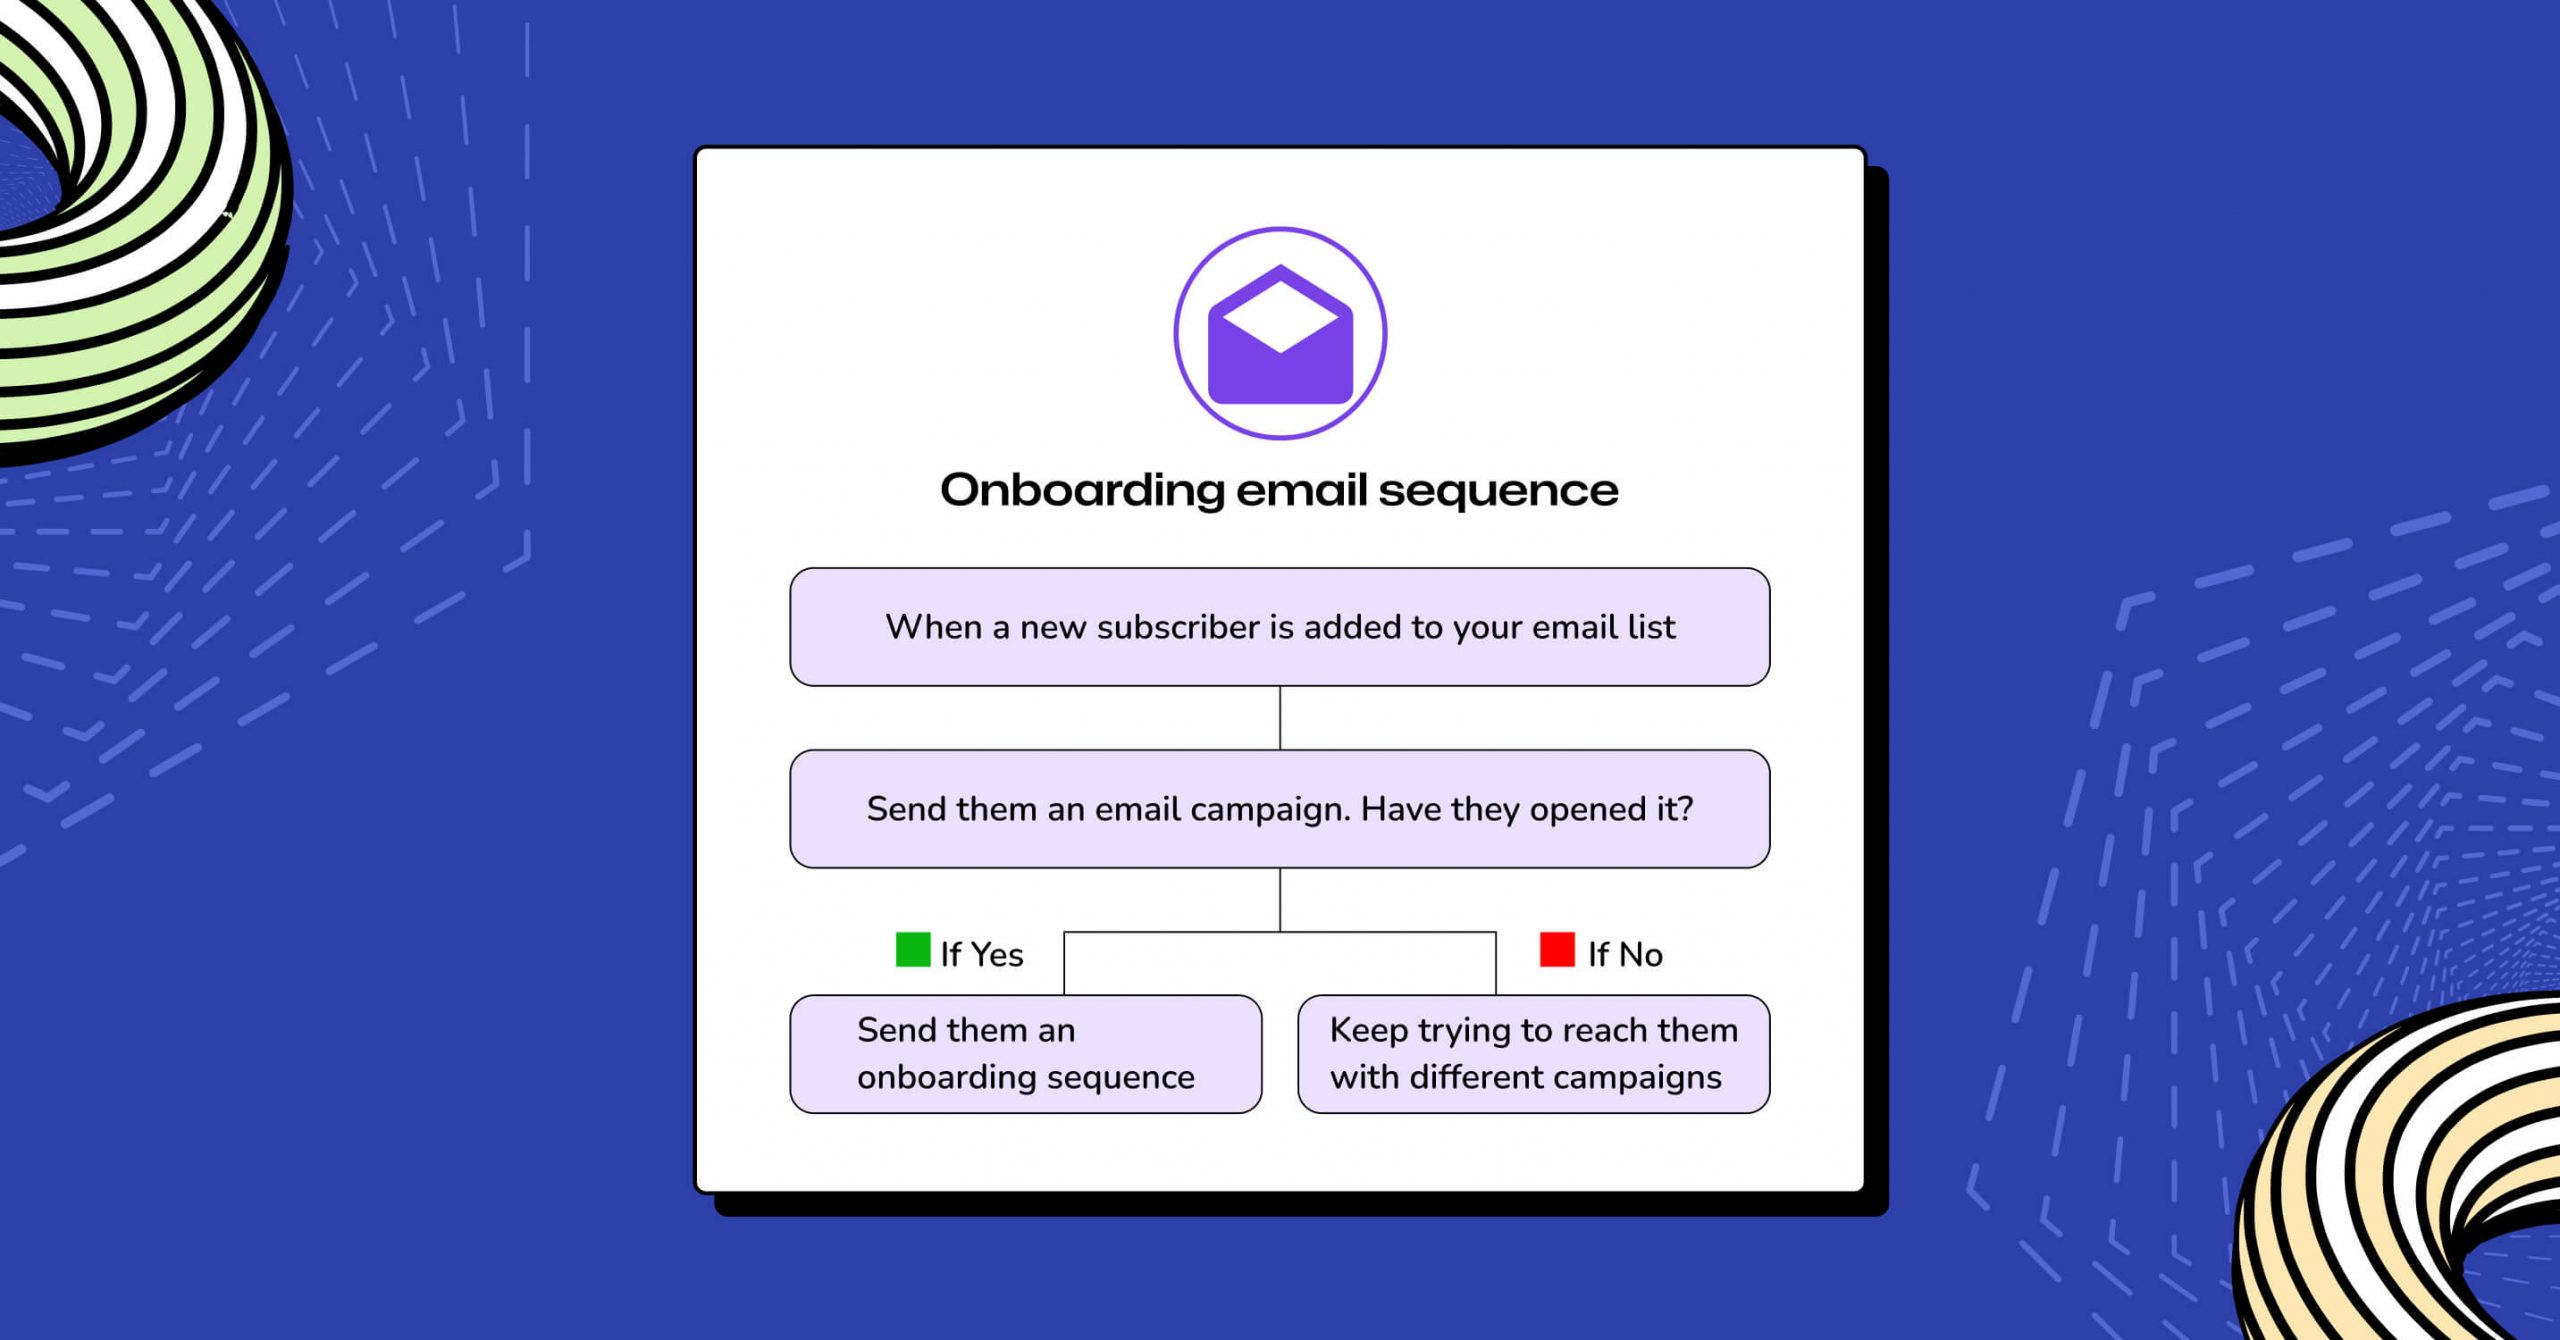
What is an Onboarding Email Sequence?
An onboarding email sequence is a series of 3–7 automated emails sent to new users or customers after they sign up or make a purchase. The goal is to guide them toward their first success with your product; educating, engaging, and converting them into loyal customers over a period of 7 to 30 days.
The onboarding email sequence is a key part of making the user’s first experience with your brand or product positive and interesting. As a result, you’ll be able to build a strong bond between the user and the brand or product. It can have a big effect on:
- User retention
- Product adoption
- Customer happiness as a whole
The main goal of an onboarding email sequence is to show your users the most important features and benefits of the product or service they just signed up for. It’s your chance to win your potential customers over and give them an idea of what they might expect in the future.
The Importance of a Great Onboarding Email Sequence
Now that you know what an onboarding email sequence is, you can already sense how important it is. Still, to give a bit more idea about the different aspects of the importance of a great onboarding email sequence, we did our research.
Here are the key reasons why you should focus on crafting an appealing onboarding email sequence:
- Educate Users & Boost Engagement: Teach new subscribers about your features and guide them step by step, leading to better long-term engagement.
- Increase Customer Retention: A well-structured onboarding sequence turns leads into loyal, repeat customers, reducing the need for separate retention emails.
- Drive Higher Conversions: Consistent engagement improves open rates and clicks, and can significantly increase overall conversion rates.
- Enable Personalized Messaging: Segment users based on their actions and preferences to deliver more relevant, targeted emails.
12 Steps to Crafting an Appealing Onboarding Email Sequence
While it’s important to create an onboarding email sequence that ticks all the boxes, there are no definite steps to creating one. Then again, there are a few steps that you must include. Now, what to follow and what not to; let’s not put you through this confusion.
Below, we’ve taken to on a step-by-step journey to creating a solid onboarding email sequence. By following them, you can easily come up with an onboarding sequence that engages your audience and turns them into fans!
Let’s get started!
1. Identify Your Goal
Not all businesses have the same goal, and you need to clearly understand yours before you dive into developing your onboarding email sequence. Think about the end goal(s) you wish to reach with the chain of emails you will send.
Once you have your goal fixed in your head, it’ll be easier for you to craft the onboarding emails accordingly. You can customize your sequence depending on whether your goal is to boost product sales, decrease customer churn, enhance customer involvement, or something else.
For example, if your onboarding email sequence aims to turn your freemium subscribers into premium subscribers, setting this goal prior to anything will help you craft an email sequence that’s focused on conversion.
2. Figure Out the Onboarding Touchpoints
To be able to provide exactly the information your users may need at the exact time, you need to know where they are onboarding from. You also need to know their journey and note the key points of the journey.
This will help you set up an onboarding email sequence that delivers the right message at the right time. Take notes about whether your user is signing up, making an account, logging in for the first time, filling out a profile, making a purchase, exploring key features, etc.
Depending on these touchpoints, you can then tailor personalized messages for them.
3. Segment Your Audience
Contact segmentation is undoubtedly one of the most important factors in crafting an effective onboarding email sequence.
Not all of your onboarding email sequence needs to be the same. While sometimes you may need to start an onboarding email sequence right after a user purchases, some onboarding email sequences may start after someone signs up for a registration form.
That’s why you must properly segment your contacts based on different factors. Here are a few common segmentation that can help you make the most out of your onboarding email sequence:
- Demographic segmentation: When you segment your users based on their age, income, gender, educational level, marital status, etc., it is called demographic segmentation.
- Geographic segmentation: When you segment your users based on their location, region, city, climate, population, etc., it is called geographic segmentation.
- Behavioral segmentation: If you segment your audience based on their activities, like what pages they view, what posts they interact with, what they have added to their cart, what newsletters they have subscribed to, etc. It is called behavioral segmentation.
- Psychographic segmentation: When you segment your users according to their lifestyles, values, personalities, or interests, it is called psychographic segmentation.
4. Write Your Welcome Email
Regardless of at what touchpoint your new users start their onboarding journey, your onboarding email sequence needs to start with an awesome welcome email.
Keep the email personalized by greeting them with names and providing information about their needs. Remember to thank them for signing up or purchasing, depending on their action. And don’t forget to give them an idea about what they may expect in the upcoming emails!
5. Send Onboarding Guidelines if Necessary
Right after you welcome your users, you next should provide them with the necessary guidelines. Rather than leaving them in the dark, provide all the necessary materials like blog content, video links, e-books, etc, so they can easily navigate their way through your software or service.
By sending such helpful emails, you create a great impression on the users. They think you don’t just email them to sell products; you genuinely want to help them with what they want. This helps your brand to create a long-lasting bond with its customers.
6. Write an Email to Introduce Your Product or Service
Once you have helped your customers navigate their initial onboarding stage, it’s time to familiarize them with what you do. Since you have earned credibility through the first two or three emails of your onboarding sequence, your users will be keener to reading your emails.
Send appealing product or service descriptions to your users, highlighting special features and offerings. This is your time to introduce your product as they have never known.
7. Don’t Forget to Include Social Proofs
Including components of social proof, such as user testimonials, success stories, or case studies, in the onboarding emails is an excellent idea. Your new users can gain more confidence in joining you if they notice that previous users have successfully interacted with your product or service.
8. Consider Providing Discounts or Premium Material for Free (Optional)
Discounts work better than anything in any scenario. It also stands true for the onboarding email sequence!
Right after introducing your product, if you tell your users about any ongoing discounts or send them any premium material for free, consider you have already won their hearts!
These discounts or free materials make the users feel valued and special. And the more you can make them feel this way, the more engagement you can expect from them.
9. Use Clean and Actionable CTAs
Once you’ve included the aforementioned steps in your onboarding email sequence, it’s time for a call to action. If we recall step one, what was your goal?
Prepare a bespoke CTA and get the copy ready accordingly. This CTA must satisfy your goal and should not be too pushy. Try to appear helpful rather than salesy, and you’ll win the deal!
Remember, forcing someone to take action will never get the job done. Rather, focus on pointing to users’ problems and describe how your product or service solves that problem. Only then you’ll be able to get more conversions to your CTAs.
10. Employ A/B Testing
A/B testing helps you determine which version of your email copies/ format/ subject lines work better. Whether it is a subject line, email campaign, automation, or email sequence, it is a necessary step before sending it out to the actual receipts. Once you have your A/B testing done for the onboarding email sequence, you’ll have a sure shot at successful conversion.
11. Ensure Responsive Design
While your email may look good on a laptop or desktop, email formats often get messed up in the mobile view.
These days, most people check their email from their mobile phones. And if you want to engage maximum readers, you don’t want to send an email whose subject line is not properly visible on mobile.
That’s why you should not forget to optimize your emails for various devices as your last step. Especially the mobile. Consider the pre-header and subject lines’ word limit for better mobile optimization.
12. Set up Email Automation
Email automation has become a necessary part of any email sequence. Many email tools today have the feature of automating emails based on various filters, such as demographics and dates.
Additionally, you can set multiple triggers and actions for your emails with the help of a WordPress email automation tool. For example, if the users click on any of the CTAs, you can trigger a different set of emails, and if they fill out the form or show more interest in your product or services, it will segment those users and send a different set of emails.
This way, you’ll be able to keep the users hooked in their onboarding journey.
FluentCRM is one such tool that allows you to create and send emails automatically without the need for manual intervention. Through this tool, you will be able to create appealing onboarding email campaigns that will send emails automatically based on various filters and factors. You can also automate various kinds of marketing activities based on your user journeys.
For greater flexibility and advanced automation possibilities, you can also connect FluentCRM with automation tools like SureTriggers.
Onboarding Email Sequence: What’s the Right Timing?
Knowing what to write is only half the job. The other half is knowing when to send each email. Send too many emails too fast, and you overwhelm new users. Send too few, too slowly, and they forget who you are before they even get started.
Almost all the industry has seen high engagement during the first week after signup. This means you should load your onboarding email sequence with your most important emails in the first 3–5 days, then slow down as users settle in.
Here is a proven timing framework you can adapt based on your business type:
| Day | Email Type | Goal |
|---|---|---|
| Day 0 (immediately) | Welcome email | Confirm signup, set expectations, and deliver any promised content |
| Day 1 | Getting started guide | Help users take their first meaningful action |
| Day 3 | Feature spotlight | Highlight the one feature that delivers the most value |
| Day 5 | Social proof & Testimonials | Build confidence with testimonials or a case study |
| Day 7 | Check-in + FAQ | Address common friction points and offer support |
| Day 10 | Upgrade nudge (if freemium) | Introduce premium value before the free trial ends |
| Day 14 | Last chance/discount | Final push with urgency or an incentive |
A few timing rules to follow:
- Send the first email within 5 minutes of signup
- Never send more than one email per day
- A simple tool might only need 4 emails over 7 days
- Stop the sequence when the goal is met
Ready-to-use Onboarding Email Sequence Templates
Building the structure of your sequence is one thing. Writing the actual emails is where most people get stuck.
Here are four copy-ready onboarding email templates you can adapt for your own business. Each includes a subject line, preview text, and full body copy.
#Template 1 — Welcome Email (Day 0)
Subject line: Welcome to [Brand Name] — let’s get you started
Preview text: Here’s everything you need to know for your first few days
Hi [First Name],
Welcome aboard. Thank you for joining [Brand Name].
You made a great decision. Over the next few days, we will send you a short series of emails to help you get the most out of [Product/Service]. Nothing overwhelming; just the essentials, in the right order.
Here is what to do right now to get started:
→ [Primary CTA — e.g., “Set up your account” / “Start your first lesson” / “Explore the dashboard”]
If you run into any questions along the way, just reply to this email. We read every message.
Talk soon,
[Your Name]
[Brand Name]
#Template 2 — Feature Spotlight (Day 3)
Subject line: The one feature our best customers use every week
Preview text: Most people miss this; here’s how to make it work for you
Hi [First Name],
Three days in, how are you finding things so far?
Today I want to show you the single feature that makes the biggest difference for our customers: [Feature Name].
Here is what it does: [1–2 sentence explanation of the feature and the problem it solves].
Here is how to use it in under 2 minutes:
- Go to [Location inside product]
- [Action step]
- [Action step]
That’s it. Most of our customers say this alone was worth signing up.
→ [Try it now — link to the feature]
Let me know how it goes.
[Your Name]
#Template 3 — Social Proof (Day 5)
Subject line: How [Customer Name] achieved [Result] using [Brand]
Preview text: A short story that might sound familiar
Hi [First Name],
[Customer Name] came to [Brand] with a familiar problem: [describe a pain point your audience relates to].
Within [timeframe], they were able to [specific outcome]. Here is what they said:
“[Short, specific testimonial quote — 2–3 sentences maximum]”
— [Customer Name], [Role/Company]
They are not an exception. [X number] of our customers have seen similar results by using [specific feature or approach].
If you have not tried [Feature/Approach] yet, now is a great time:
→ [CTA — e.g., “See how it works” / “Try this yourself”]
[Your Name]
#Template 4 — Upgrade Nudge (Day 10)
Subject line: You are missing out on [specific feature] — here’s why it matters
Preview text: Your free plan does not include this, but it’s worth knowing about
Hi [First Name],
You have been using [Brand] for a little while now, so I want to be straight with you about something.
The free plan you are on does not include [Feature Name] — and based on what most of our users are trying to do, it is often the thing that makes the biggest difference.
Here is what it unlocks:
- [Benefit 1]
- [Benefit 2]
- [Benefit 3]
If you want to give it a try, we are offering [X% off / free trial/bonus] for the next [X days].
→ [Upgrade now — link]
No pressure at all. The free plan is great for getting started. But if you are ready to go further, this is a good time.
[Your Name]
Real-life Example of a Successful Onboarding Email sequence
Various companies have different approaches to their onboarding email sequences, and they all differ. That’s why you can’t just follow someone else’s sequence blindly. But that does not mean you can’t take inspiration from them.
And if we are talking about taking inspiration, Grammarly has, hands down, the best onboarding email sequence that anyone can take a few notes from. Here’s what they did.
Email #1: An Introduction to Grammarly
Subject line: “You + Grammarly = Ready for Action”
Grammarly’s first email triggers immediately after signing up for their free plan. This email is a classic example of introducing your brand and guiding your audience in using your web tool, especially if you’re selling a SaaS application.
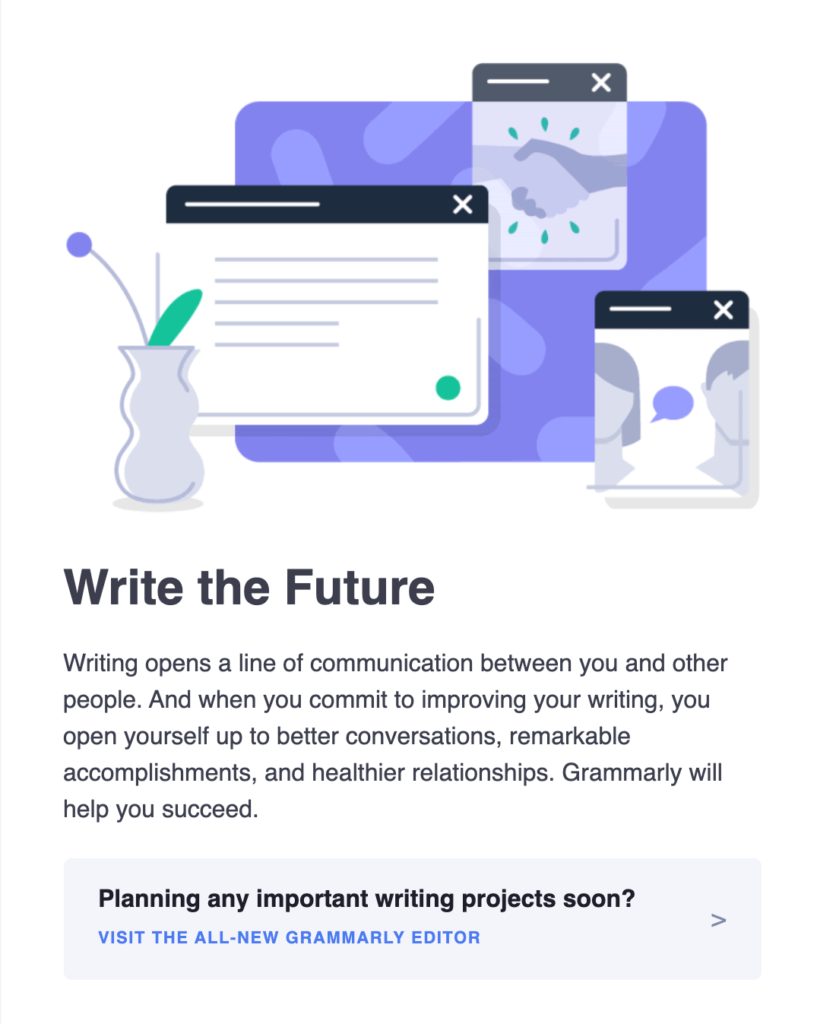
The email starts with an introduction to Grammarly and invites the user to try the tool right away. We like it because Grammarly focuses on the user’s pain point rather than simply giving a plain introduction. This makes the email much more relatable to the audience, and SaaS businesses can surely take inspiration from this part.
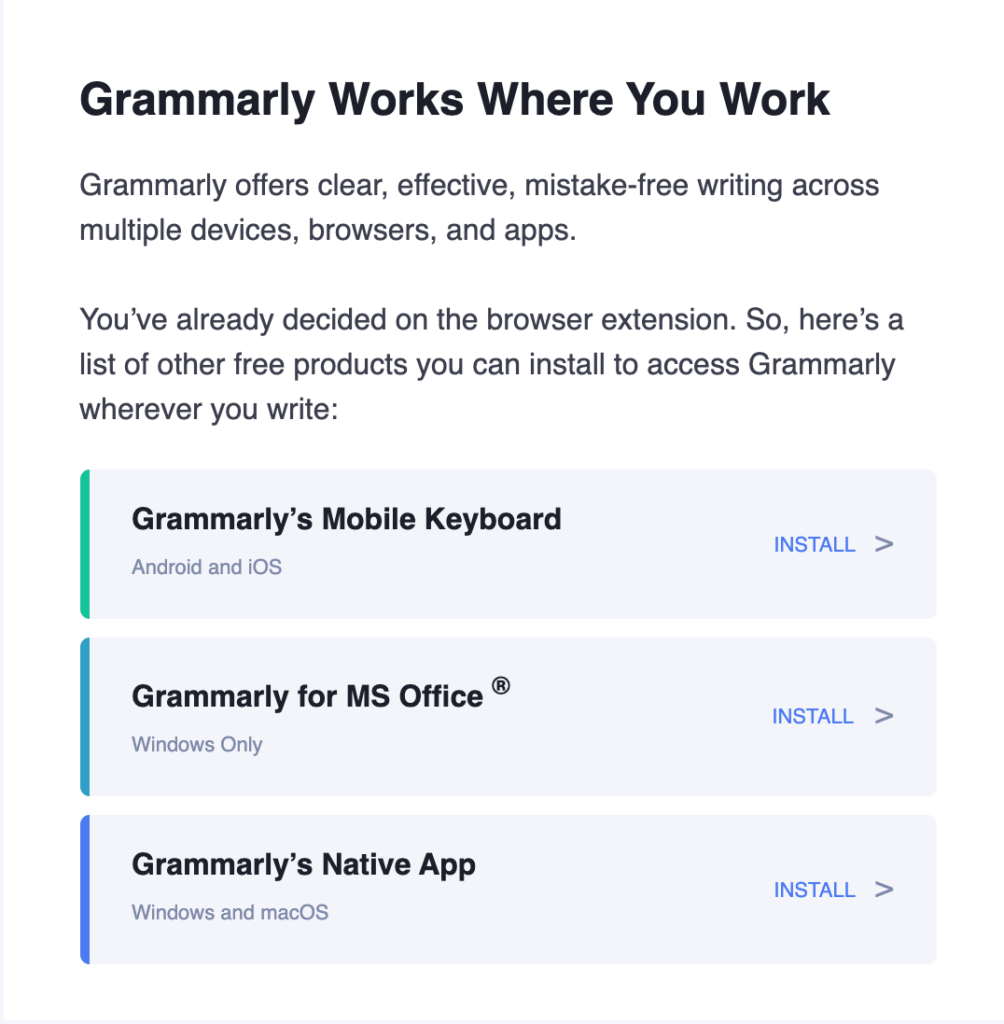
This section also shows the user how to use some of the other tools that Grammarly has for smartphones, PCs, and MS Office. By adding these tools, Grammarly users won’t need to use any other app for this purpose, and they’ll always keep Grammarly in mind.
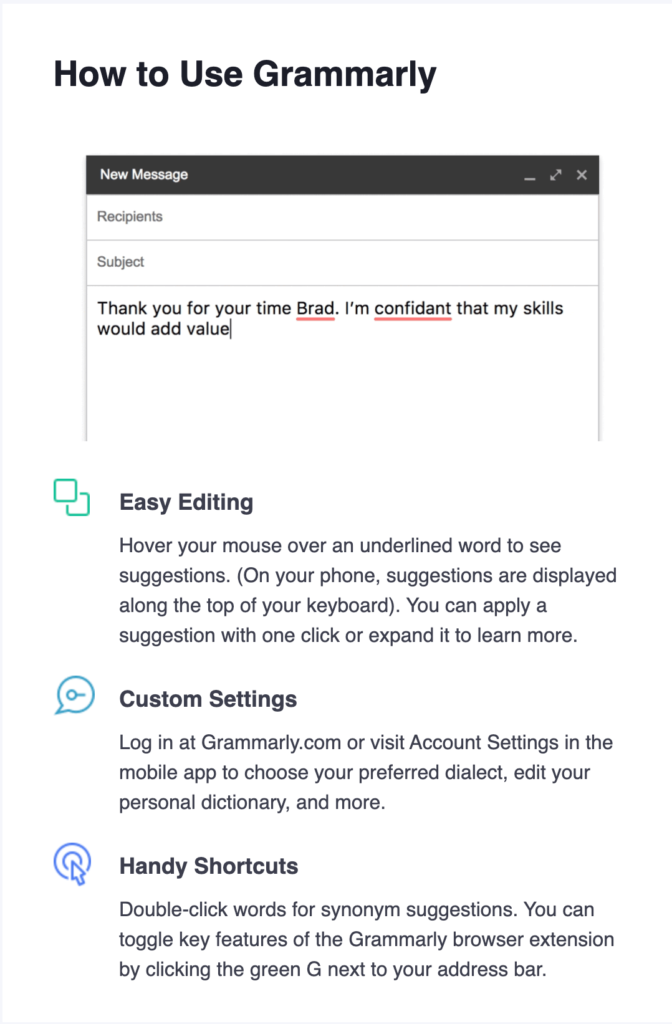
After introducing the user to the available tools comes the prominent part, where Grammarly provides a quick walkthrough for the users. This helps the users understand the tool and its features.
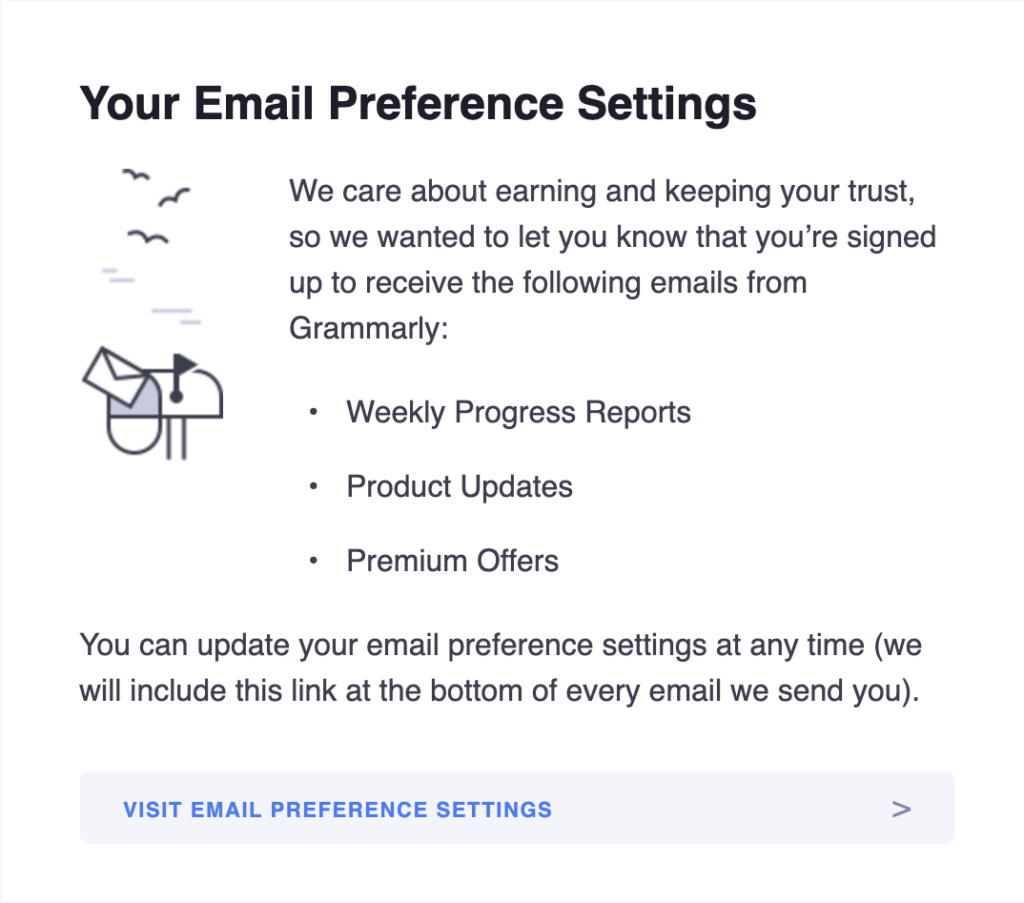
Getting people to change their email settings in a welcome email?
That’s how Grammarly earns your trust!
Some users don’t like being in a marketing email loop, and there’s no point in sending marketing emails to people who don’t like getting them. By letting users choose how they want to receive emails, Grammarly increases interaction and builds trust.
If you want to make sure the crowd is more interested, you should try this method!
In the end, Grammarly concludes the email with a call to action (CTA) that isn’t too pushy to buy their premium service. You can’t expect someone to buy your SaaS product the first time they hear about your brand. So, that’s understandable!
Email #2: Free Features and Product Updates
Subject line: “Get the Most Out of Your Free Account”
Grammarly sends another welcome email the day after the user signs up. Now this one is an expected email for a freemium product user.
The email consists of two parts where Grammarly tries to lure people into using their product on other platforms such as mobile phones, browsers, native apps, and desktops for free and also promotes premium features in hopes of getting them to subscribe to pro.

We like the second part especially because Grammarly focused on their best offering with this email.

A lot of SaaS businesses lose users after the first time they talk to them. But Grammarly keeps people using their free service by giving them an email about how to get the most out of it.
Given that it can be expensive for SaaS companies to get new customers, this email does fit with their goal of customer retention.
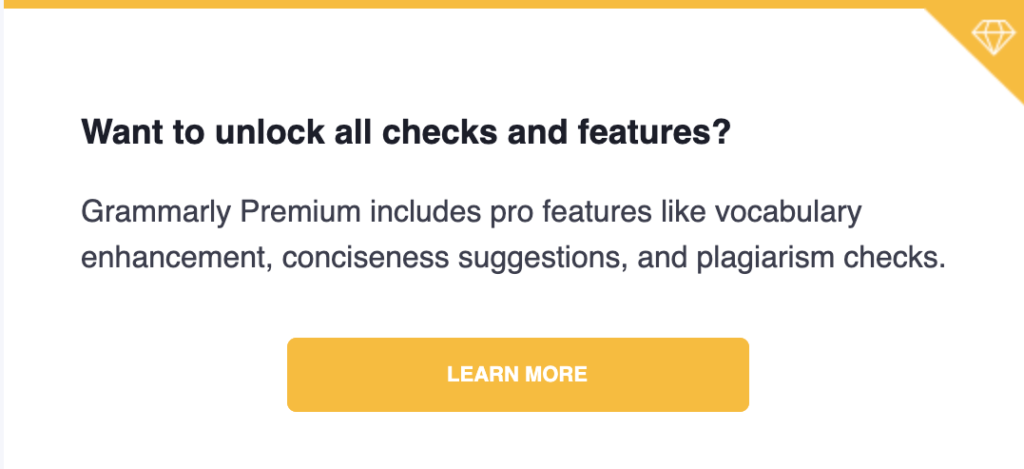
Email #3: An Introduction to Grammarly Premium
Subject line: “What Exactly Is Grammarly Premium?”
The goal of any SaaS business with a free form of a product is to get the user to upgrade to a paid plan. Grammarly does the same thing!
Five days after a new user signs up, Grammarly sends them their first sales email. This is a good idea because the user had a few days to try out the free version and possibly started to want the paid version. Their first sales email can be broken down into three parts.
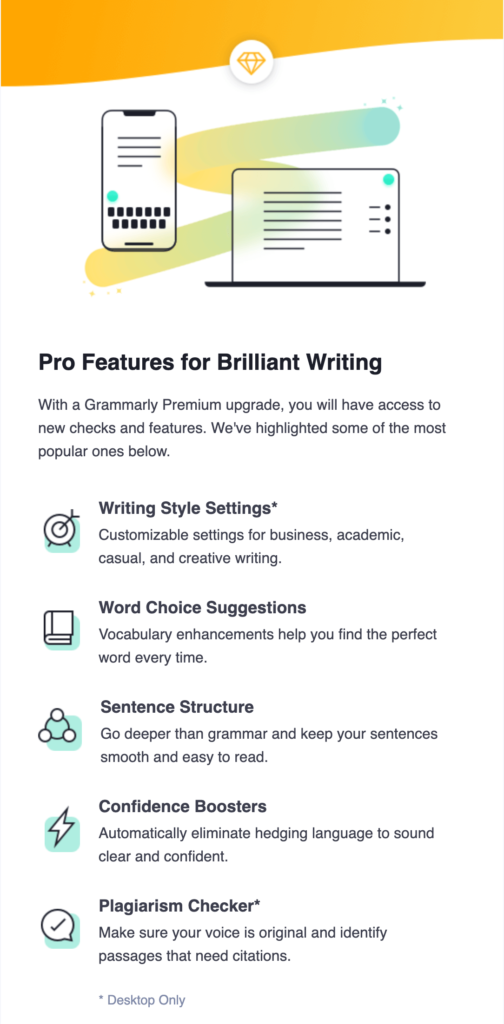
The first part is not too different from what most SaaS businesses do. Grammarly introduced its premium version and bulleted down the premium features.
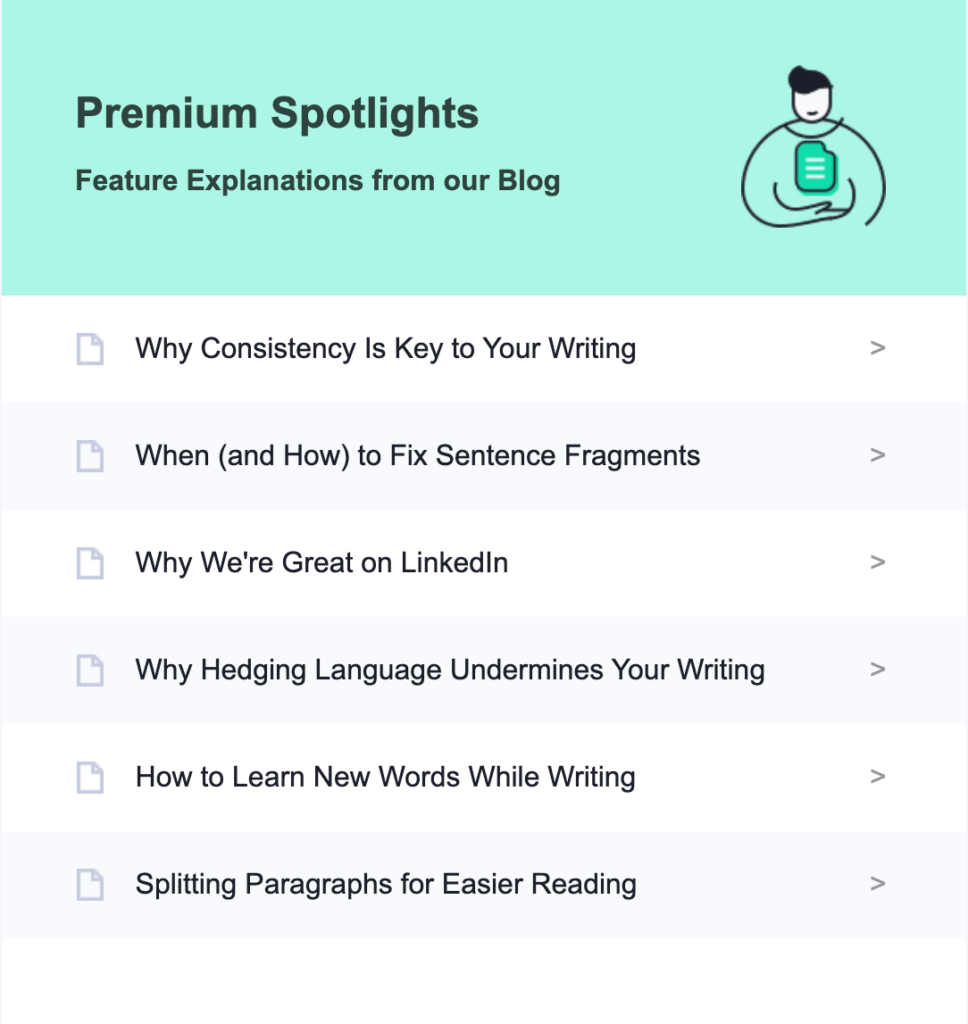
However, the inclusion of feature explanations and their top blog posts in the next part adds even more value to the audience.
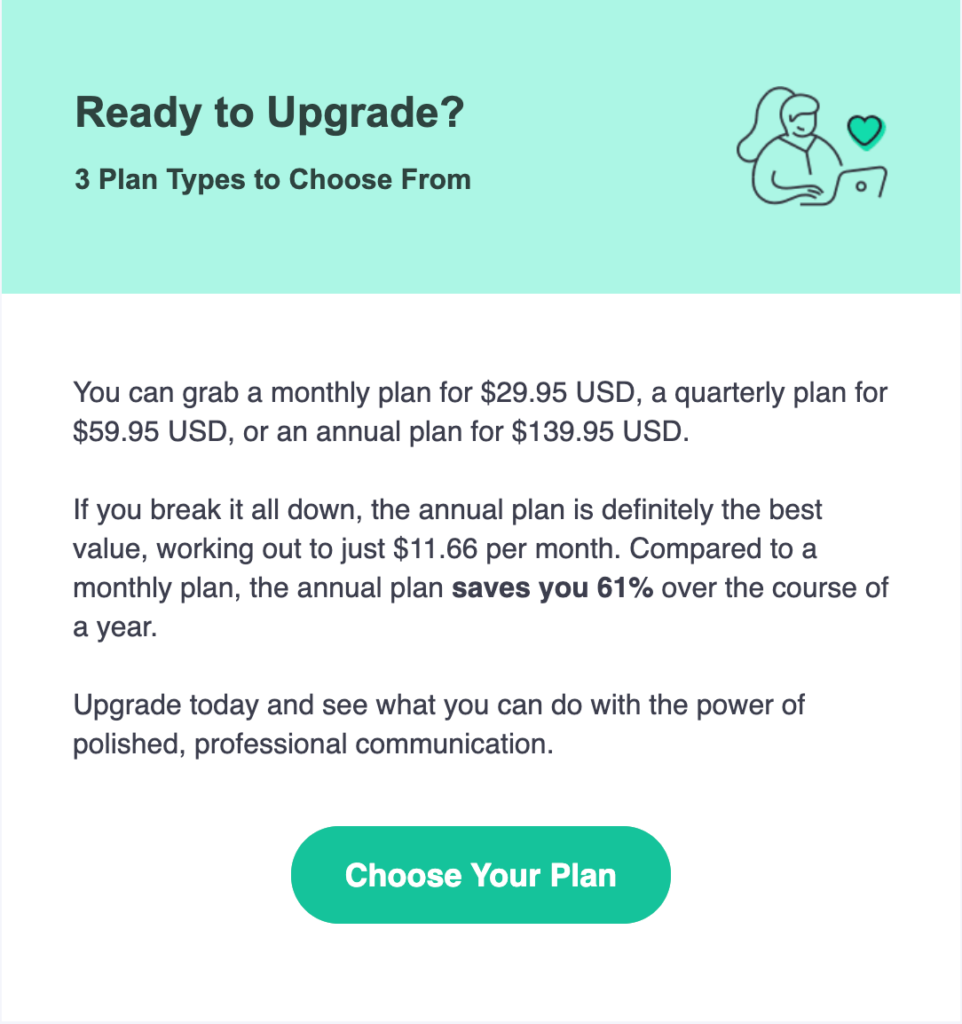
And finally, their well-explained price plan and call to action (CTA) make perfect sense to the audience and make it easy for them to decide to buy.
This email is the same as a landing page and shows people what’s special about their product. Also, the premium spotlight section can be a great way to boost sales because the material shared will help the audience learn more.
Email #4: Discount on Upgrade
Subject line: “Write like a pro. Here’s a 40% off Grammarly Premium!”
The fourth sales email triggers seven days after a new user signs up. Since this is the last email in the series of welcome emails, Grammarly makes an offer that many people won’t be able to refuse.
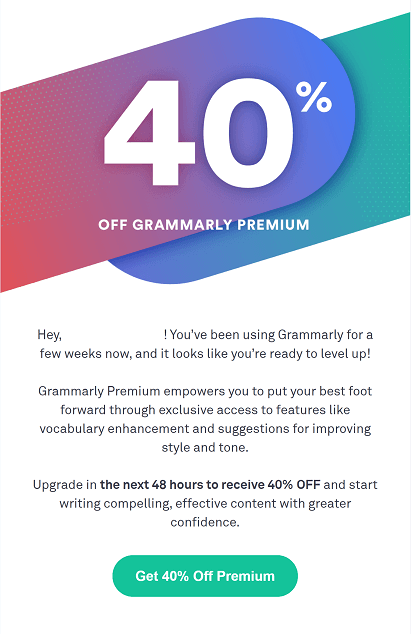
And, to deal with people who always put things off, they gave users a limited-time rate to get them to act quickly.
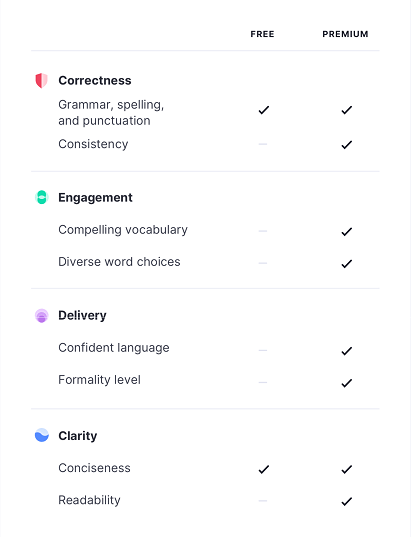
With a hard-to-refuse offer, this FOMO strategy gets customers to make a choice as soon as they open the email. With a comparison table that shows what the free version doesn’t have, Grammarly also makes users think twice about passing up the deal.
How to Create an Onboarding Email Sequence with FluentCRM?
We hope you are not overwhelmed with all the information you have received about the onboarding email sequence. In case you are, FluentCRM’s got your back!
Let’s see how you can easily create an onboarding email sequence using FluentCRM:
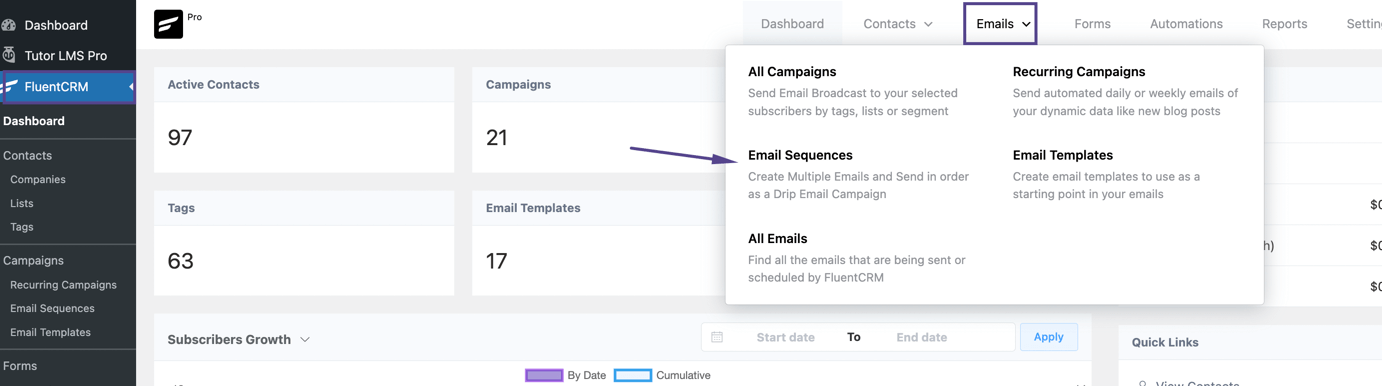
Create Email Sequence
To create an onboarding email sequence, first, go to the FluentCRM dashboard and hover over the Emails section. and select Email Sequences from the drop-down menu.
Click on + Create New Sequence.
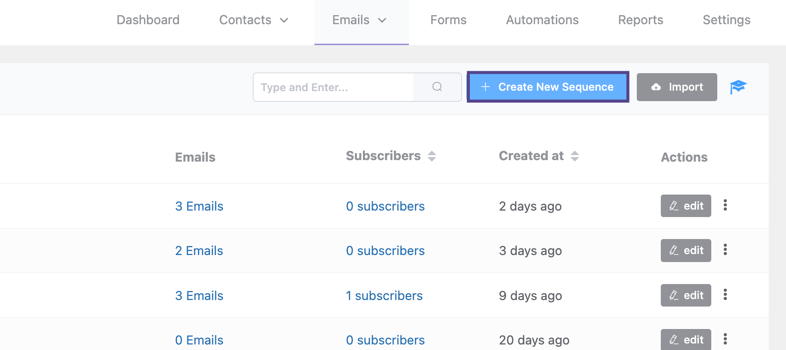
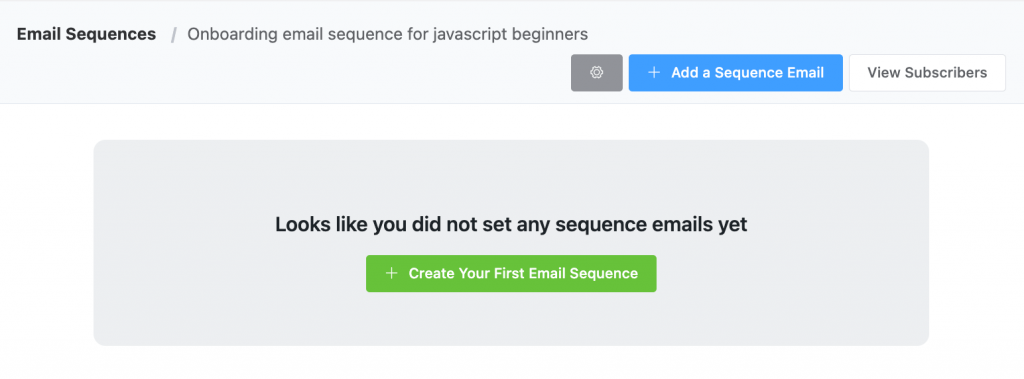
Give an appropriate title for your email sequence.

Then, click the button to start email sequence creation.
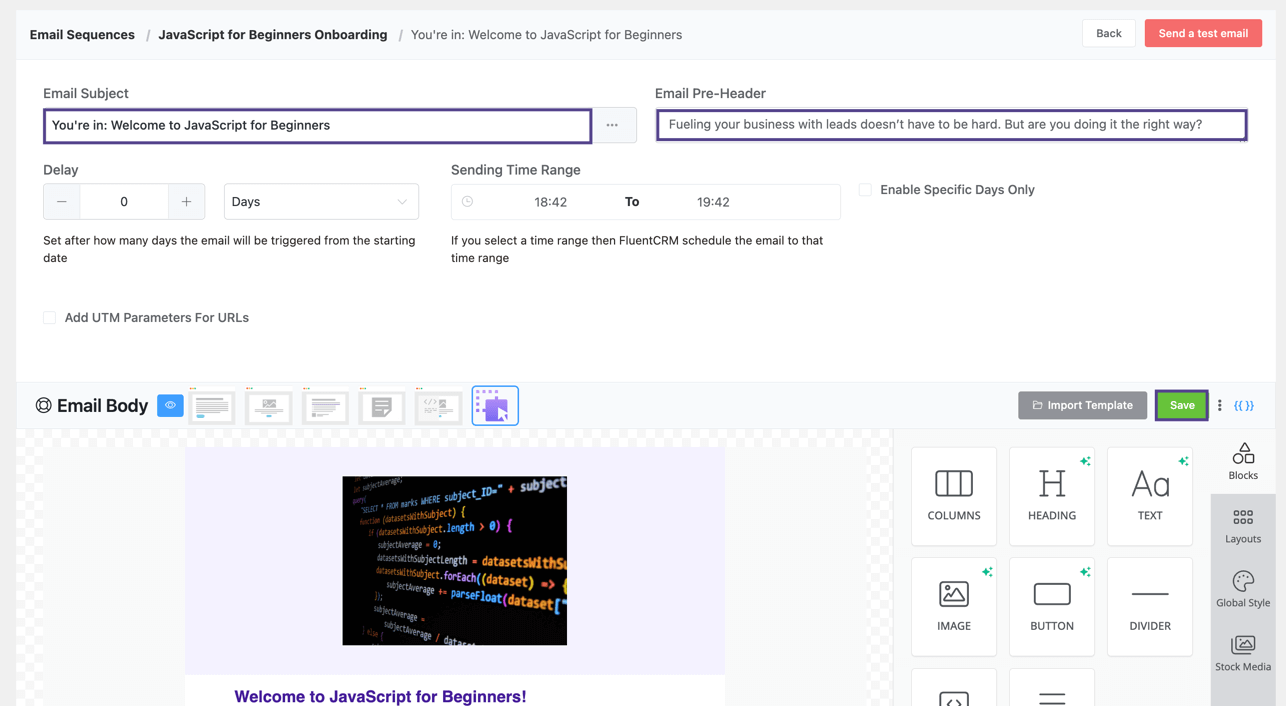
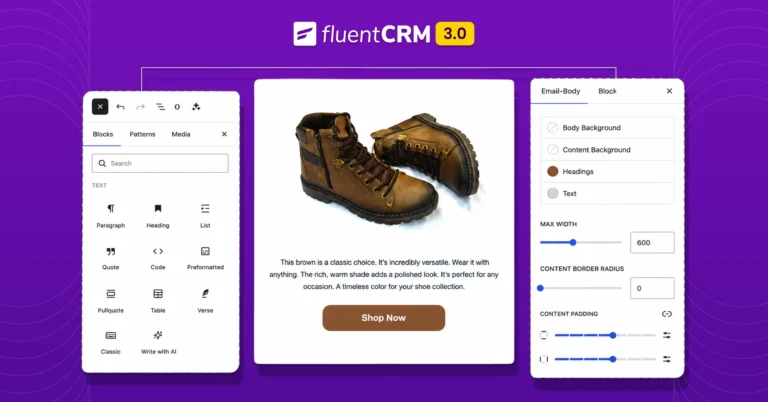
On the next page, you’ll be transferred to FluentCRM’s email builder. Fill up the necessary fields shown in the following picture and create a personalized email for your users.
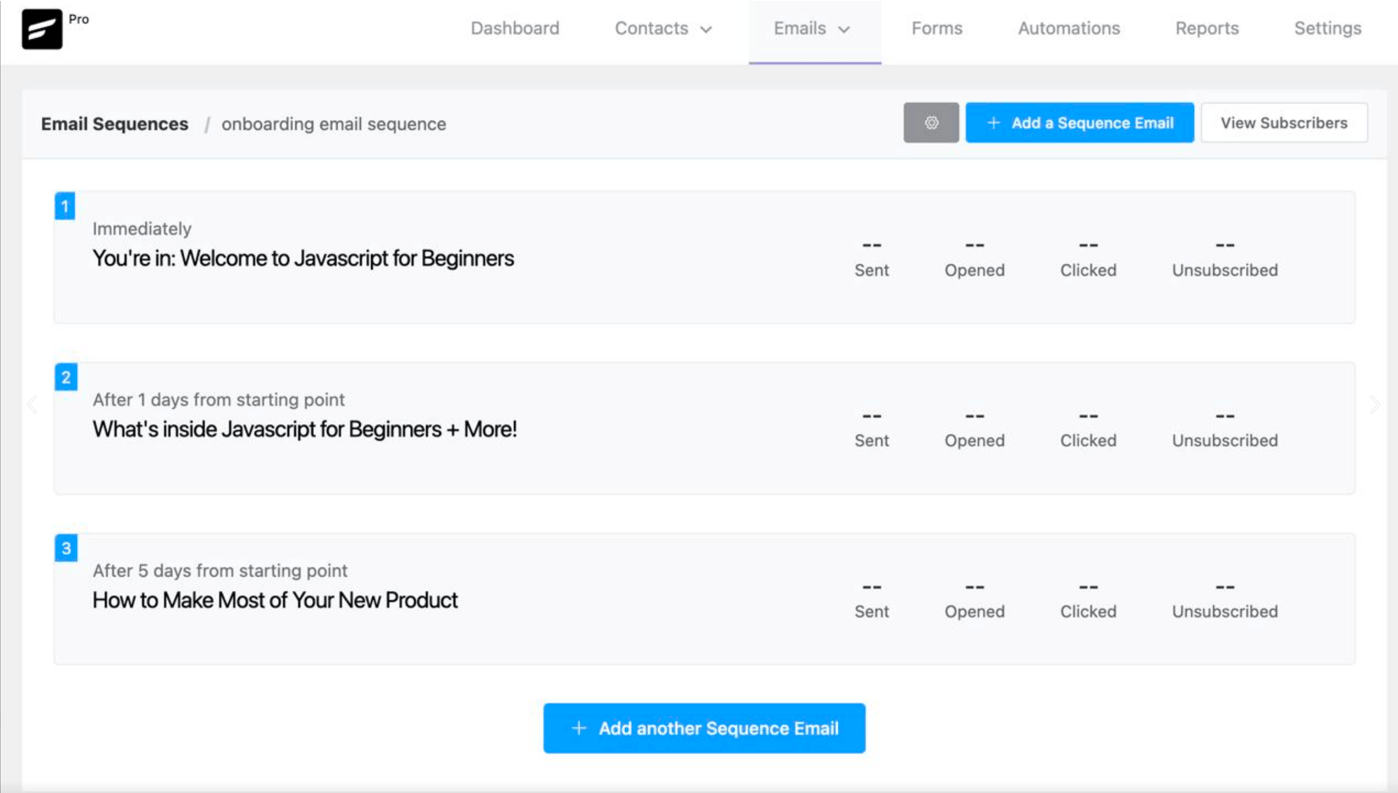
If you have created the first email of your sequence successfully, creating the rest won’t be a big deal for you. So, here’s a little idea of what the sequence might turn out to be.
Create an Onboarding Automation
Now, you’ve created an onboarding email sequence. But these are not going to be sent by themselves. And that’s where FluentCRM’s automation funnel features come in.
Automations will let you create workflows based on triggers. What are triggers, you may ask?
Triggers let you automate actions and events when something happens on your website. Since we’ve created a course onboarding email sequence above, a Course Enrollment trigger would be our best pick to automate it.
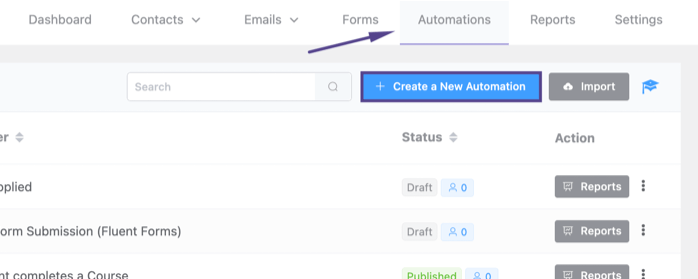
So, we’ll go to the FluentCRM dashboard, click on Automation and select the +Create a new automation.
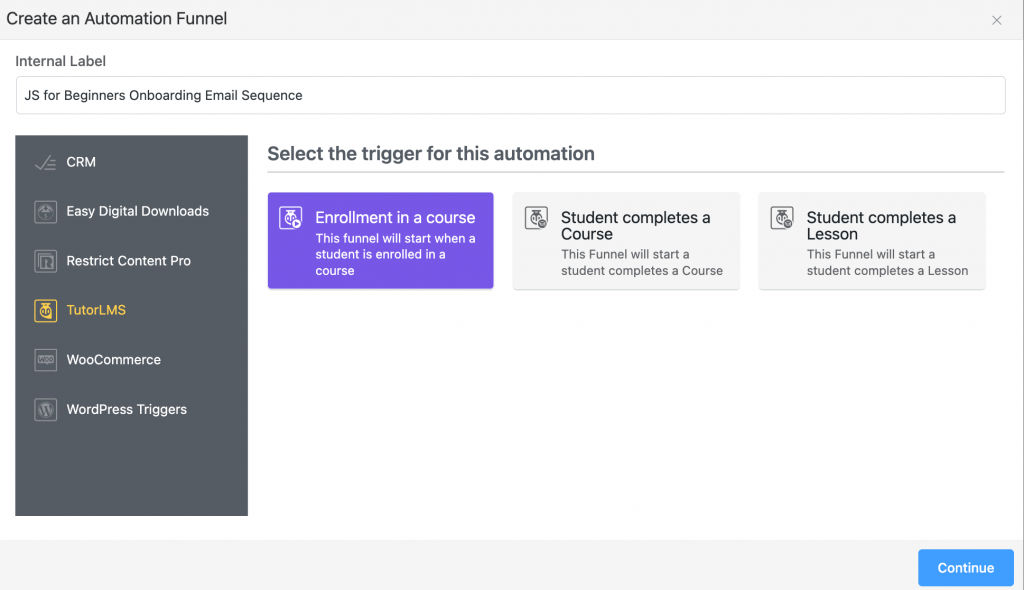
Then, we’ll select the course enrollment trigger.
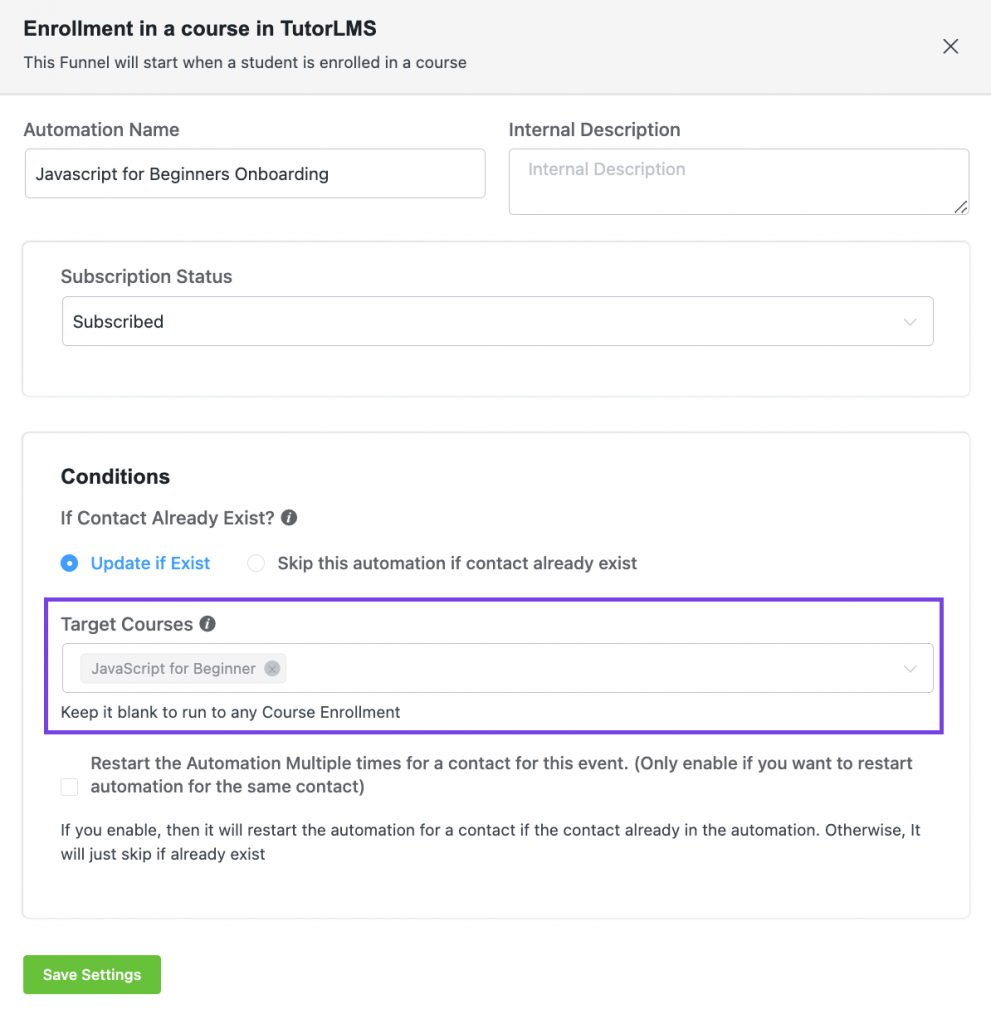
After choosing the trigger, now we’ll need to specify the course for which the email sequence will run.
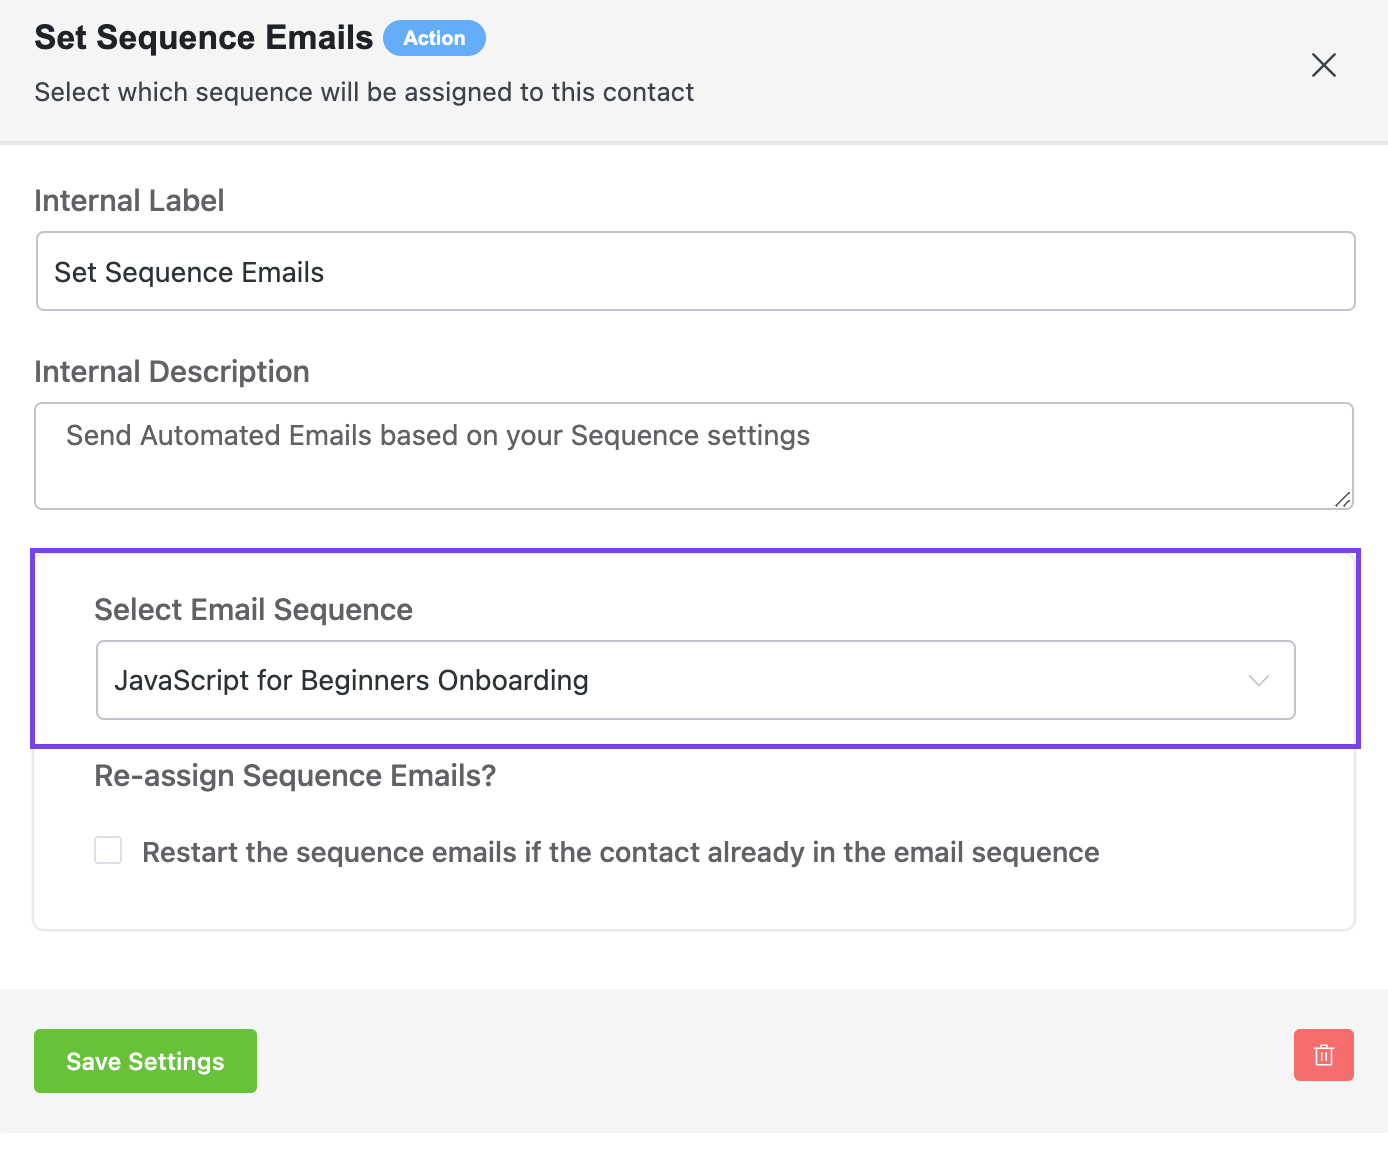
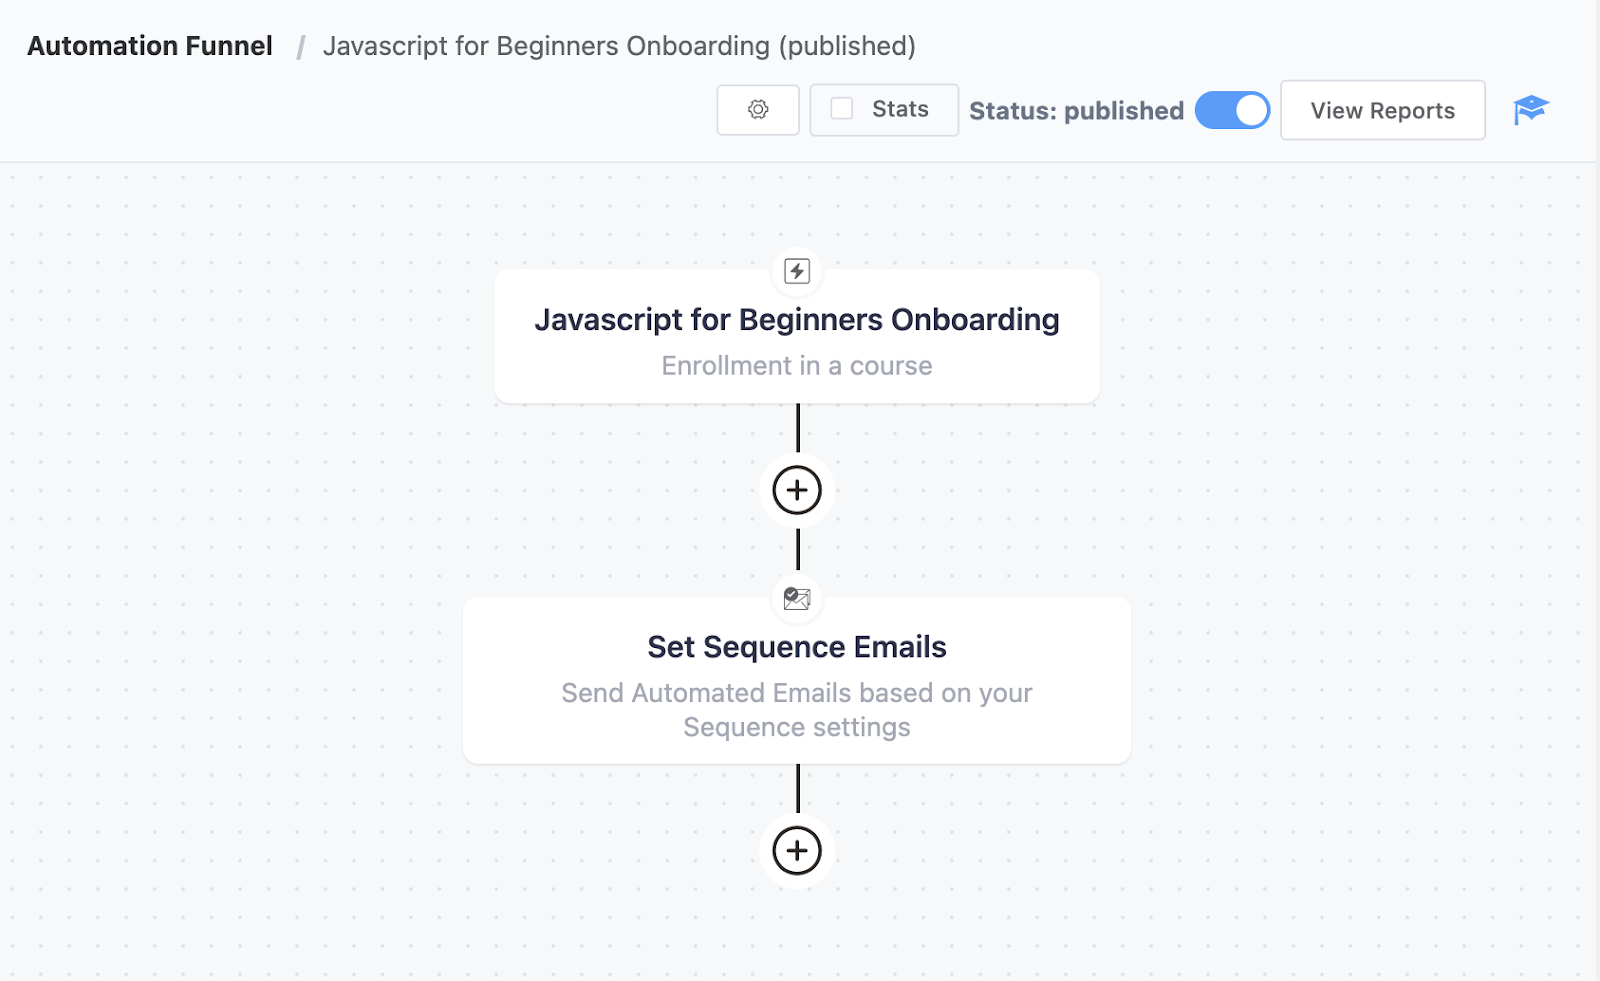
Now, click on the plus icon that you see below. Select the Set Sequence Emails action and select the email sequence you created earlier.
Once you’ve added the trigger, you’ll need to add an email sequence to the automation funnel. It’s just as easy as selecting the Set Sequence Emails block and specifying the email sequence you created earlier.
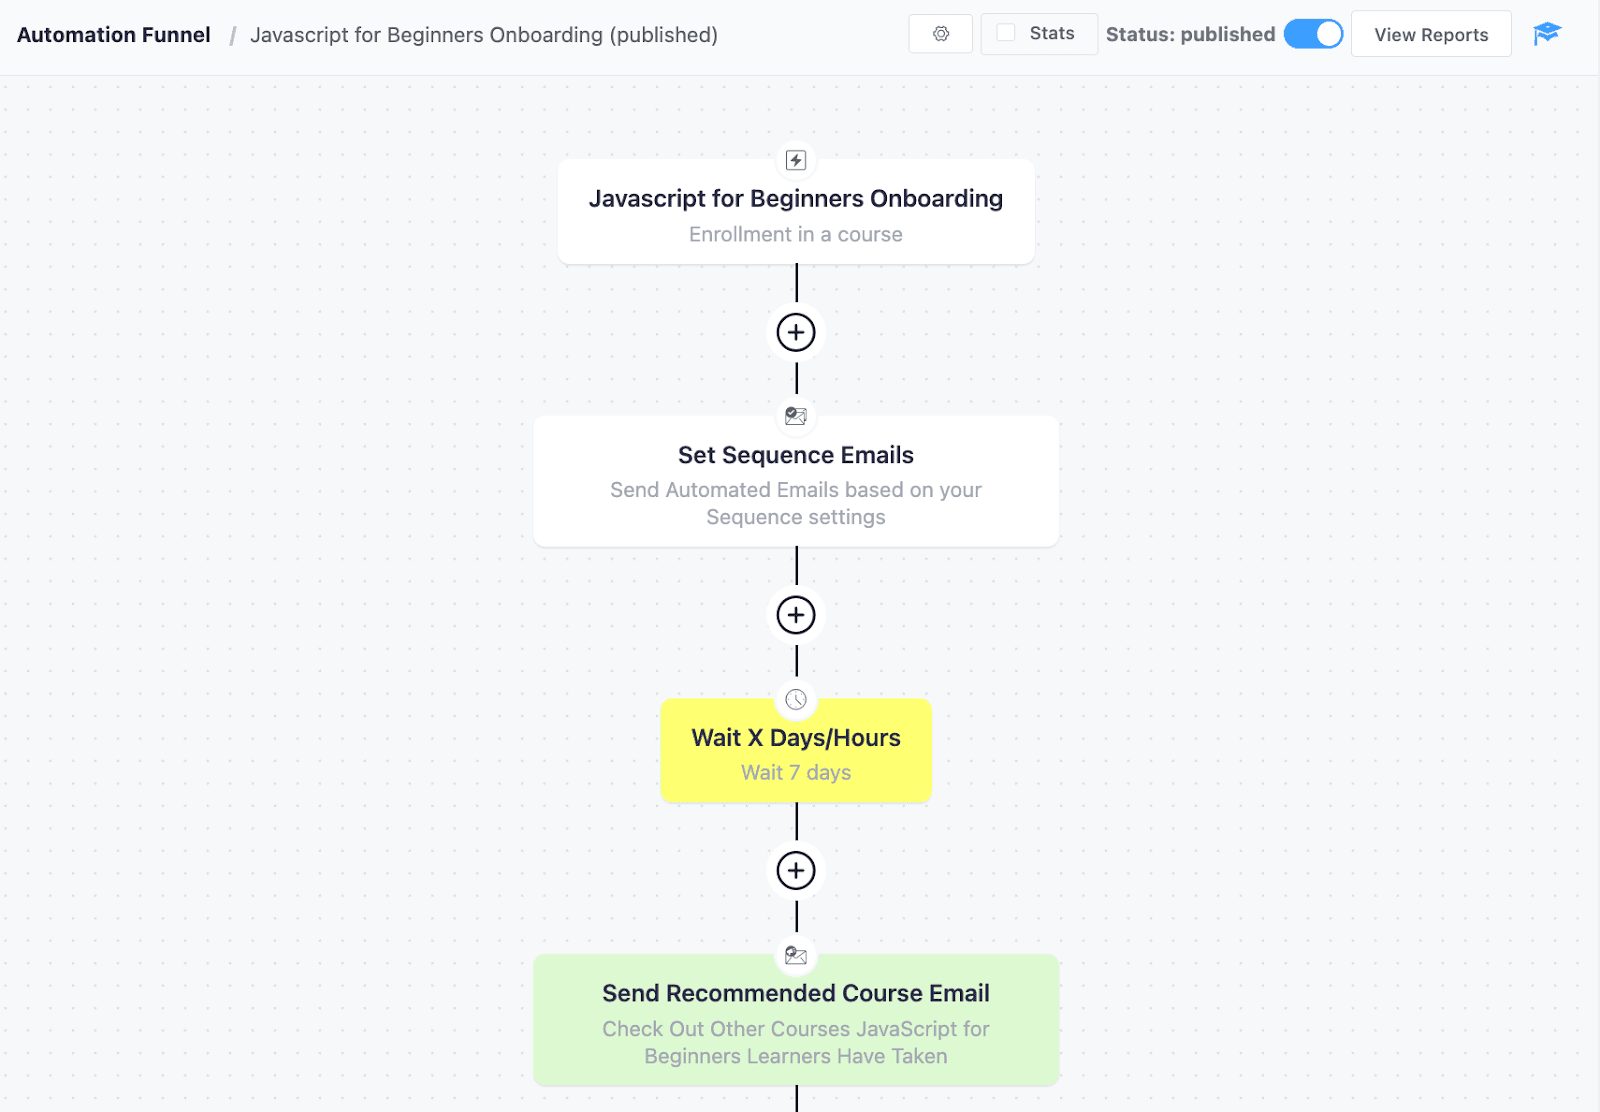
Your final automation will look something like this:
Once you’re done onboarding your students, why not invite them to check out your other courses too?
So that’s how you create an effective onboarding email sequence inside FluentCRM. You can utilize other automation features of FluentCRM to get the most out of your email sequence, as we have done for this automation!
Conclusion
While onboarding users and turning them into repeat customers is hard, it gets way easier with a decent onboarding email sequence. If you still don’t feel the urge to put effort into building and creating an onboarding email sequence, you are falling behind by the day.
We hope you found this blog enlightening enough to create your own onboarding email sequence. Don’t forget to let us know if you get confused at any stage of your Email sequence.
Sakhawat Showrabh
From writing poems and short stories to writing technical stuff about WordPress and email marketing, plenty of things have changed. What didn’t change is my love for writing and wasting time. When I am not writing, I waste my time peacefully.
Table of Content
Related Articles and Topics
-
New Gutenberg Editor: The Email Builder WordPress Users Always Wanted in FluentCRM
If you’re a WordPress user, isn’t it satisfying to write in Gutenberg? You click the…
-
How to Create a SaaS Free Trial Email Sequence That Converts
Most SaaS companies treat trial onboarding like a fixed schedule rather than a behavioral journey,…

Leave a Reply