
WordPress Newsletter Automation: Revolutionize the Way You Engage Your Audience!

Summarize with


No matter who you are, you understand the value of engaging with your readers and customers regularly. And one of the best ways to do that is by sending email newsletters.
Speaking of email newsletters, are you a—
- Content creator, who regularly publishes content on WordPress and wants an easy way to connect with your readers?
- Business owner, who wants to keep your customers informed about their products, services, and updates?
- Marketer, looking to inform, educate, nurture, and convert leads through regular promotions and updates?
Say goodbye to manually writing and sending email newsletters and say hello to WordPress newsletter automation, a streamlined, efficient, and consistent method of email communication!
With WordPress newsletter automation, increasing your reach and customer engagement by highlighting your freshly brewed content will become easier than ever!
Ready?
Let’s get started!
Getting started with WordPress newsletter automation
While the idea of WordPress newsletter automation seems fascinating, the goal is pretty simple.
- Capturing email addresses of people who are interested in your offerings
- Reaching out to them at the right time to increase website traffic and engagement
- Ensuring your audience receives content tailored to their interests
- Highlighting your freshly brewed content to inform, educate, and nurture your audience
- Maintaining consistent communication to foster improved customer engagement
All this while saving time automating newsletters that you’d otherwise write manually.
It takes just a few steps!
1. Create an Opt-in Form to Capture Email Addresses (Optional)
* You don’t need to create an opt-in form if you already have an email list or opt-in form set up on your website. If you already have a form, check out our documentation to integrate it with FluentCRM.
To begin, you’ll need an opt-in form to capture the email addresses of people who visit your website. And with FluentCRM installed on your website, you can create an opt-in form in seconds.
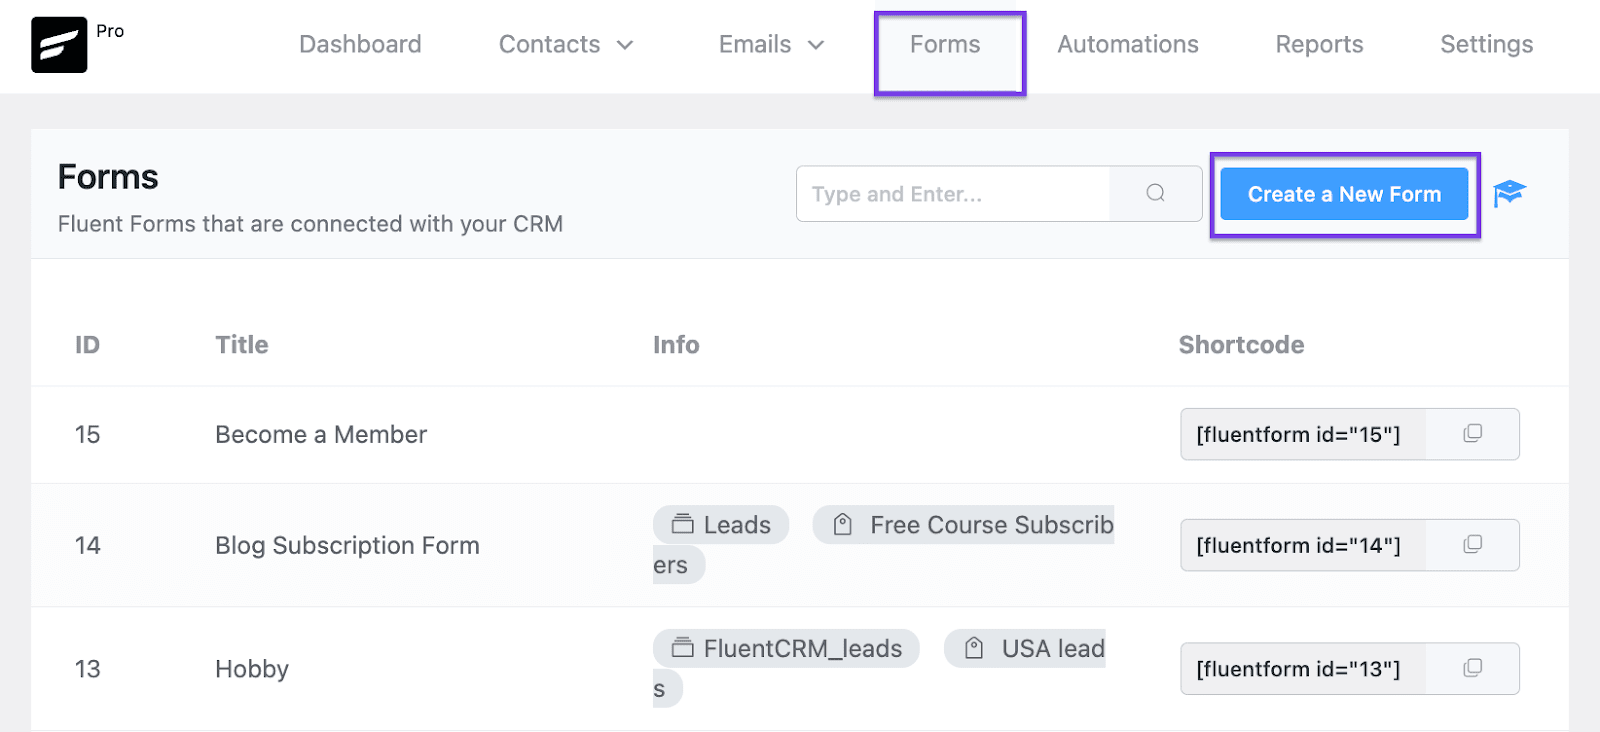
Go to your FluentCRM dashboard and switch to the Forms tab. Then, click Create a New Form.
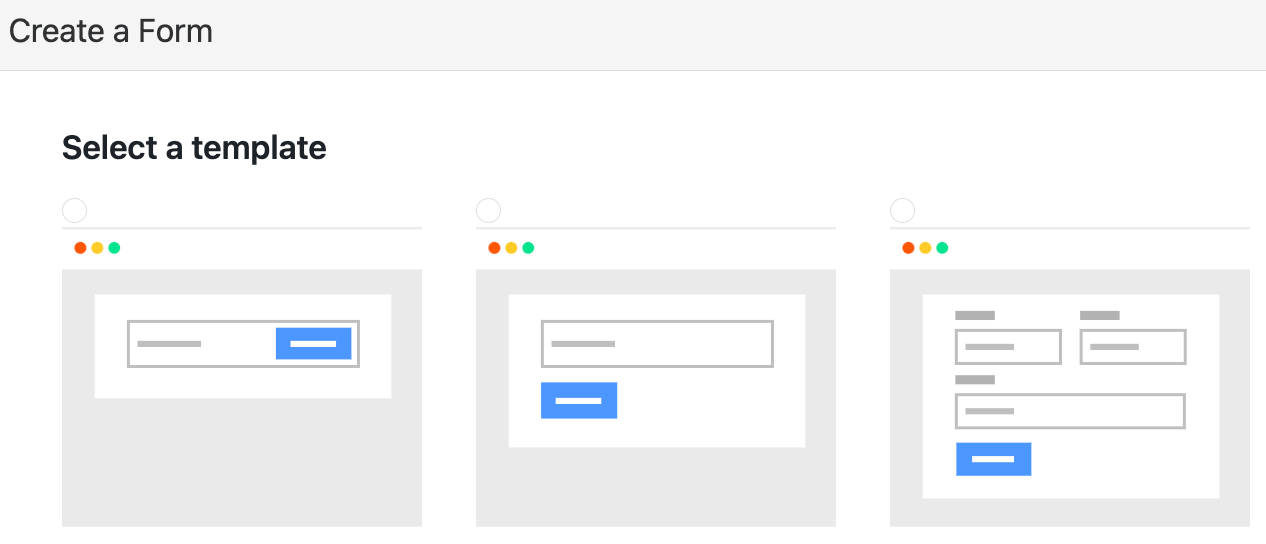
Next, you’ll need to choose a template. Don’t worry, you can customize the form later.
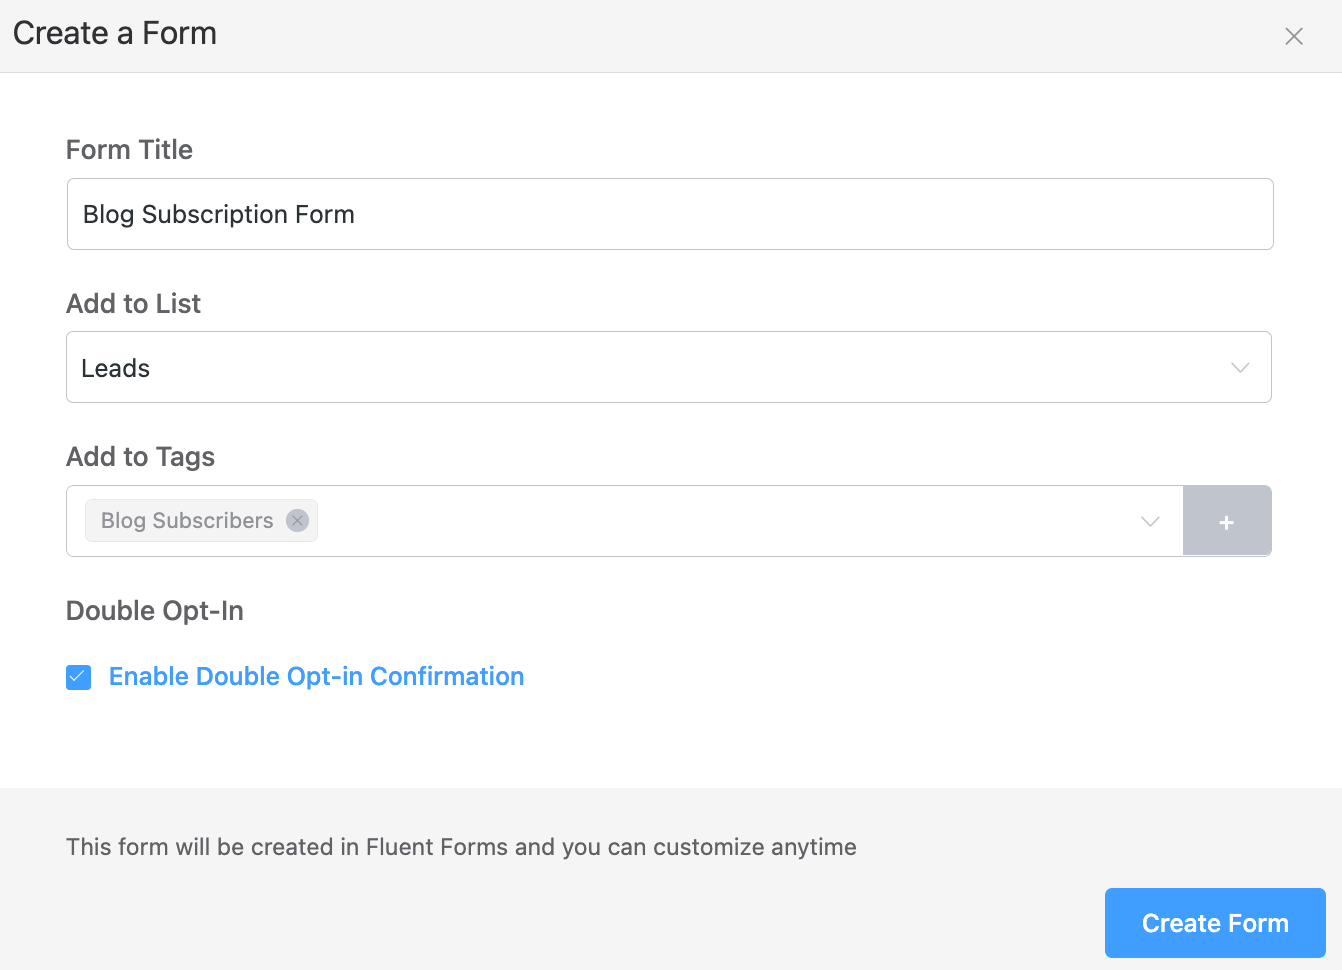
After choosing a template, you’ll need to give a Title, select the Lists and Tags you want to assign, and click the Create Form button to complete the form creation.
By assigning a List and Tag, you’re making sure you’re categorizing your contacts for effective targeting. That’s why you also have a plus (+) button to create a tag!
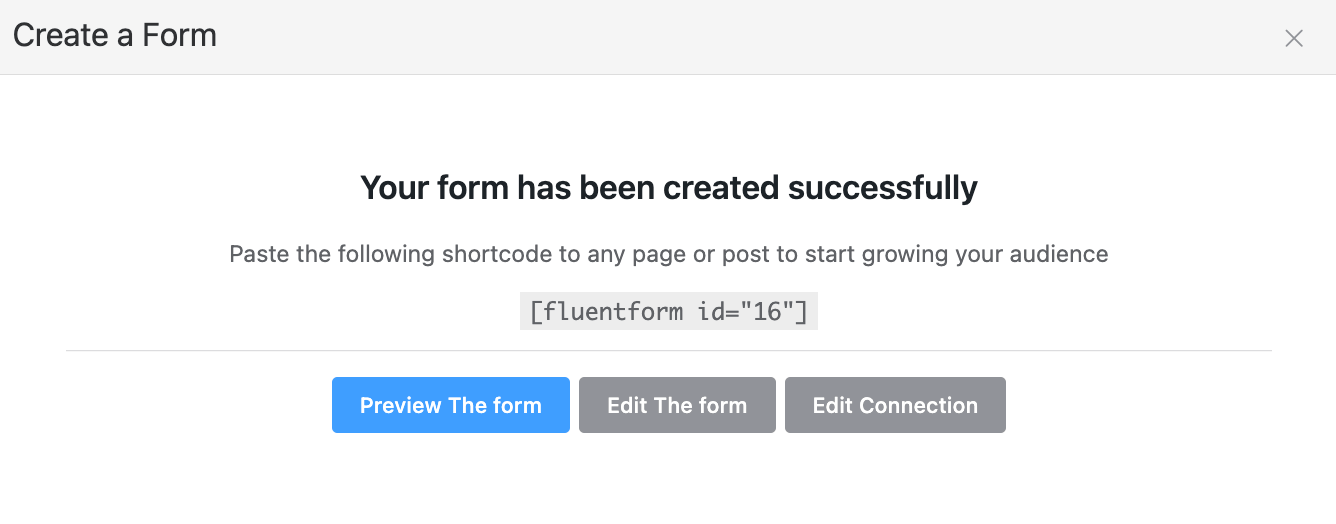
Finally, you’ll get a success message saying your form has been created. You can embed the form anywhere on your website using the shortcode. It’s also possible to preview or customize the form layout and edit the integration for advanced integration functionalities.
You’ll now be able to display the form for capturing your visitor’s email address on your website. So go ahead and paste the form wherever you like. We’ve placed our form on the single post layout sidebar and it looks pretty neat!
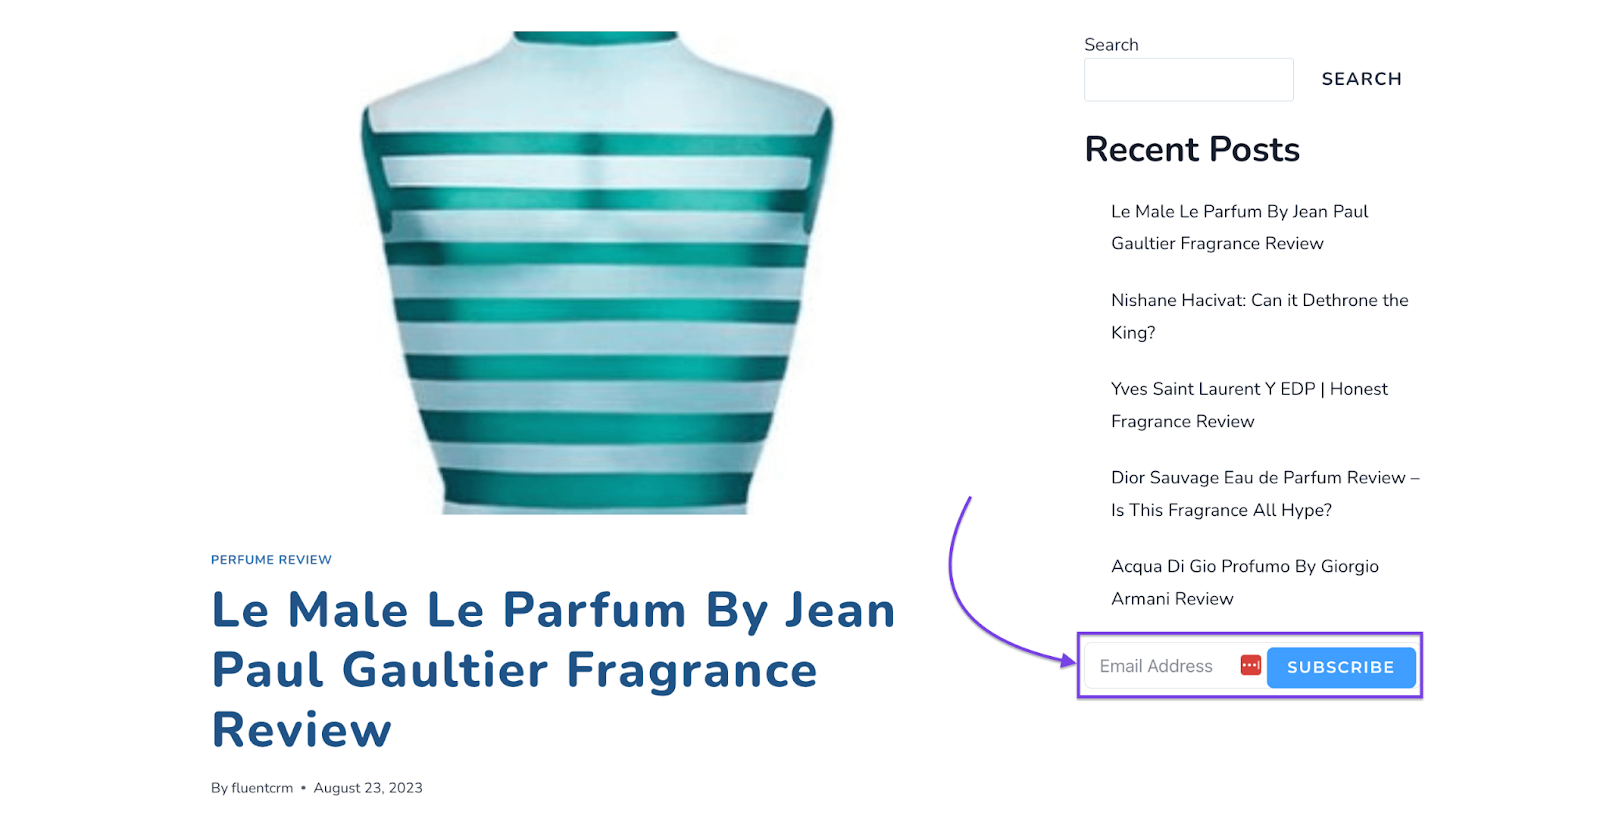
Tip: Your website’s landing pages, blogs, footer, and sidebar are some great places where people are likely to leave their email addresses!
Once you’re done creating your email subscription form, you can expect leads to pour in. With a few people on your email list, you’re ready to start automating newsletters.
Want to know how it works?
FluentCRM’s Recurring Campaign, combined with the Latest Posts Block makes the perfect setup for newsletter automation. With this combination, you get to highlight your latest content at regular intervals!
Let’s get to choosing your email newsletter frequency and timing!
2. Choose a Newsletter Frequency and Timing
When it comes to automating newsletters, the first few questions to answer are:
- How often do you want to email your users?
- Is it a daily, weekly, or monthly newsletter?
- Can you think of a specific day/time your audience is most likely to engage with your newsletters?
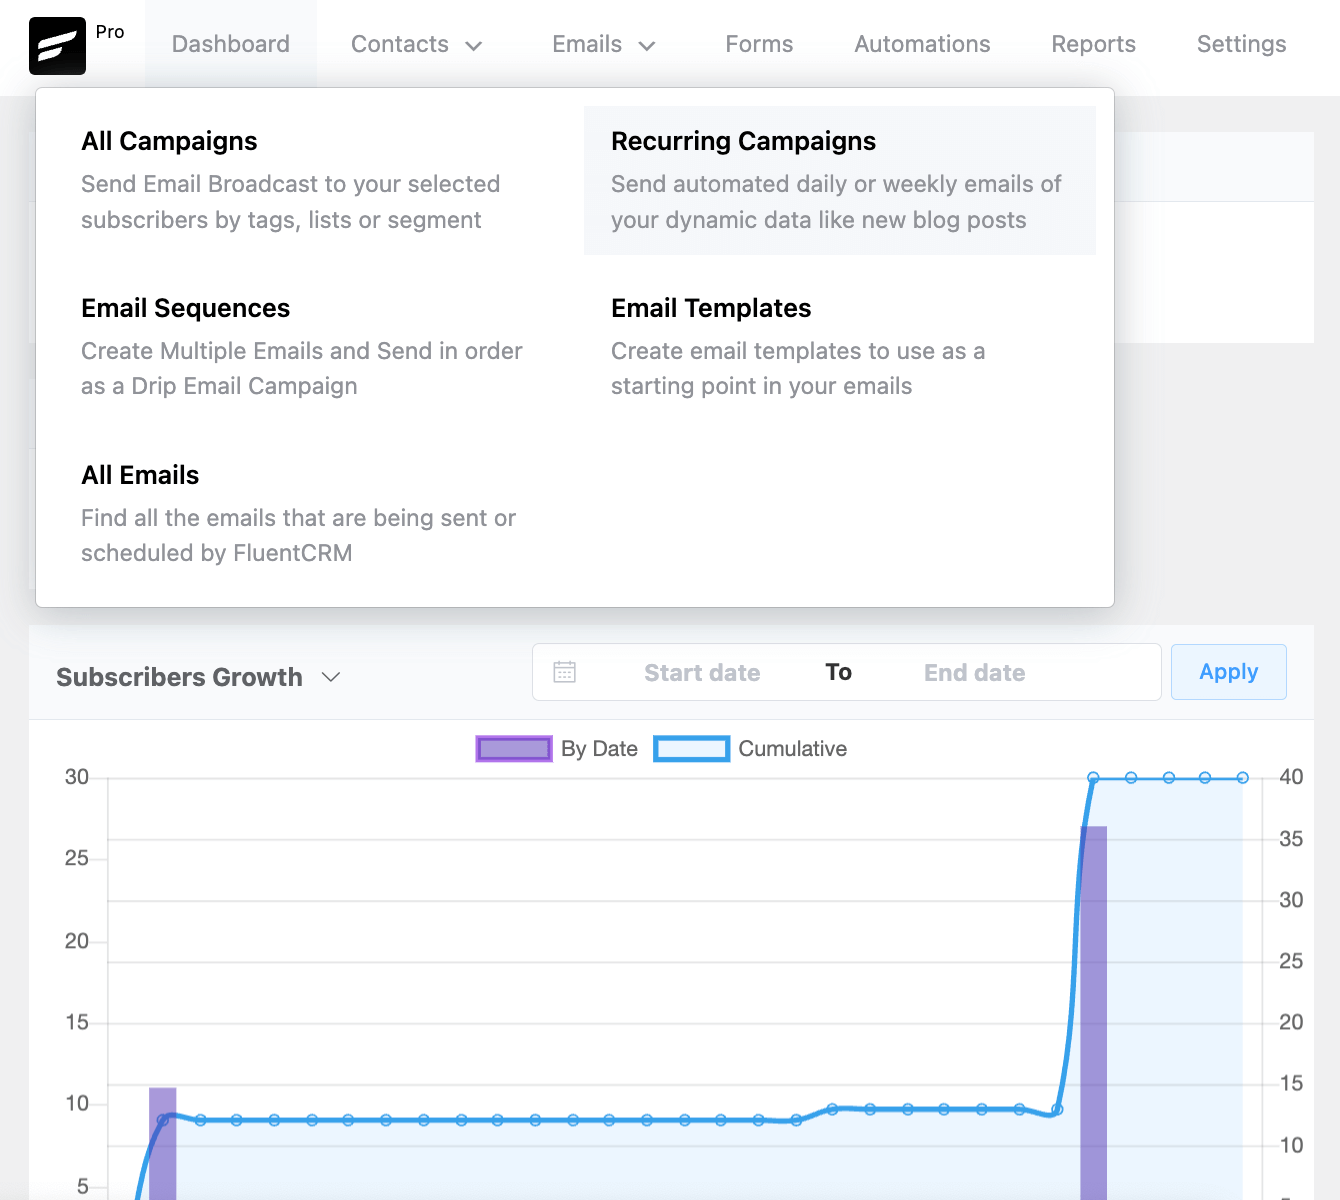
Fortunately, FluentCRM lets you choose all that. So go to the FluentCRM dashboard and hover over to Email>Recurring Campaigns.
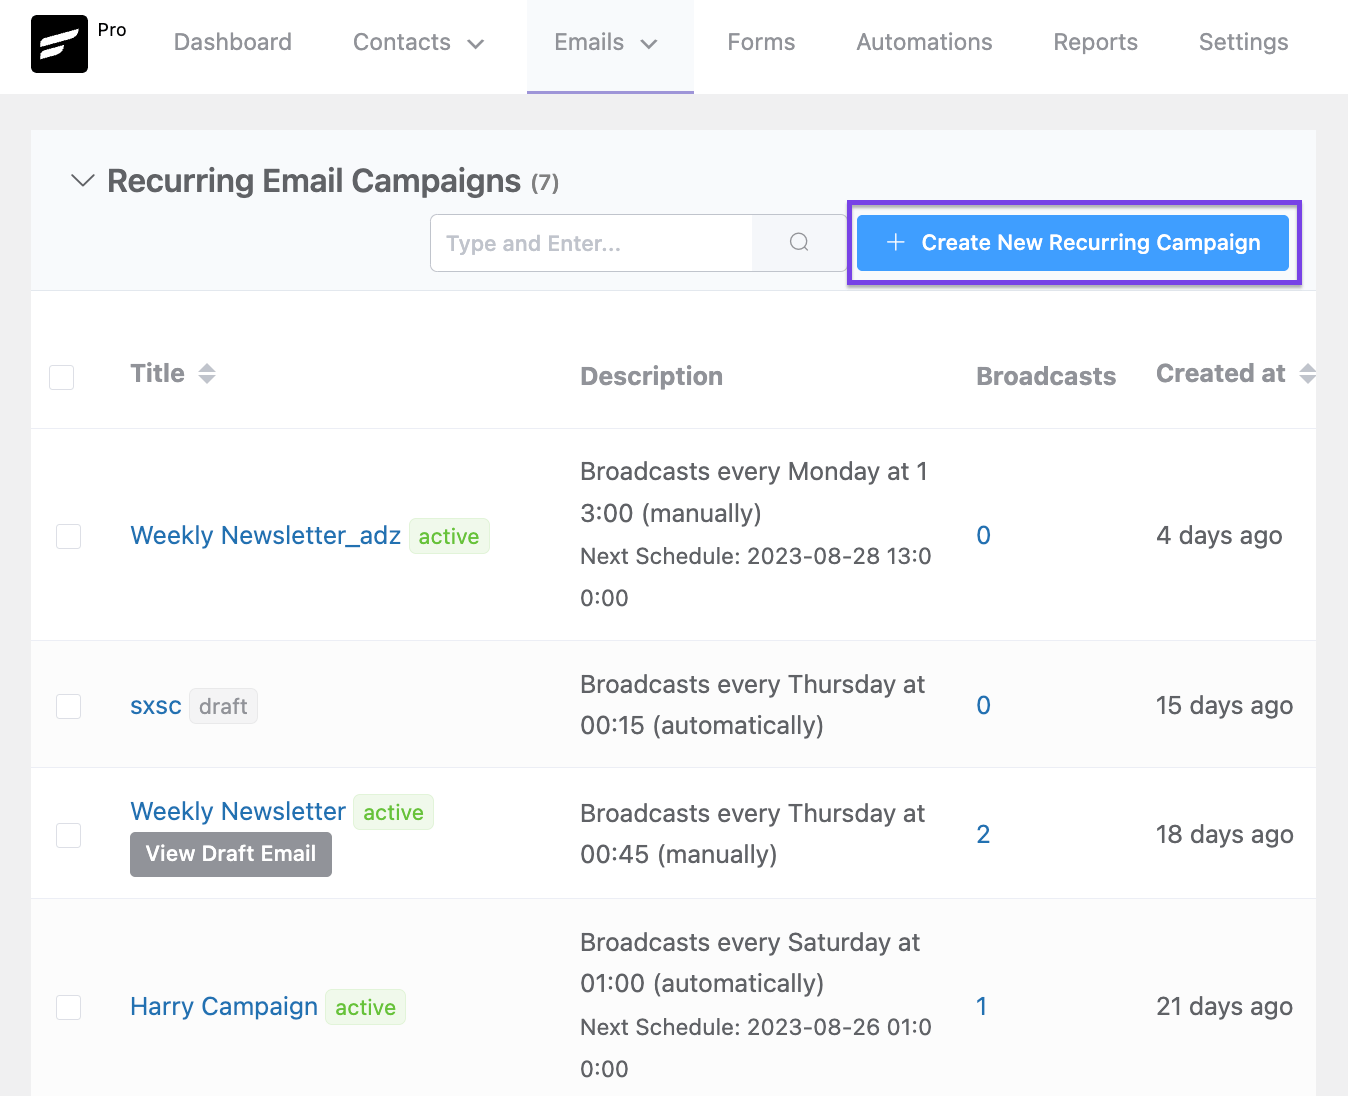
Then, click Create New Recurring Campaign to get started.
Now, you’ll need to specify your email frequency —the interval and timing of your automated newsletter.

As you can see, we’ve named our campaign a Monthly Roundup and selected Monthly frequency with all our emails going out on Day 1 at 1:00. This is great timing as we publish 2/3 perfume reviews each month and most of our subscribers usually engage at those times.
We’ve also chosen to Send Emails automatically to the selected day and time as we won’t be editing the emails before sending them. But if you want, you can disable this option to see a draft of your email that will go out.
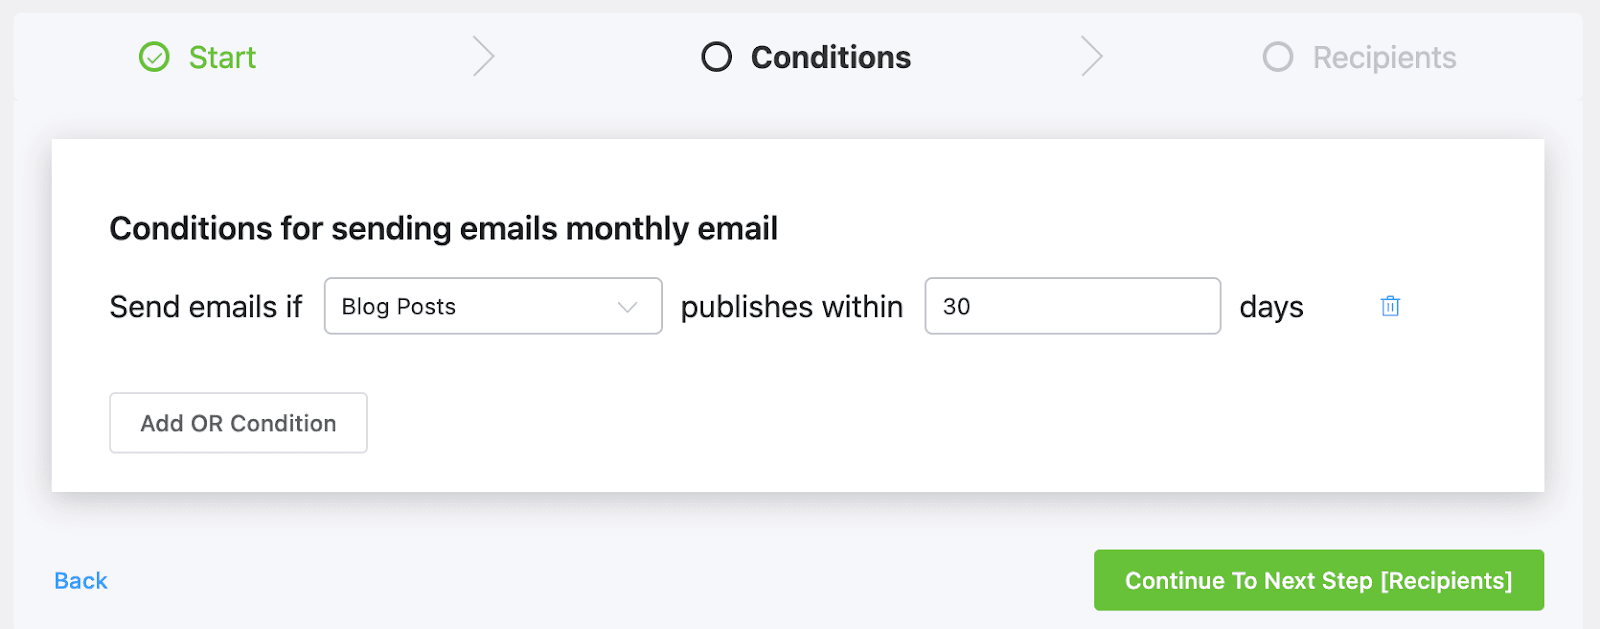
3. Set Conditions and Recipients
After choosing your frequency, you’ll need to specify two more things:
- WordPress lets you publish blog posts, pages, products, courses, and so many other things. What kind of content should trigger the email?
- You may have subscribers, customers, students, administrators, editors, and many other kinds of audiences. Who are the recipients of your email newsletter?
By answering these questions, you’ll know exactly which kinds of content you want to send to, and who are the people you’ll reach out to.
So let’s say we want to reach out to our blog subscribers with blog posts, We’ll have to select Blog Posts published within 30 days (as it is a monthly newsletter) and hit Continue to Next Step.
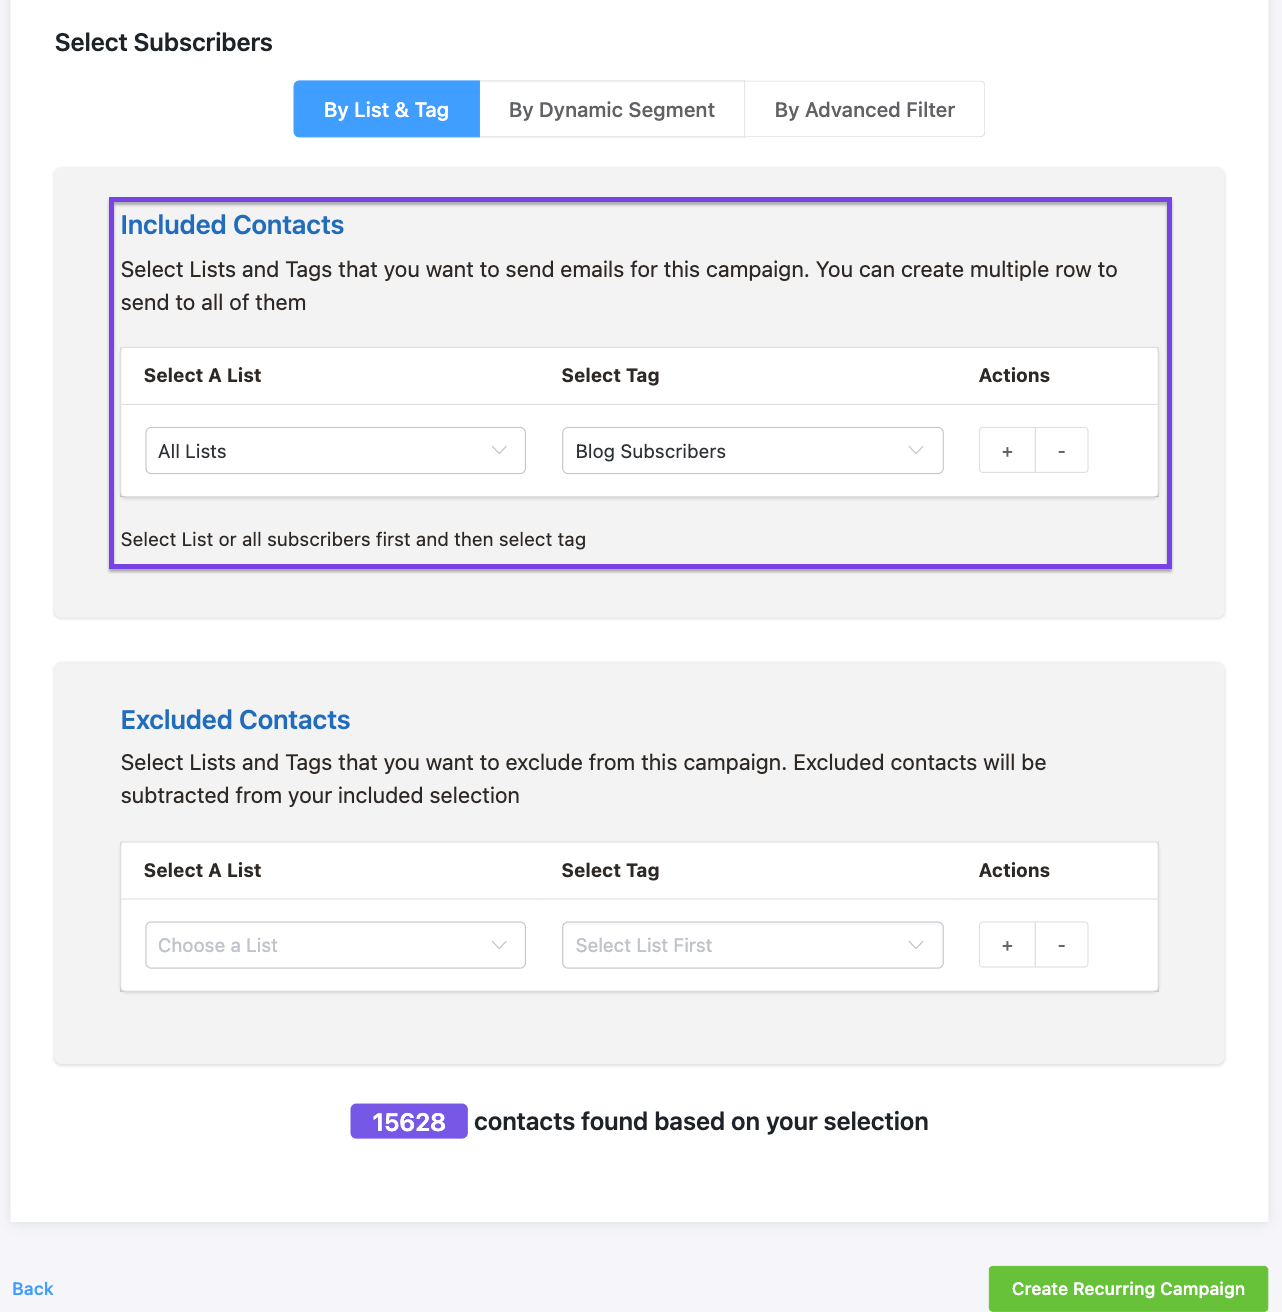
In the next step, we’ll specify our recipients. Since we only want to send these emails to our blog subscribers, we’ll specify the tag as shown below.
However, FluentCRM also offers hyper-targeting capabilities if you want to reach out to a more specific group of audience. Here’s an example showing how you can target contacts of a specific company:
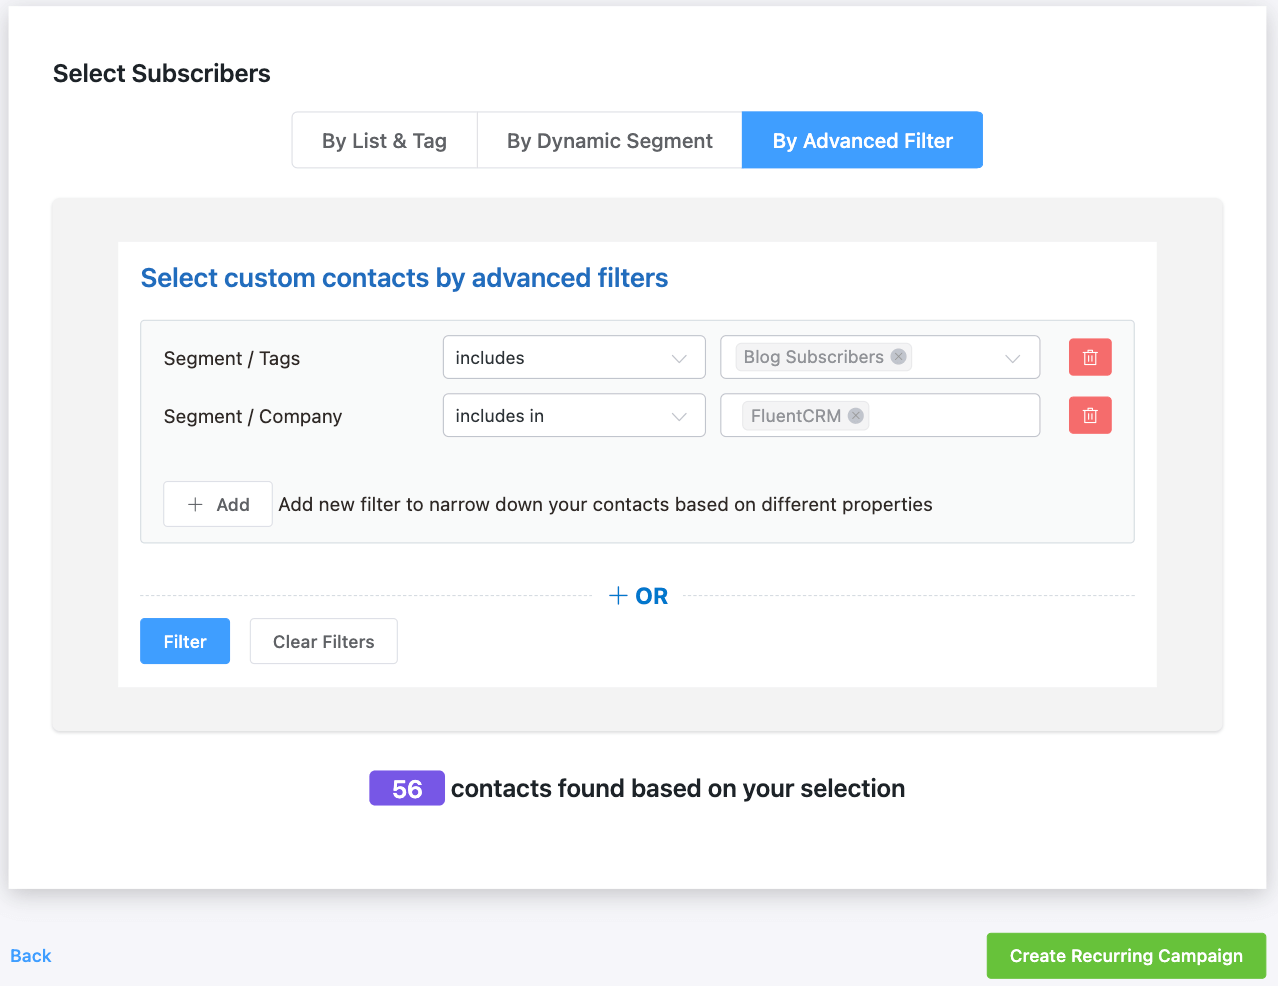
Powerful, eh?
Once you’ve specified who to send the email newsletters to, click Create Recurring Campaign to move to the next part.
4. Compose Your Email
Now you’re ready to work the part that’ll interact with your recipients —the email. Composing and designing newsletters usually takes a lot of manual work. But with FluentCRM’s latest posts block, you’ll be able to eliminate many tasks such as:
- Manually writing the email body
- Designing the email title, body, or appearance
- Inserting Post URLs to email body
Sounds great?
Let’s get started.
Once you’re in the email composing section, you’ll see a bunch of options for writing an email.
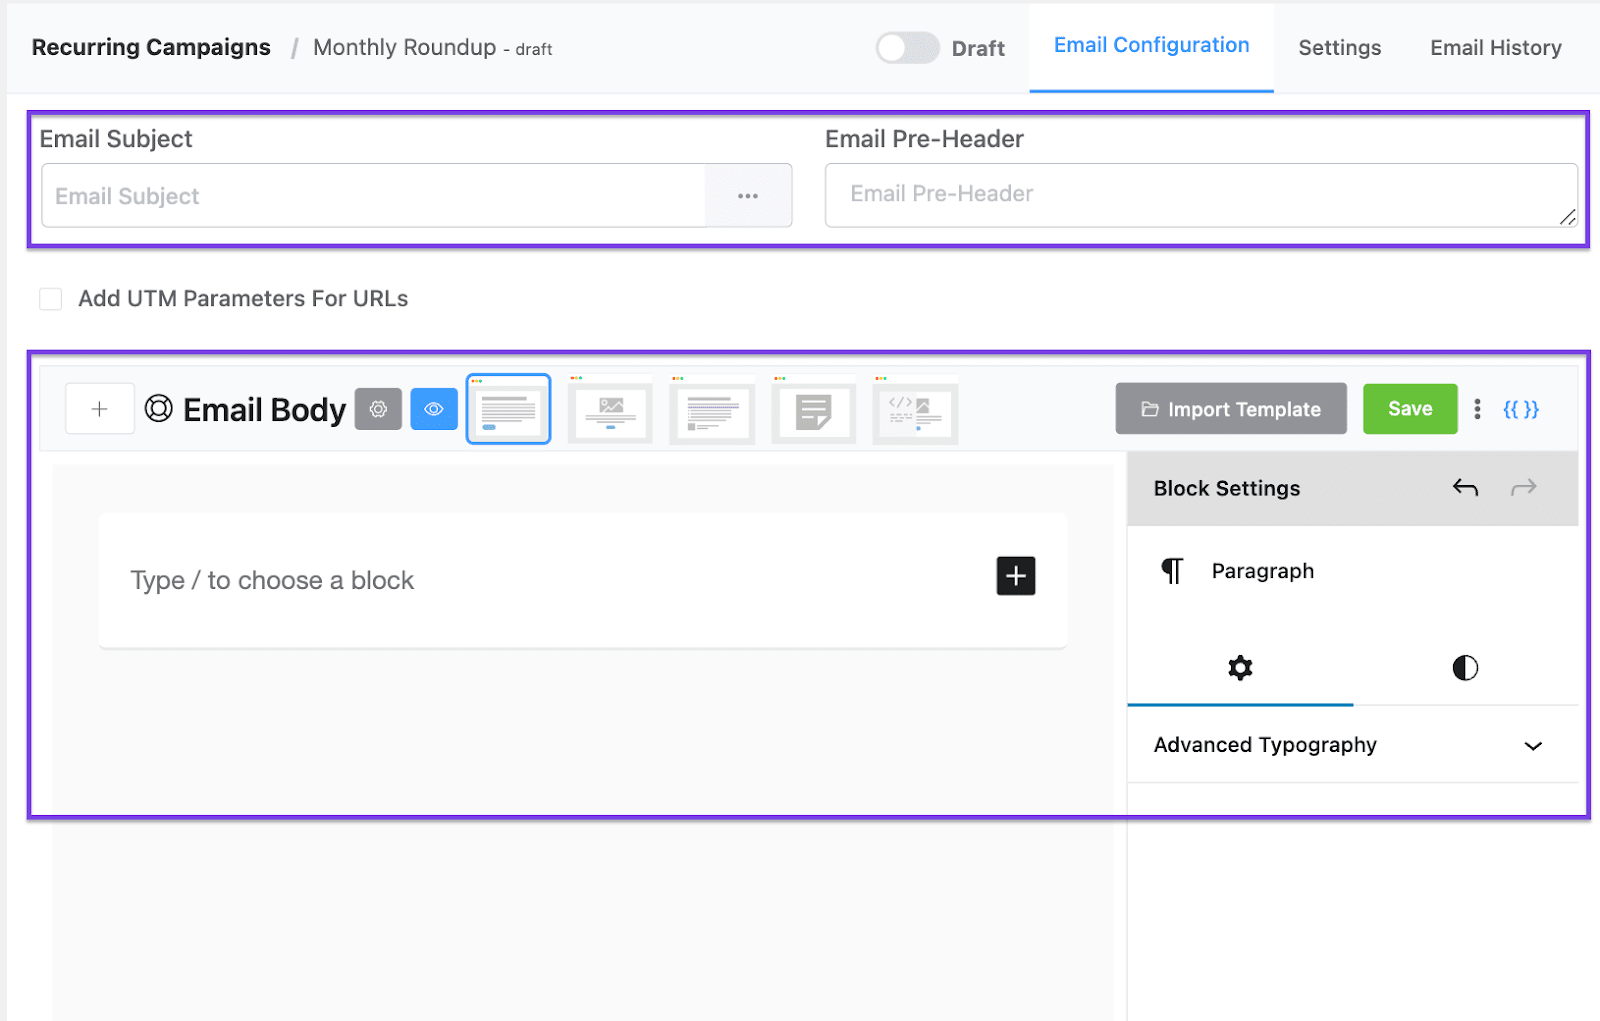
On top, you can specify your Email Subject Line and Email Pre-header. However, the best part about this email composer is that you can use dynamic data, such as your Latest Post URL.
For example, if you write about current issues, you can use your post title as your email subject line via merge codes.
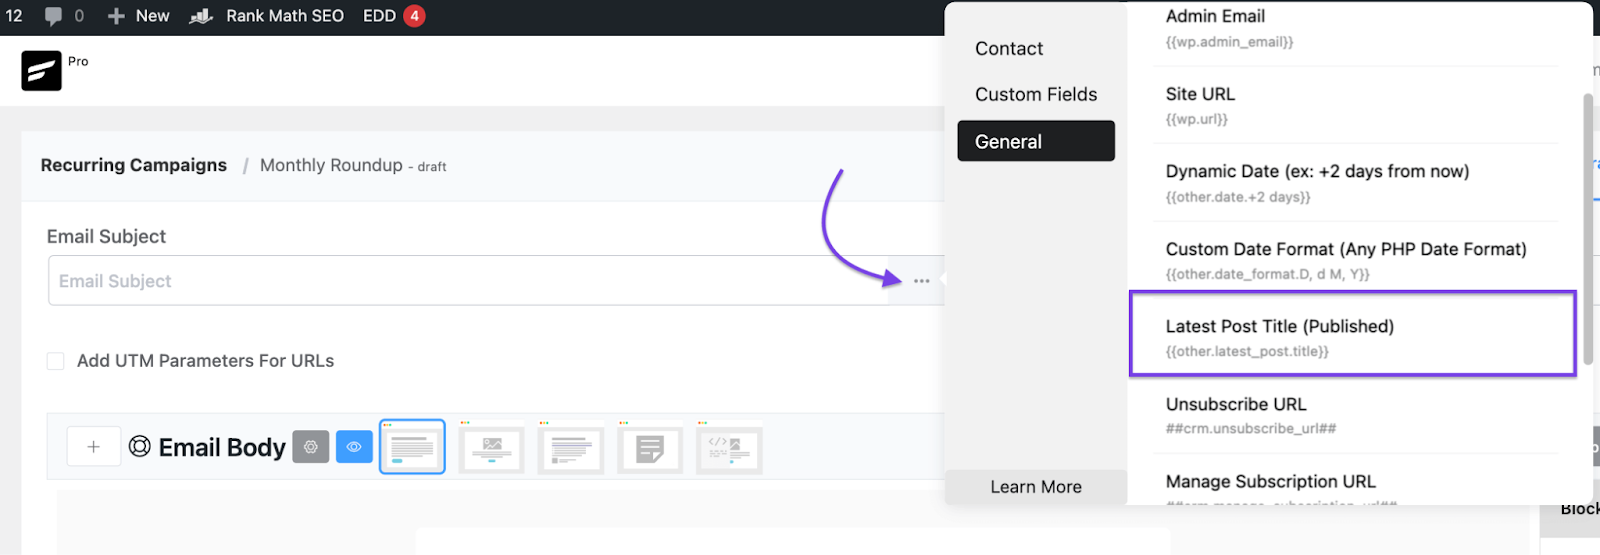
However, as we’re sending a monthly newsletter, we’ll just add a generic subject line and pre-header.
Now, we’ll need to write an evergreen copy to highlight the top perfume reviews each month. As you know, composing emails in FluentCRM is just as simple as writing a blog post on WordPress. You can simply click the plus (+) icon to see all the available blocks.
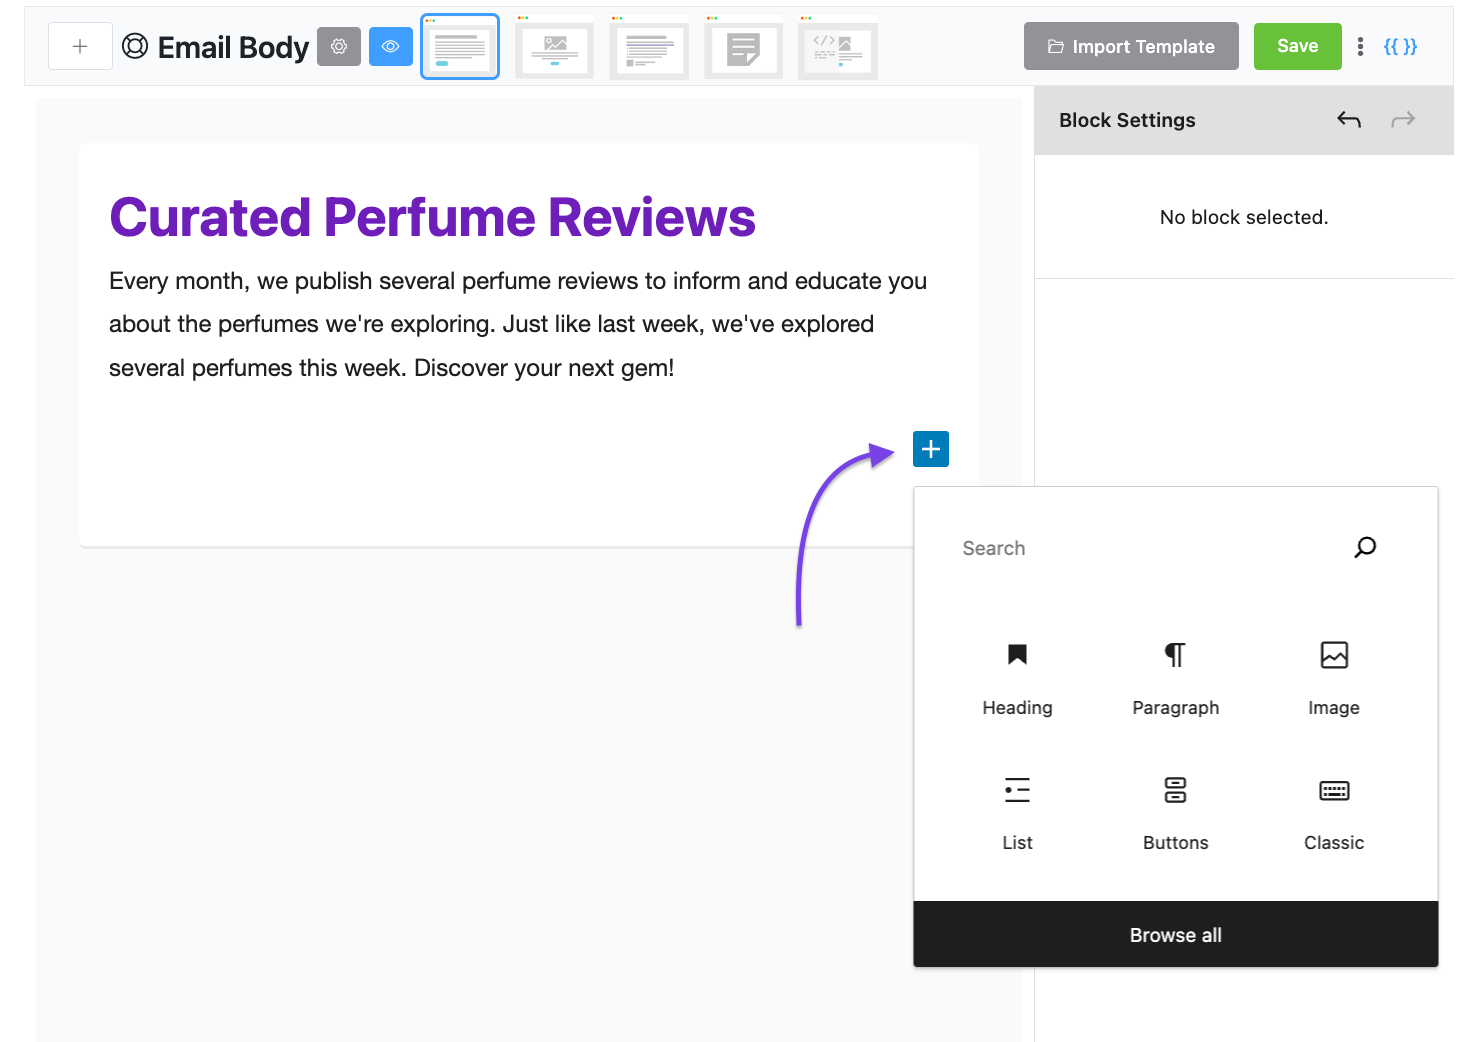
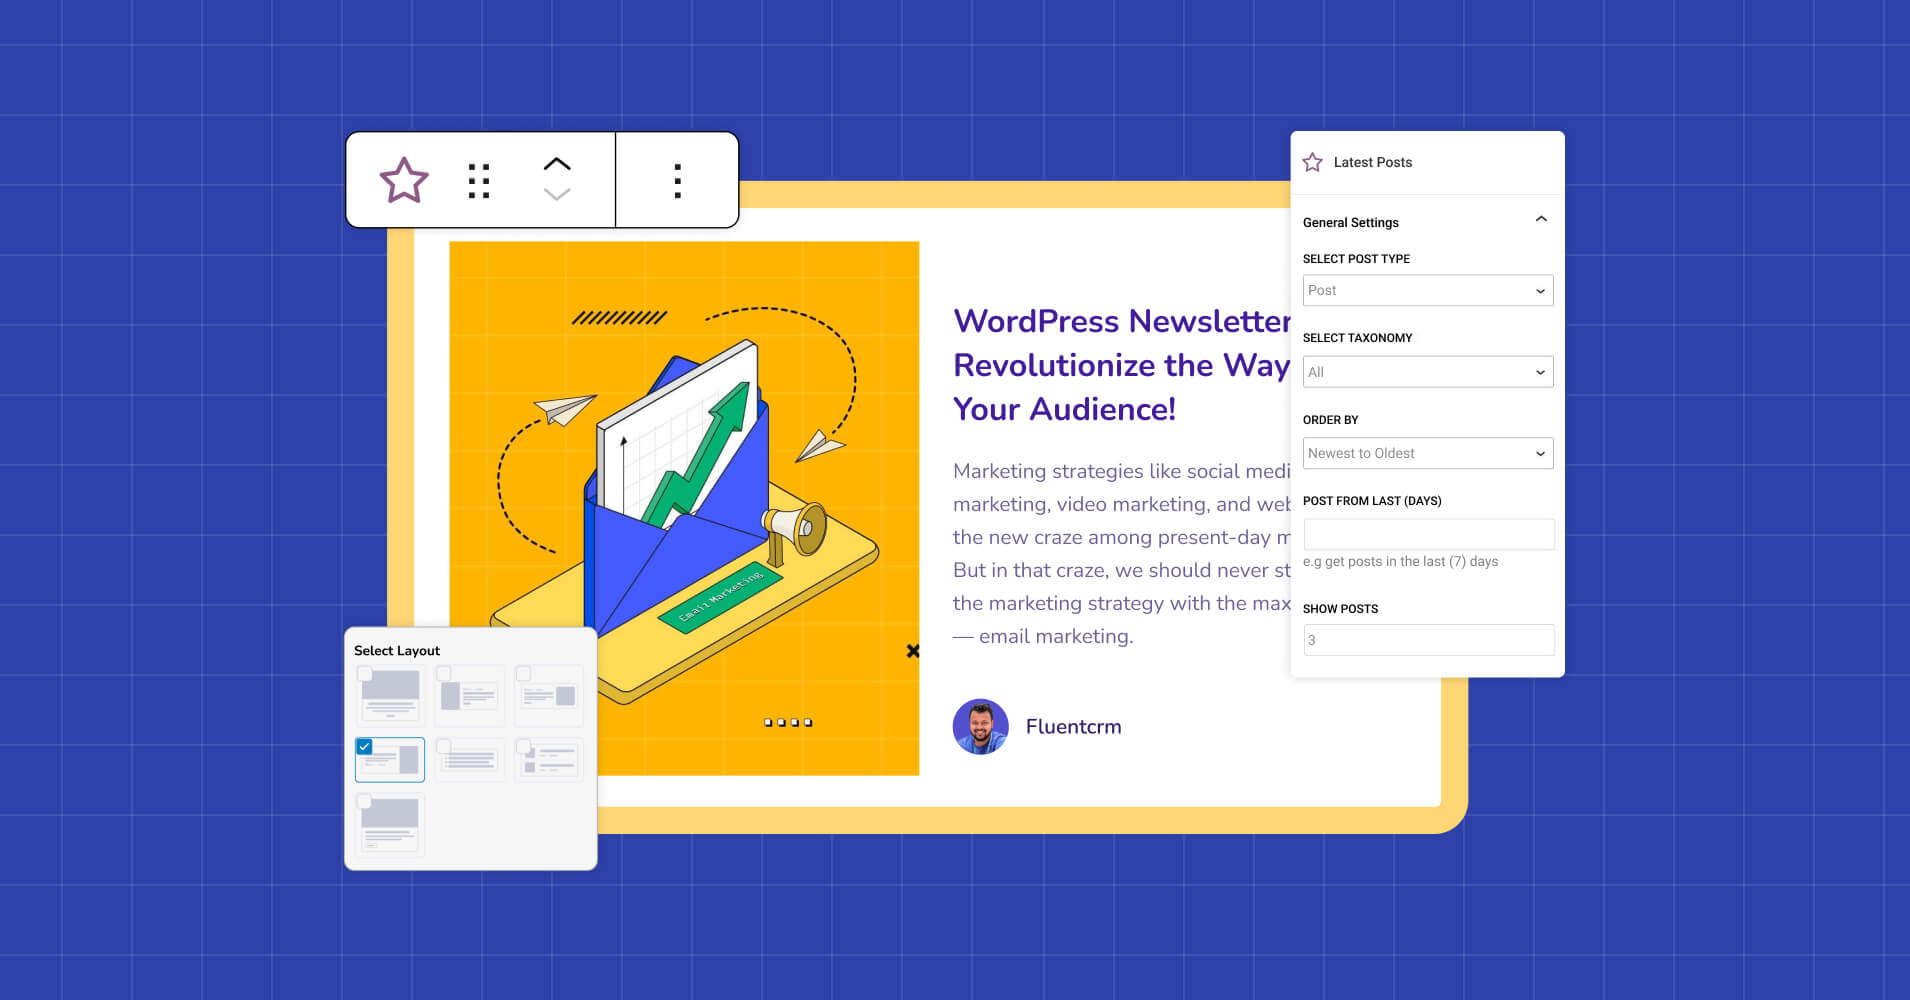
You’ll also find the Latest Posts Block among these options.
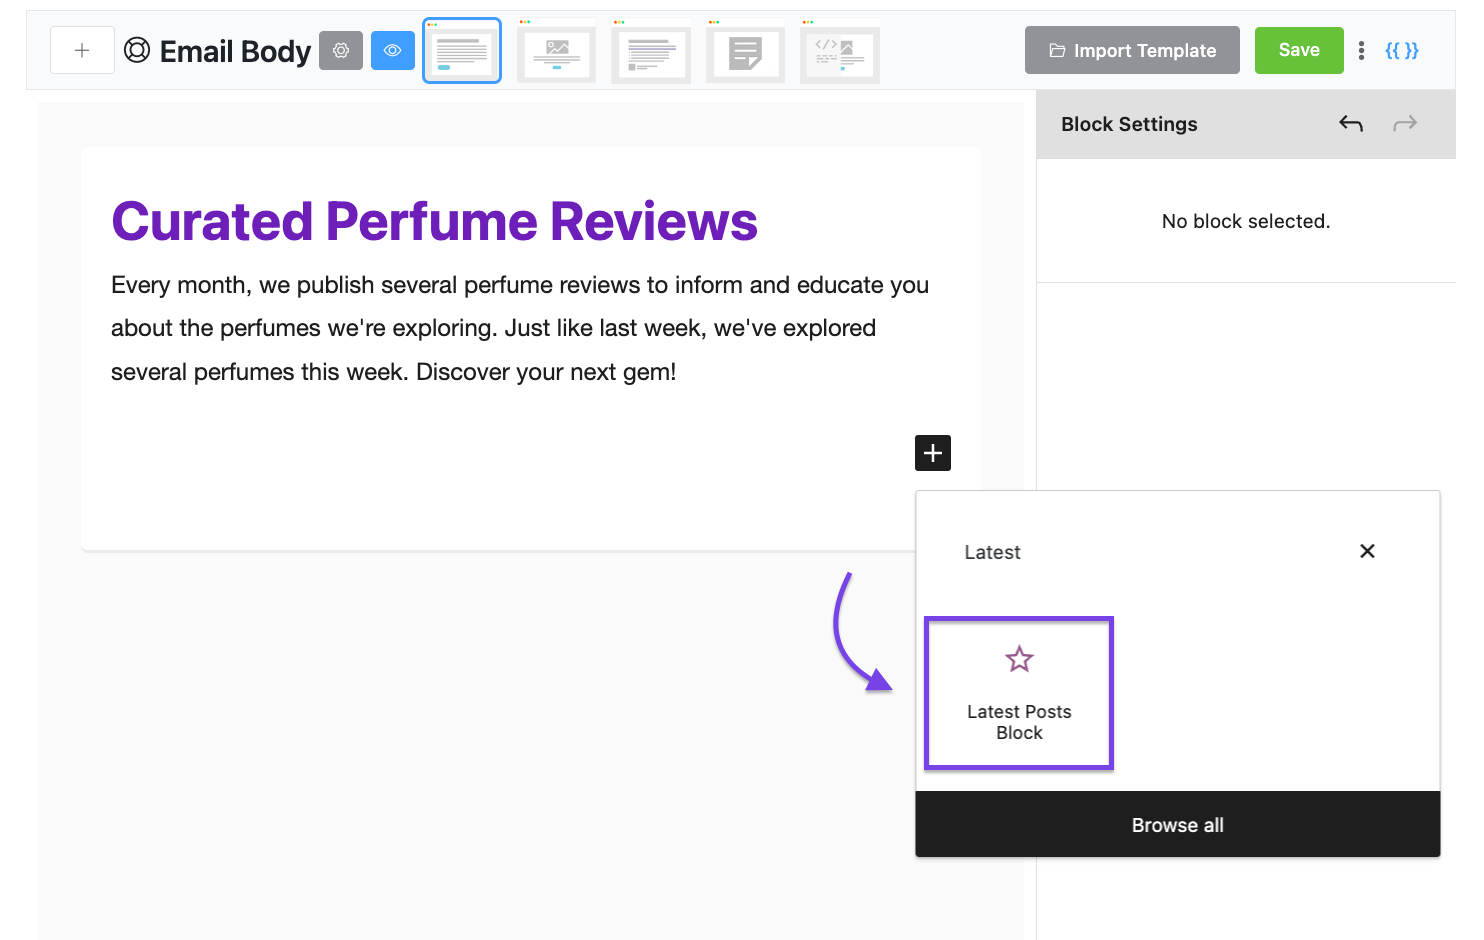
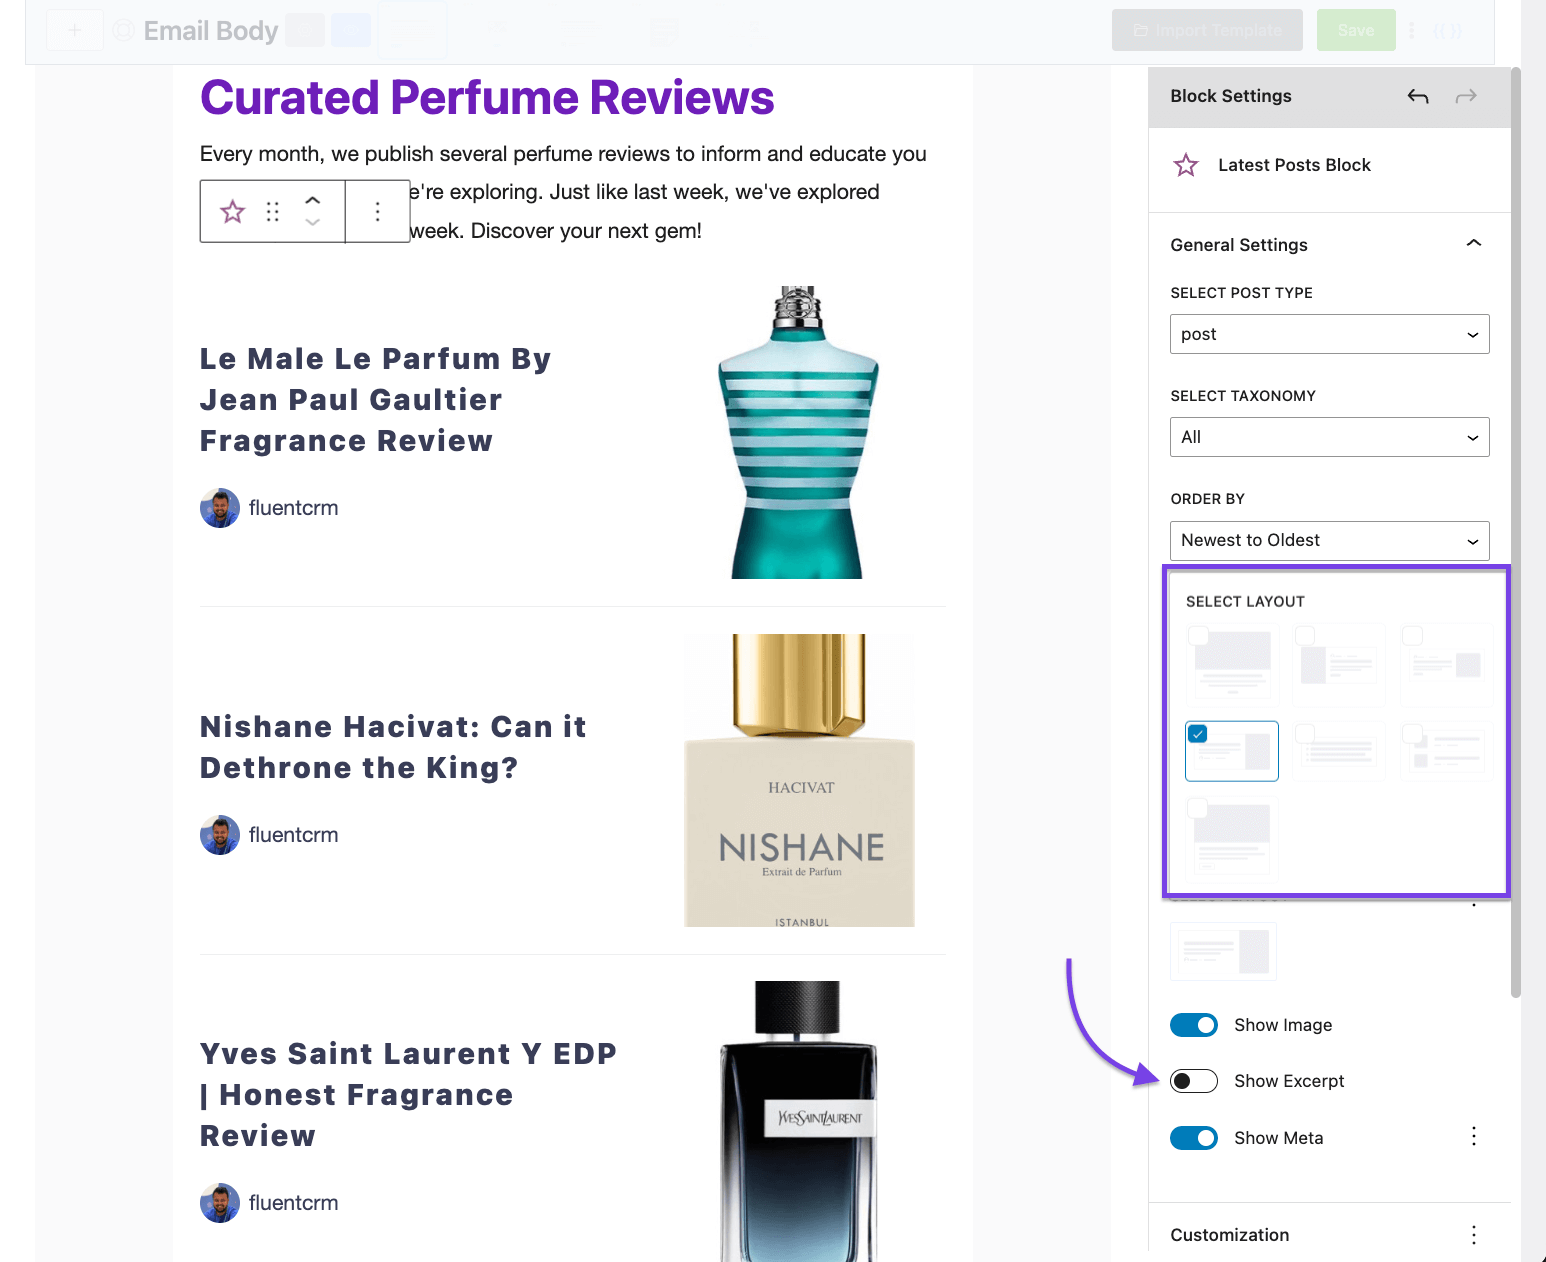
Clicking the Latest Posts block will automatically fetch all the latest posts you’ve published on your website —with post URL, excerpt, and feature image. There are also a few options to specify the type and category of WordPress post you want to fetch, how many posts you want to showcase, and in what order.
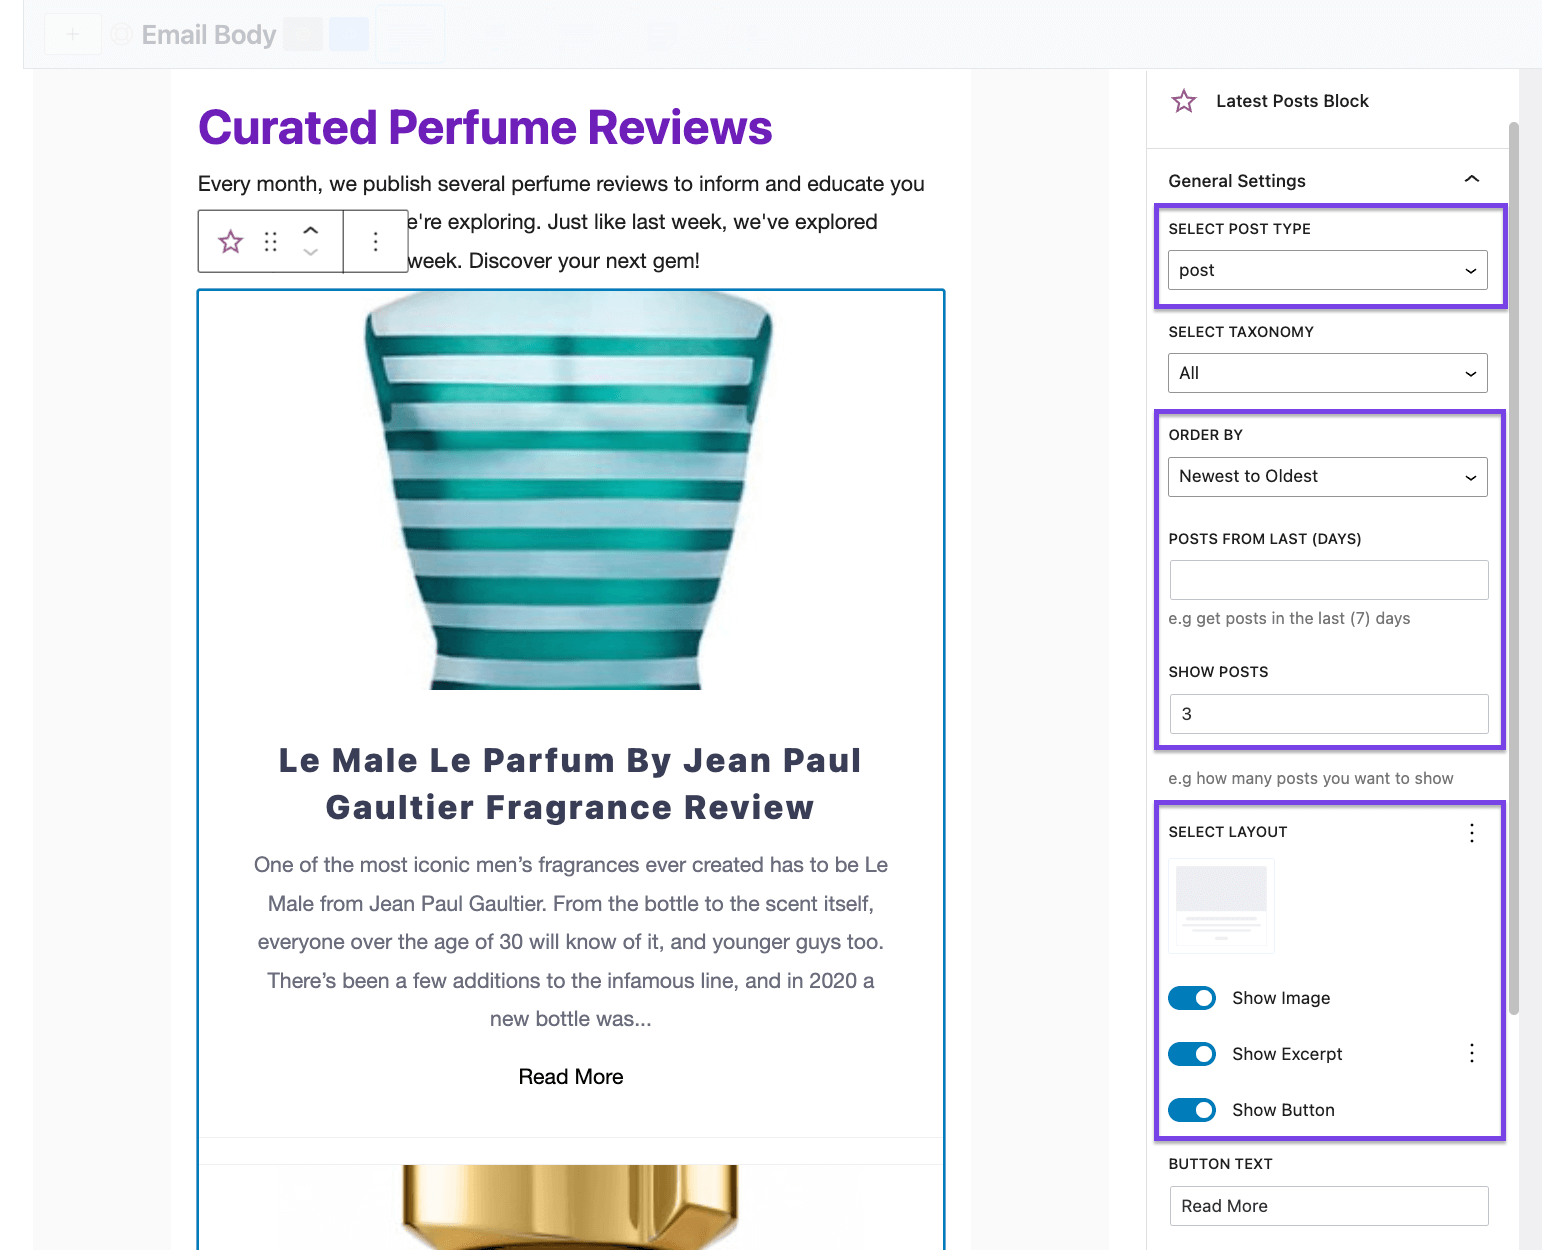
Finally, you can select the post appearance from a few pre-made layouts and choose what to display (e.g. posts from a specific category). We decided to go with the side-by-side layout and turned off the excerpt.
Looks beautiful, right?
Honestly, there’s more you can explore!
5. Activate and Optimize!
Surprised?
By following all the above steps, we’ve completed almost all the steps to create a newsletter engine inside our WordPress site.
Now all we have to do is activate the automation by toggling the button on the top right.
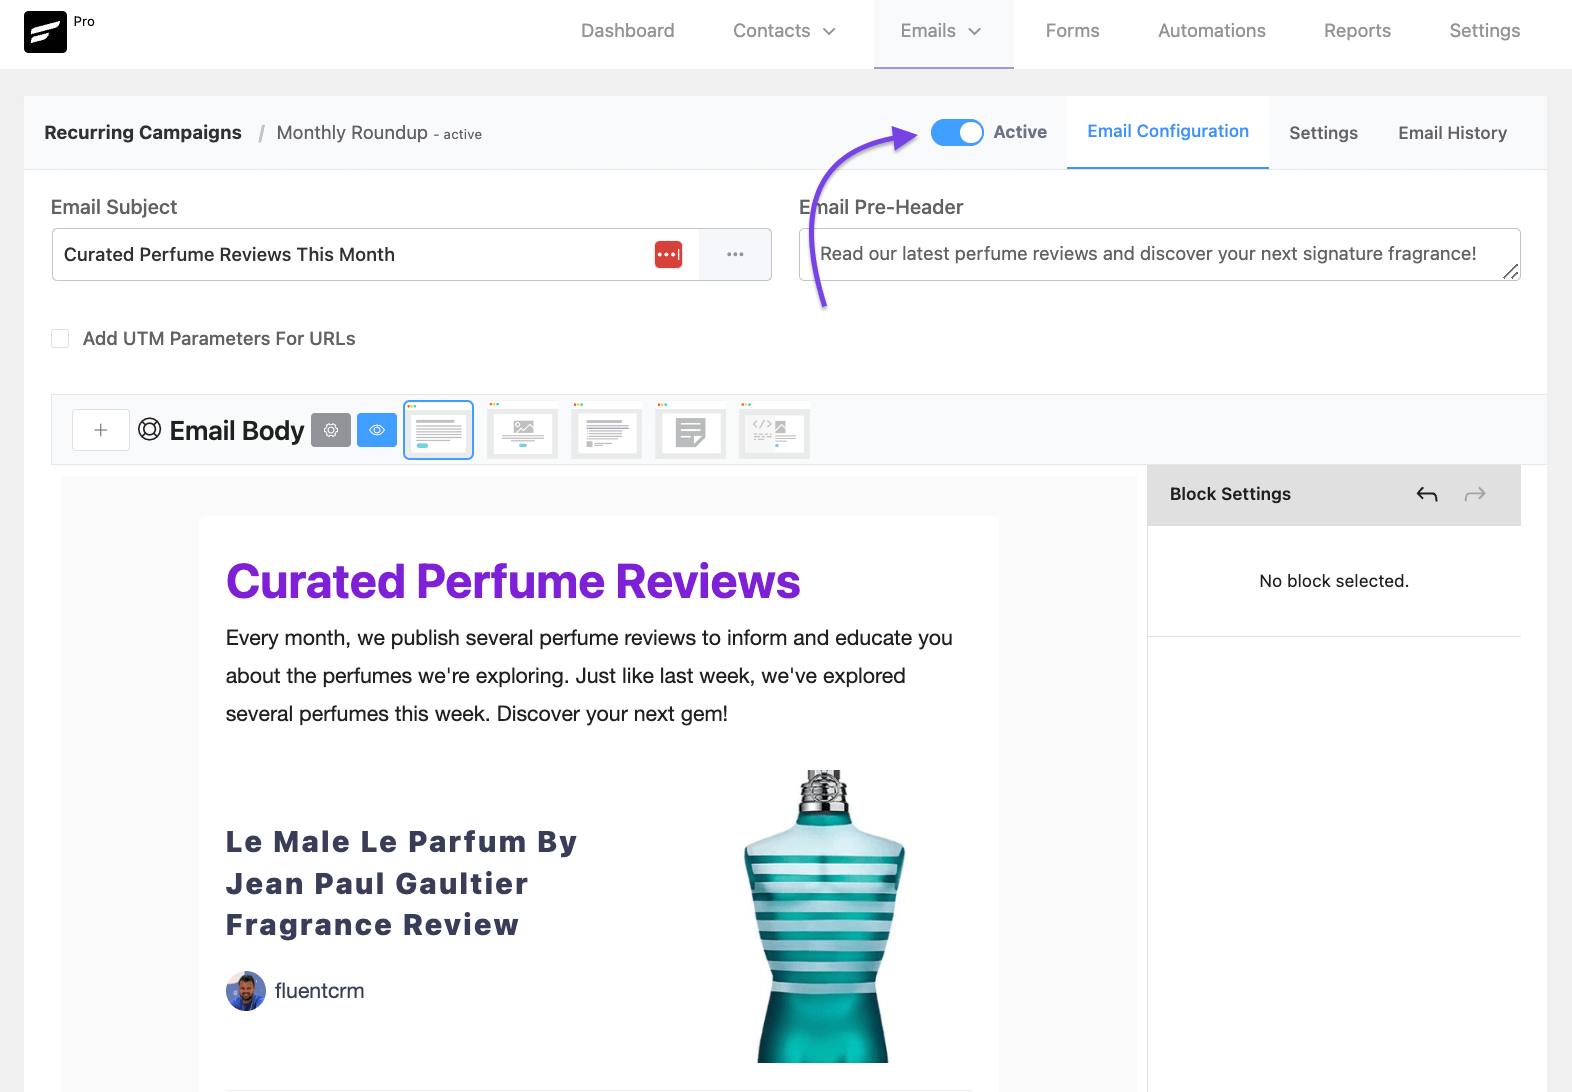
That’s it, that’s all you need to set up your WordPress newsletter automation. While the recurring campaign will automate an email on the selected day, the latest posts block will fetch our latest post —all without any manual assistance!
But hold on!
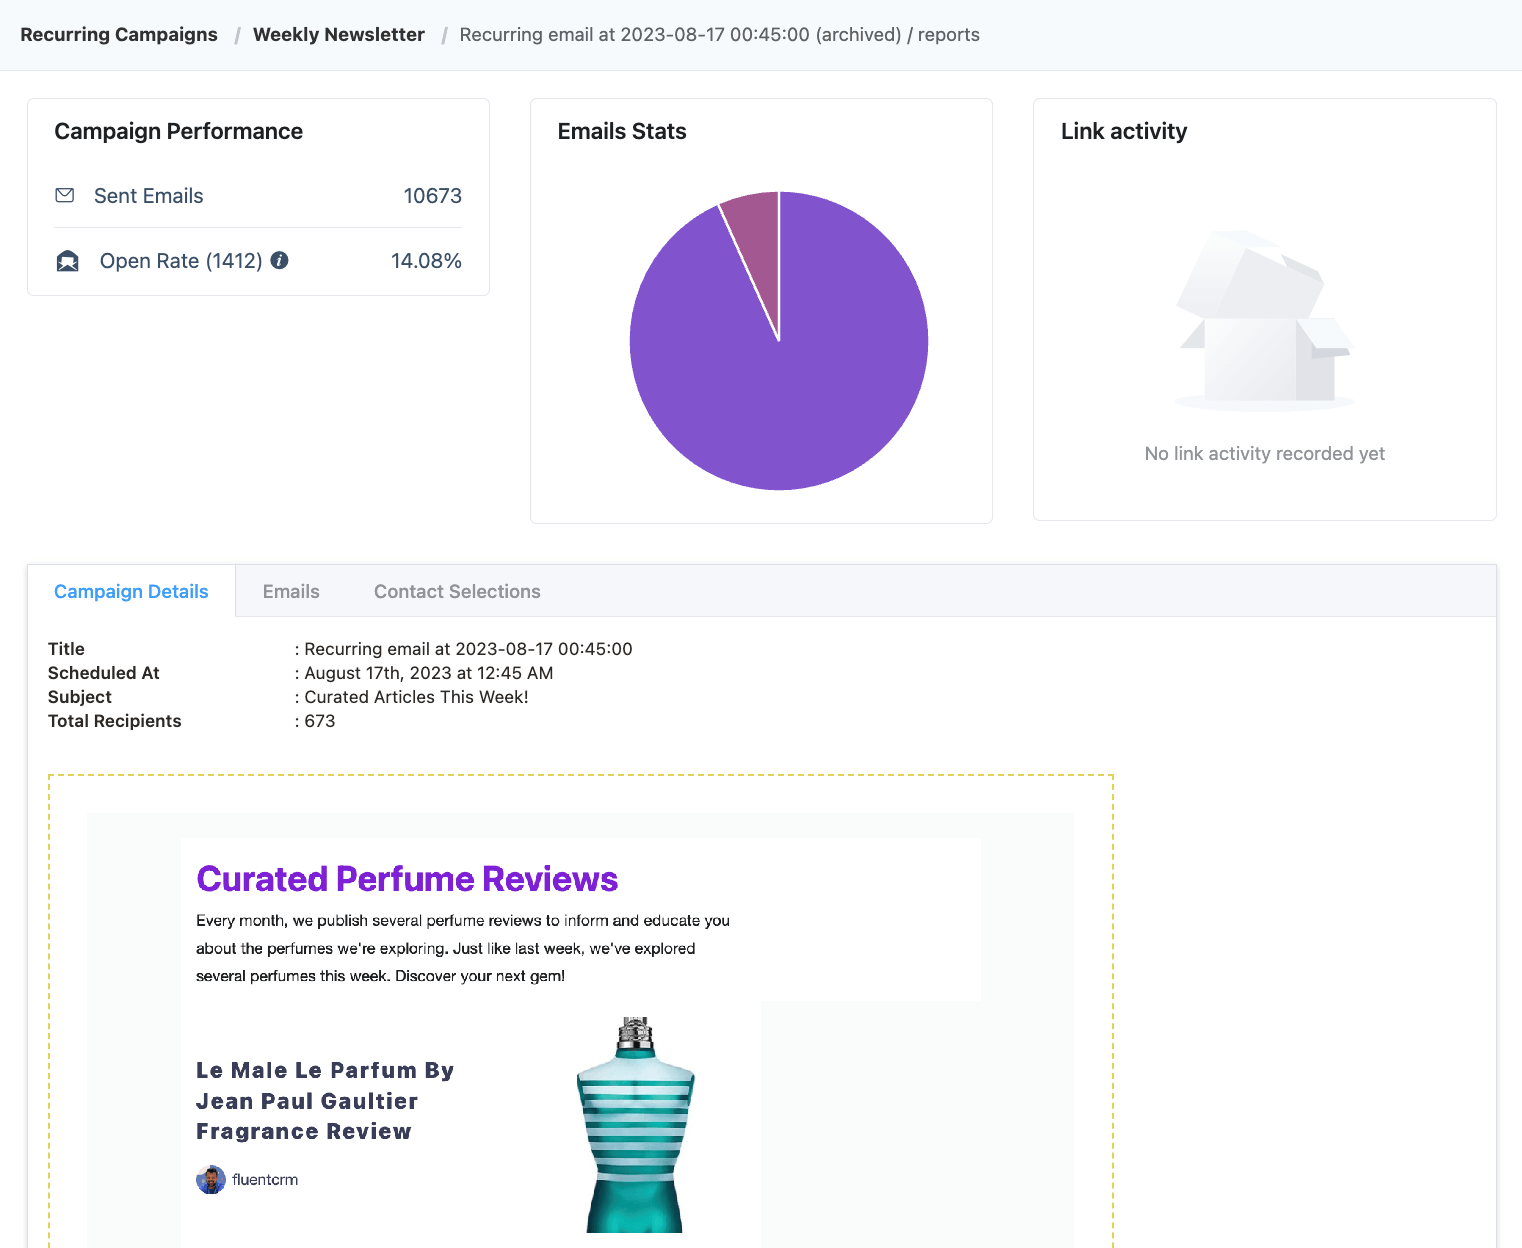
Aren’t email marketers supposed to optimize their emails based on performance? How would you measure your email marketing KPIs when you’re automating them?
Fortunately, FluentCRM tracks all the email newsletter broadcasts so that you can track and optimize your newsletters!
Automate, Engage, and Thrive!
In the age of artificial intelligence, writing email newsletters manually simply isn’t efficient. However, the lack of an efficient automation tool meant engaging your audience with targeted content delivery was a daunting job at work…until now.
Now that you know how to create an automated WordPress newsletter, you’ll also want to employ WordPress email automation for other purposes. Need some examples? We have also prepared some email automation examples to help you start saving time and gain more efficiency!
So go ahead and focus on what truly matters, producing great content, improving your customer experience, and taking your business to a whole new level!
We wish you all the best!

Nazir Himel
Product Marketing Lead
Hey! I’m an inbound marketing specialist focused on email marketing automation. I love turning complex features into clear, user-centric messaging and when I’m not shaping product stories, I’m experimenting with content frameworks, conversion journeys, and helping others communicate value without sounding salesy!
Table of Content
Related Articles and Topics
-
FluentCRM Email Signature Generator: Create Professional Signatures for Every Email
FluentCRM’s Email Signature Generator is a browser-based email signature builder that creates professional, HTML-formatted signatures…
-
How to Send Automated Payment Reminder Using FluentCRM
Late payments are rarely dramatic. People forget, get busy, miss a date, or mean to…

Leave a Reply