

Connect WP Forms, Ninja Forms, Gravity Forms, or Any Forms with FluentCRM

Summarize with


Leads are prospects or potential customers for your business. The more leads you collect, the better your business will grow. In order to ensure constant growth, you need to collect leads faster.
Your contact form is one of the simplest yet most effective tools for capturing leads. FluentCRM is one of the most popular email marketing automation plugins for WordPress. Although it has a built-in contact form integration with Fluent Forms, Elementor Forms, and MailOptin, popular WordPress forms like Contact Form 7, WP Forms, Gravity Forms, Ninja Forms, Formidable Forms don’t integrate with FluentCRM yet.
If you’re using any of these forms, it looks like the only way out is to export your list every month into a CSV file and import them into FluentCRM manually. This isn’t helpful for businesses that deal with a lot of things at once.
However, if you can spend a few minutes configuring and connecting your forms with FluentCRM, you can integrate almost any form with FluentCRM! And today, we’ll show exactly how you can connect any form with FluentCRM to capture leads.
Before we begin…
In order to integrate FluentCRM with forms that don’t have native integration, you need to use the Incoming Web Hooks feature of FluentCRM.
What are webhooks?
Don’t get confused by the term. Webhook is extraordinarily simple, and you don’t need to be a coding expert for configuring it. With webhooks, you can easily connect your WordPress site or plugin to any other plugin or service that doesn’t offer an official integration with your favorite plugin or service.
Note: the Incoming Web Hooks is a Pro feature in FluentCRM. So if you haven’t got FluentCRM Pro yet, now is the right time to get it. Currently, we are offering a 40% discount on the FluentCRM annual license.
FluentCRM’s incoming webhooks will listen to any webhook requests. This essentially means that to capture leads in FluentCRM, you need to send a webhook request from your WordPress form plugin.
For sending webhook requests, your WordPress form plugin needs to have webhook integration. Now, this might be available as an add-on if you’re using a form like WP Forms or Ninja Forms.
If your form plugin doesn’t have a form plugin integration, you might need to use a third-party service like Zapier, Pabbly, or Integromat.
Don’t worry; we’ll go over both ways you can connect your forms with FluentCRM!
You can capture leads from any website!
Webhooks work by sending and receiving requests via an API connection. You don’t need to have FluentCRM on the same site that captures leads for you. This essentially means that you can capture and store leads from any sites you have, regardless of where you installed FluentCRM.
Let’s say you have two websites, Site A and Site B. Now maybe you’re capturing leads in Site A. But if you don’t capture leads from Site B, you risk missing out on huge revenue potential that you can achieve with FluentCRM’s wide range of marketing automation features. With webhooks, you can automatically capture and store leads that come through your Site B, even if you’ve installed FluentCRM on Site A!
How to integrate FluentCRM with any WordPress form plugin
FluentCRM’s Incoming Web Hooks helps you easily integrate any forms so that you can collect and store leads into your contact list. This can be done in two ways.
- First, if your form plugin offers an outgoing webhook, you can set up a direct webhook integration to send entries to FluentCRM.
- Second, if your form plugin doesn’t support webhook integration, you can use a third-party application like Zapier, Pabbly, or Integrately to send entries to FluentCRM.
So without further ado, let’s find out how we can integrate FluentCRM in both ways!
Integrating a form via outgoing webhook request
Most popular WordPress forms support outgoing webhooks. In this tutorial, we will use the Fluent Forms webhook integration to send webhook requests to FluentCRM.
Note that webhooks work the same way in every WordPress form plugin, so no matter which WordPress form plugin you’re using, this process will be the same.
So first, we will create an incoming webhook in FluentCRM. And then, we will create an outgoing webhook from our form plugin to send contact data to FluentCRM.
Step 1: Creating an incoming webhook in FluentCRM
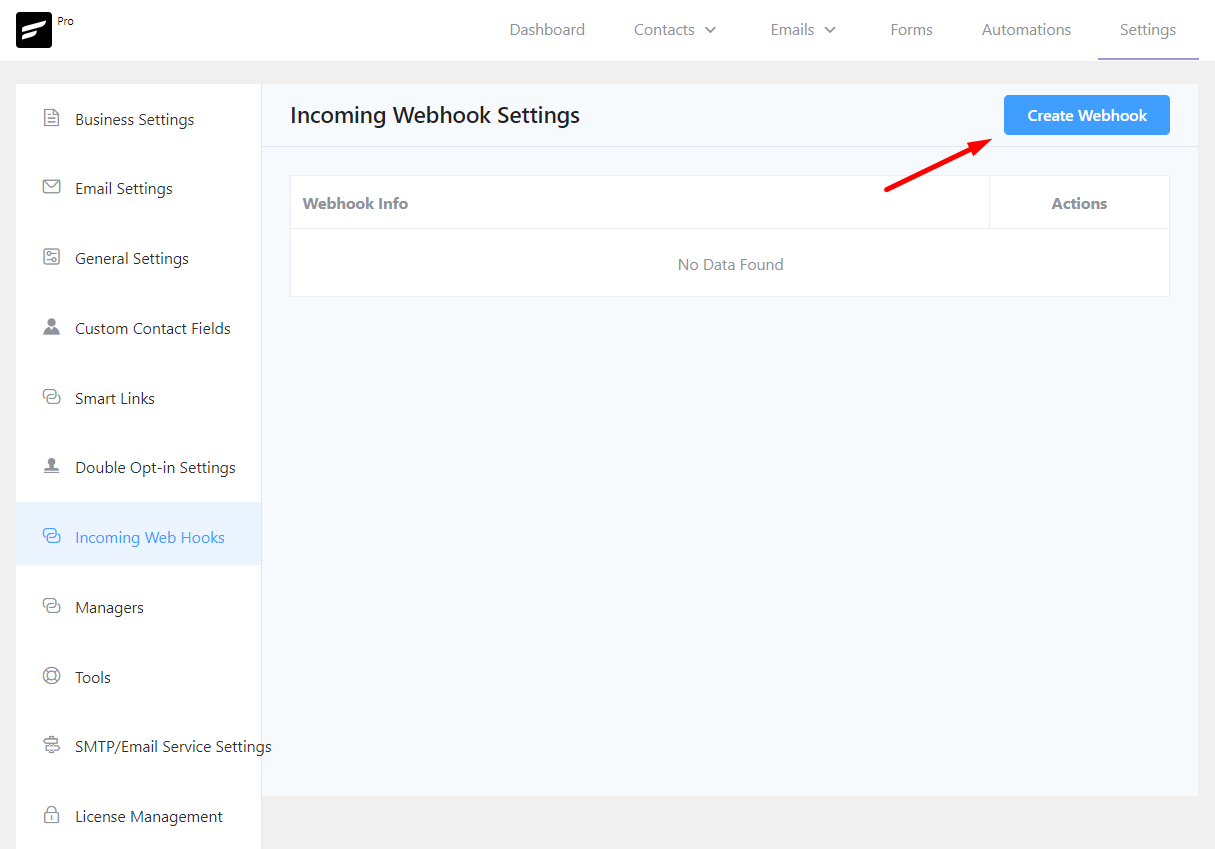
Creating an incoming webhook in FluentCRM is really easy. From your FluentCRM dashboard, navigate to the settings tab and select Incoming Web Hooks. From there, click the Create WebHook button.
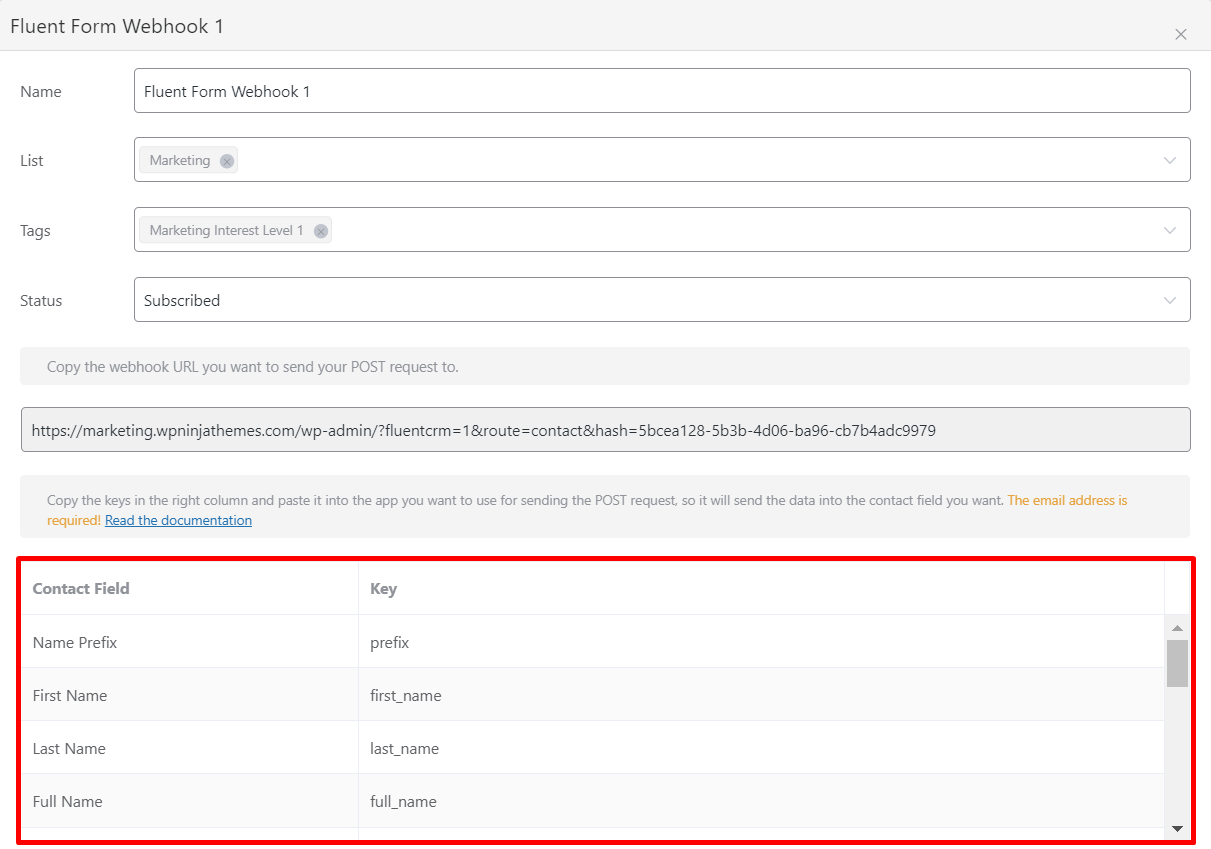
This brings up a pop-up window where you can give a name for your webhook and select the lists and tags you want to assign to contacts through the webhook integration. Based on your preference, you can also set the contact Status.
*Note: It is recommended to set up opt-in confirmation before sending marketing emails to your contacts. So if you haven’t acquired subscription confirmation from your contacts, you need to set contact status to Pending so that FluentCRM can send an opt-in email to your contacts.
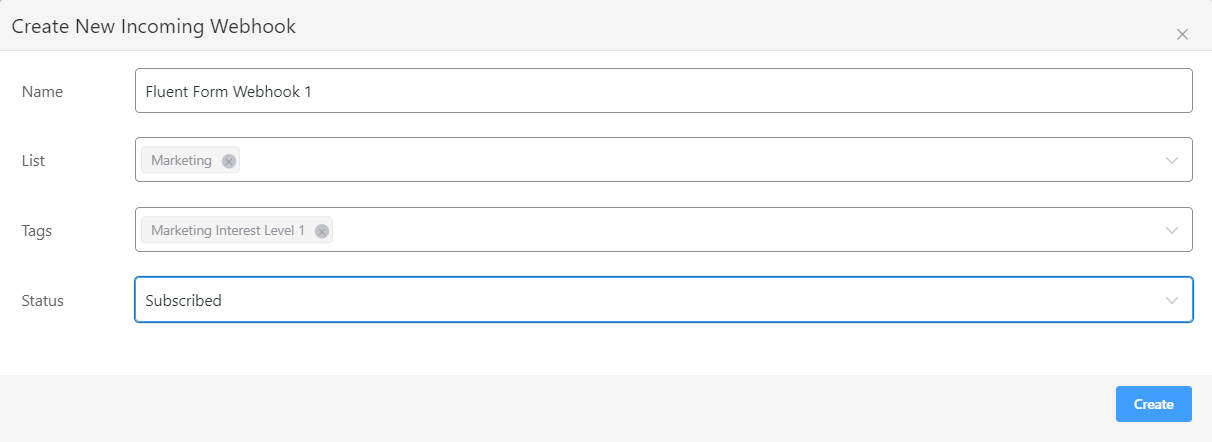
In the above example, we’ve named our webhook and selected the list and tags, and set the status for adding the contacts.
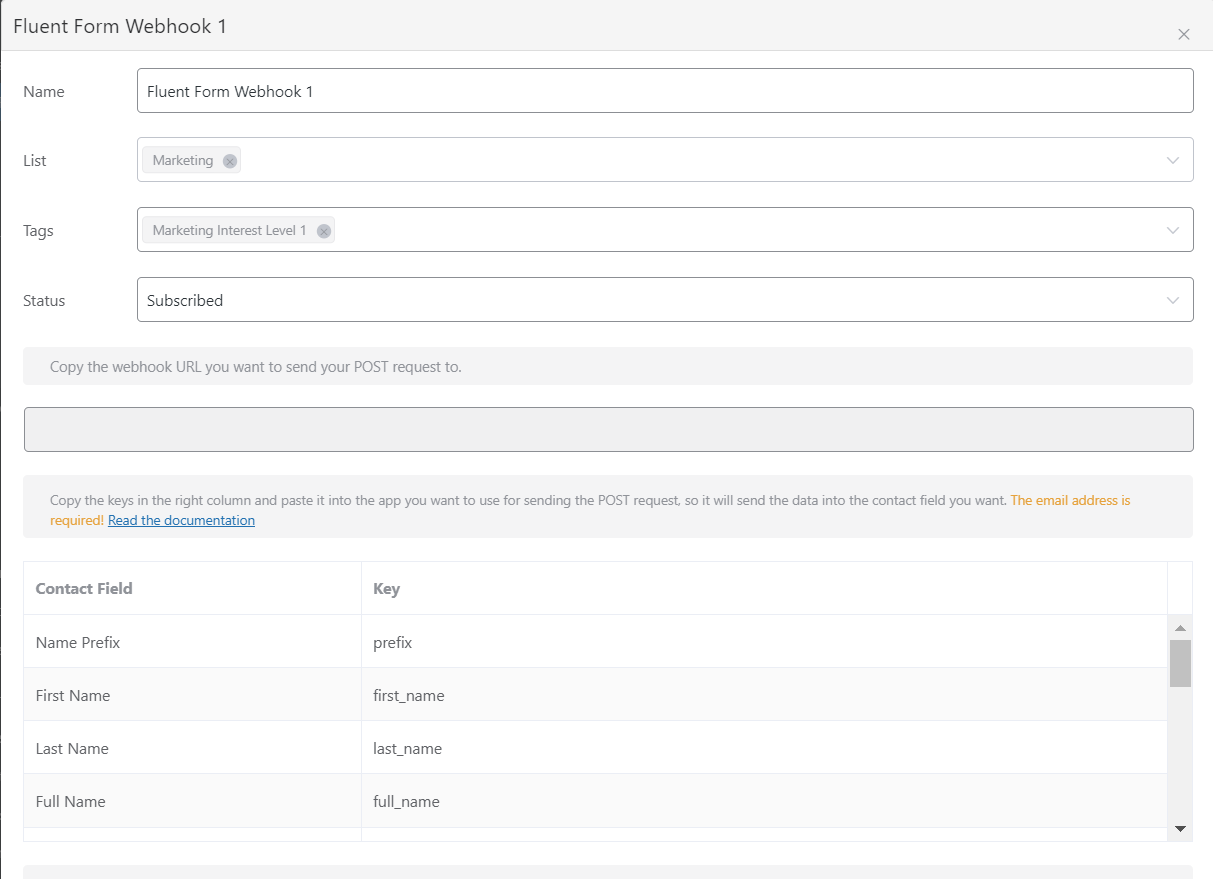
Once you’re done with the settings, click Create to save the webhook. Upon creating the webhook, FluentCRM will automatically map the contact fields and show you the details. You can also add or change the selected list, tags, or status here.
Closing the pop-up will get you your webhook request URL. To copy the URL, simply click the copy button we’ve shown below. If you want to change the webhook configuration or delete it, you can also do it here.
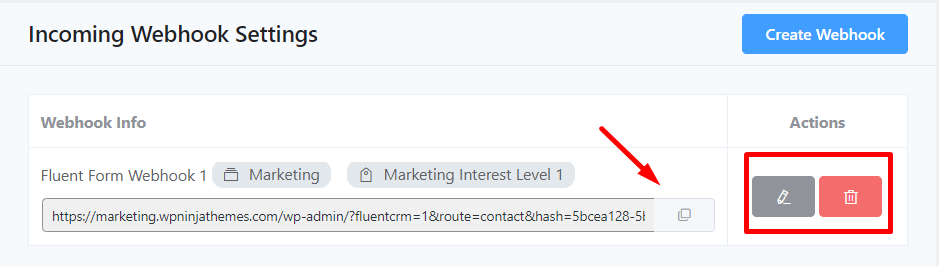
This webhook URL lets FluentCRM receive incoming requests. So now you can move to the next part!
Step 2: Sending outgoing webhook request with your lead generation form
If you have already created a subscription form, the next step is to configure an outgoing webhook request with your form. This will automatically add contacts to FluentCRM whenever someone submits your email subscription form.
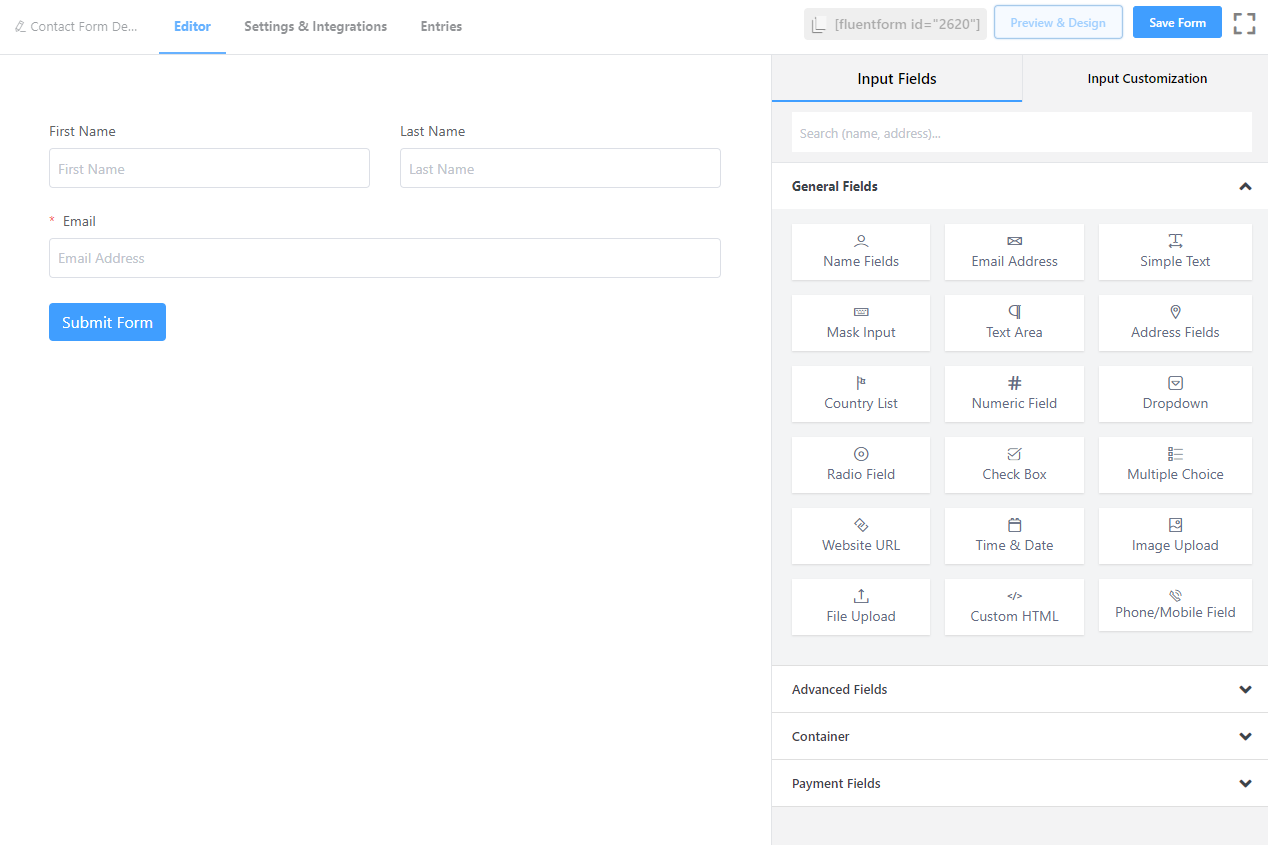
Below you can see a basic subscription form we’ve created using Fluent Forms. However, we haven’t configured any integration for this form yet.
Before we can create webhooks, we need to enable the webhook module in Fluent Forms. To do that, simply go to Fluent Forms>Integrations and enable the WebHooks module.
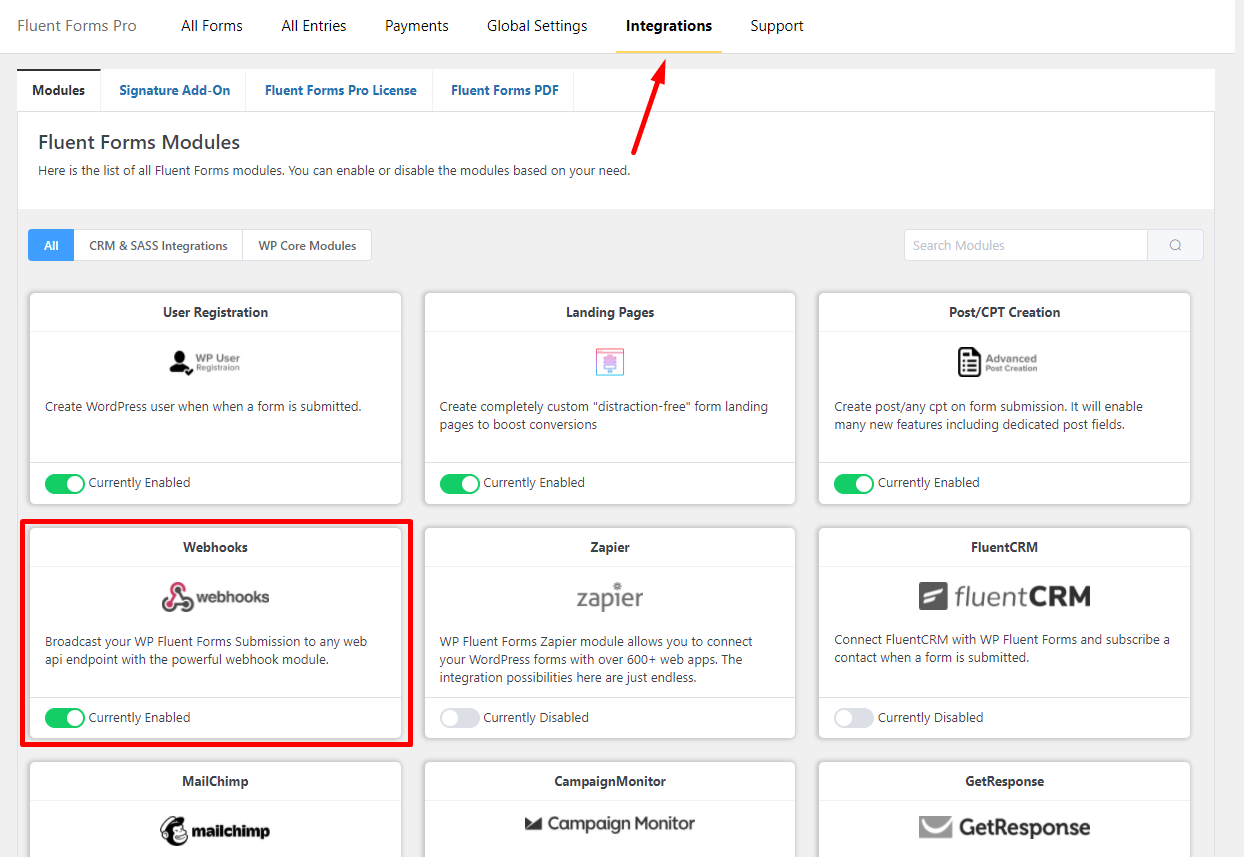
Note that this may vary between form plugins you’re using. In order to enable the webhook module on the form plugin you’re using, check your form documentation.
Let’s get back to creating the outgoing webhook in Fluent Forms. In Fluent Forms, the webhook is available in the Settings and Integrations. This might be available in the other places of the form plugin you’re using.
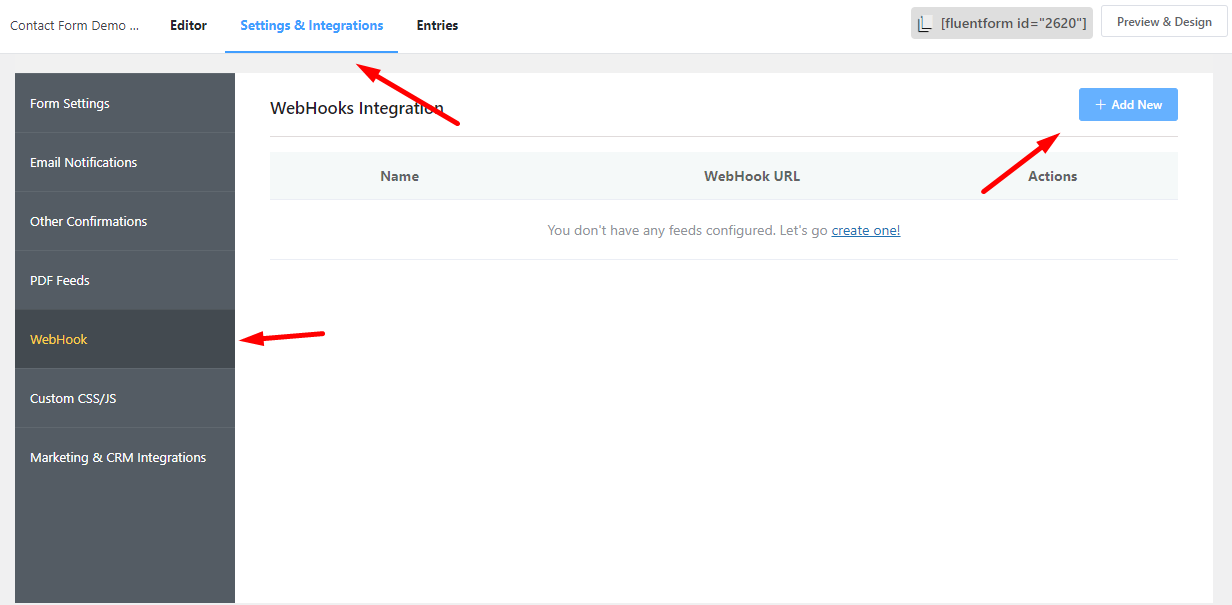
Clicking the Add New button will bring up the webhook integration menu:

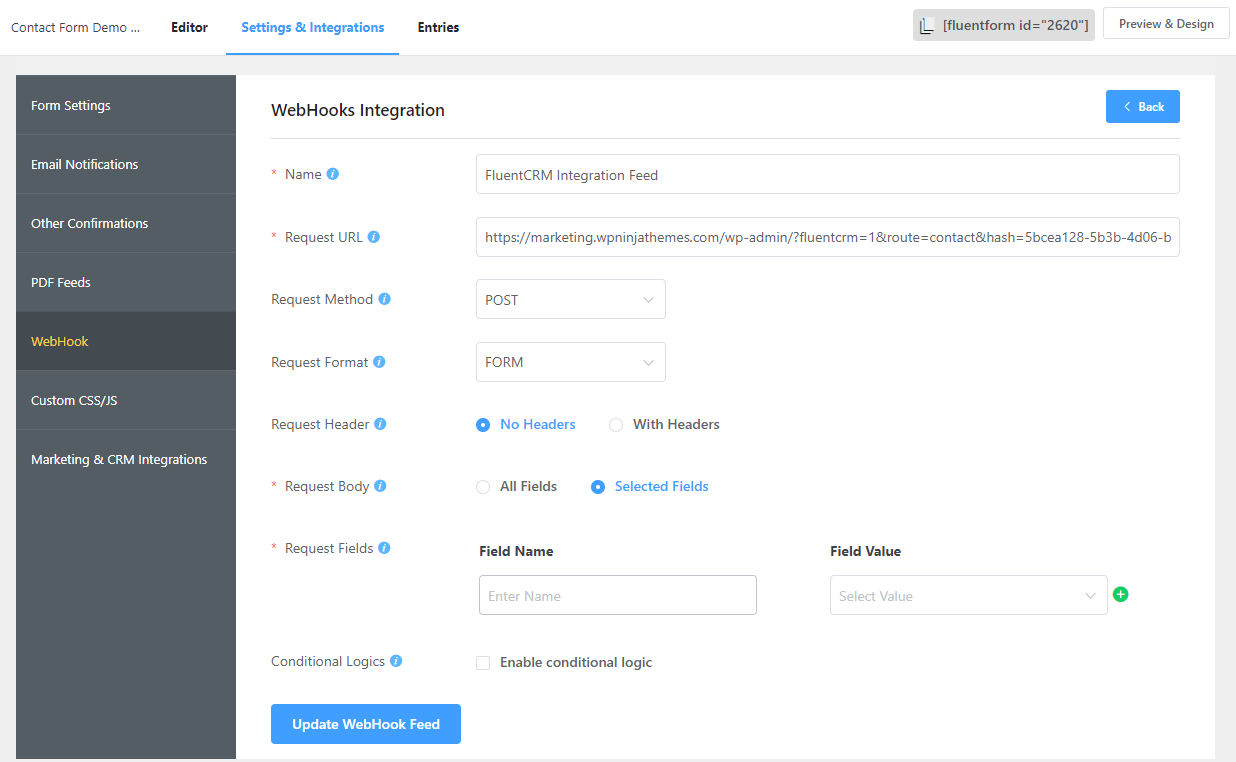
This is where you need to create the integration feed. Here’s how you need to configure the integration feed:
- Name: Anything you want to name your integration feed (we’ve named it FluentCRM integration)
- Request URL: The incoming webhook URL you’ve acquired from FluentCRM
- Request Method: Post
- Request Format: JSON/FORM
You can leave the rest as they are.
Once you’re done configuring the webhook feed, click Create WebHook Feed.

Here’s how we have configured the webhook integration feed
That’s it. Now your form is integrated with FluentCRM. And every time someone submits a form they will be automatically added to your contact list!
Step 3: Mapping form fields
The form we’ve created above is a very simple one. And in this way, FluentCRM will only capture your subscriber’s First Name, Last Name, and Email Address. But if your form has multiple fields, such as Country, Phone Number, ZIP code, etc., these data won’t be captured.
So how do you map these fields so that they appear in FluentCRM?
In order to map webhook data, FluentCRM provides you with prefix keys of the contact field data you store. You can find these prefix keys in the incoming webhook feed you created in FluentCRM:
So let’s add a Country field in our subscription form first and go back to editing webhook integration feed.
In order to map fields with FluentCRM, we need to choose Selected Fields in the Request Body. Then you need to map the fields with prefix keys provided by FluentCRM. Here’s how our field mapping looks like:
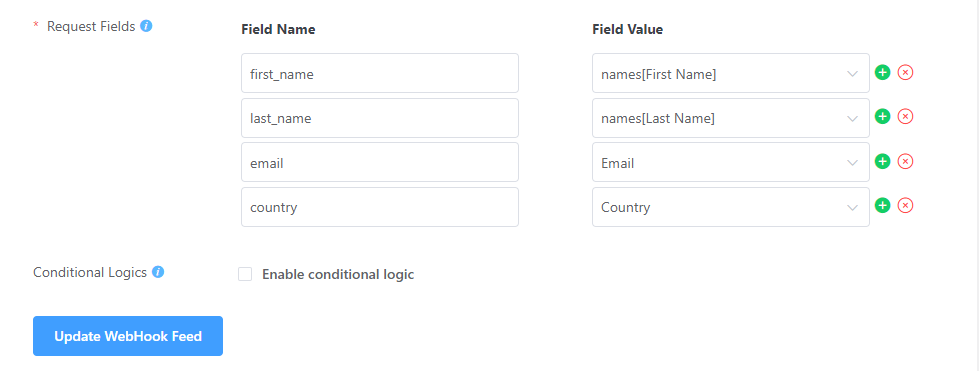
Click Update WebHook Feed, and your form data will be mapped within FluentCRM.
*Field mapping may work differently on other form plugins. Most form plugins allow prefix/parameter key mapping. So look for that on your form plugin to properly map fields.
Step 4: Checking integration
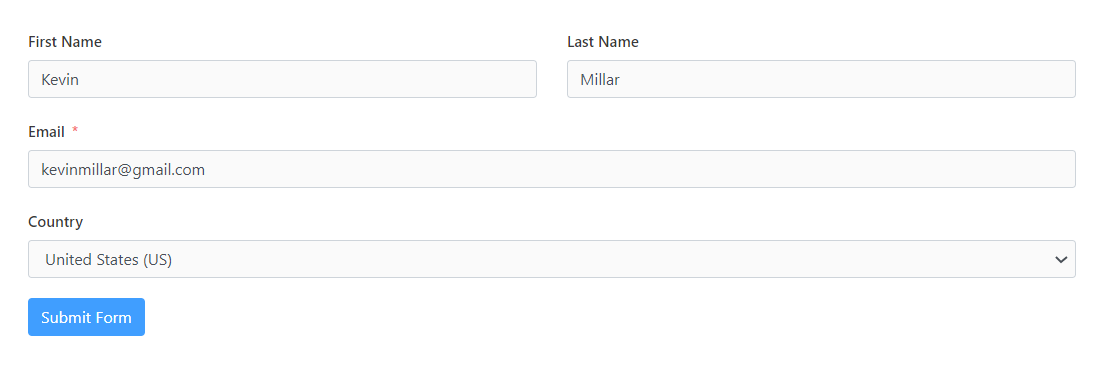
Let’s submit a form to check if our webhook is capturing leads properly. Here’s a test form we have submitted:
Next, we’ll reload our FluentCRM contacts.
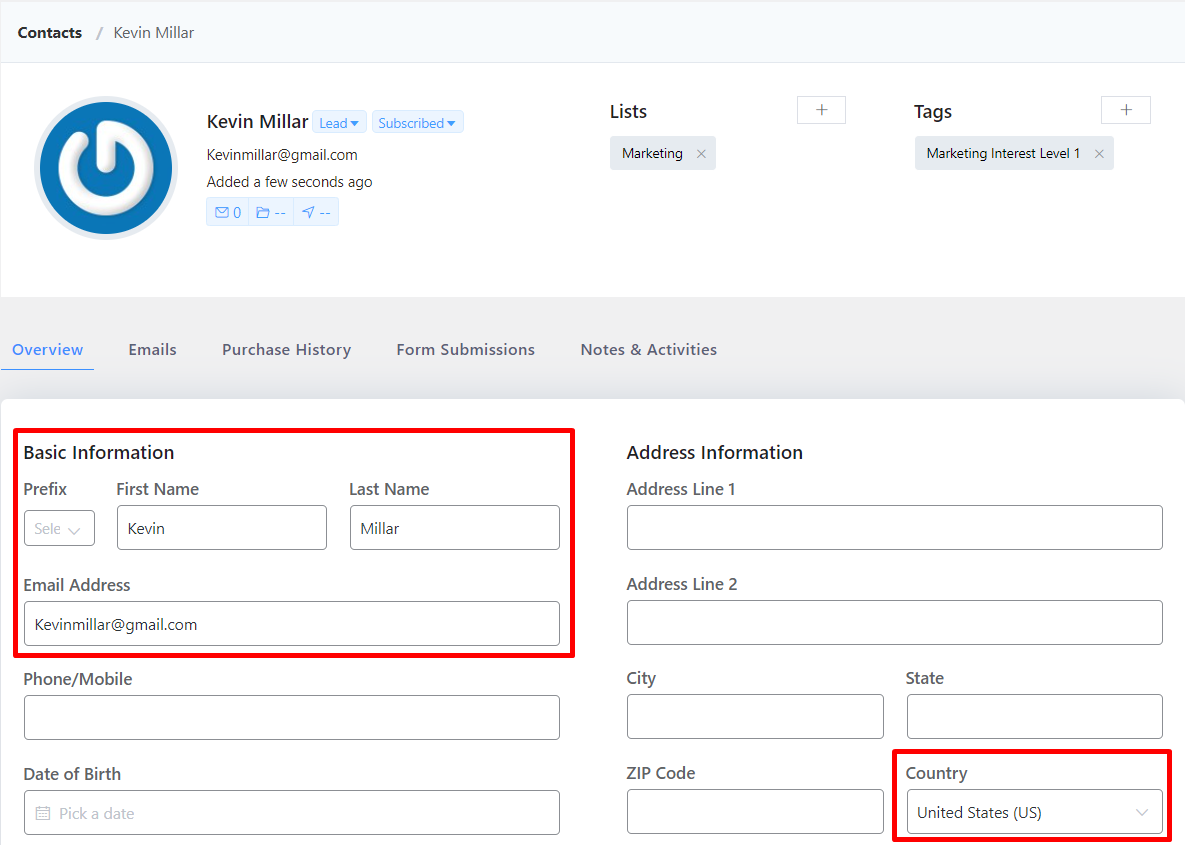
Voila! Our integration feed is working perfectly!
Integrating a form via third-party webhook connectors
Although most popular WordPress forms such as WP Forms, Gravity Forms, Ninja Forms offer webhook integration, forms like Contact Form 7 don’t have default webhook integration yet. However, if you use third-party webhook connectors like Zapier, Pabbly, or Integromat, you can easily integrate Contact Form 7 with FluentCRM.
Step 1: Installing webhook add on for Contact Form 7
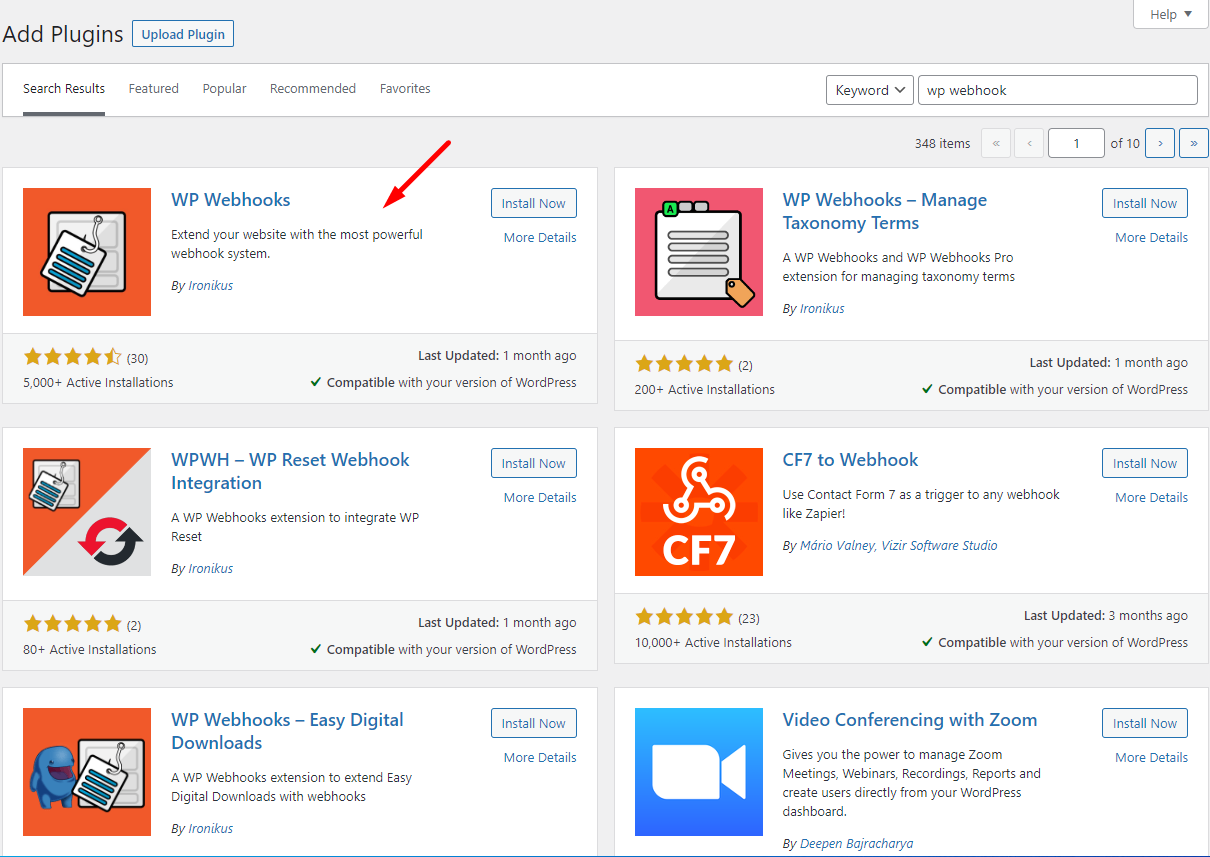
Since contact form 7 doesn’t offer a webhook integration, we’ll need to use a webhook plugin. For this purpose, we recommend WP Webhooks. It offers an easy-to-use webhook functionality so that you can integrate apps and services with WordPress.
Simply install and activate the plugin from the WordPress repository to get started.
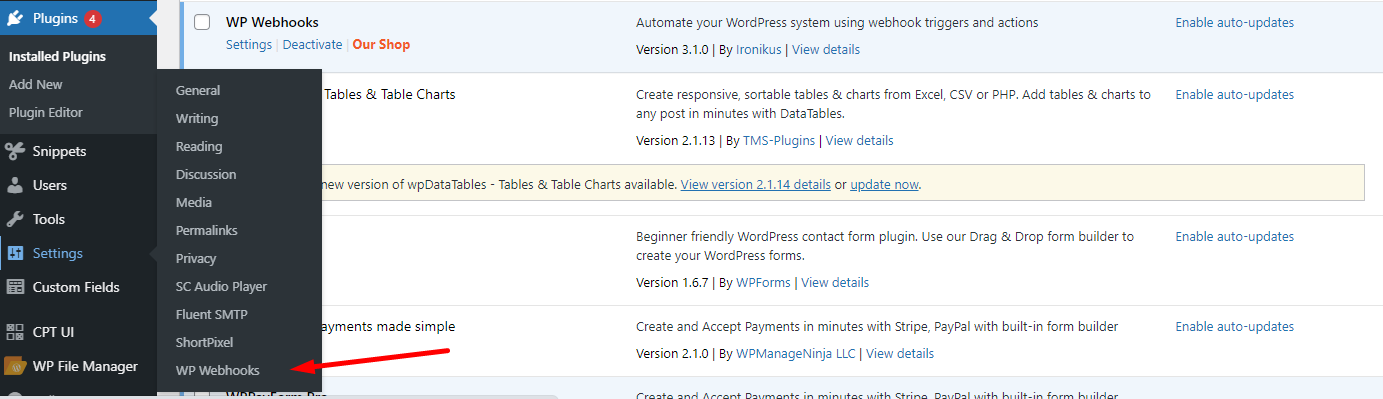
Once you’ve installed and activated the plugin, you can access the plugin by hovering over your WordPress dashboard’s Settings.
Step 2: Setting up webhook connector with Contact Form 7
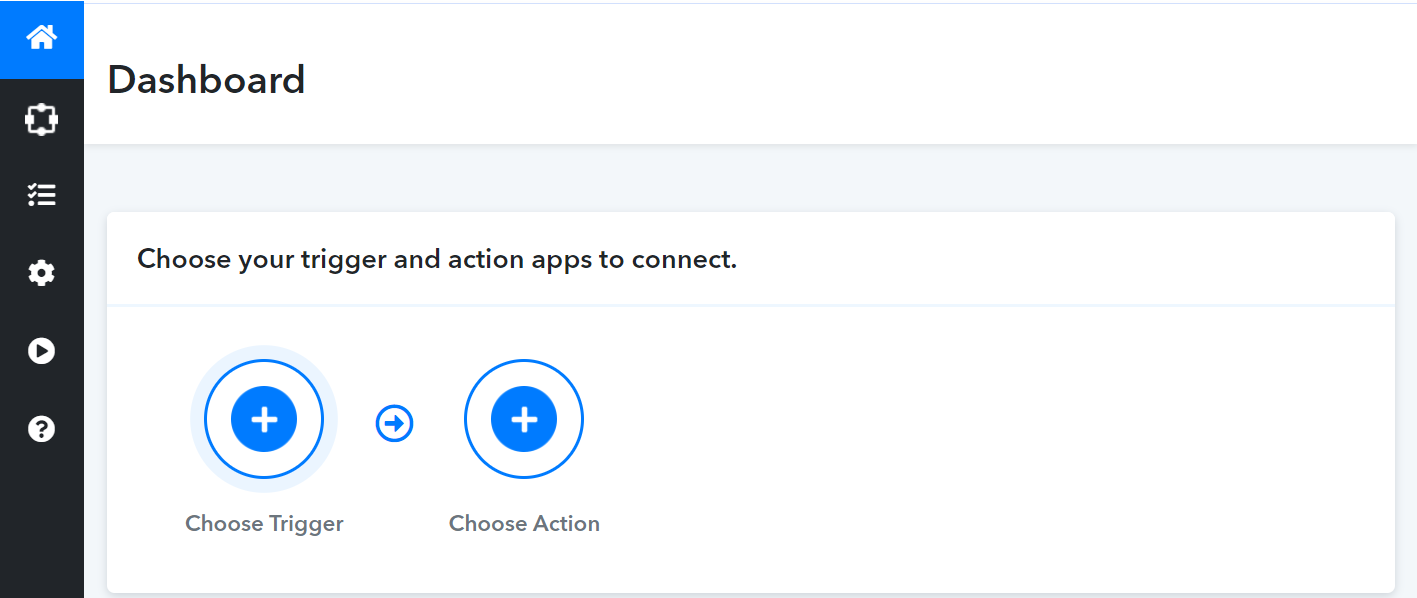
Several webhook connector applications will allow you to integrate apps and services. For this tutorial, we’ll be using Pabbly Connect to integrate Contact Form 7 with FluentCRM. It is one of the easiest webhook connector applications and offers 100 tasks for free.
Once you’re in the Pabbly Connect dashboard, you’ll see two options to connect your applications.
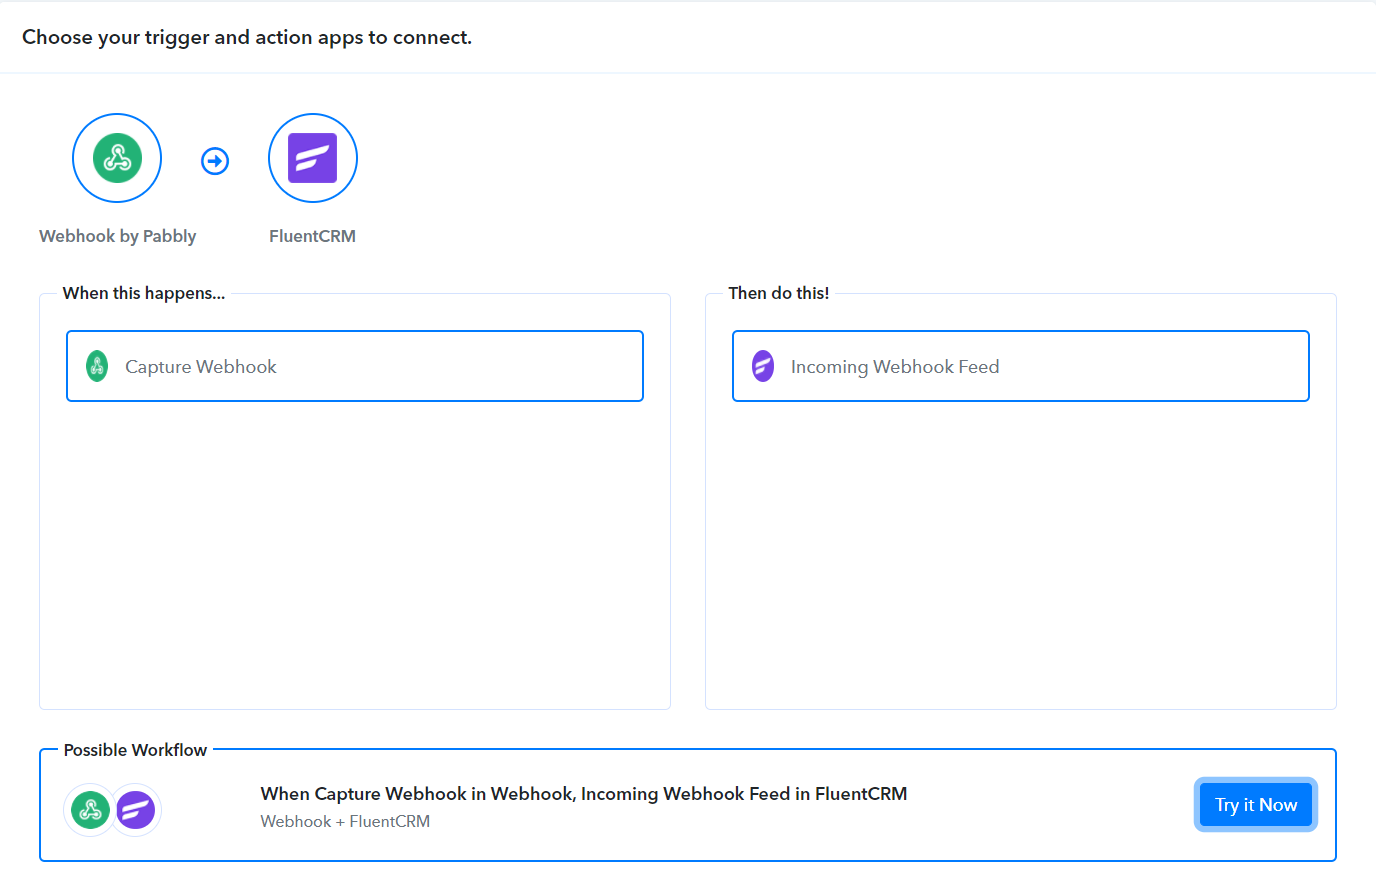
For the trigger option, search and find Webhooks by Pabbly. And for the action, search and find FluentCRM. The available triggers and actions will be shown. Click the Try it Now button to configure the integration.
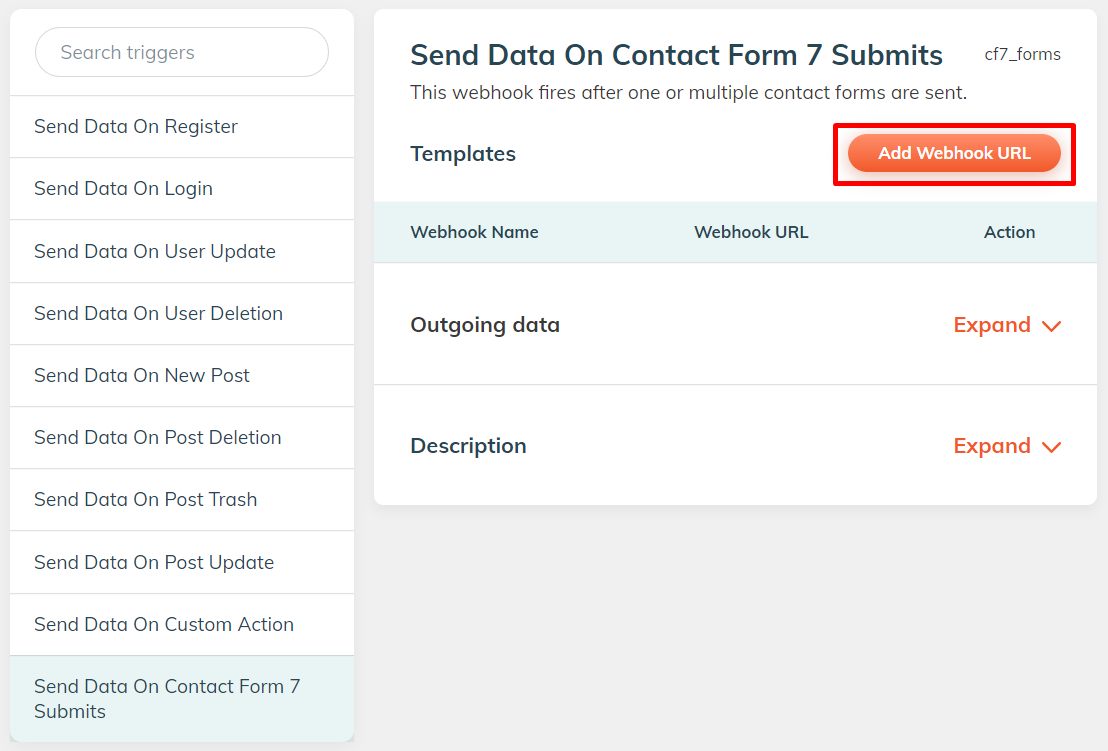
This will open the workflow window where you’ll get the Webhook URL. Copy the URL and go to WP Webhooks>Send Data module. Then choose Contact Form 7 Submit and click the Add Webhook URL.
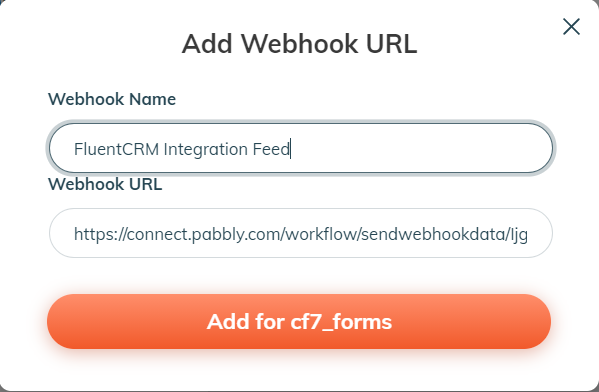
When you’re prompted to add the webhook URL, provide the URL you’ve acquired from Pabbly Connect and click Add for cf7_forms button to proceed.
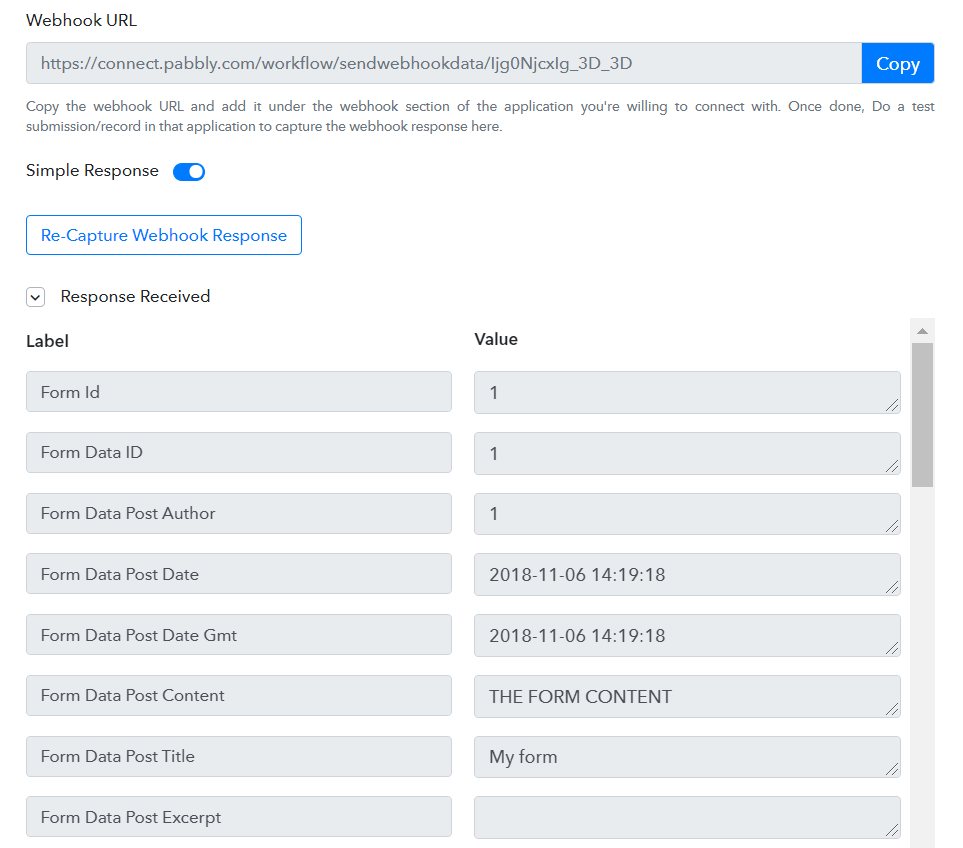
After you’ve added the webhook, Send A Demo submission so Pabbly Connect can capture the webhook response.

Within a few seconds, Pabbly Connect will show you all the data it has received via webhook:
The next task is to connect FluentCRM in the workflow. Simply scroll down and click the Connect button.
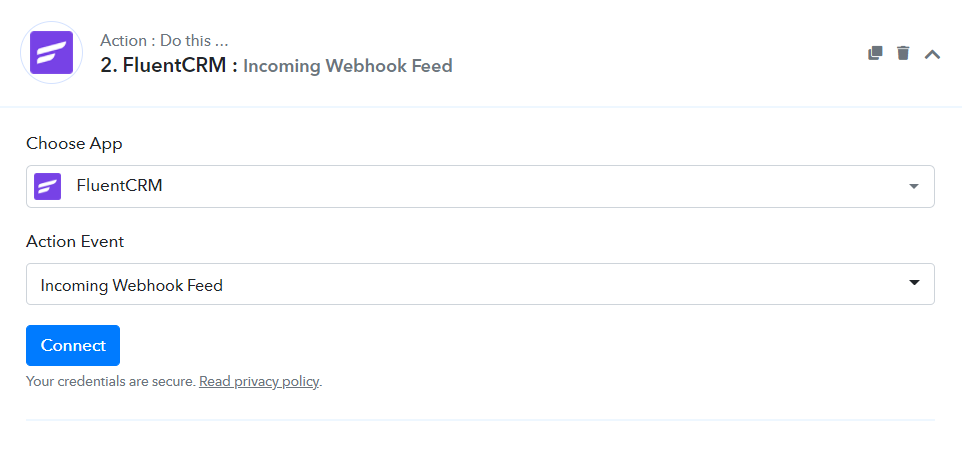
When the integration window opens, you need to provide the webhook URL and map the fields with FluentCRM. Simply insert the incoming webhook URL and map the form fields.
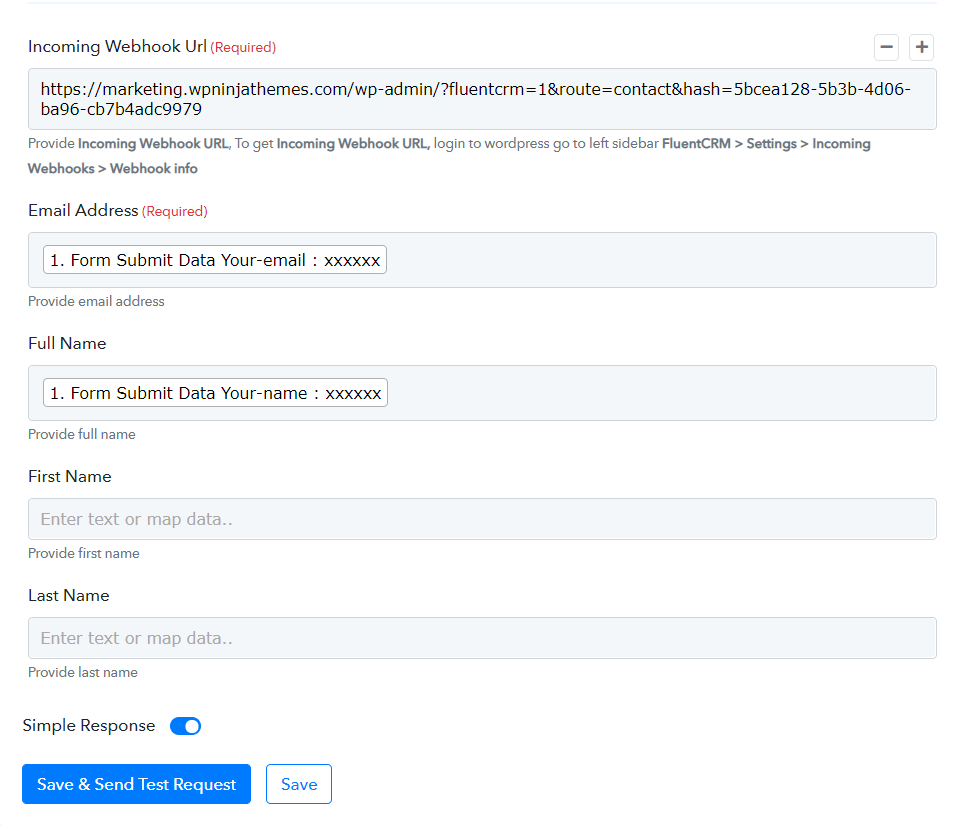
After mapping the form fields, click the Save & Send Test Request button to finalize the integration.
Over to you…
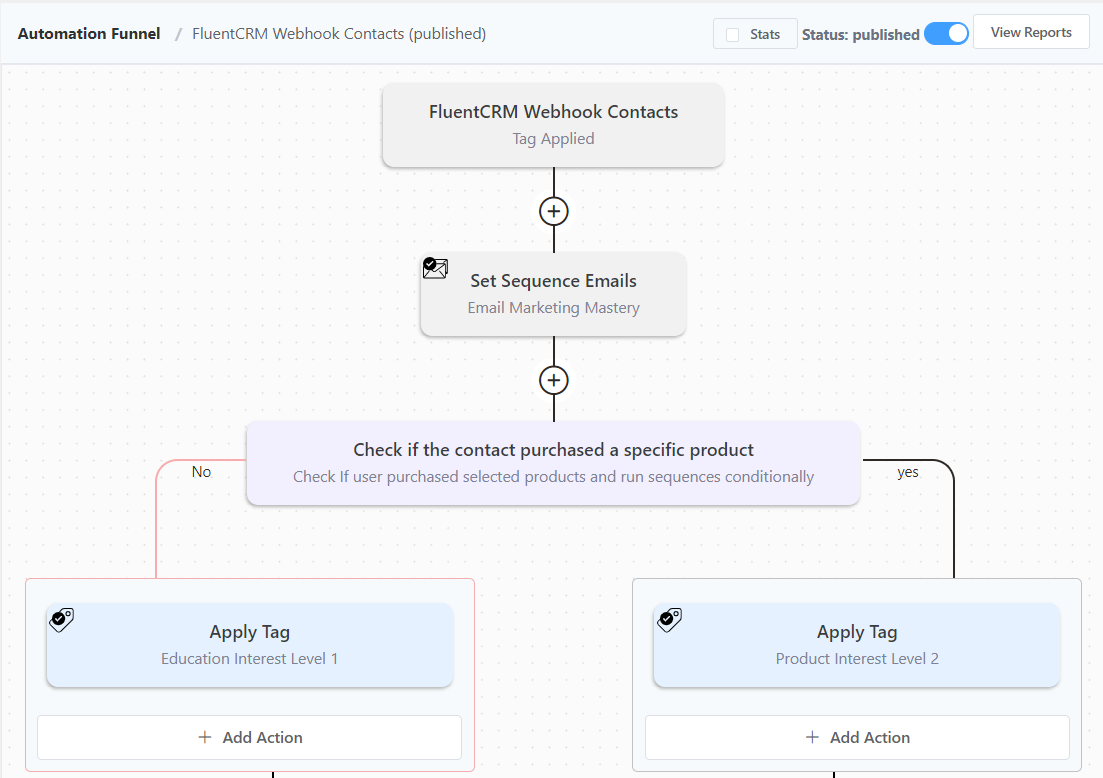
Want to make the most of your new contacts? The best way is to onboard your contacts with an email sequence right away. To do that, just select a Tag Applied trigger and select a Tag you applied on FluentCRM’s webhook feed to trigger automation. Then, set your email sequence and relax on autopilot!
We hope our tutorial helped you connect your contact form with FluentCRM. If you’re still experiencing issues connecting your form with FluentCRM, let us know in the comment section. Also, follow us on Twitter and subscribe to our blog for more FluentCRM tips and tricks.

Nazir Himel
Product Marketing Lead
Hey! I’m an inbound marketing specialist focused on email marketing automation. I love turning complex features into clear, user-centric messaging and when I’m not shaping product stories, I’m experimenting with content frameworks, conversion journeys, and helping others communicate value without sounding salesy!
Table of Content
Related Articles and Topics
-
How to Change the Gmail Profile Picture of Your Custom Email (2026)
Email communication is a vital tool for any business since it’s an opportunity to connect…
-

FluentCRM Email Signature Generator: Create Professional Signatures for Every Email
FluentCRM’s Email Signature Generator is a browser-based email signature builder that creates professional, HTML-formatted signatures…
Comments
-
Hi , I’m using o ther form on https://comprosuasmilhas.com.br/ . The form has a lot of select fields . Is possible with fluent forms make a script that load select itens on page load?
Thank you

Leave a Reply