How to Sell Online Courses on Autopilot with FluentCart, LearnDash, and FluentCRM

Summarize with


Last Updated:
If you are a course seller, you must be juggling three separate tools for three separate purposes:
- One for payments
- One for lesson
- One for emails
And most of the time, you need to go through complex setup to make them all sync.
So, what most cost sellers do is:
- Manually copy each buyer from their store into their LMS
- Add them to their email list
- And hope nobody slipped through along the way
It works when a seller sells a few courses a month. But as sales grow, students start falling through the gaps between manual processes.
FluentCart, LearnDash, and FluentCRM are 3 separate plugins, but they work together as one connected system. In this guide, we’ll showcase how they work in sync.
Quick Summary
- FluentCart sells your course, LearnDash delivers it, and FluentCRM follows up with every student.
- One FluentCart setting enrolls buyers into LearnDash automatically and removes access if they get a refund.
- A second FluentCart setting sends every buyer into FluentCRM with the right tags and list.
- Four automations cover the moments that matter most: welcome, abandoned checkout, course completion, and refunds.
- You’ll need FluentCart Pro and FluentCRM Pro for the integrations shown here.
Why FluentCart + LearnDash + FluentCRM is the Perfect Combination?
You can sell courses with almost any mix of tools. But most mixes need extra connectors, extra monthly bills, and a lot of patience when something breaks.
This trio is different for a few simple reasons.
They’re Built to Work Together
FluentCart and FluentCRM come from the same ecosystem of tools, and both are native LearnDash integrations that make the sync better than any other combination.
Here, you don’t need Zapier, webhooks, or a third-party bridge to keep your course selling platform alive.
What you would do is connect them together in a few clicks, and the tools start collecting the necessary information.
Everything Stays Inside WordPress
If you want to sell courses within WordPress, then your data stays secure and under your control.
Your courses, lessons, payment details, store information, contacts, and emails all live in one WordPress dashboard.
No need to log in to three separate tools to find out whether a student paid, enrolled, or opened your welcome email.
One Profile for Every Student
Purchases from FluentCart, course progress from LearnDash, and email activity from FluentCRM all land on the same contact profile. You can see who someone is and what they need at a glance.
Smarter Email Sending
Because FluentCRM knows what each student bought and how far they’ve gotten, it can send the right message to the right person. Students who finished get your next offer. Students who stalled get a nudge. Nobody gets an upsell for a course they already own.
Data Ownership & Predictable Costs
FluentCRM runs on your own site, so your student list stays yours. And unlike many hosted email tools, you don’t pay more every time your list grows.
What You’ll Need Before You Start
Before you set anything up, make sure these are installed and active on your WordPress site:
- FluentCart + FluentCart Pro: The LearnDash integration lives in FluentCart Pro.
- LearnDash: With at least one course already created.
- FluentCRM + FluentCRM Pro: LearnDash triggers and most automation features are part of Pro.
One small LearnDash setting is worth changing first.
Open each course, go to its Settings tab, and set the access mode to Closed. This way, only people who buy through FluentCart can get in.
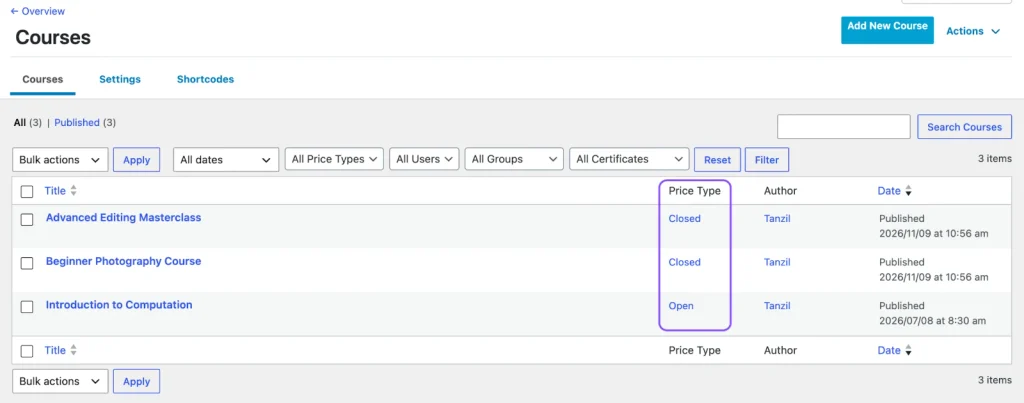
Throughout this guide, we’ll use a simple example course business called Photography Academy.
It has two LearnDash courses: Beginner Photography Course and Advanced Editing Masterclass.
How to Sell Online Courses with FluentCart, LearnDash, and FluentCRM
Once the tools are installed and activated, each tool works around one clear job, and none of them step on the others’ toes.
Here’s what the tools handle:
- FluentCart Sells. It handles your course products, checkout, payments, and refunds.
- LearnDash Teaches. It holds your courses, lessons, quizzes, and student progress.
- FluentCRM Follows up. It remembers every student’s details, tags them, and sends the right email at the right time.
Although the tools do their own job, the magic is in how they pass information to each other.
Each tool works like a connected system: when someone pays in FluentCart, LearnDash makes the closed course open for them, and FluentCRM learns who they are and what they bought. When they make progress in LearnDash, FluentCRM sees that too and reacts.
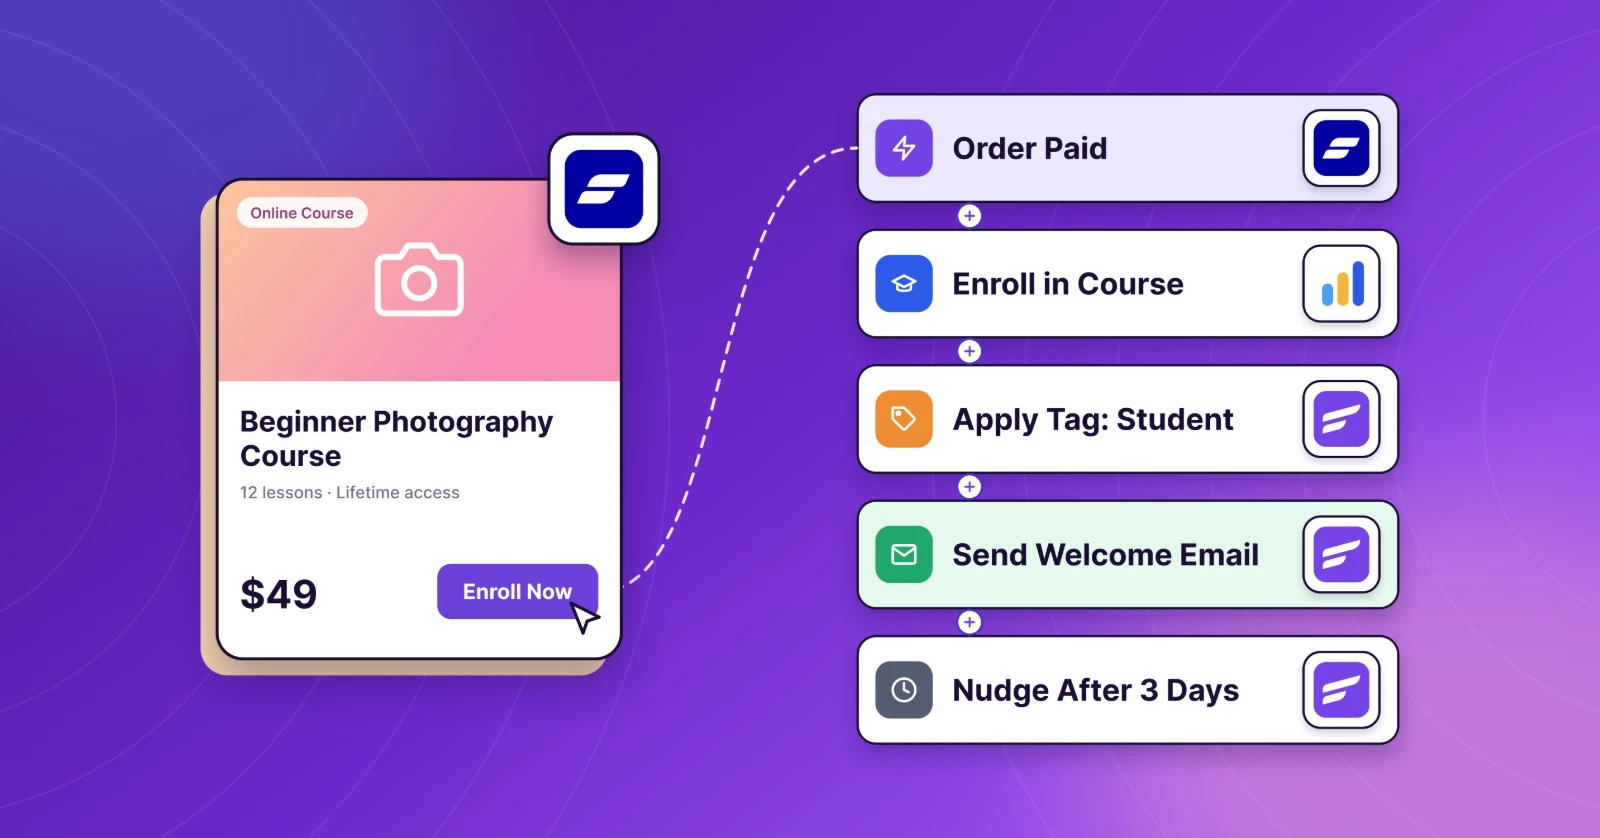
To make it sound simple, here’s how the full journey of one Photography Academy student will unfold in the coming sections:
- A visitor buys the Beginner Photography Course in FluentCart.
- FluentCart enrolls them in the LearnDash course instantly.
- FluentCart also adds them to FluentCRM with a “Bought” tag.
- FluentCRM sends a welcome email and checks on their progress a few days later.
- When they finish the course, FluentCRM congratulates them and suggests the next course.
You set this up once. After that, every sale runs through the same steps without you.
Let’s build it in four simple steps.
Step 1: Sell Your Course & Enroll Students Automatically
This first step removes the most boring job in a course business: enrolling buyers by hand.
Create a Product for Your Course
Go to FluentCart > Products > Add Product.
Give it the same name as your course and choose Digital Product.
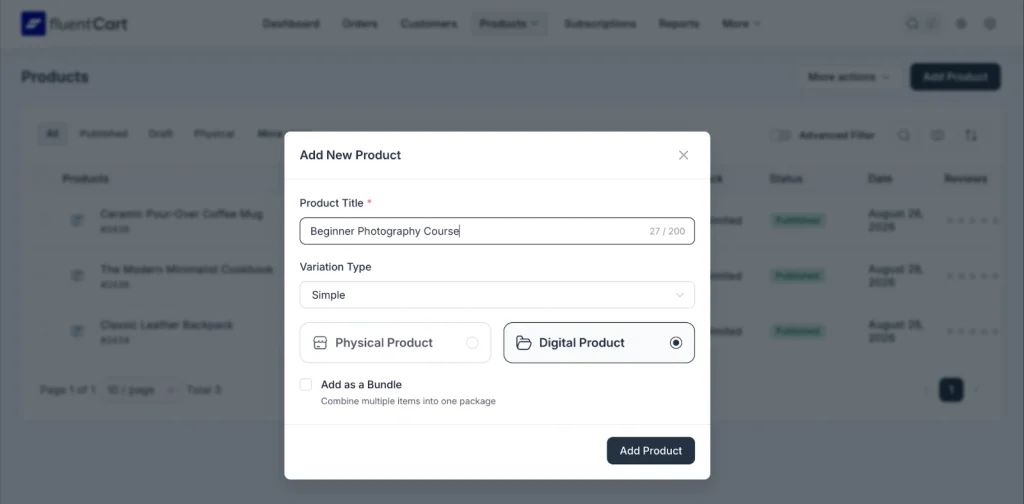
Set the price, add a short description, and change the status to Published.
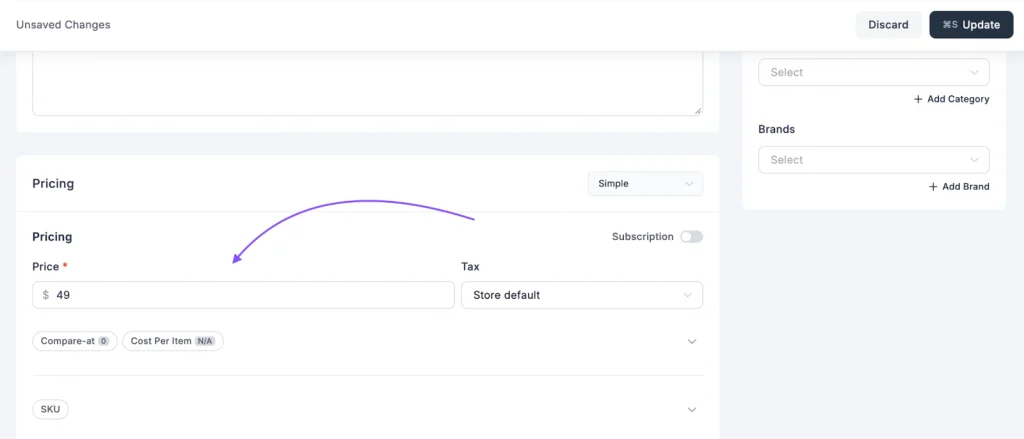
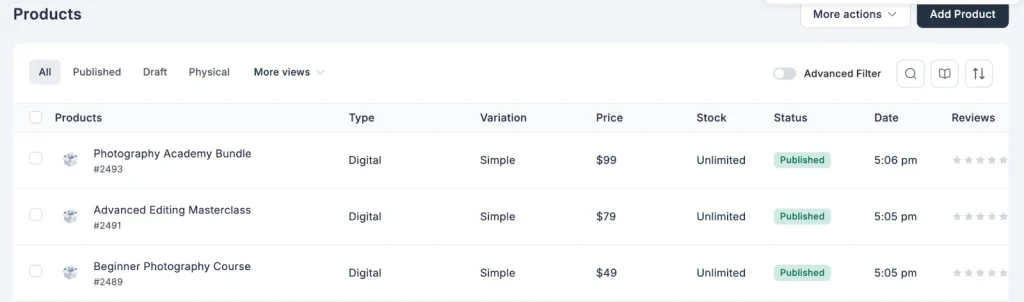
We created three products:
- The Beginner Course ($49)
- The Advanced Course ($79)
- Photography Academy Bundle ($99)
Connect the Product to Your LearnDash Course
Open the product and click the Integrations tab. Then click Add Integration and choose LearnDash.
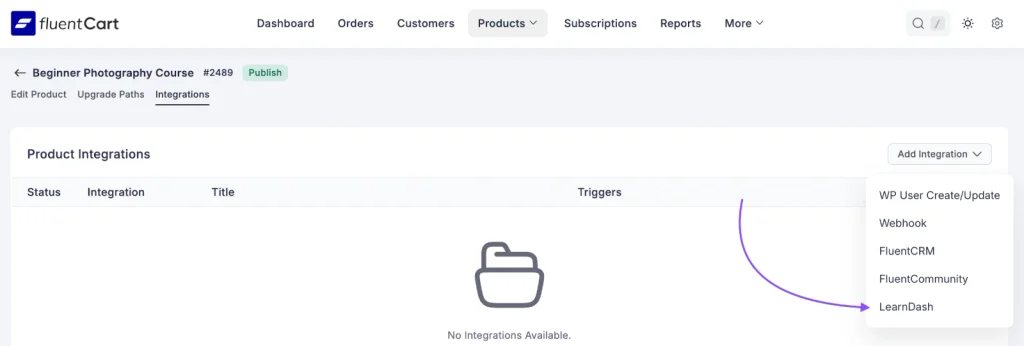
Now fill in a few fields:
- Feed Title: A name for your own reference, like “Enroll in Beginner Photography Course.”
- Add To Courses: Pick the LearnDash course this product unlocks.
- Remove on Refund: Tick this box so FluentCart removes access automatically if the order is refunded.
- Event Trigger: Choose Order Paid, so enrollment happens the moment payment goes through.
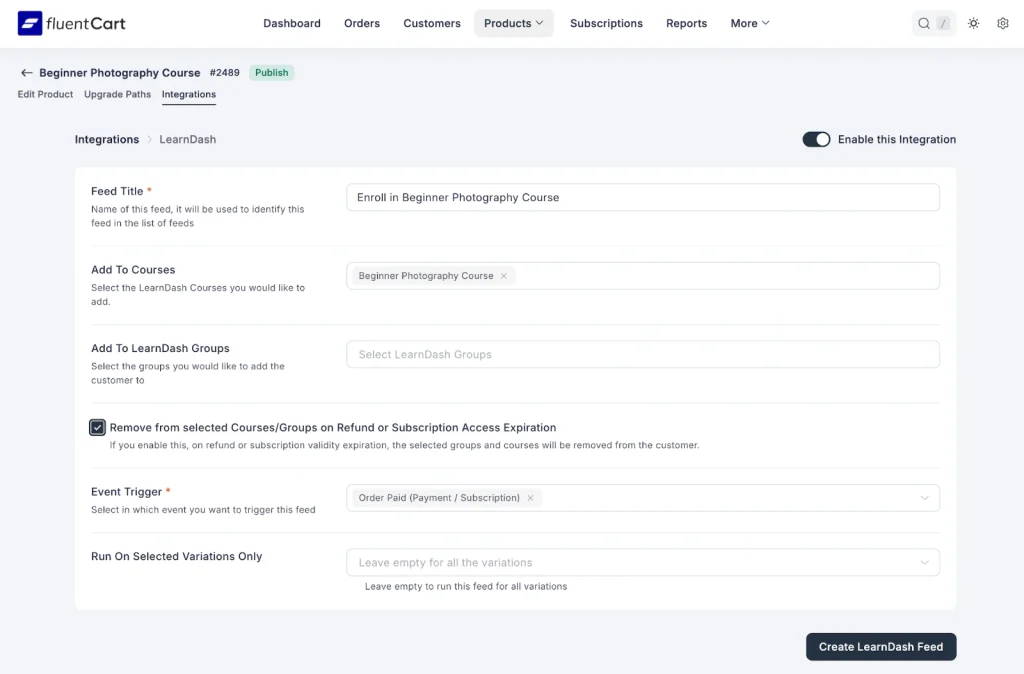
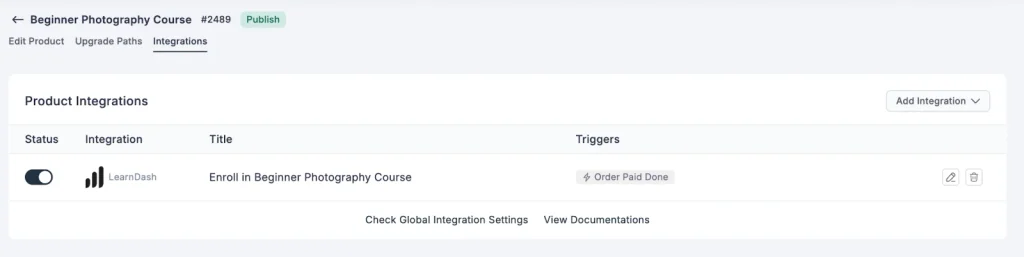
Click Create LearnDash Feed, and you’ll see it listed as active on the product.
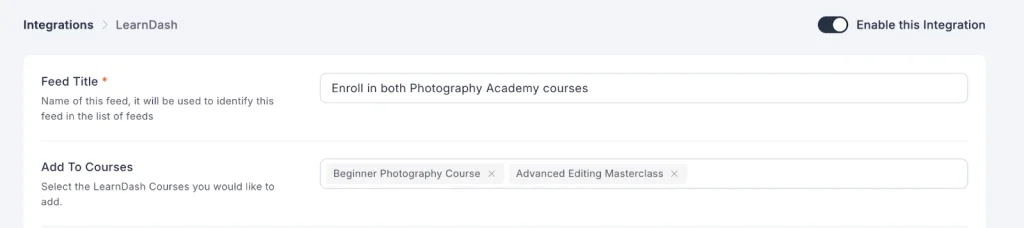
Selling a Bundle? Add Both Courses
For a bundle, just select more than one course in the same feed. One purchase now unlocks both courses.
That’s it. From now on, every paid order enrolls the student for you, even at 11 PM.
Read more: LearnDash Integration in FluentCart
Step 2: Send Every Buyer into FluentCRM with the Right Tags
Enrollment gives students access. Tags tell FluentCRM who they are, so it knows which emails to send them.
Plan a Simple Tag System First
Before connecting anything, create a few tags in FluentCRM > Contacts > Tags.
A clear naming pattern makes your list easy to read months from now. We used three simple prefixes:
- Bought: what the student purchased (Bought: Beginner Photography)
- Completed: what they finished (Completed: Beginner Photography)
- Status: anything special, like a refund or an abandoned cart
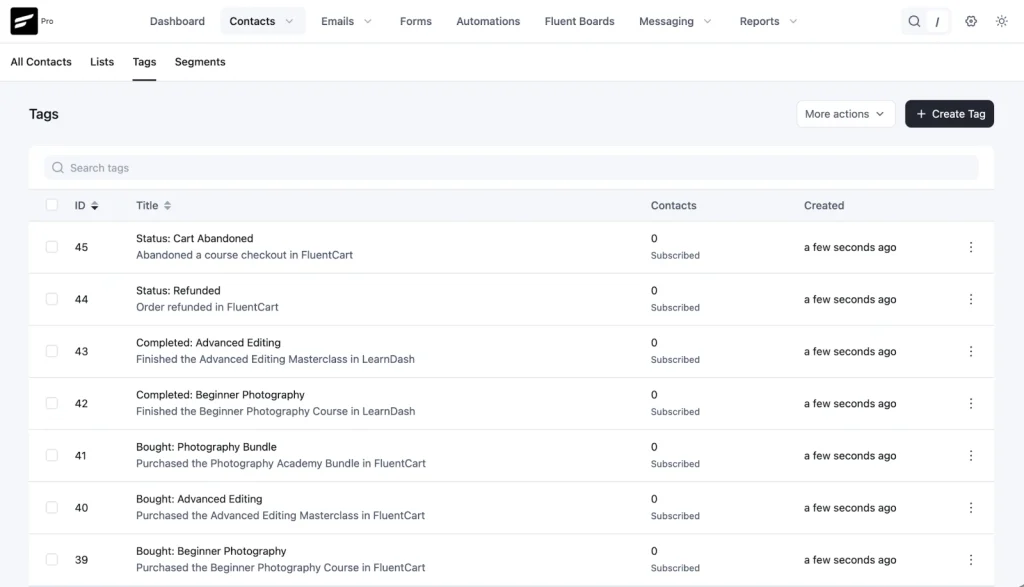
We also created one list, Photography Academy Students, for everyone who buys any course.
Read more: How to Organize Contacts Using Lists, Tags & Custom Fields in FluentCRM
Add a FluentCRM Feed to Each Product
Go back to your product’s Integrations tab, click Add Integration, and this time choose FluentCRM. Then:
- Add To Lists: Photography Academy Students
- Add To Tags: Bought: Beginner Photography
- Note: An optional line that appears on the contact’s profile
- Double Opt-in: Leave it off. These are paying customers, not newsletter sign-ups.
- Remove on Refund: Tick it, so the “Bought” tag disappears if the order is refunded.
- Event Trigger: Order Paid
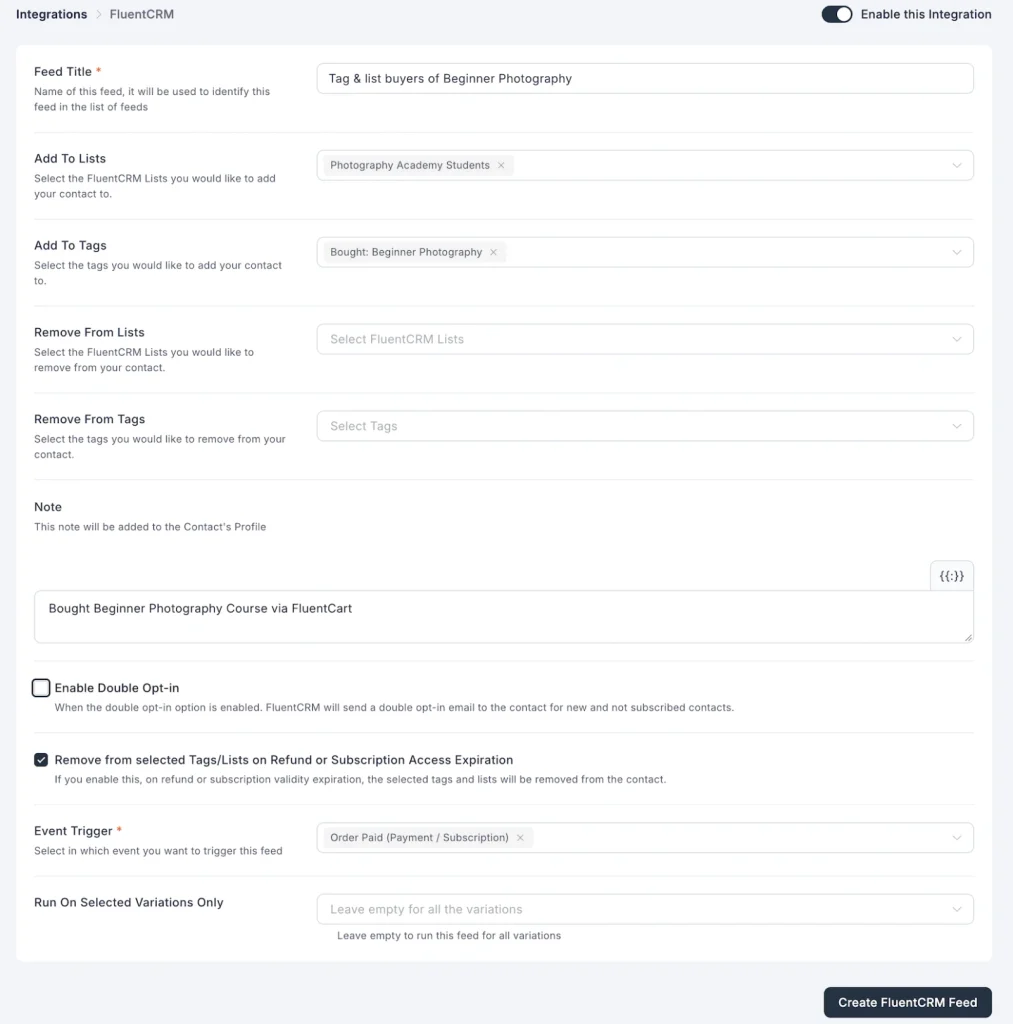
For the bundle, add all three “Bought” tags. That way, bundle buyers also get the emails meant for each course.
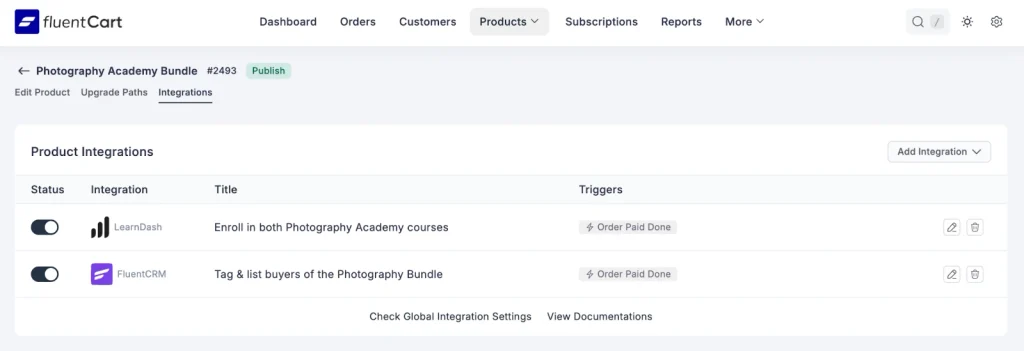
Now each product has two feeds side by side: one for LearnDash access and one for FluentCRM.
Read more: FluentCart Integration with FluentCRM
Step 3: Turn On the LearnDash Integration in FluentCRM
FluentCart already talks to FluentCRM the moment both plugins are active.
Now, LearnDash needs one quick switch so FluentCRM can see student progress too.
Go to FluentCRM > Settings > Integrations. You’ll see LearnDash and FluentCart listed together.
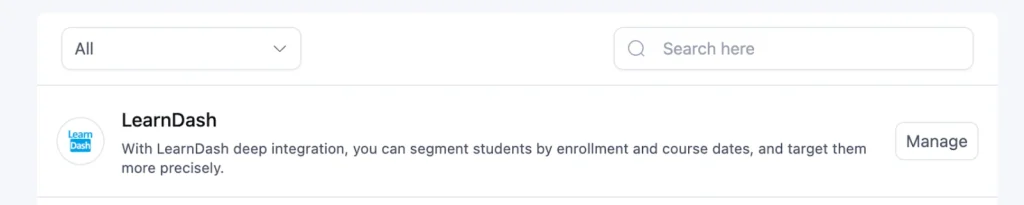
Once you click Manage next to LearnDash. Here you can choose a default list, tag, and contact status for new students, then click Re-Sync Data to bring in your existing students.
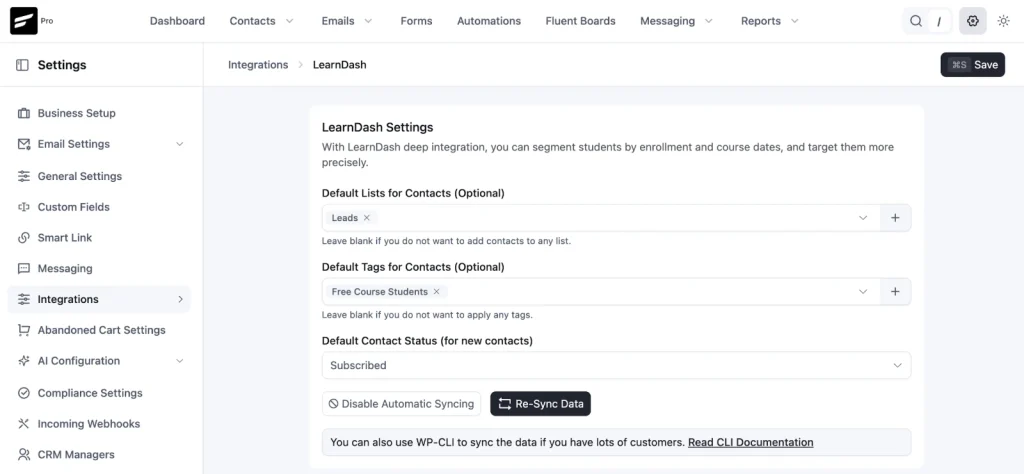
Tip: If FluentCart already tags your buyers, keep these defaults light. Otherwise, students may end up with extra tags they don’t need.
Once this is on, FluentCRM can react to six LearnDash moments, including Course Enrolled and Course Completed.
Step 4: Build 4 Automations That Run Your Course Business
Now comes the fun part. Your students are enrolled and tagged, so FluentCRM can start looking after them.
Every automation starts the same way: go to FluentCRM > Automations > New Automation and pick a trigger. FluentCart and LearnDash each have their own trigger tab.
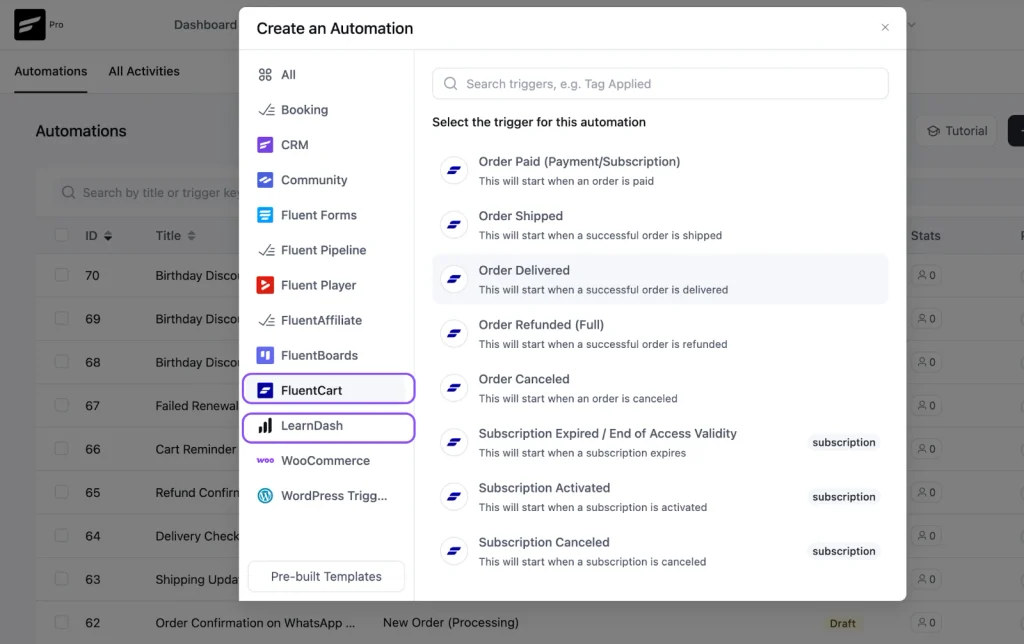
Here’s a quick look at the four we’ll build for four different purposes:
| Automation | Trigger | What it does |
|---|---|---|
| Student onboarding | Course Enrolled (LearnDash) | Welcomes new students and nudges them if they stall |
| Abandoned checkout | Cart Abandoned (FluentCart) | Reminds people who left checkout halfway |
| Completion upsell | Course Completed (LearnDash) | Celebrates the win and offers the next course |
| Refund follow-up | Order Refunded (FluentCart) | Tags the student and asks what went wrong |
Welcome New Students & Nudge the Ones Who Stall
The hour after someone enrolls is when they’re most excited. This automation turns that excitement into progress.
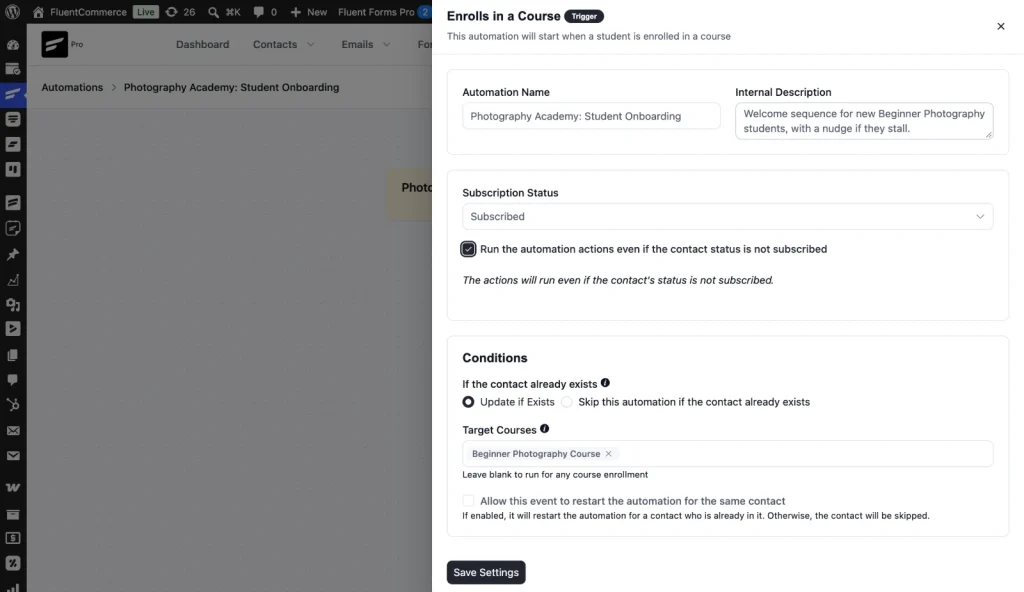
Choose the Course Enrolled trigger and pick your course under Target Courses.
Also tick Run the automation actions even if the contact status is not subscribed. Course emails are part of what students paid for, so they should arrive no matter what.
Then add your steps from the block picker. You’ll find simple actions like emails and waits, plus LearnDash actions such as enrolling or removing someone from a course.
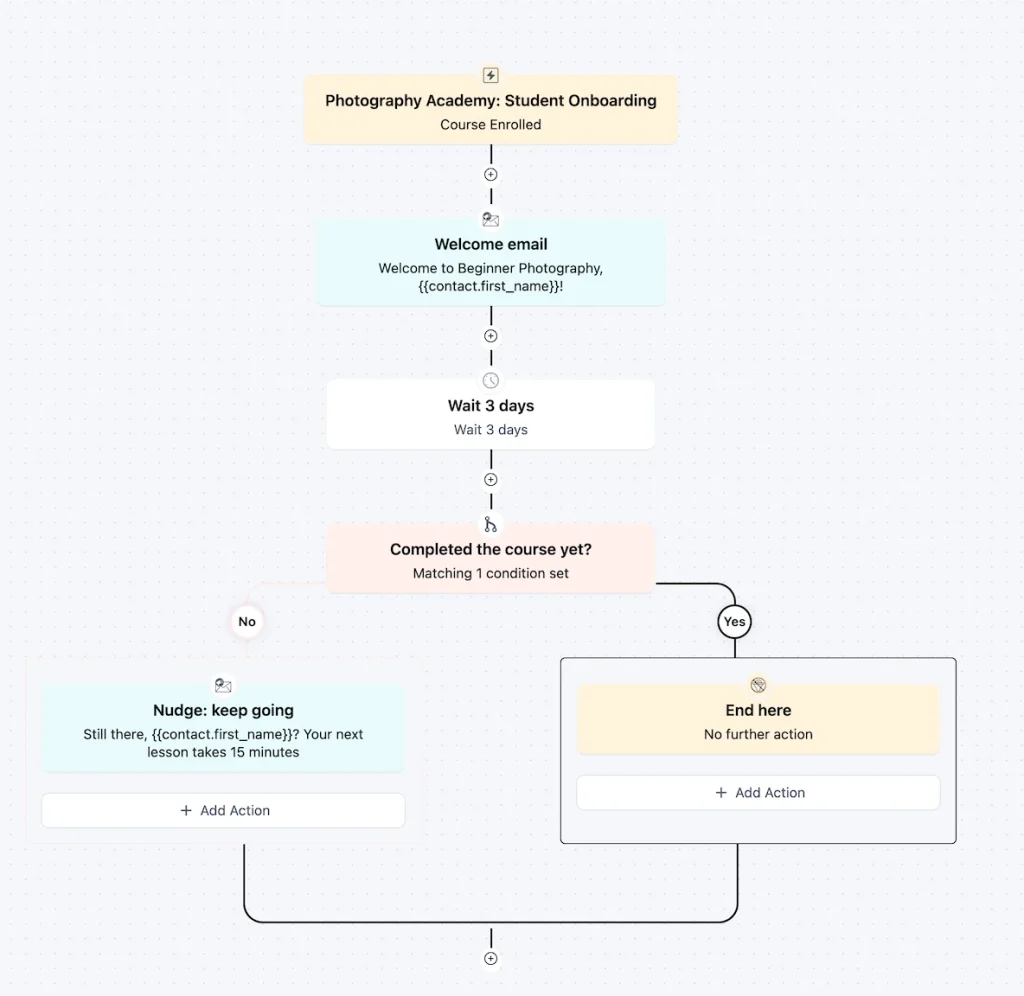
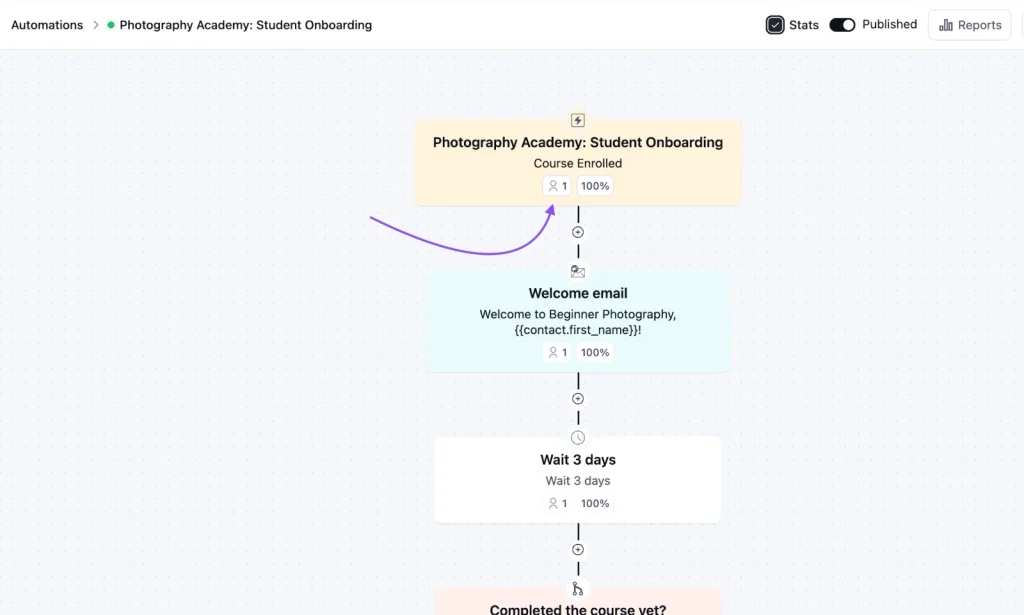
Here’s an overview of our onboarding flow:
- Send a welcome email right away.
- Wait 3 days.
- Check if they’ve completed the course using a LearnDash condition.
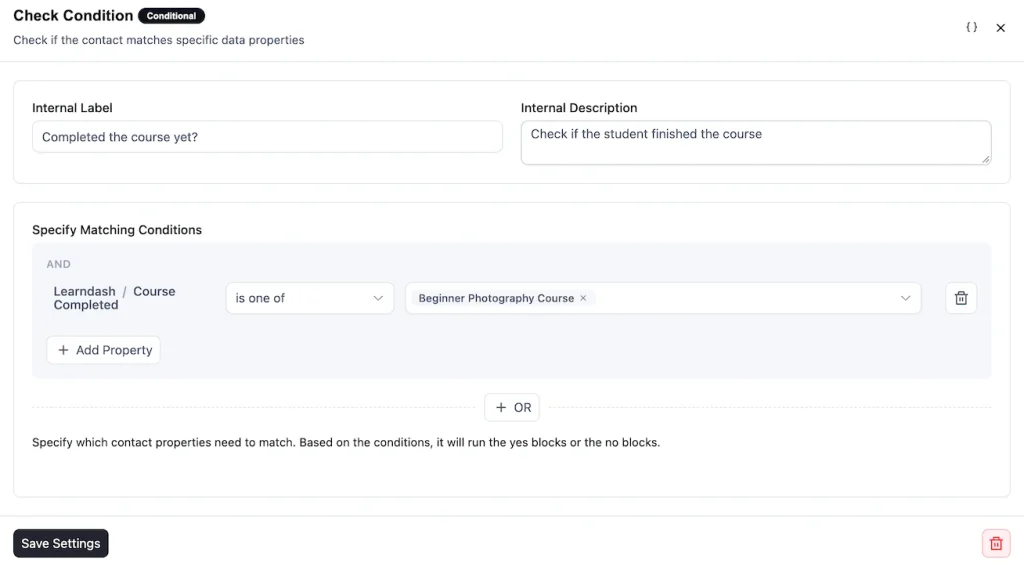
- If not, send a friendly nudge that points them back to their next lesson.
Want a longer sequence? Our guide to building a student onboarding email sequence walks through every email in detail.
2. Recover Students Who Leave Checkout Halfway
Some visitors add your course to the cart, type their email, and then get distracted. Without a reminder, that sale is gone.
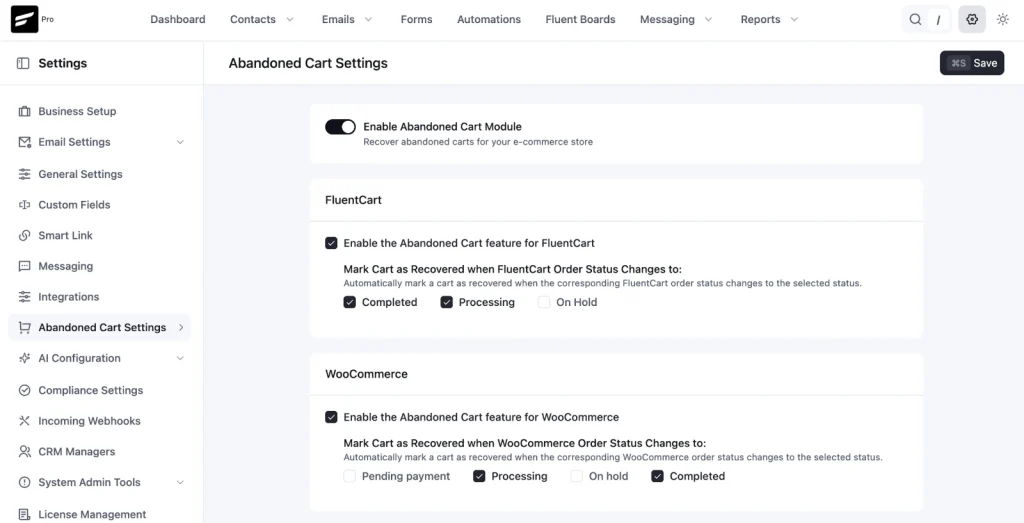
First, turn on cart tracking. Go to FluentCRM > Settings > Abandoned Cart Settings, switch on the module, and tick Enable the Abandoned Cart feature for FluentCart.
You can also add a tag here, like “Status: Cart Abandoned,” which FluentCRM removes on its own after they buy.
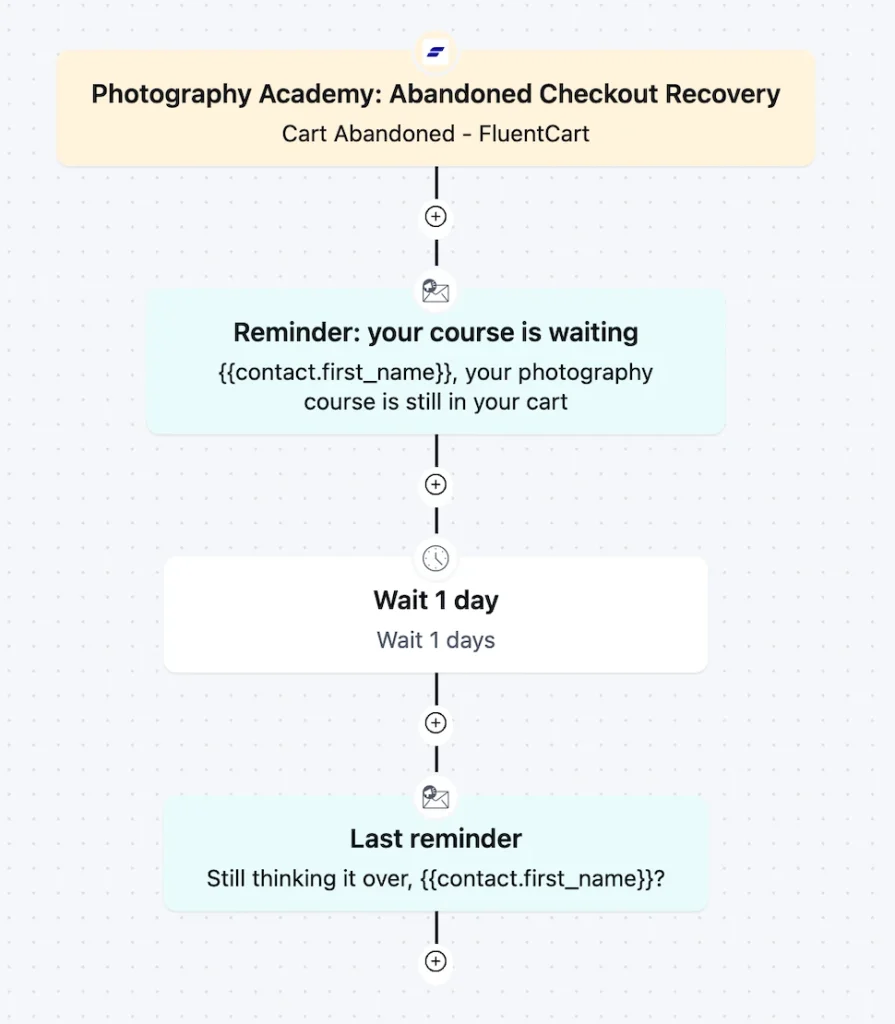
Next, create an automation with the Cart Abandoned – FluentCart trigger.
We kept it to two short reminders:
- Reminder email: “Your photography course is still in your cart.”
- Wait 1 day.
- Last reminder: a quick reminder of what’s inside the course.
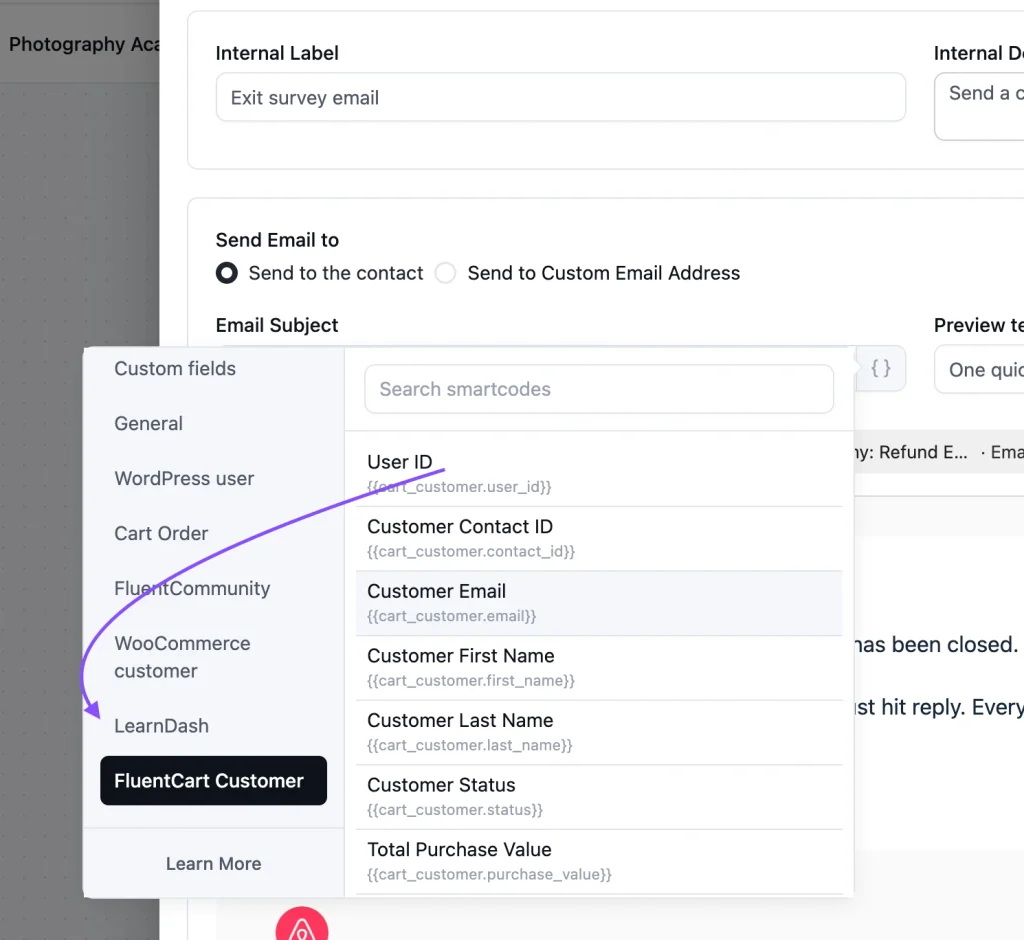
Inside each email, you can use the Abandoned Cart – FluentCart smart codes. The cart items table shows exactly what they left behind, and the recovery link takes them straight back to checkout with their cart restored.
In a hurry? Start from the ready-made FluentCart abandoned cart automation template instead, or read more abandoned cart recovery strategies to improve your emails.
3. Celebrate Course Completion & Offer the Next Course
A student who just finished your course already trusts you. That makes them the easiest person to sell your next course to.
Choose the Course Completed trigger and pick the Beginner course. Then build this flow:
- Apply the tag “Completed: Beginner Photography.”
- Send a congratulations email.
- Wait 2 days.
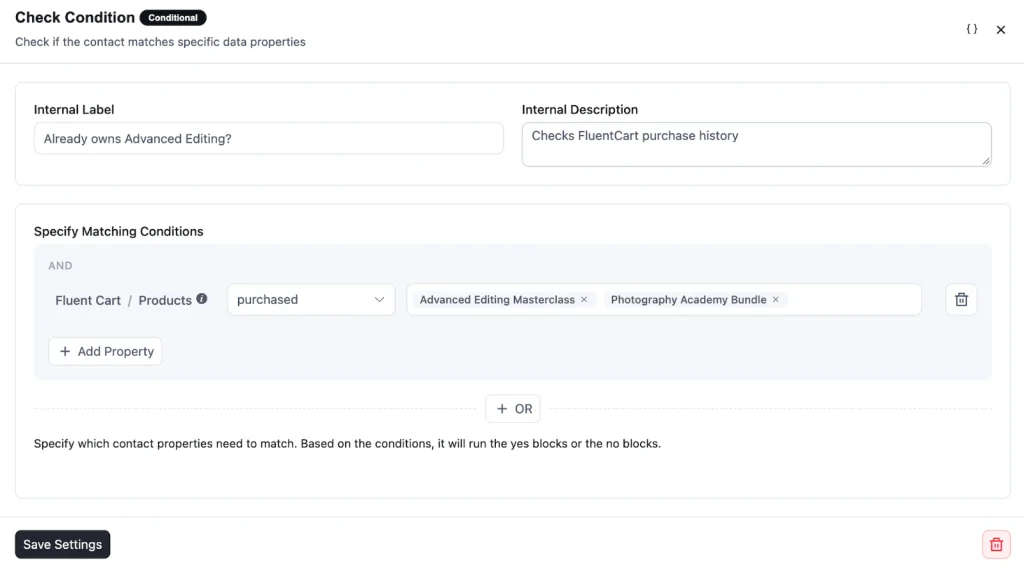
- Check if they already own the Advanced course. This is where FluentCart and FluentCRM really work as a team.
- If they don’t, send an upsell email. If they do, the automation simply ends.
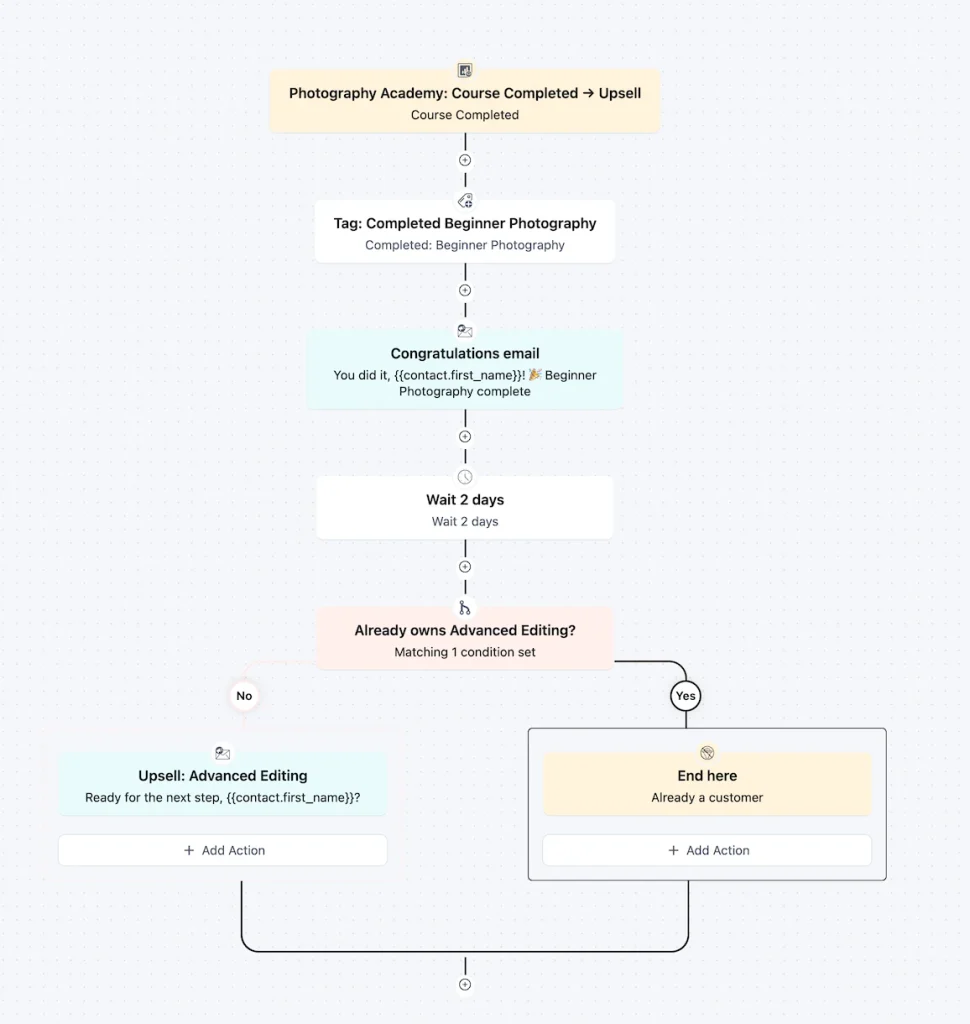
For the conditional section in this automation, choose Fluent Cart > Products > purchased. Select the Advanced course and the bundle. No one gets offered a course they already paid for.
Note: You can also send a certificate along the way with a course certificate automation.
4. Follow Up When a Student Asks for a Refund
Refunds happen. The useful thing is to learn from them.
When an order is refunded, FluentCart already removes course access and the “Bought” tag. This automation adds the human side.
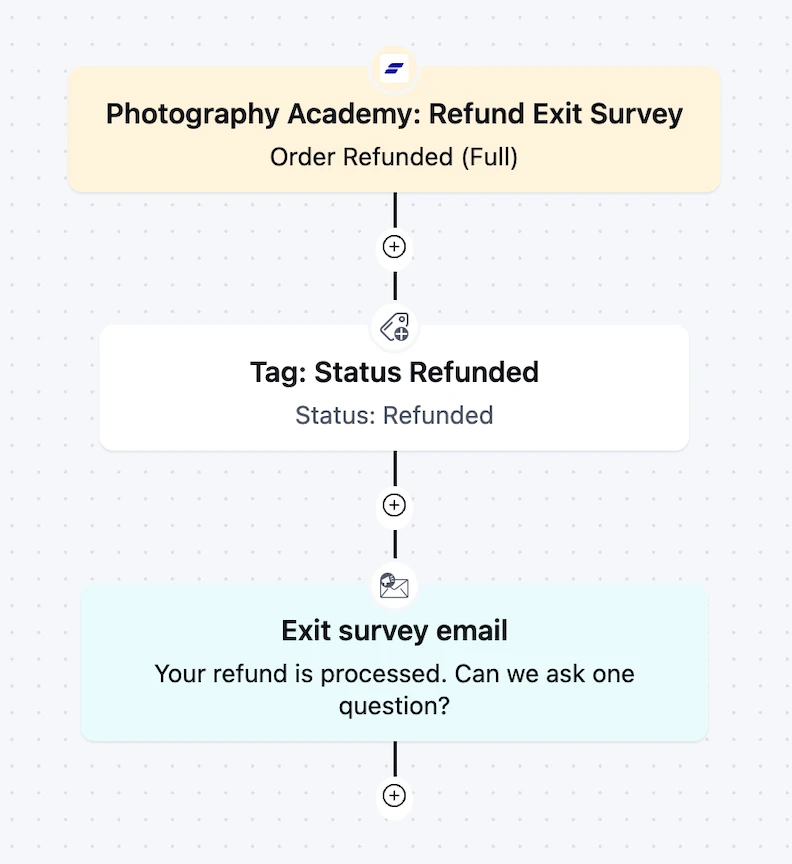
Choose the Order Refunded (Full) trigger and select your course products. Then:
- Apply the tag “Status: Refunded” so you can leave these contacts out of future sales emails.
- Send a short exit survey email asking one simple question: what didn’t work for you?
The answers often show you exactly what to fix in your course or your sales page.
Once all four are ready, go to the All Automations panel, switch each one from Draft to Published.
Now each automation will run on its own, without your effort, and send emails and reminders to students who are interacting with your courses.
Test the Whole Flow with One Order
Before real students arrive, run one test order and watch everything happen.
The easiest way is to switch FluentCart to Test Mode and buy your own course.
You can also create an order from FluentCart > Orders > Create Order for a test customer and mark it as paid.
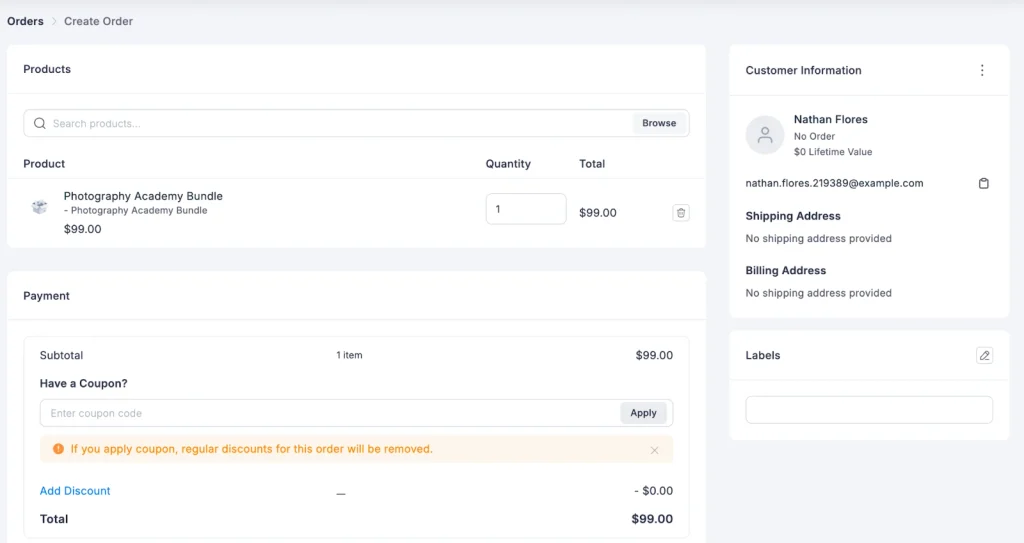
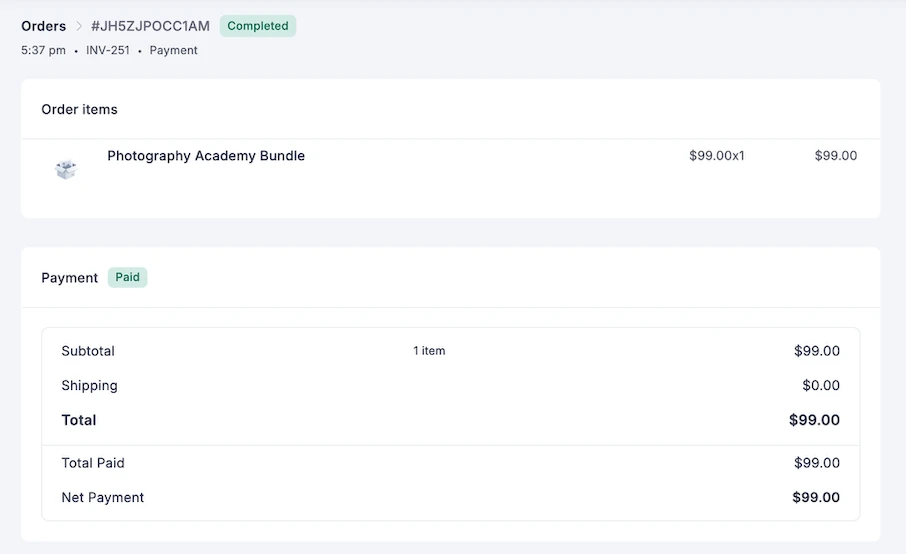
The order’s activity log shows each step as it happens. FluentCart even creates a WordPress user for the buyer automatically, so LearnDash has someone to enroll.
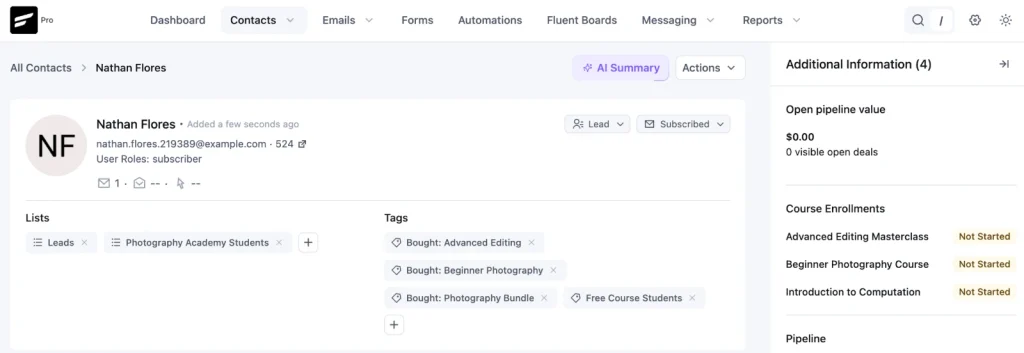
Now open the contact in FluentCRM > Contacts. One profile shows everything:
- The “Bought” tags and the Students list from FluentCart
- The course enrollments from LearnDash
- The purchase and lifetime value in Commerce Info
Finally, open your onboarding automation and tick Stats. You’ll see your test student has entered the flow and received the welcome email.
If all of that checks out, your course business is officially running on autopilot.
A Few Tips to Keep It Running Smoothly
If you have done everything correctly, then your setup will be live, and most of the setup work is already done.
Now, a few small habits will keep everything running smoothly as more students join and your course business grows.
- Keep enrollment in FluentCart: FluentCRM can also enroll students in courses, but doing it in two places can cause mix-ups. Let FluentCart handle access close to the payment, and use FluentCRM for communication.
- Avoid double emails: There’s a difference between LearnDash notifications & FluentCRM automation. LearnDash sends its own purchase and registration emails. Let it keep those, and use FluentCRM for everything after via automation.
- Start with one automation: The onboarding flow gives you the biggest win, so build it first and add the others once it’s running.
- Check in on quiet students: If someone hasn’t logged in for a while, a short reminder can re-engage inactive learners.
Let Your Course Business Run Itself
Running a course business shouldn’t mean checking your inbox at midnight to enroll a new student.
With this setup, FluentCart takes the payment, LearnDash opens the course, and FluentCRM takes care of every email that follows. You do not need to stare at your computer screen until midnight to see enrolled and who dropped off.
The entire journey simplifies your business with FluentCRM connected to your system
- New students feel welcome
- Busy students get a gentle nudge
- Finished students hear about your next course at the right time
That’s how to sell online courses without the manual workload: set it up once, then get back to what you enjoy most: creating great courses.
Tanzil Ebad Efti
Content Writer & Strategist
Words are my favorite playground. As a Creative Writer at WPManageNinja, I don’t just produce content; I tell stories. By mixing fiction and metaphors with real-life examples, I turn my writing into a creative journey that’s easy for readers to digest and relate to.
Table of Content
Related Articles and Topics
-
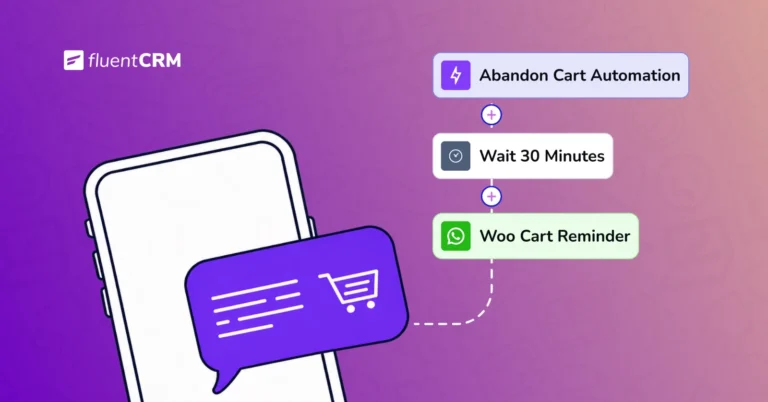
How to Send WooCommerce Order Notifications and Follow-Ups via SMS & WhatsApp
A customer visited your store, added a product to the cart, then clicked “Place Order.” …
-
How to Build a Course Certificate Automation Funnel in FluentCRM [+Setup Guide]
A student clicks “Finish Course,” the progress bar hits 100%, and a small message appears:…