



Last Updated:
Email communication is a vital tool for any business since it’s an opportunity to connect with customers personally. And while sending a business email, you need to ensure that you are using a custom email with a professional picture.
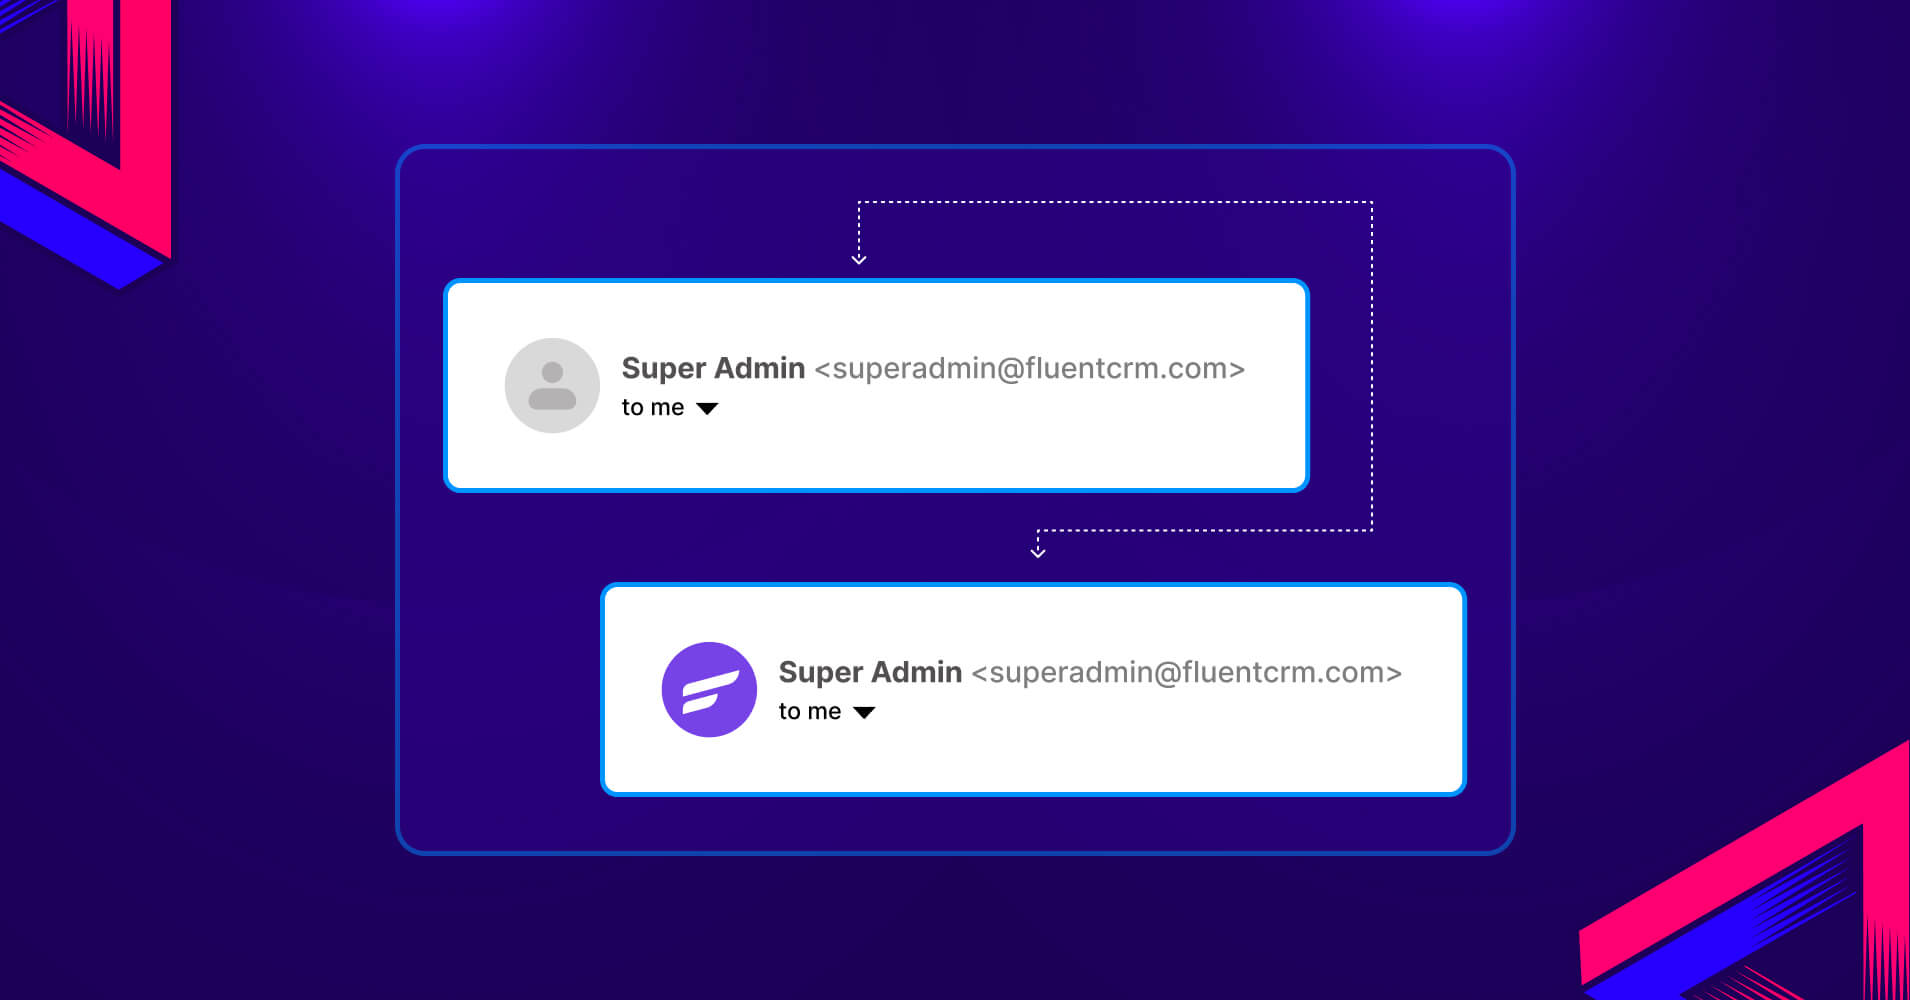
A profile picture in your custom email represents your authenticity, credibility, and reputation and influences the open rate. But unfortunately, when you send an email from your custom email to Gmail users, your email hits the inbox without a picture.
So, if you are someone looking for a solution to fix this issue, then keep reading.
In this blog, we’ll share the easiest way to set the profile picture of your custom email in Gmail regardless of any email hosting and web hosting.
Let’s jump into the solution!
Gmail Profile Picture Requirements
Whether you are a general user or a business owner, your Gmail profile picture will act as an ambassador to the recipient. So, you should want your profile picture to be professional, appealing, and authentic, which represents you or your business.
So, before adding or changing the profile picture of your custom email, you need to know about the requirements. The following are the requirements you need to meet to change your profile picture-
- The size of the profile picture should not exceed 5 MB
- The picture must be 250 x 250 pixels or larger to avoid blurry visuals
- The image format should be JPEG or PNG
- Don’t use an incompatible selfie, group photo, or cropped image where your half-hair is hidden
- Always upload your professional and amicable photo or a professional logo representing your business
Before You Start: Two Paths, and What Each Needs
Getting an image to show next to your custom email in Gmail comes down to which outcome you want:
- Path A – Set a Google Account photo via “Send mail as” (this guide). Links your custom sending address to a Google Account profile photo. Best when you send from a custom address through Gmail and want your picture to show. The 12 steps below cover it.
- Path B – BIMI, for a verified brand logo across inboxes. BIMI (Brand Indicators for Message Identification) is the email standard that displays your brand logo next to your authenticated emails in Gmail, Yahoo, and other supported inboxes — for everyone who receives your mail, not just you. Best for businesses that want a consistent logo everywhere rather than a per-account photo.
Both paths depend on a properly authenticated sending domain.
Before either method works reliably, make sure your emails are authenticated with SPF, DKIM, and DMARC. For BIMI specifically, you also need a DMARC policy at quarantine or reject and a square SVG logo hosted on a stable HTTPS URL. If you want the brand-logo route, follow the full walkthrough by learning what BIMI is and how to set it up.
12 Simple Steps to Change Your Gmail Profile Picture for a Custom Email
Email marketing is crucial for any business, and a custom email with a professional picture or business logo will increase the chance of open rate and conversion of your transactional or marketing emails.
Remember, a missing picture in the custom email means you are losing the opportunity to convert leads into prospects and prospects into paying customers.
Nobody wants this to happen, and you end up here looking for a solution to this problem.
Don’t worry, we’ve got your back!
We have shared the easiest steps to change the profile picture for your custom email which will ensure the next time you send an email from a custom email, the email hits the recipient’s inbox with your preferred image.
So, let’s follow these quick steps to change the profile picture of your custom email in Gmail.
Step 1: Go to myaccount.google.com and log in with your login credentials if you haven’t logged in yet.
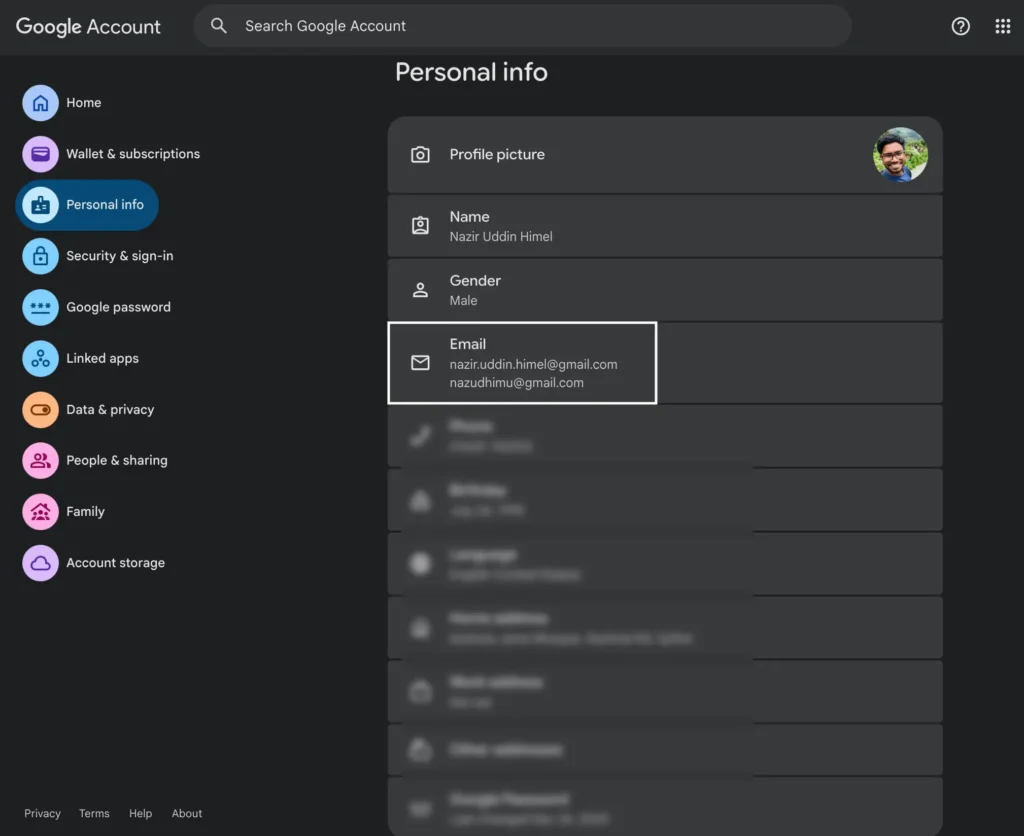
Step 2: After successfully logging into your Google account, go to Personal info from the left sidebar menu.
Step 3: Once you’re in Personal info, click on Email.
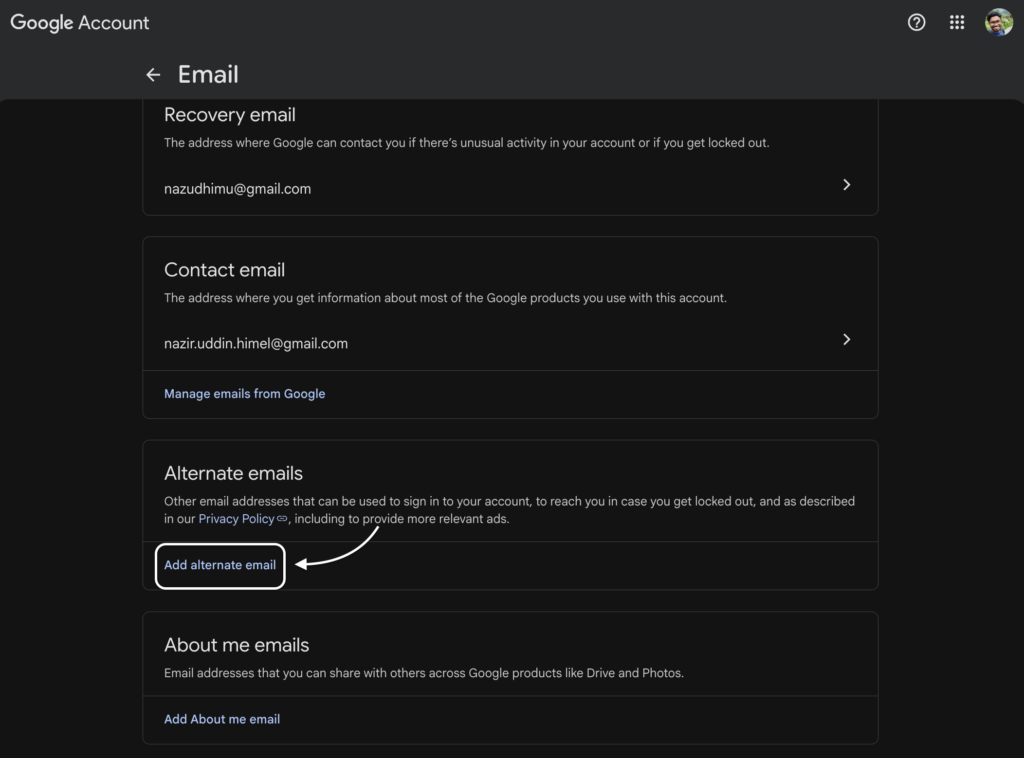
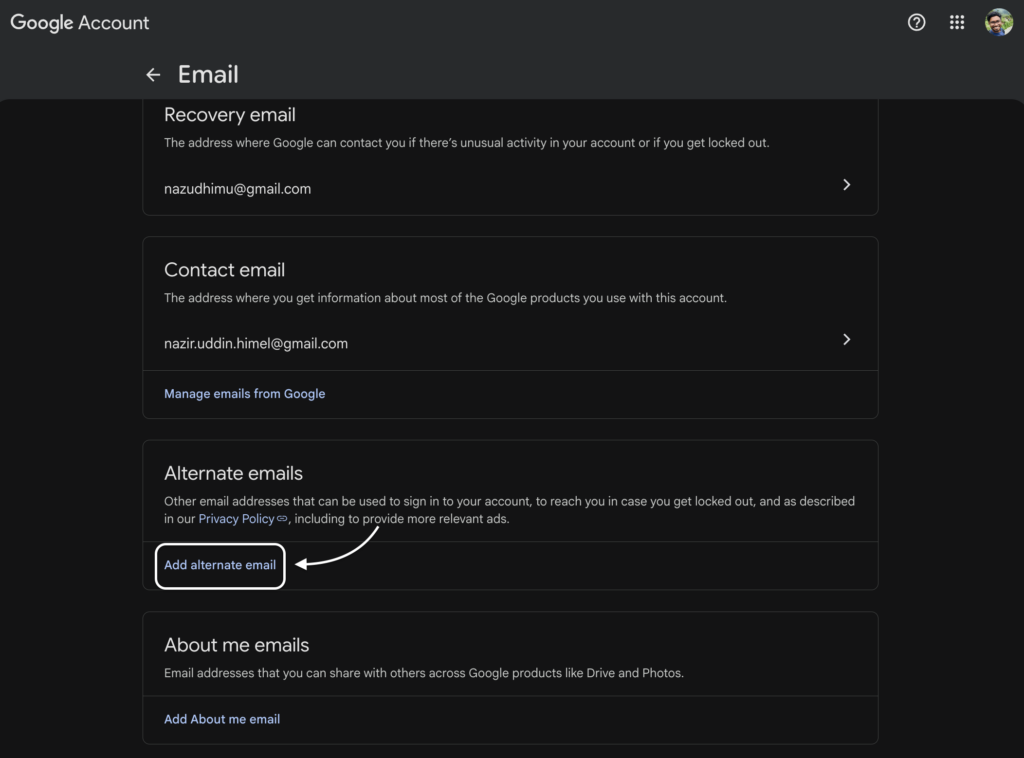
Step 4: Now scroll down again to discover Alternate emails and click on Add alternate email.
Step 5: Now a box will appear before your eyes where you need to insert your custom email address. So, write down the custom email address and click on Add. Google may ask you to confirm your identity or log in again. You have to do that too.
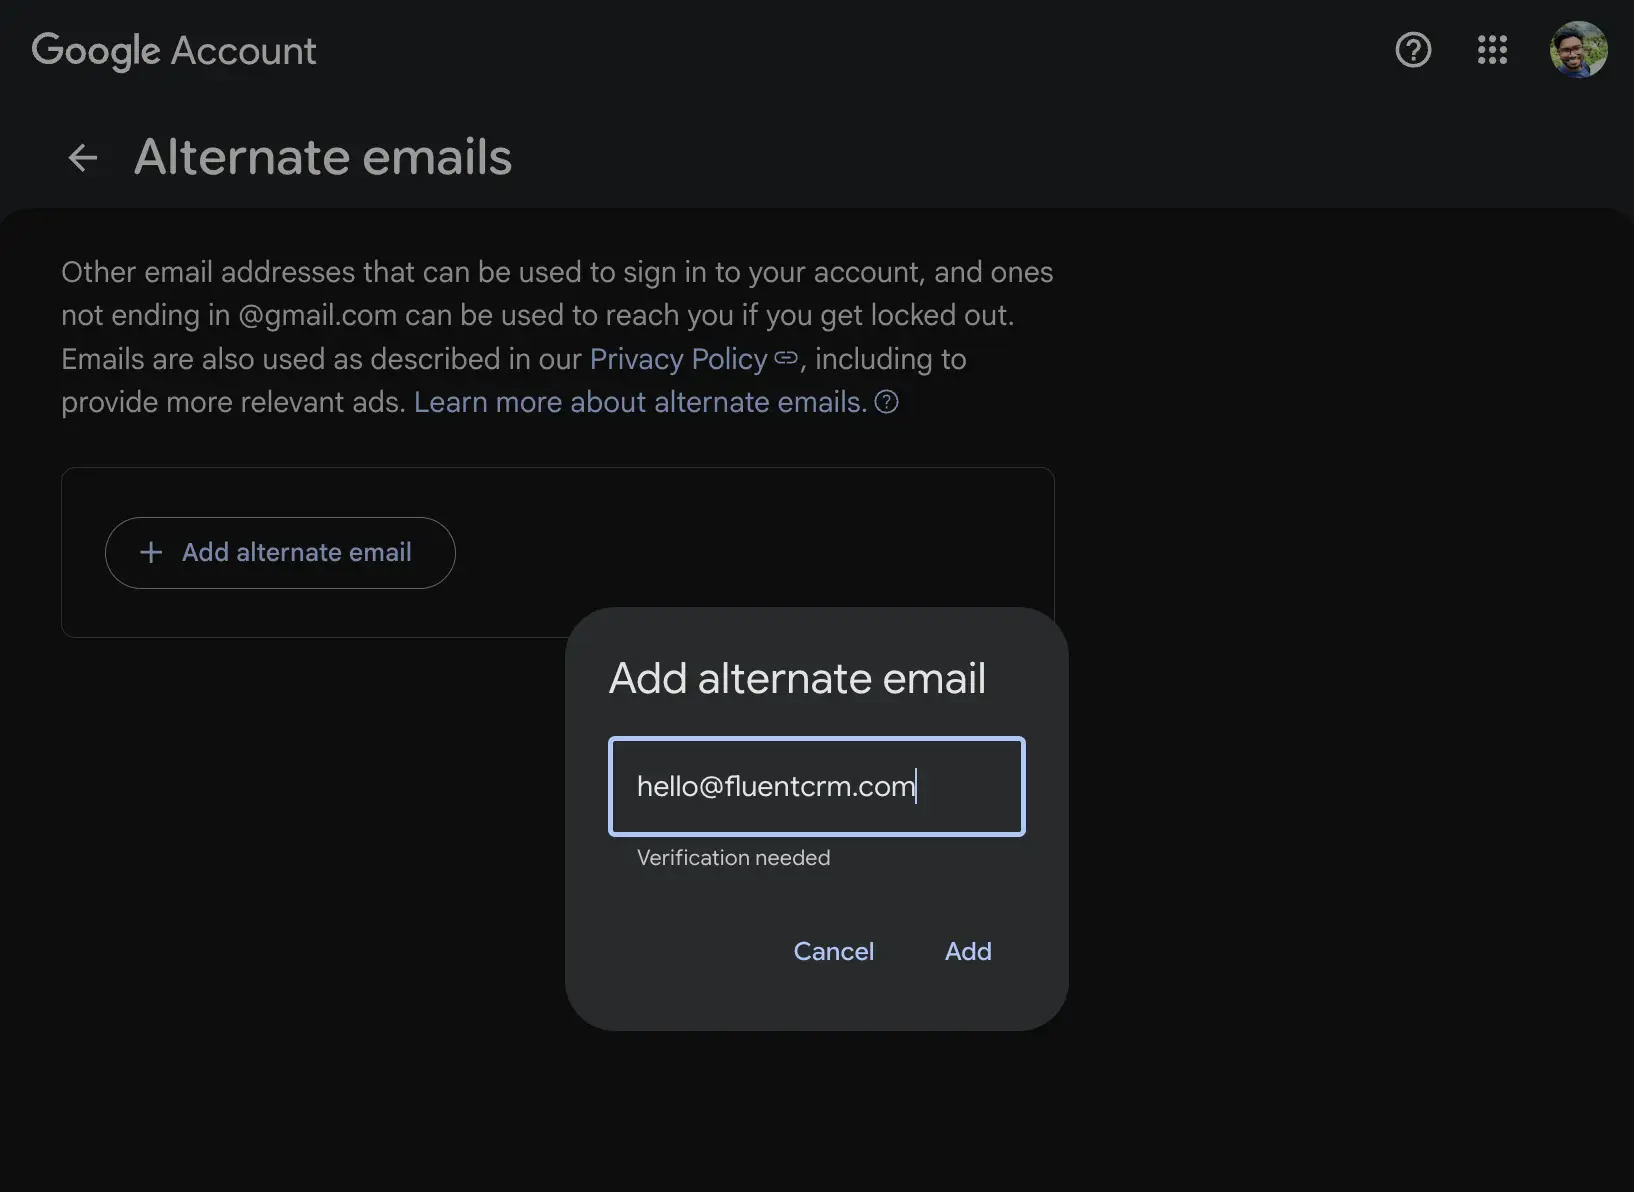
Step 6: Now a new window will appear where you’ll see Google asking for verification of your custom email.
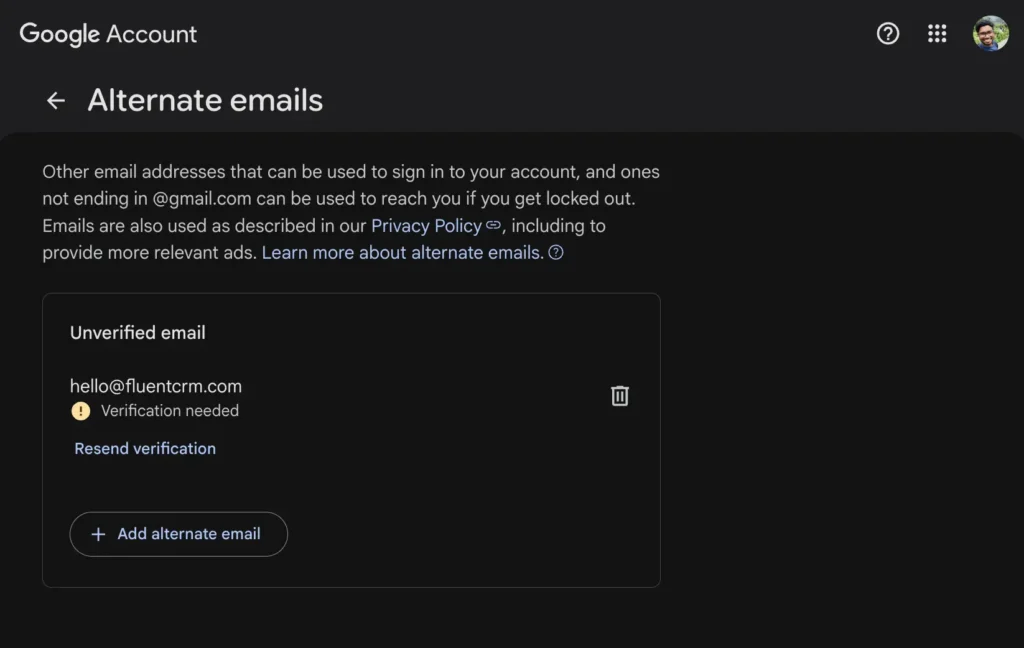
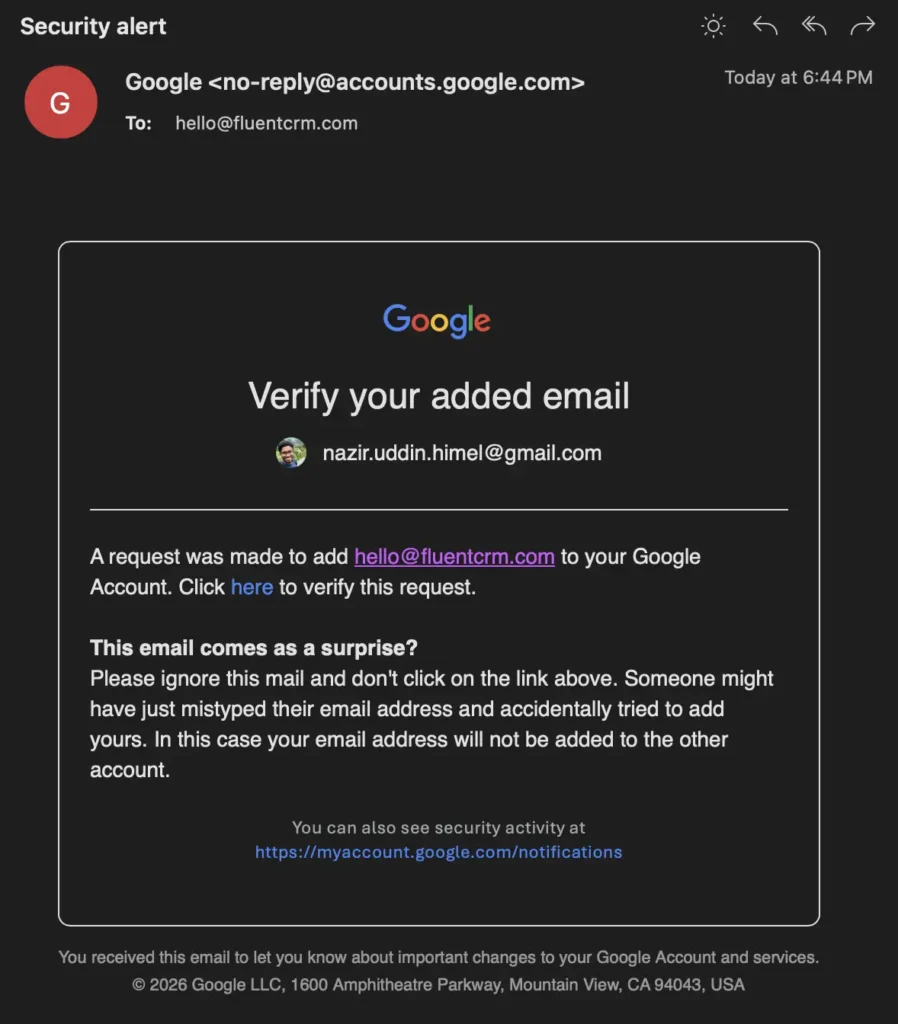
Step 7: To verify your email, go to your custom email inbox and open the verification request email. Then click the link to confirm the verification request. After clicking on the verification link, you’ll be asked to enter your Google account email and password to finish verification. Once you are done with the verification, you’ll see that you have successfully added the custom email as an alternate email
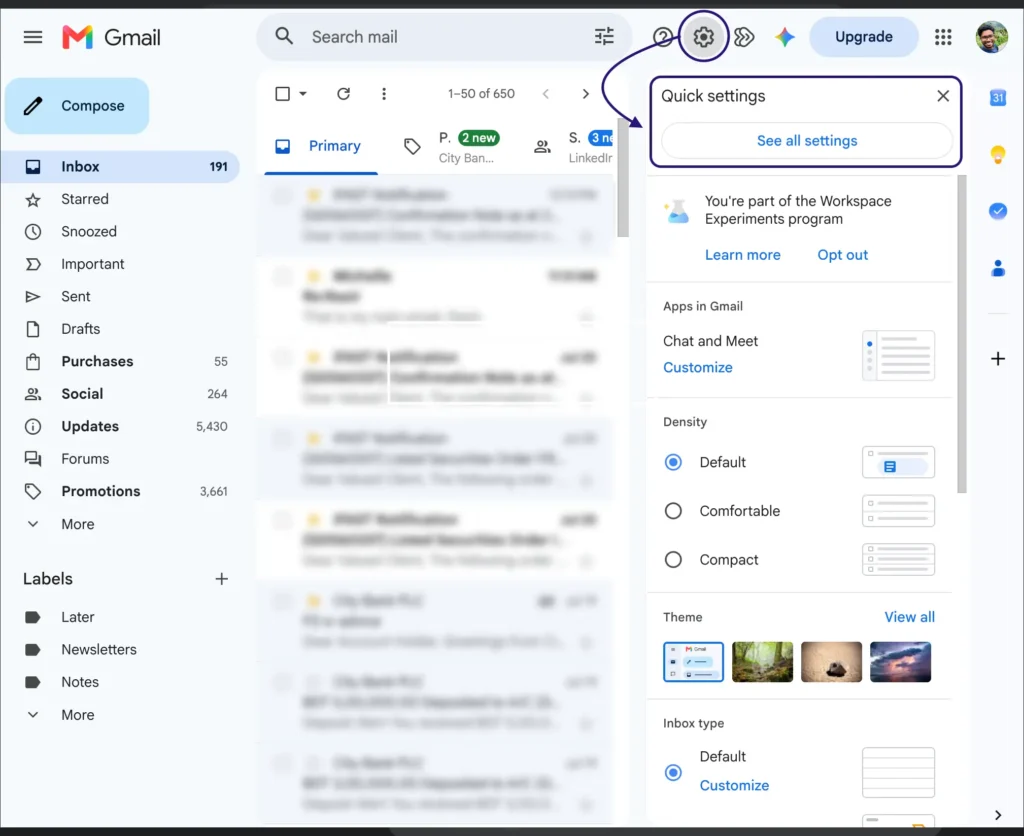
Step 8: Now go to mail.google.com, then go to Settings > See all settings. This will let you access all the configurations of your mailboxes.
Step 9: From settings, switch to the Accounts and Import tab and click on Add another email address under Send mail as.
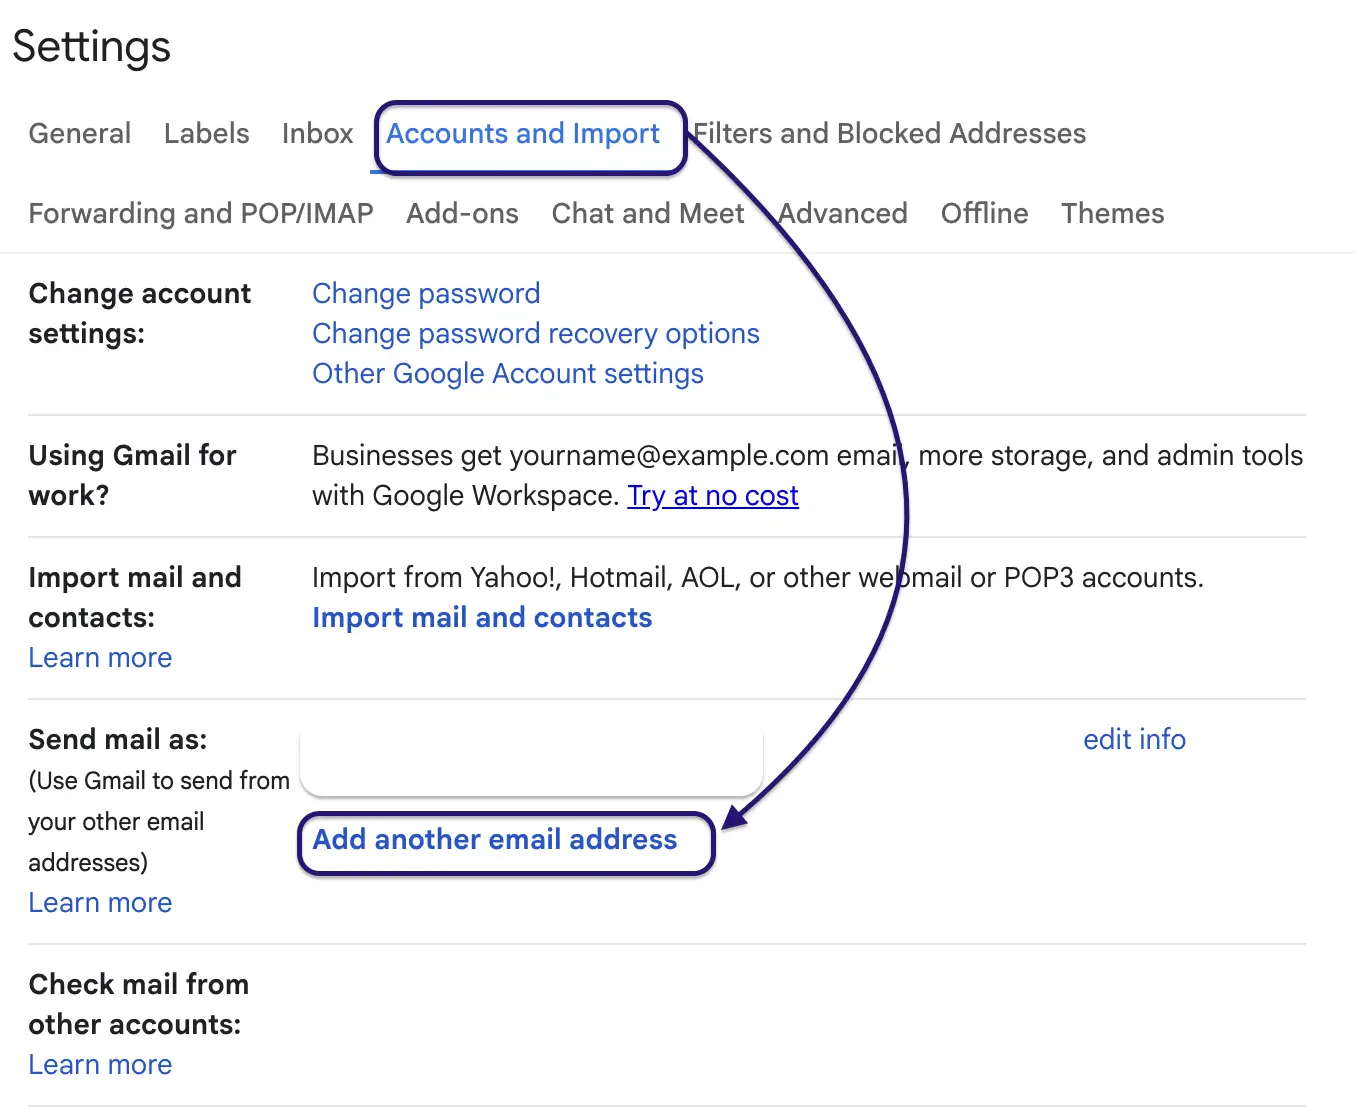
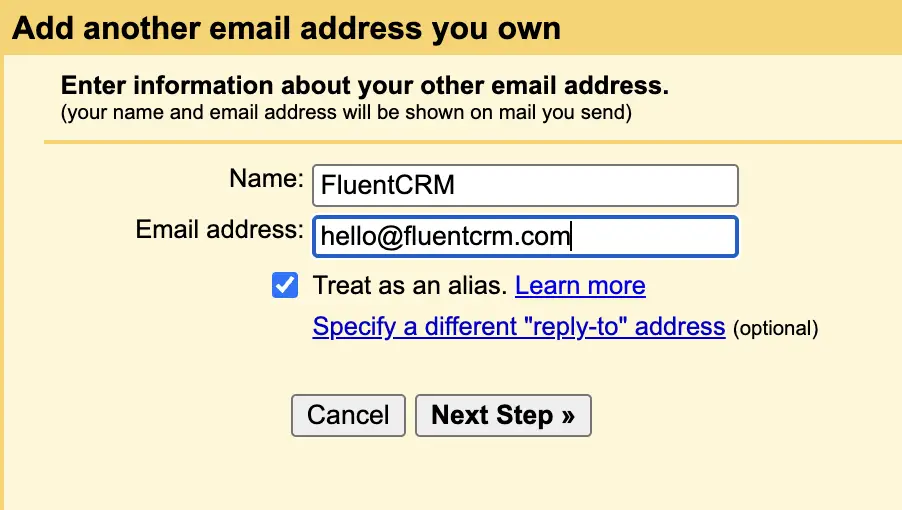
In the next window, a pop-up will appear where you need to enter your custom email address and then click on Next Step.
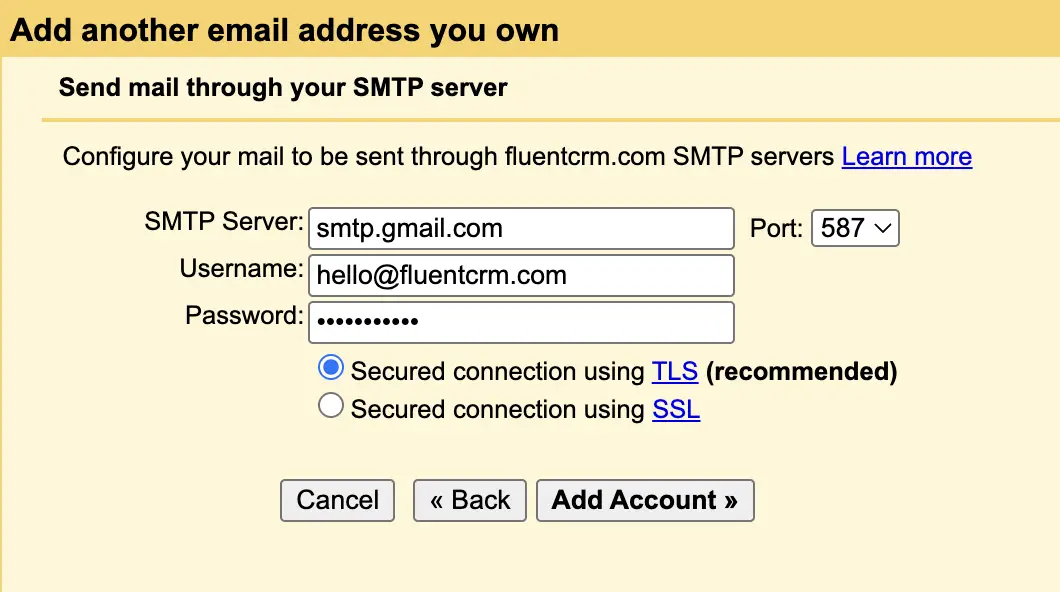
Step 10: Before proceeding to this step, you need to collect the SMTP server address, Port, Username, and Password. Then fill out these boxes-
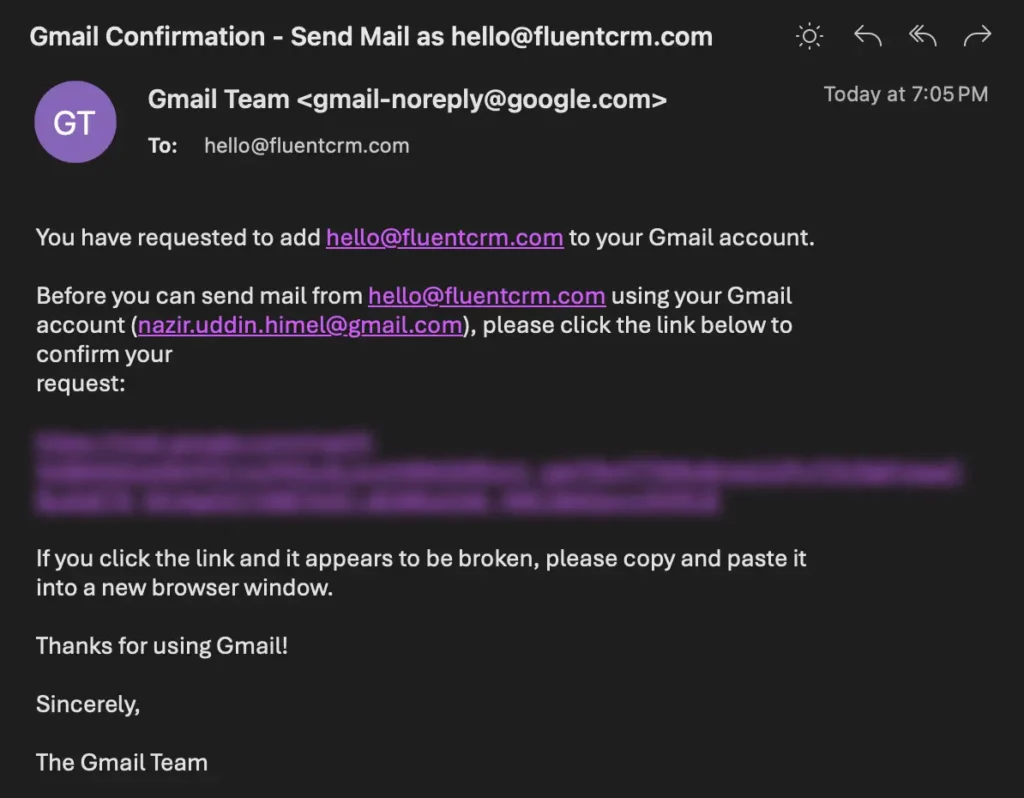
Step 11: Now a confirmation code will be sent to your custom email address. Simply click the link and authorize the confirmation if you’re taken to a browser to finish the procedure. After successfully verifying the email address, it will be added to your Gmail.
Step 12: Now all you have to do is go to myaccount.google.com again and click on your profile. Then upload your desired Gmail profile image by clicking Upload from Device and save your profile picture.
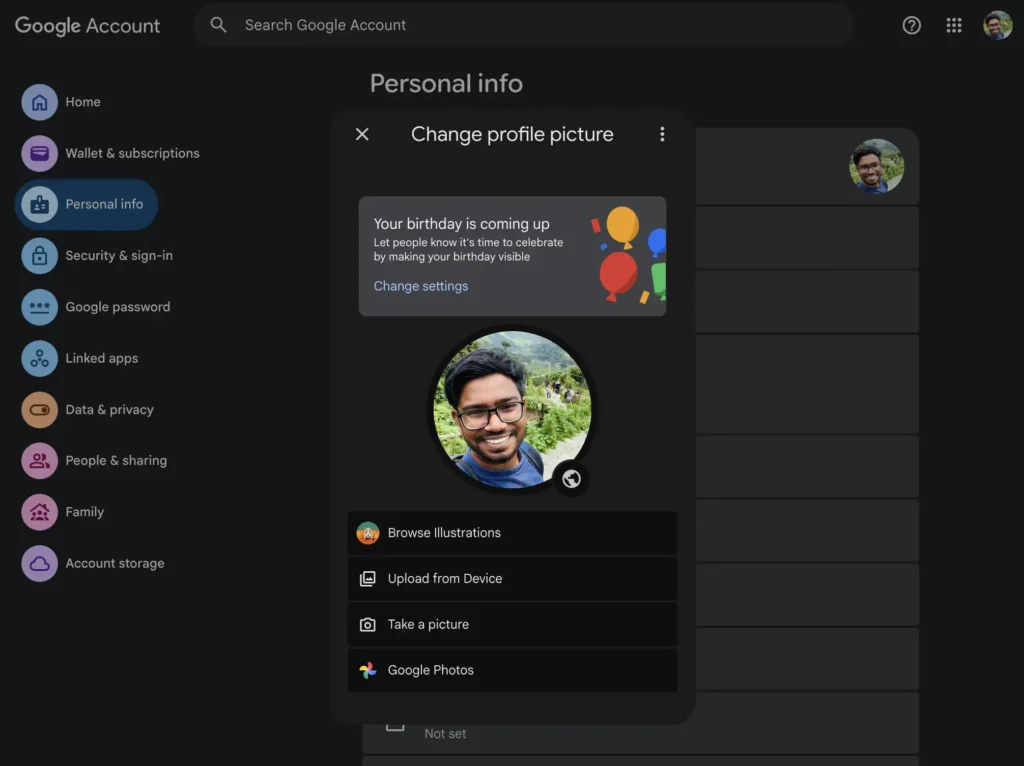
That’s all you have to do.
But remember, it’ll take one or two days for your profile picture to be updated. So, we recommend that you wait patiently during that period.
Testing the Change
When the wait is over, it’s time to check if the applied change is working or not. So, you need to send an email from your custom email to a Gmail user and see if your email reaches the receiver with your uploaded picture or not.
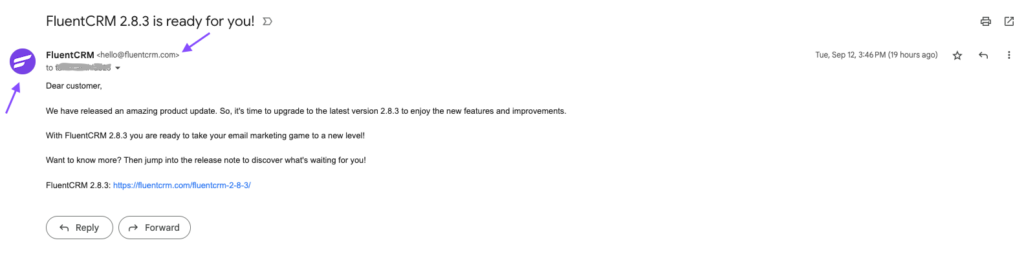
We have composed an email from our configured email and sent it to a recipient to test if the profile picture of our custom email has changed or not. Here’s the snapshot from our side after the change-
Here’s how it looks inside the recipient’s inbox on the mobile device after the change-
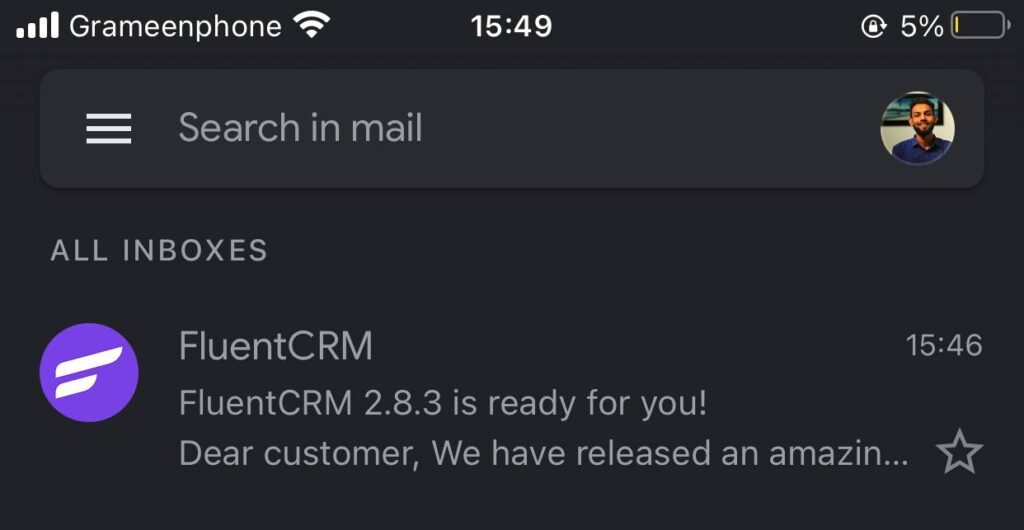
So, you can clearly observe the profile picture of the custom email has changed, and now it’s hitting the recipient’s inbox with an image.
Get Into the Inbox and Get Recognized!
A profile picture helps subscribers recognize your brand the second you land in their inbox. But actually getting past spam filters comes down to technical authentication, SPF, DKIM, and DMARC. That’s where the power of a complete WordPress stack comes in: FluentSMTP handles your technical setup and deliverability behind the scenes, while FluentCRM manages the high-converting campaigns that drive your business. Together, they ensure your emails don’t just send; they arrive, get seen, and convert.
Configure Your Custom Email with Gmail
We hope our guidelines will help you to configure the profile picture of your custom email in Gmail and the next time you send an email to Gmail users, it’ll reach them with your chosen picture!
Custom email is crucial for any business since it’s proof of your authenticity. And when you add a professional picture with it, it boosts credibility and the open rate of your emails.
Frequently Asked Questions
Tuhin
Digital Marketing Strategist
Hi! Nice to meet you. I’m a guy who loves to explore, learn, and share knowledge. I spend most of my time catching up with marketing tips & tricks. When I’m not busy with any of these, you’ll find me with a book, exploring the city, or playing my favorite games.
Table of Content
Related Articles and Topics
-
FluentCRM Email Signature Generator: Create Professional Signatures for Every Email
FluentCRM’s Email Signature Generator is a browser-based email signature builder that creates professional, HTML-formatted signatures…
-
How to Send Automated Payment Reminder Using FluentCRM
Late payments are rarely dramatic. People forget, get busy, miss a date, or mean to…




Leave a Reply