
Free Tips, News & Tutorials Delivered to Your Inbox!
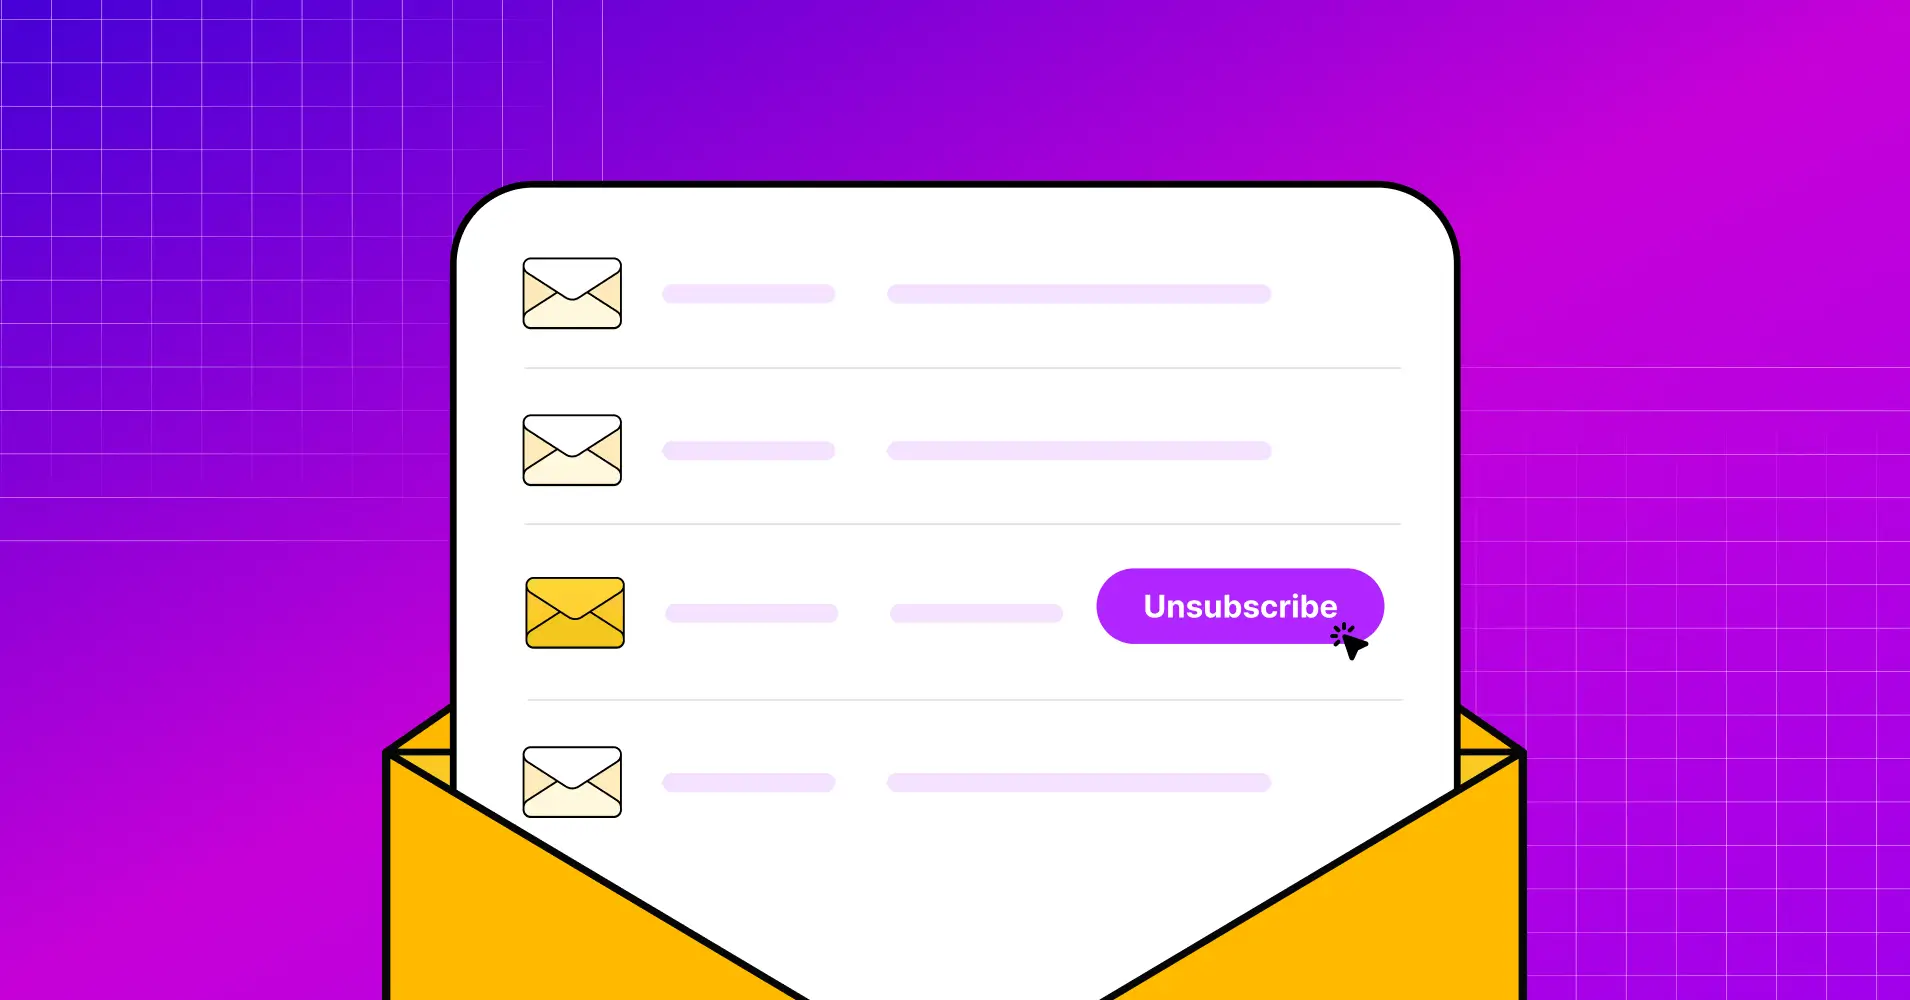
Ever spend hours crafting the perfect email, only to have it disappear into the abyss of a spam box? Sending emails without an unsubscribe option is like dodging a knife storm blindfolded- hoping that recipients won’t mark your mail as ‘spam’, but you never know!
But, there’s a simple tip to save your email: the list-unsubscribe header.
That’s not all, you need to know a lot more before implementing it in your emails. So, let’s find out the ins and outs of the list-unsubscribe header!
What Is a List-unsubscribe Header?
List-unsubscribe is an optional email header that lets recipients opt out of emails with or without having to click an unsubscribe link or mark the sender as spam or junk. It typically appears as a clickable button within the email client’s interface, allowing users to opt out of future emails from the sender without having to search for an unsubscribe link within the email content.
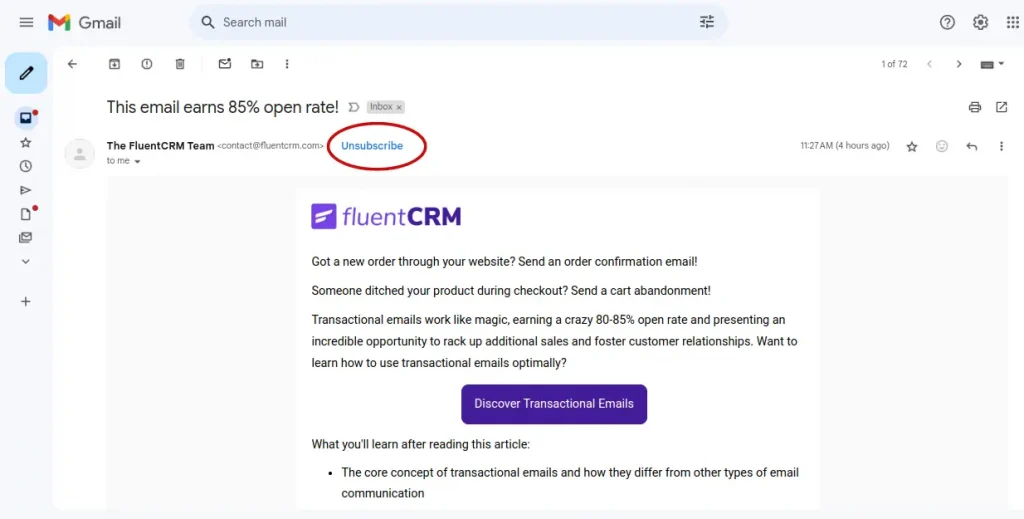
The Email List-Unsubscribe header makes it simple for users to opt-out and helps senders comply with email rules by offering an easy way for recipients to manage their preferences.
But why do you need it? The answer is given in the next segment.
Why Do You Need a List-unsubscribe Header?
Though we mentioned ‘optional’ in the definition, it’s not (really) an option anymore! The reasons are:
- Stay Compliant: It’s your ticket to staying on the right side of email laws like CAN-SPAM and GDPR – making sure you offer recipients a straightforward way out.
- Google’s Eye: Google updated its email policy in February 2024. In their rules, it’s mandatory to add an unsubscribe option! Aligning with Gmail guidelines keeps your emails in your client’s inbox, where they belong.
- User-Friendly Unsubscribes: Sometimes looking for the link is so frustrating that receivers click ‘mark spam’. But if they had a clear unsubscribe button, they would just unsubscribe.
- Protect Your Reputation: By making unsubscribing easy-peasy, you reduce the chance of annoyed recipients hitting the spam button, safeguarding your sender’s reputation. This will increase your chance to deliver your emails directly to the client’s inboxes.
- Keep Quality Leads: Allowing an easy opt-out process enables you to have interested people in your email list and enhances better engagement.
- Improve Reliability: The list-unsubscribe button at the top makes your emails look more reliable and transparent to receivers.
A point to be remembered: Often the unsubscribe option is visible depending on the sender’s reputation. So, maintain a good email sender reputation.
List-Unsubscribe Header: Workflow
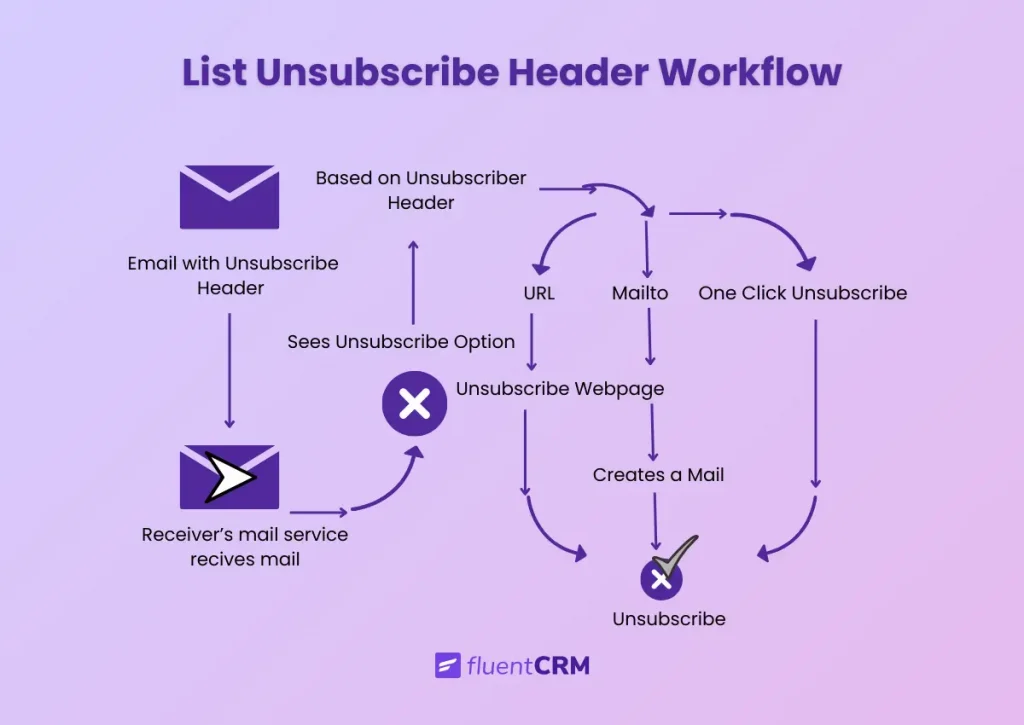
But how does the unsubscribe header work? This is the detailed step-by-step procedure follows:
- Email senders include a List-Unsubscribe header in their outgoing emails. This header contains instructions for how recipients can unsubscribe from the mailing list.
- Recipients receive the email in their inbox
- Email clients that support the List-Unsubscribe header (like Gmail, Outlook, etc.) recognize this header
- Within the email client interface, recipients see an “Unsubscribe” option or link
- Depending on the type of List-Unsubscribe header:
- URL Method: Recipients are directed to a webpage to confirm their unsubscribe request
- Mailto Method: A pre-addressed email draft opens, allowing recipients to send an email to request removal
- One Click Unsubscribe: Recipients immediately opts-out without being directed to another link
- Recipients may need to confirm their unsubscribe request. After confirmation, the sender processes the request and removes the recipient’s email address from the mailing list.
Ways to Implement List-Unsubscribe Header
The implementation process varies depending on different email services and receiver servers. In general, There are three ways you can add a list-unsubscribe header: URL, Mailto, and One-click.
The detailed process of these three is given below:
URL ( aka HTTP):
URL aka HTTP method, follows RFC 8058. This method ensures a “one-click” unsubscribe option directly within the email viewer. It’s different from the mandatory unsubscribe link typically found in the footer of marketing emails.
Now to implement URL:
- Create the URL you want to include in your email. This could be a link to a webpage, a specific resource, or a landing page.
- If you’re sending an HTML email (which is common for marketing emails), include the URL within an <a> (anchor) tag. Here’s an example:
"List-Unsubscribe":"<https://www.unsubscribeURLexample.com/unsubscribe.html?opaque-identifier=unique-id>"Replace – https://URLexample.com with your actual URL.
This will show something like:
Click here to visit our website is the text that will be clickable in the email.
- Insert the HTML code into the body of your email template. This example assumes you’re using an email marketing tool or service that allows you to input HTML directly into the email content editor.
- Test the email to ensure the URL is clickable and directs recipients to the correct web page when clicked.
Mailto
Introduced in RFC 2369, the mailto method for unsubscribing involves including an email address in the List-Unsubscribe header. When a recipient clicks the unsubscribe link, it triggers an email to this address, requesting removal from the list.
Include List-Unsubscribe:‘<mailto:[email protected]?subject=unsubscribe>’ in the email header.- When a recipient clicks the unsubscribe link, an email is sent to ‘[email protected]’ with the subject “unsubscribe”:
- You need to monitor this email inbox for unsubscribe requests
- Manually or automatically process each request by removing the sender’s email address from your mailing list.
- Optionally, set up an auto-responder to confirm the unsubscription to the recipient.
Consider before Implementing Mailto: While some email providers support mailto, it’s not compliant with Gmail and Yahoo’s 2024 requirements. Prefer using the URL method for better compliance.
To learn more about Gmail and Yahoo’s 2024 requirements, give this blog a read!
One-Click Unsubscribe
The one-click unsubscribe method allows recipients to unsubscribe with a single click. One-click unsubscribe is introduced in RFC 8058. This method directly processes the unsubscribe request without needing further confirmation.
To implement the one-click unsubscribe follow the steps stated below:
- When recipients click the unsubscribe link, it sends a POST request to a specific URL and automatically processes the unsubscribe request.
Include List-Unsubscribe: <https://clicks.mycompany.com/unsubscribe_page/usercode; List Unsubscribe= One Click> in the email header
- Remove the email address from your mailing list
- Use an identifier in the URL to track which email is unsubscribing without showing the email address
Consideration: In Gmail 2024 policy, they strictly asked to maintain a one-click unsubscribe. As it meets their 2024 requirements, it’s better to use a one-click unsubscribe header to maintain your sender reputation.
Implementing List-unsubscribe with FluentCRM
You don’t wanna code in the backend and see the whole procedure, do you? In that case, you can use a tool like FluentCRM.
It’s a powerful WordPress plugin for email marketing automation, letting you manage contacts, run email campaigns, and create automated workflows directly from your WordPress dashboard.
Now, if you are already using FluentCRM and still unaware of how to add a list-unsubscribe header then follow these guidelines.
To add a list-unsubscribe to your emails, you can try two methods: the detailed one and the concise one.
Method#1
To apply a detailed one:
- Go to FluentCRM backend page
- Include List-Unsubscribe in the header section
In the header section, add $headers[] ="List-Unsubscribe: <{$unsubscribeUrl}>"; $headers[] ="List-Unsubscribe-Post: List-Unsubscribe-One-Click";- Test your mail by sending it to you first
- If the test goes well you are ready to go!
The list-unsubscribe header might look like this in the API section:
{

 "From": "[email protected]",

 "To": "[email protected]",

 "Subject": "Unsubscribing has never been easier!",

 "HtmlBody": "<b>Hello</b>",

 "TextBody": "Hello",

 "Headers": [

 {

 "Name": "List-Unsubscribe-Post",

 "Value": "List-Unsubscribe=One-Click"

 },

 {

 "Name": "List-Unsubscribe",

 "Value": "<RandomURL.com?subject=unsubscribe>,<https://www.unsubscribeURLexample.com/unsubscribe.html?opaque-identifier=unique-id>"

}

 ],

 "MessageStream": "broadcast"

}
Here in the header section, you will change the value as per instruction.
You also need to change RandomURL.com to the URL link you prefer.Method#2
In FluentCRM, the entire detailed procedure is condensed into a shorter, faster process.
To apply the steps, you have to:
- Go to FluentCRM dashboard
- Choose settings
- Go to compliance
- Give a tick mark on – Enable one-click unsubscribe
FluentCRM Dashboard > Settings > Compliance and give a tick mark on Enable one-click unsubscribe
That’s it. You need only two changes in the backend and you are ready to go. If you feel like there is too much code, then try the easier solution.
Email Clients Supporting List-Unsubscribe Header
Support for list-unsubscribe varies across email clients. Some email clients honor mailto or URL-based list-unsubscribe headers (or both), while others don’t support list-unsubscribe at all.
Here is an easy-to-follow diagram:
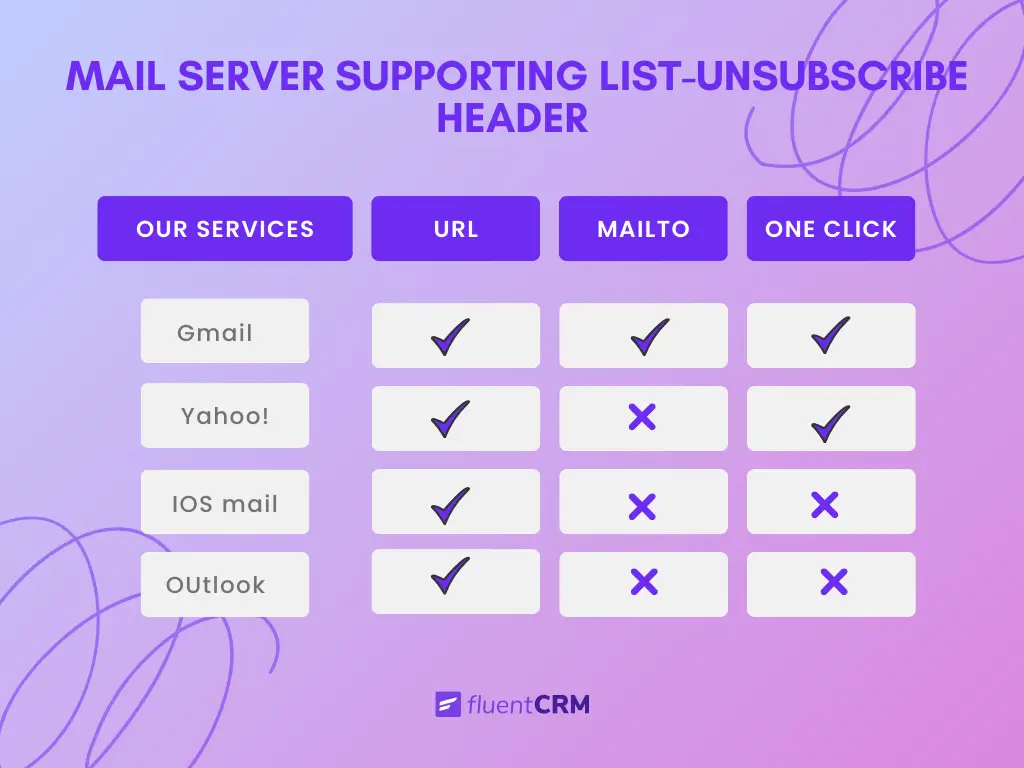
The following email clients support the list unsubscribe header. With these guides, you can now decide even faster which one to implement for which email service.
Time to Decide What’s Best for You!
Now, the question remains: which method should you choose?
Every email service has its approach, but according to Google’s new policy as of 2024, one-click unsubscribe is mandatory. Additionally, opting for a URL option is recommended over mailto, as mailto is considered somewhat outdated.
This approach not only respects user preferences but also helps maintain a positive reputation with email providers like Google. Choosing simplicity and clarity ensures a smoother experience for everyone involved.
But, if you’re feeling overwhelmed by all this information, remember that FluentCRM is in line with compliance with its email.
So, before pressing that send button make sure that the unsubscribe option is visible bright and clear!
Frequently Asked Questions
Before wrapping it up, let’s dive into some frequently asked questions about the email list-unsubscribe header:
Try Our Free Marketing Automation Plugin for WordPress!


Leave a Reply