4 Excellent Email Sequence Examples and How to Create Them in FluentCRM


Emails are perhaps the most extensively used marketing medium across industries. Whether your list has a few thousand or millions of subscribers, emails offer a proportionate ROI, which is a lot compared to Social Media and PPC (pay-per-click) advertisements.
It’s been said again and again that emails need to be personalized actually to make an impact. So how do email marketers manage thousands of contacts’ emails and still manage to sound personal?
Enter email sequences!
What is an email sequence?
Simply put, email sequences are a consecutive series of emails that take your customers/leads through the buyer’s journey. Email sequences are varied in nature, depending on the purpose of the sequence.
A big part of crafting a sequence depends on the buyer’s stage a particular contact is at. This means each type of email sequence is meant to offer something unique to the recipient.
How does email sequences work in FluentCRM?
All email marketing automation tools including FluentCRM, depend on automation funnels to carry out day-to-day marketing tasks. These funnels are usually triggered when something happens on your website.
Form submissions, product purchases, course enrollments are all good examples of a trigger that can initiate a funnel.
*Check out our documentation to see the list of triggers you can use.
However, to trigger a series of emails aka email sequence, you need to create the email sequence at first. Check out this video tutorial to find out how to create and use email sequences in FluentCRM:
Now that you know the fundamentals of email sequences, let’s look at four excellent email sequence examples and how to create them in FluentCRM.
Four excellent email sequence examples (+tutorial)
Email sequences vary depending on what kind of business you’re in. There are several email marketing sequences like abandoned cart reminders, post-purchase follow-ups, upsell sequences, course completion sequences, etc.
Frankly speaking, the common mistake every email marketer makes is using too many email sequences. The more emails you send out, the more you risk triggering spam traps.
However, there are a few email sequences every business should use. And here we’ve covered them in detail. We’ll also go through the funnel creation process so that you can create them the right way!
Ready to start?
Let’s begin!
1. Welcome Email Sequence
A welcome email is the first direct communication to a subscriber from your brand. They have a stark impact on the likelihood or frequency that they’ll open your emails in the future. The classic e-commerce trap of hard-sell messaging in the wrong context will get you nowhere.
Hence, you need to make it count with a few emails that trigger conversations and lays the foundation for building customer relationships.
Let’s create a simple welcome email sequence with FluentCRM!
Head over to the FluentCRM dashboard and go to Automations>Create new automation.
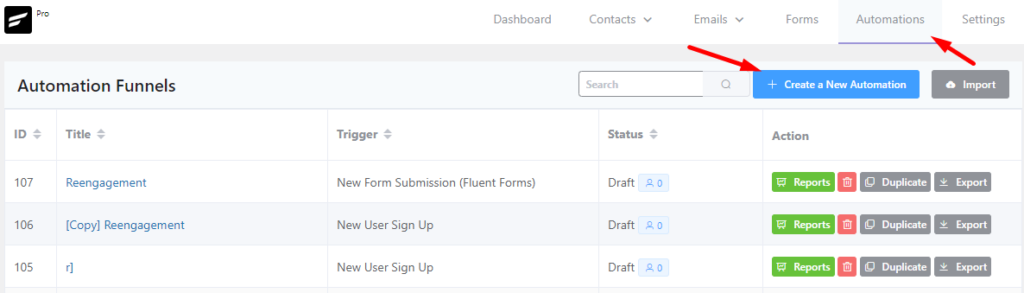
Upon clicking the button, FluentCRM will show you all the available triggers. It offers multiple dedicated WordPress-based triggers as well as plugin-based triggers for WooCommerce, Easy Digital Downloads, and many more.
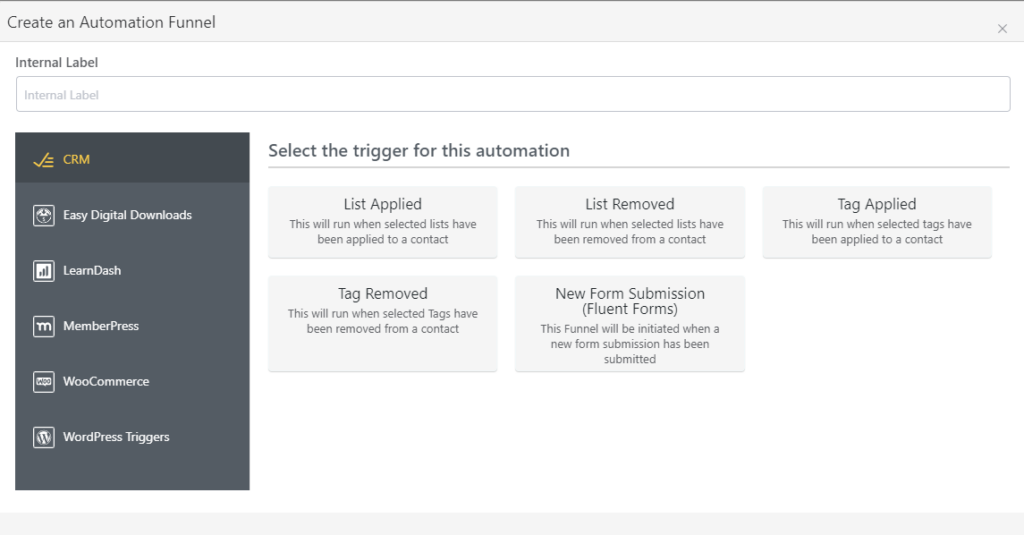
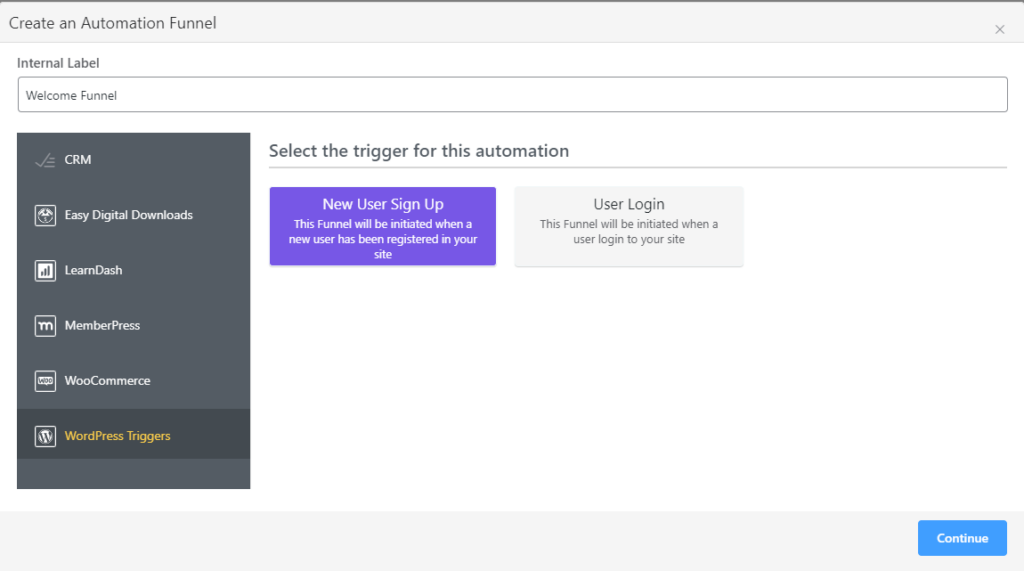
Select the type of trigger you want to use and fill out the details. Since we allow user registrations, we’ll go for the WordPress new user sign-up trigger for now. Hit continue to proceed.
When you hit continue, the funnel page will appear. Here you need to configure the initials such as the subscription status you want to assign, whether you want to update contact information or not, and the user role you want to target.
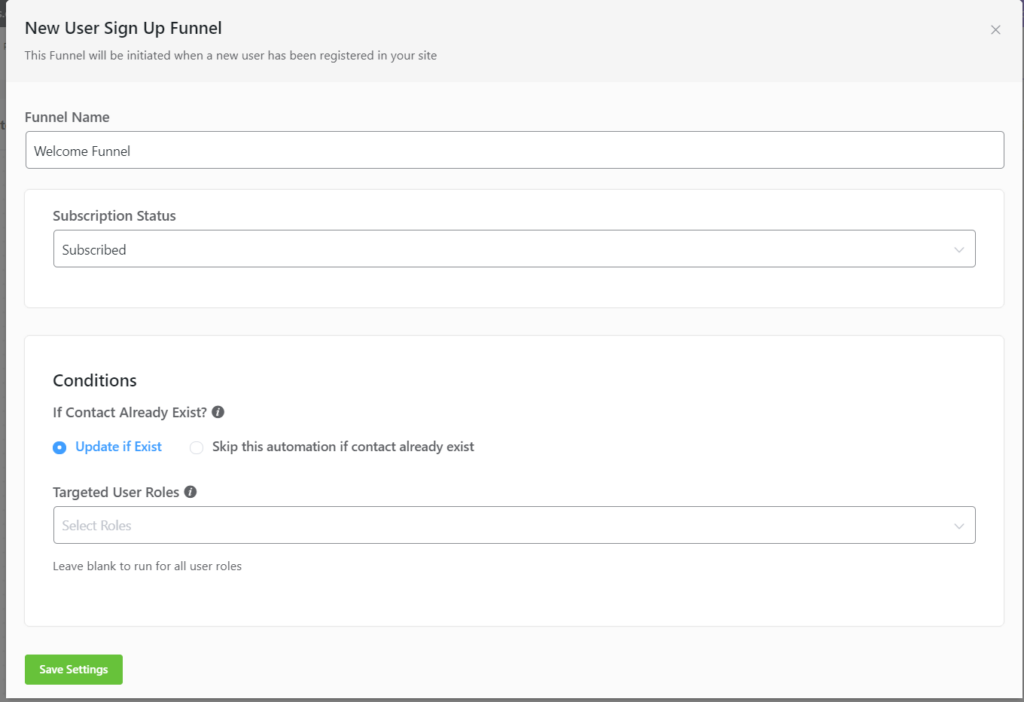
If you want to set up a double opt-in confirmation, you can also set the Subscription Status to Pending. As we don’t need that, we’ll set it to Subscribed. We’ll also leave the Contact Update and Target User Role as they are since we’re not targeting a specific user role and we want updated contact information. Hit Save Settings and the funnel page will appear.
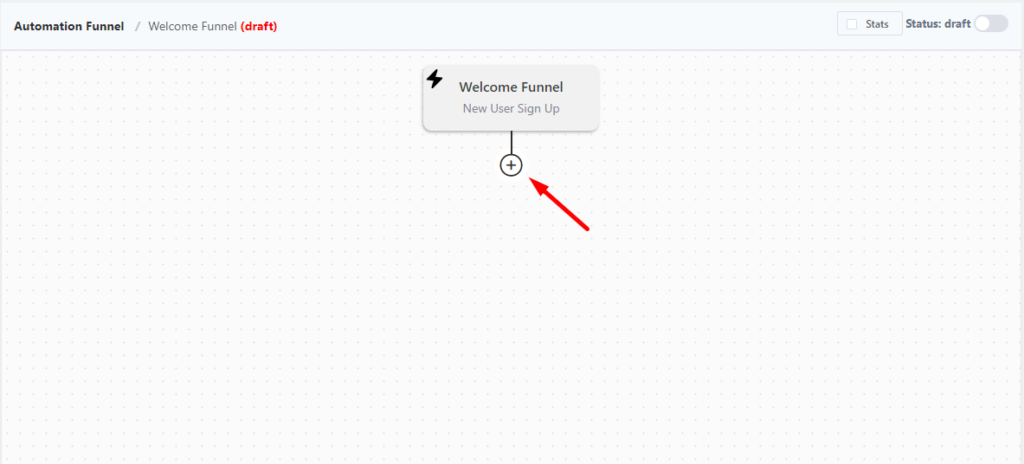
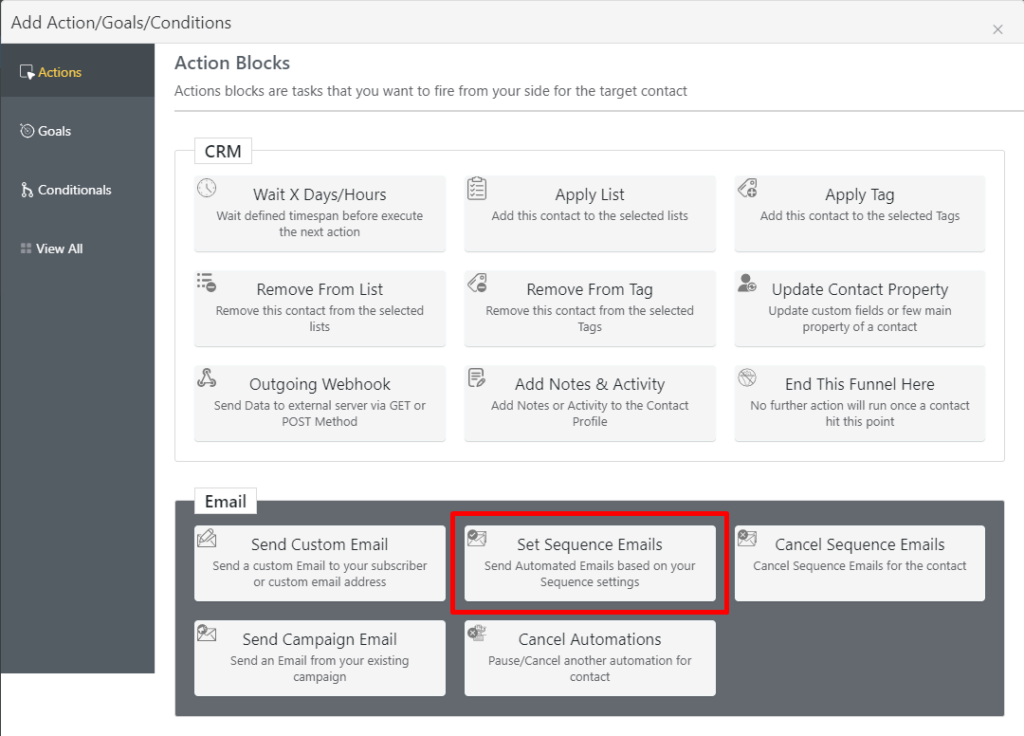
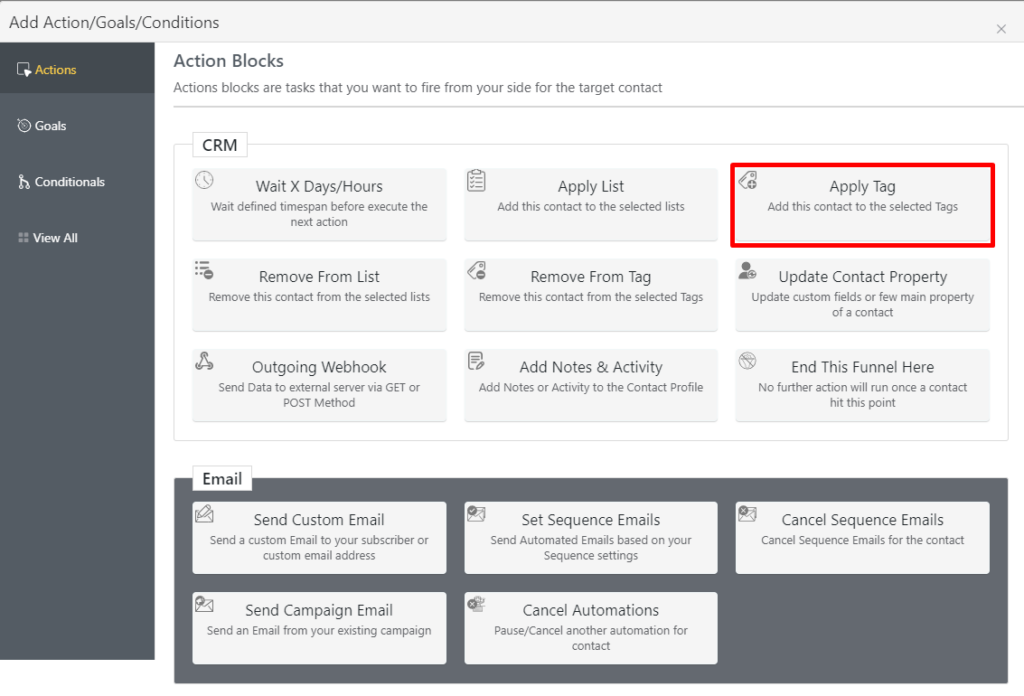
This is where we can add various actions to automate our email marketing tasks by clicking the Plus (+) icon. To add our welcome email sequence, we’ll use a Set Sequence Emails block.
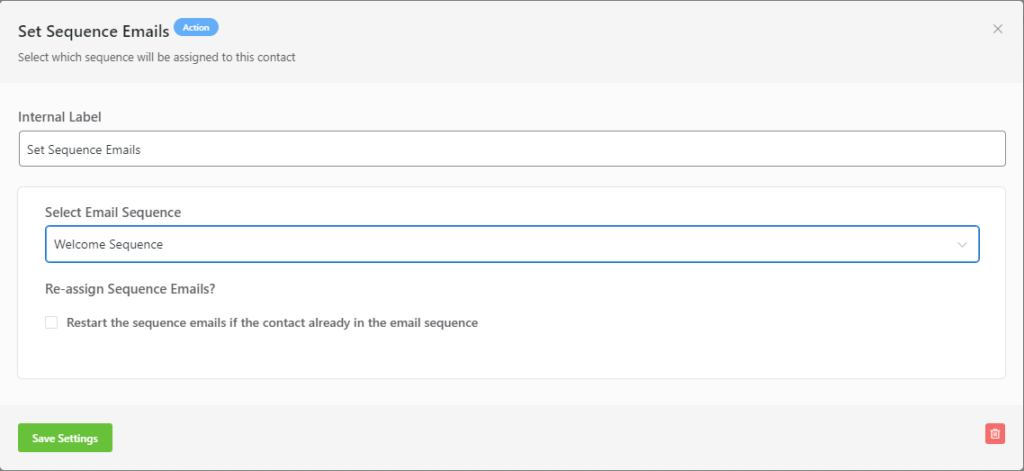
Again, we need to select which email sequence we want to automate, so we’ll go ahead and select that. You can also enable this sequence to restart if the contacts join again, but we’ll skip that for now.
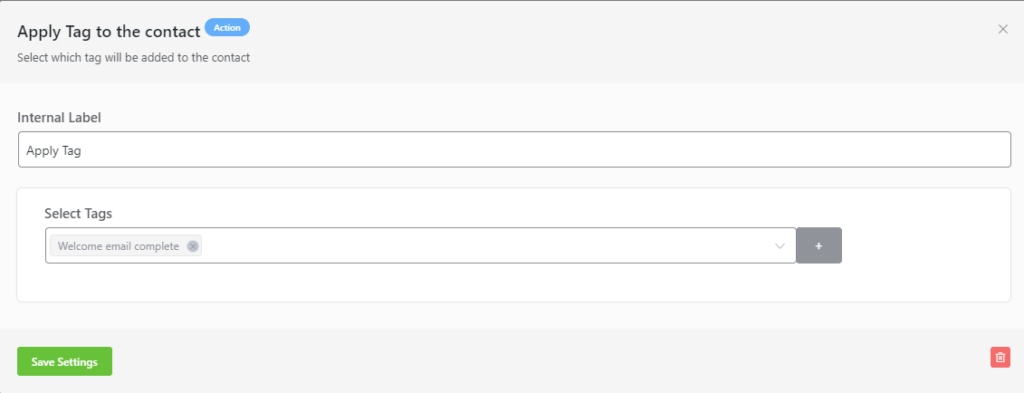
After the sequence ends, we want to add a Tag to identify that the contact has been through the Welcome Sequence. For that, we’ll use an Apply Tag block from the Actions.
Again, we need to select the trigger we want to apply to the contact profiles.
That completes our automation for the Welcome Email Sequence.
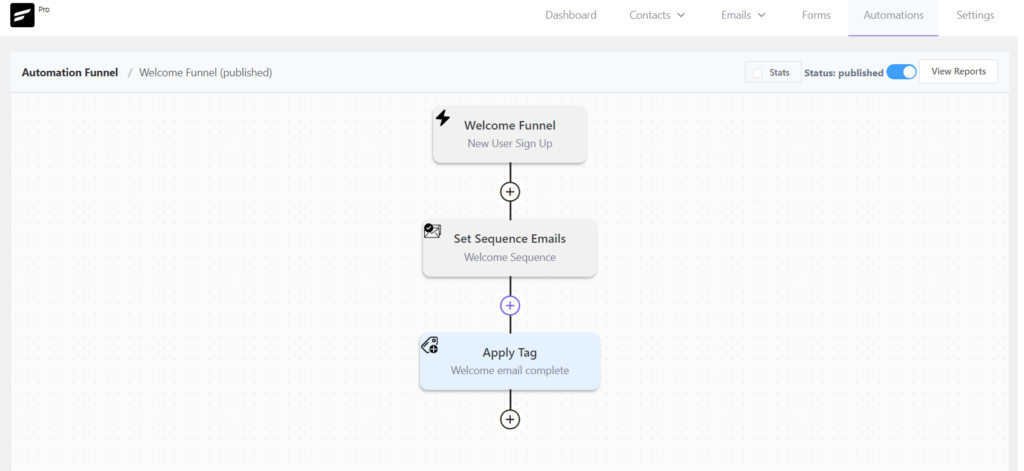
Let’s recap: whenever someone signs up on our website, they are added as a contact. Then, they’ll start receiving our welcome email sequence. And after the sequence ends, we’ll add a tag to identify that the contact has been through the Welcome Sequence. Neat, eh?
2. Onboarding Email Sequence
Onboarding emails are meant to help your customer achieve the ‘aha moment’. It’s essentially where they realize the value of your product/service. This has a great impact on customer retention & higher revenue.
Onboarding emails are needed when your customers are already familiar with your business and need a clear idea of what your business offers for them. Suppose someone purchases a product, you can send them a series of emails to onboard your customer.
For creating an onboarding email sequence, we’ll use a plugin-specific trigger that’s intended for purchase. However, you can choose other triggers depending on which plugin you’re using to sell your product or how you’ve set up your purchase flow.
With that said, let’s begin with WooCommerce New Order Trigger(Processing) to identify our first-time customers.
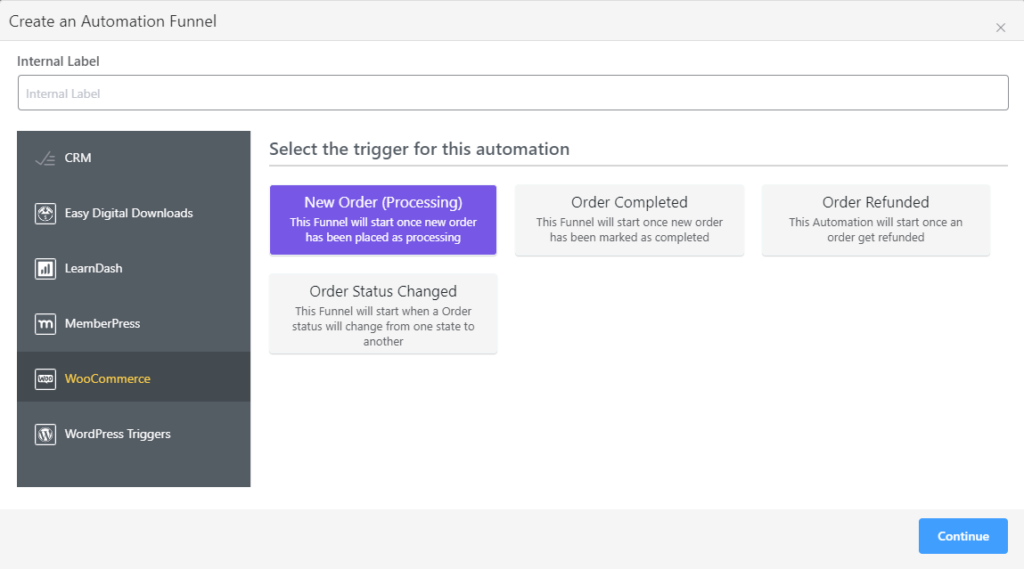
Head over to the automation page on FluentCRM and create a new funnel as said before. But this time select the WooCommerce New Order trigger(Processing).
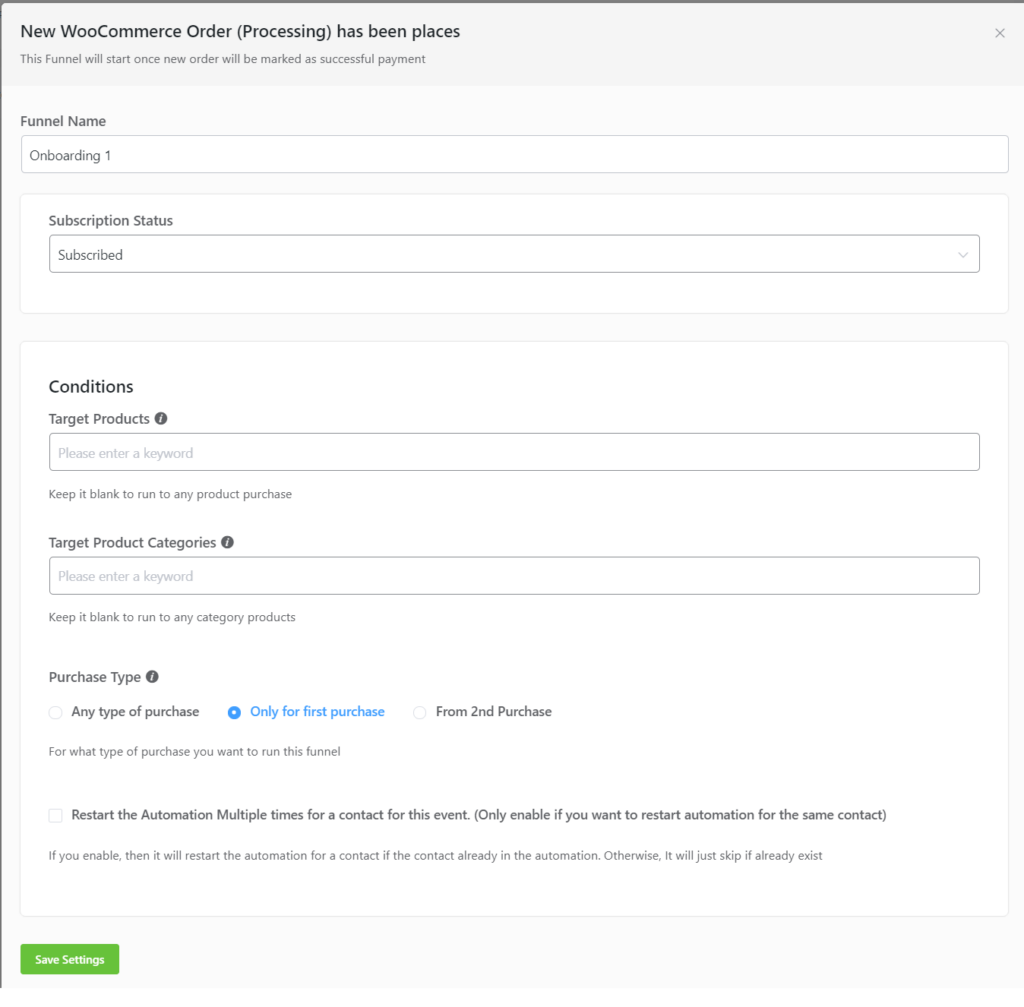
Again, you can specify particular products to target with this funnel. We’ll leave it blank as we want it to work for all products. We also selected the first purchase condition so only first-time buyers get this sequence.
Time for building the funnel, let’s put in the actions. Like before, we’ll add a Set Sequence Emails block and apply a Tag to be able to distinguish the contact.
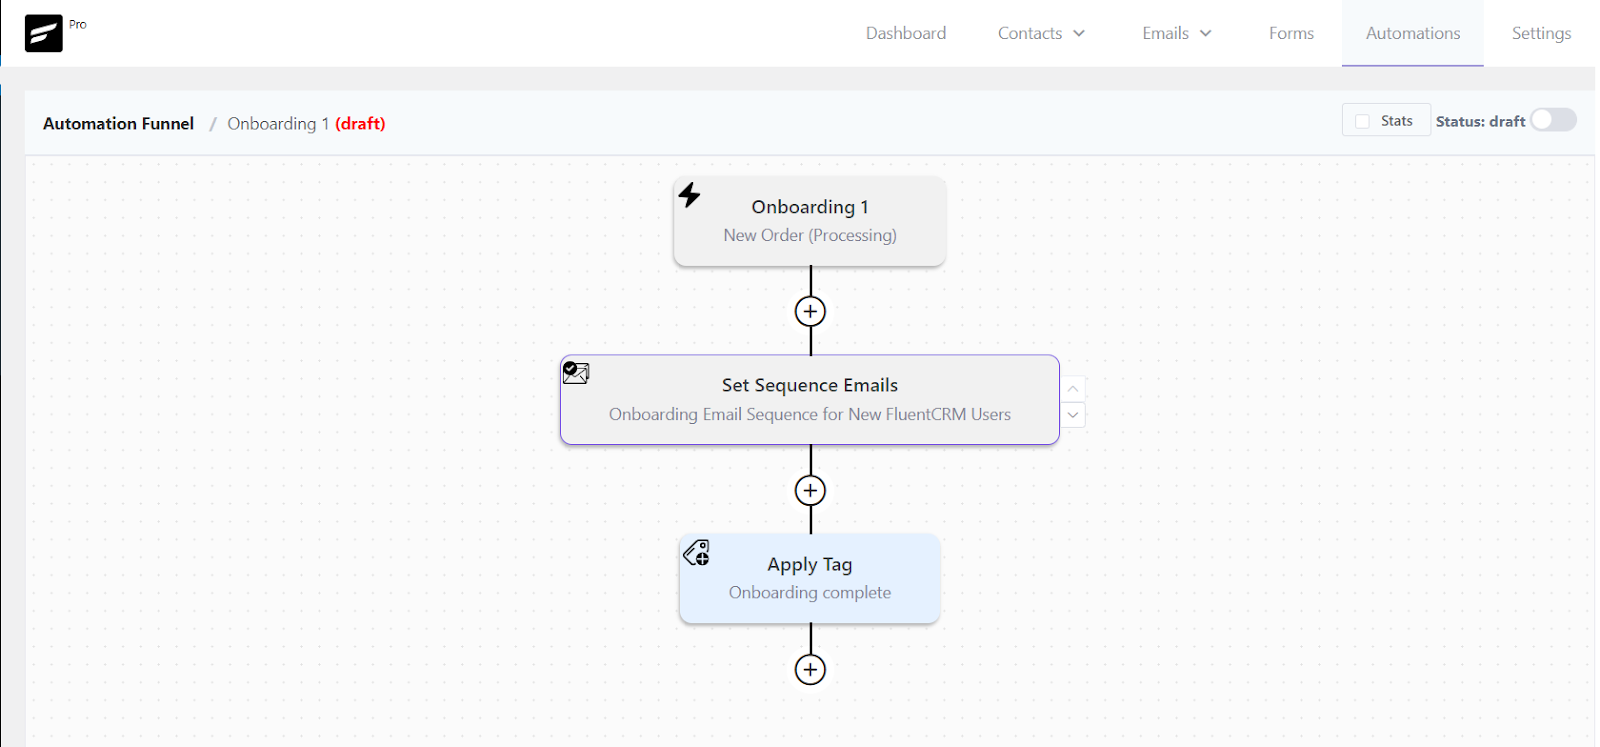
That’s a basic onboarding sequence funnel.
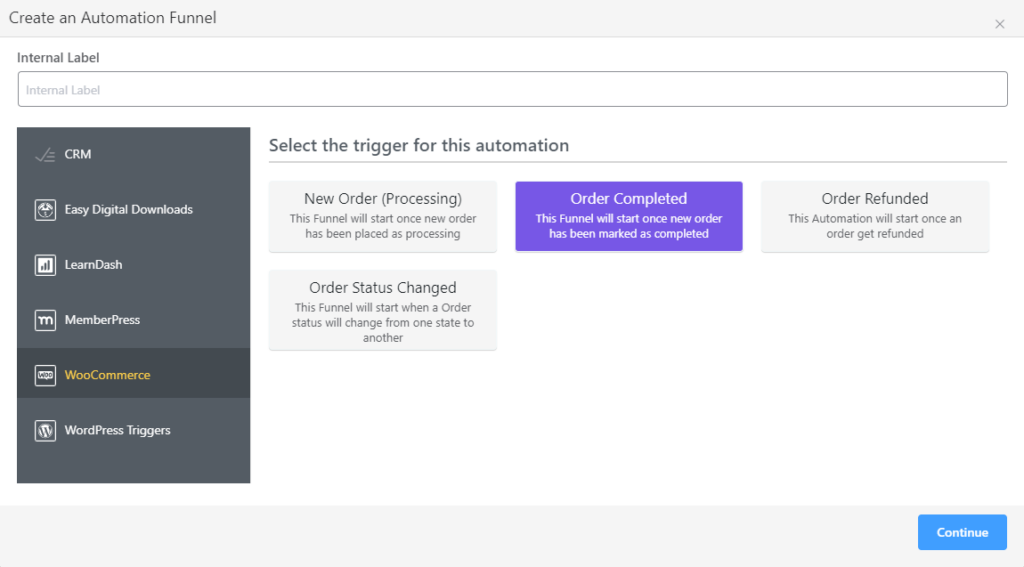
But wait. We’ve got another neat feature that works even better. Let’s say you’d like to have two separate onboarding sequences, one after the order is processed and one after the order is completed – kind of like a post-purchase follow-up.
We can use the WooCommerce order completed trigger. The rest of the automation remains the same!
3. Re-engagement Email Sequence
The aim of re-engagement emails is to get customer’s attention rather than push sales. There is no set rule for when you should send this. You can set your own condition & limit of inactive days of a subscriber before you send this email.
Let’s say new contact signs up on your e-commerce website by submitting a form. We prefer to send them a welcome sequence and give them the opportunity to learn about our business before considering a purchase.
However, there has to be a limit to that right? What happens afterward?
Well after 3 months/90 days since signing up to our site, we want to check if they’ve made a purchase yet. If yes, that’s great! If not, we want to re-engage with them.
Here’s how you can do it with FluentCRM. Create an automation funnel with a Form submission trigger and map it with your website’s email subscription form.
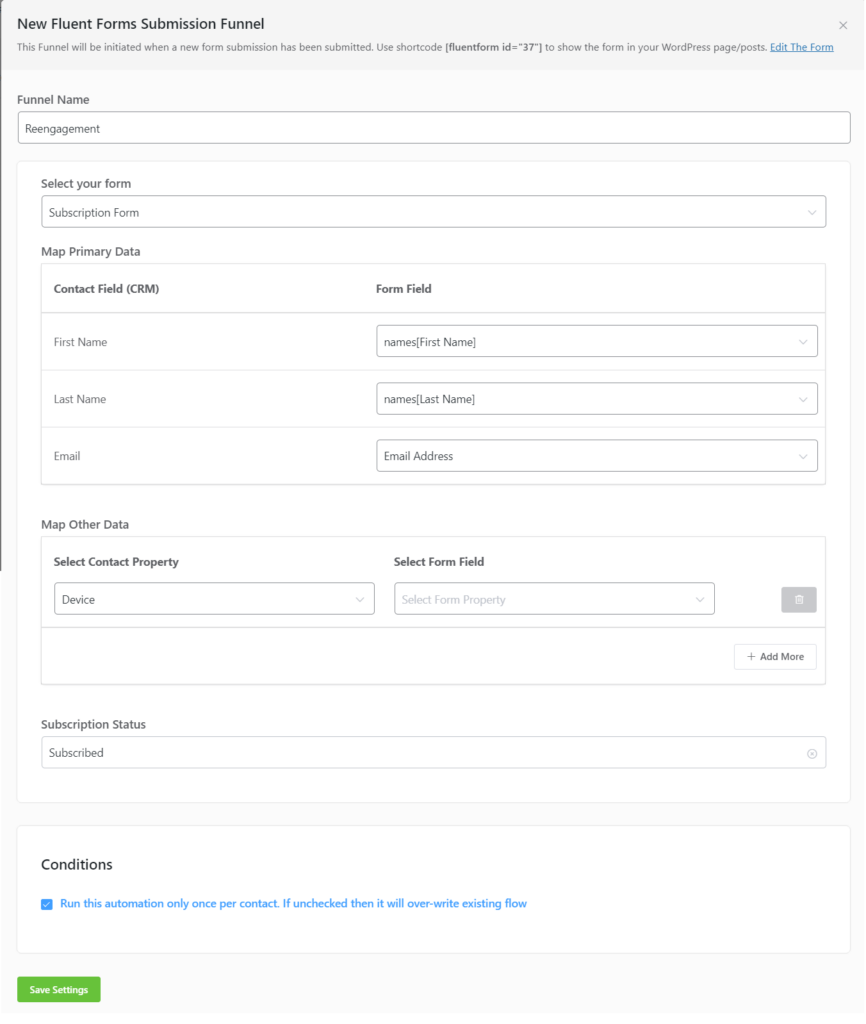
In the funnel, we’ll first send the Welcome sequence. This sequence sends the emails over 4 weeks. Essentially, one email per week with a view to luring people into buying our product.
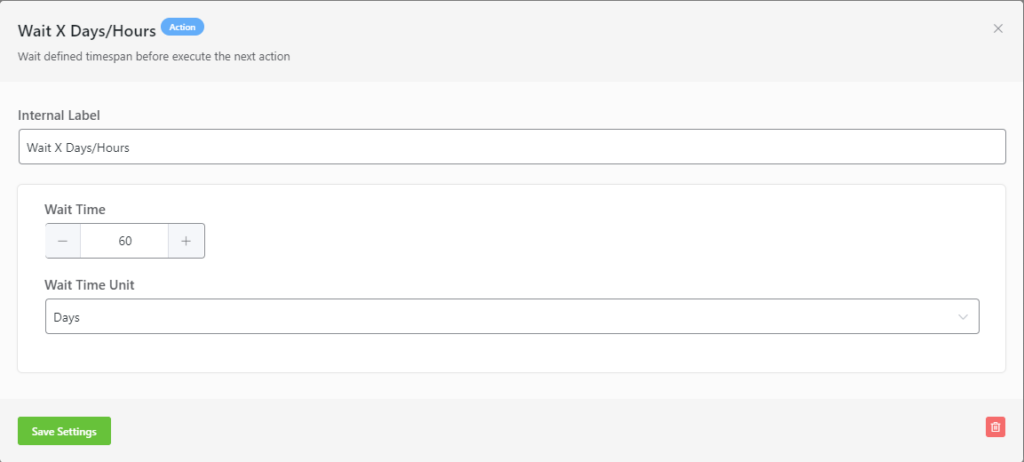
Now we’ll add a Wait X days block so the user has time to make any purchase. We set the waiting period to 60 days.
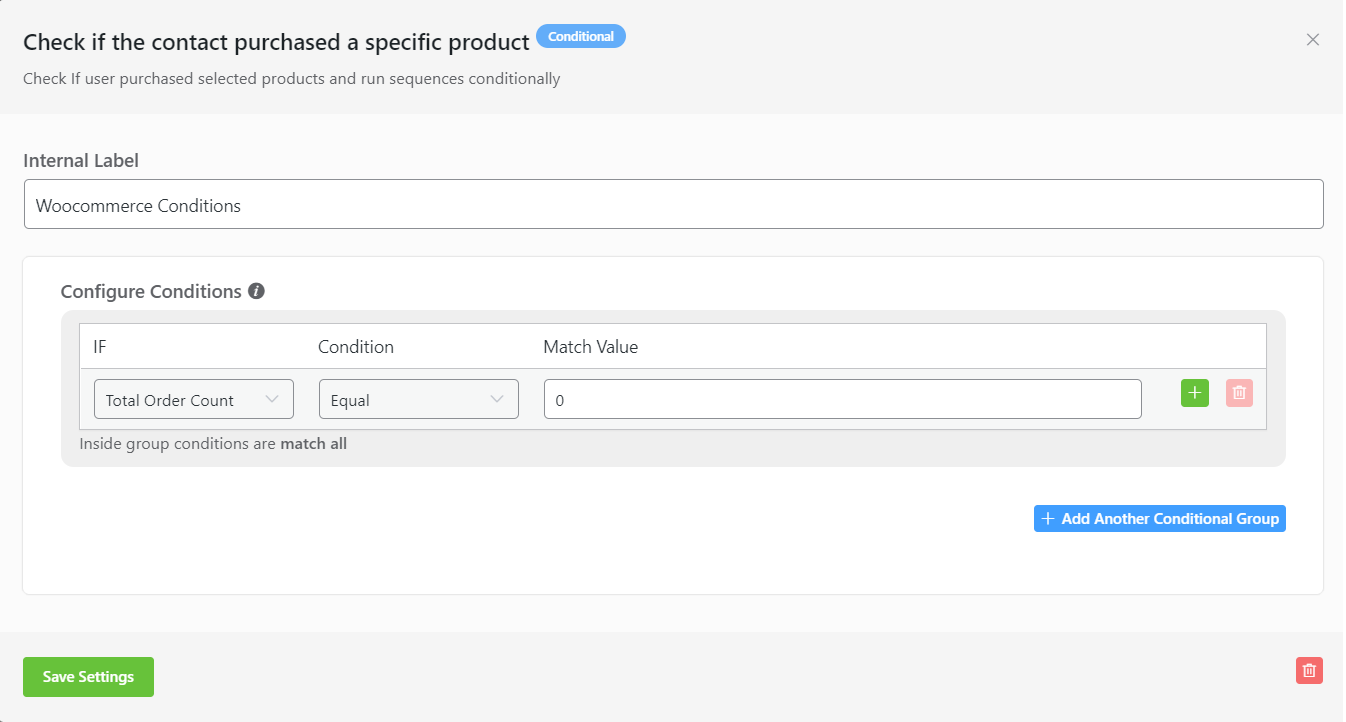
Then we use a WooCommerce conditional block to see if they’ve made any purchase. [In conditions we used Total order count = 0].
Note: Conditional blocks allow you to set different paths for contacts based on whether the condition is matched or not.
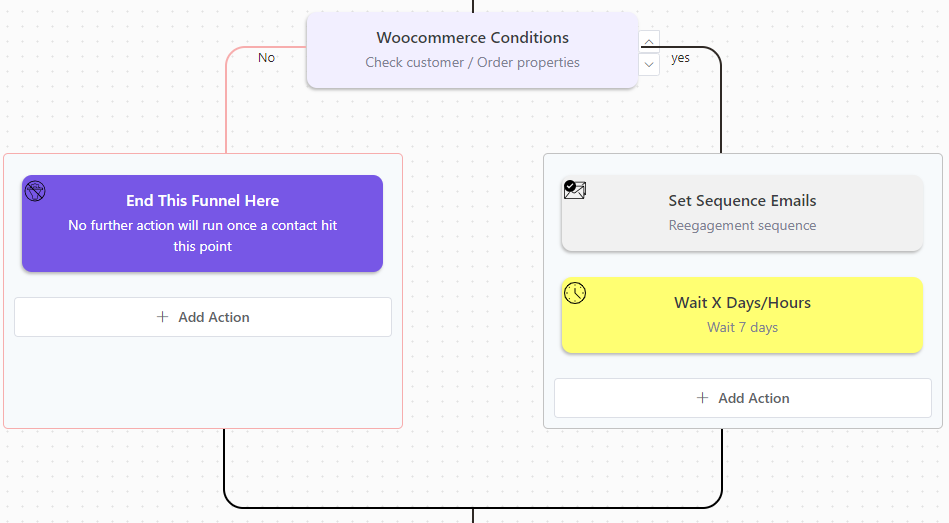
If the conditional returns No, then the contact has made a purchase and the funnel will be canceled. If it’s Yes, the funnel will proceed to send the re-engagement sequence as we weren’t able to persuade them into buying any product. We’ll also add another delay to ensure our contacts had time to check the emails.
Now we need another condition to check if they’ve interacted with any of the re-engagement sequence emails. If they did, we want to stop sending any more re-engagement emails.
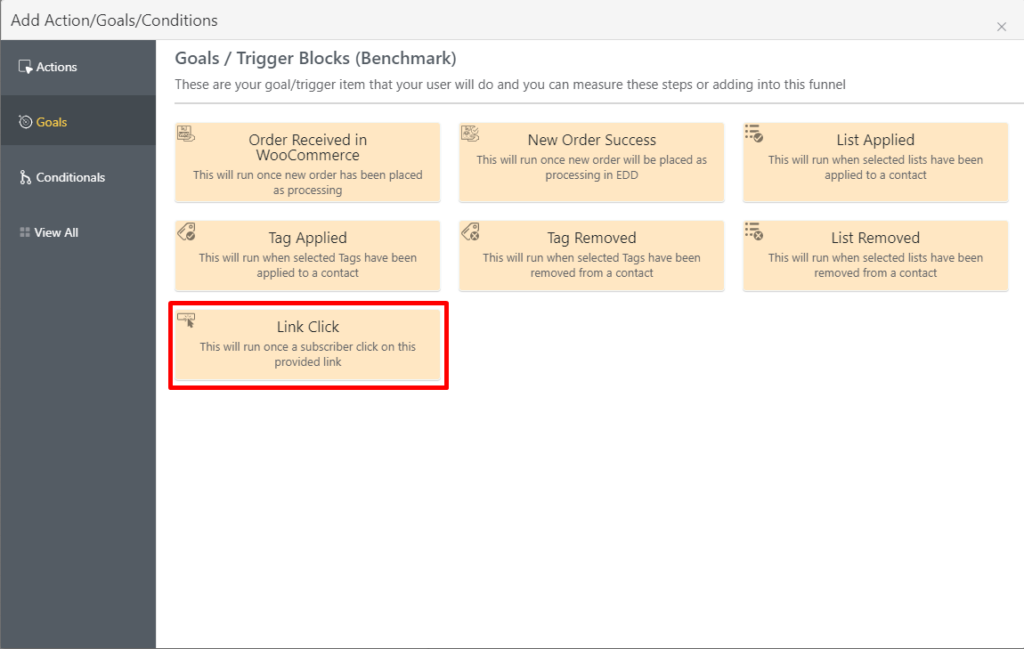
Let’s say our emails include a link. And as soon as a contact clicks the link, we want to cancel the re-engagement emails. In FluentCRM, this kind of condition is called Goals/Benchmarks. And to achieve our automation, we’ll use a Link Click goal.
For first-timers, using FluentCRM’s Link Click goal can be a bit tricky. Your original link is marked in green. This is where you need to paste your link. FluentCRM gives you a special link to track link clicks as goals in the Copy This Link field. So, to track link clicks, click Save Settings and copy-paste the given link within your emails.
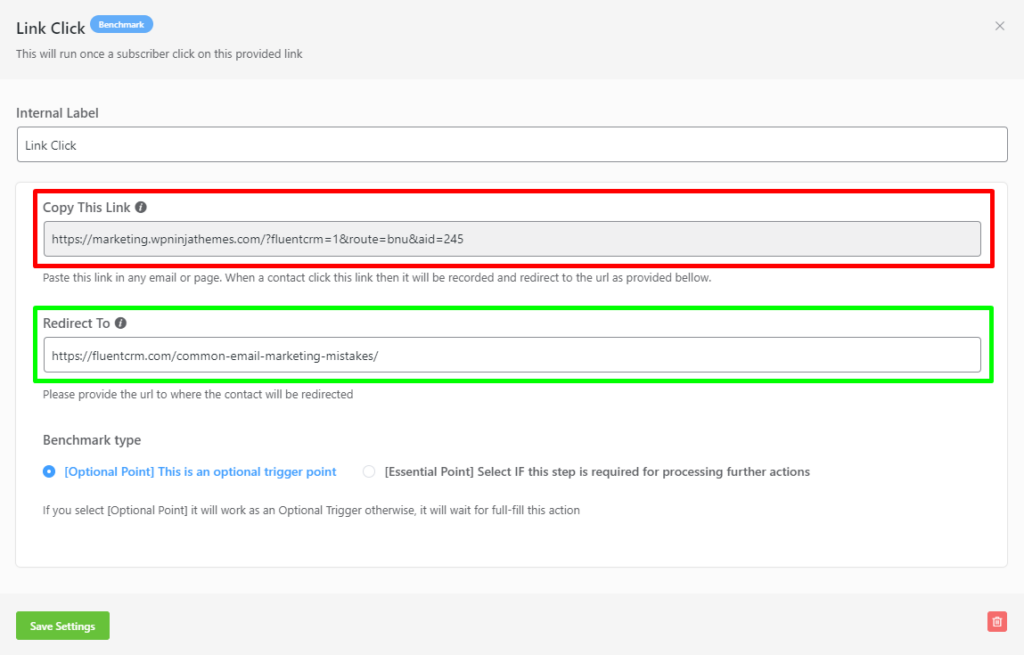
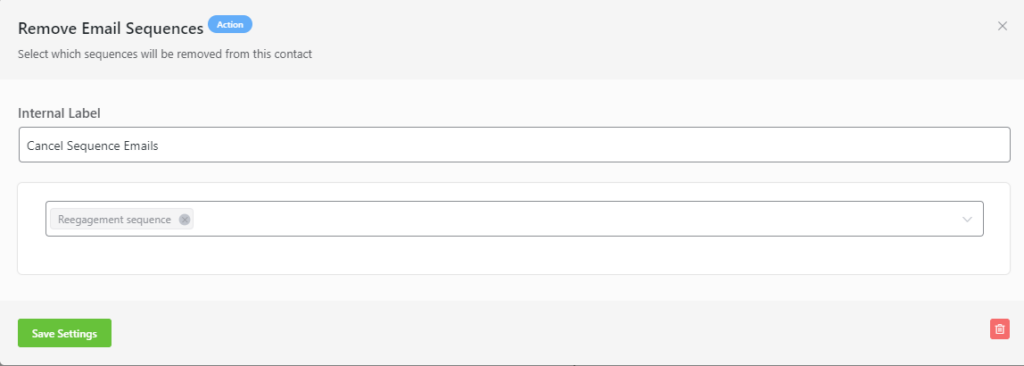
After you’ve set the goal to track, you can use a Cancel Sequence Emails block to cancel re-engagement emails once your goal has been met. This is as simple as adding a block and selecting your email sequence.
And that’s our re-engagement email sequence ready to win back potential customers!
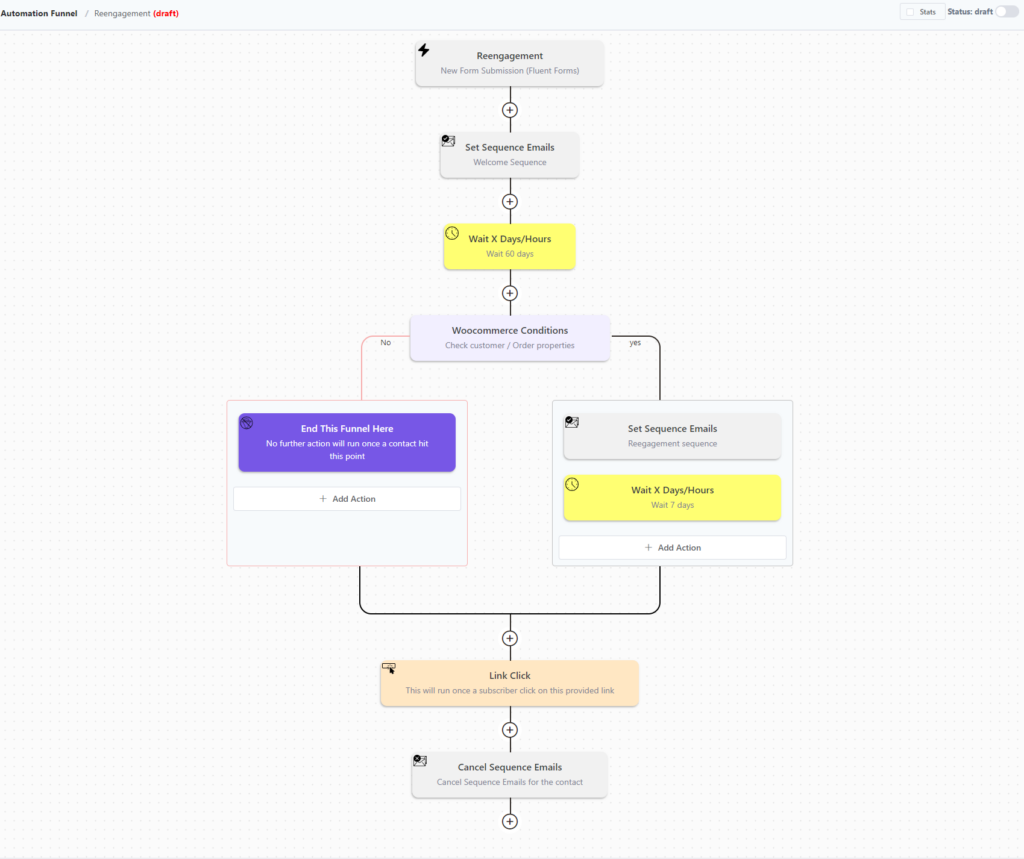
So here’s a recap: After identifying our subscribers with the form subscription trigger and sending out a welcome sequence that tries to persuade them into buying, we’re sending them an email sequence after 60 days so that they stay with us. And if they demonstrate engagement in any emails, we simply cancel the sequence as that’s not required.
4. Renewal sequence
Sending a renewal sequence is important for absolutely every subscription-based business. Since it is essential, we think there should be an easy way to do it. A slight nudge a couple of days before the subscription ends is a far more pleasant approach instead of sending a blunt service discontinued email on the day it ends.
You can use FluentCRM’s membership plugin-based triggers or work your way around with tags to do this. Whatever the way you define the trigger, remember that your goal is to reach out a few days before your contact’s subscription ends.
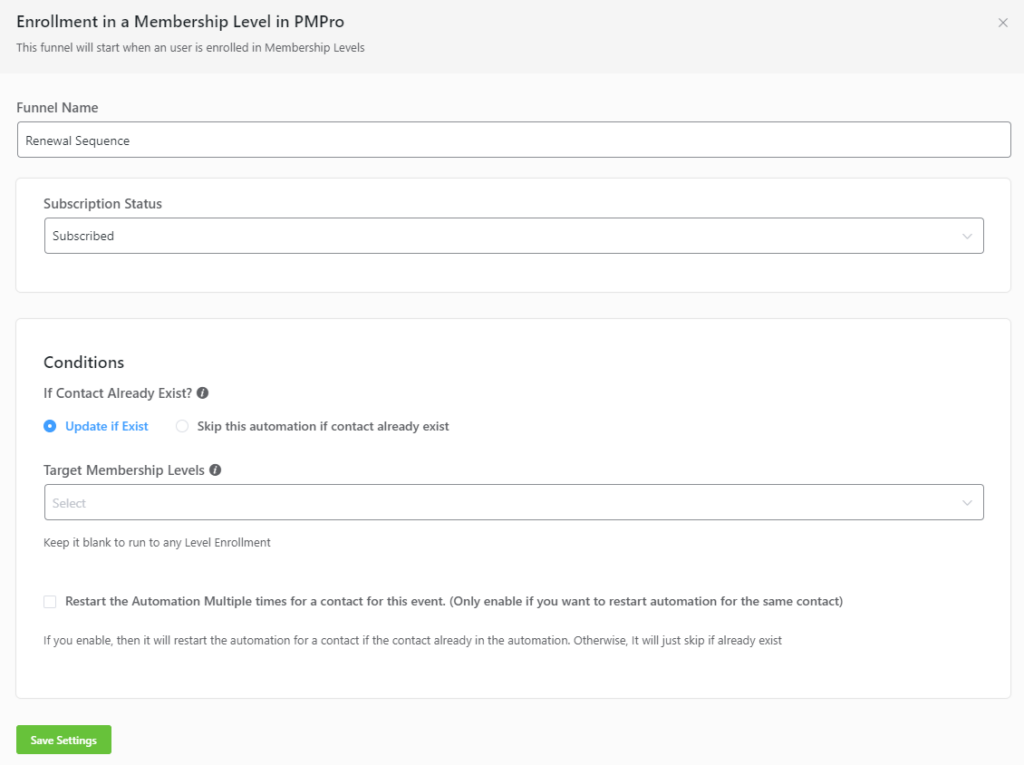
To keep it simple. we’ll select Member Level Assignment of a user trigger that comes via Paid Memberships Pro Integration.
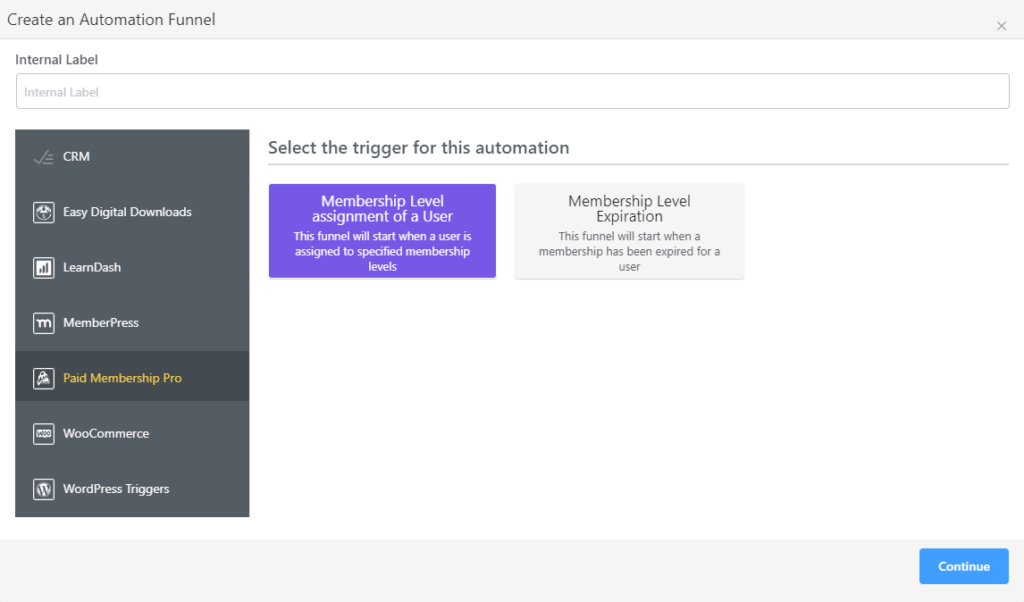
As before, we can target a membership level, or keep it blank.
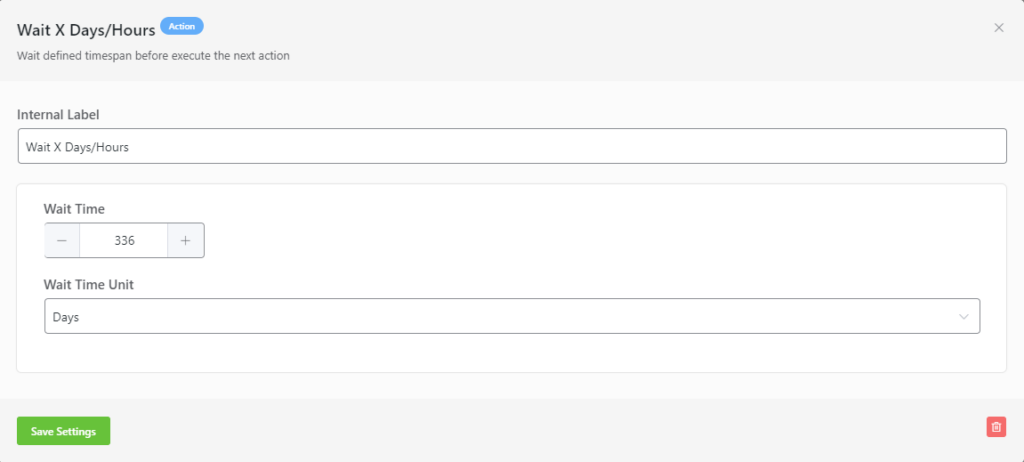
Next, we’ll add a delay. Let’s say our user’s subscription is for one year, we can start our sequence four weeks before the subscription ends. So the delay need’s to be set to 48 weeks*7 days = 336 days.
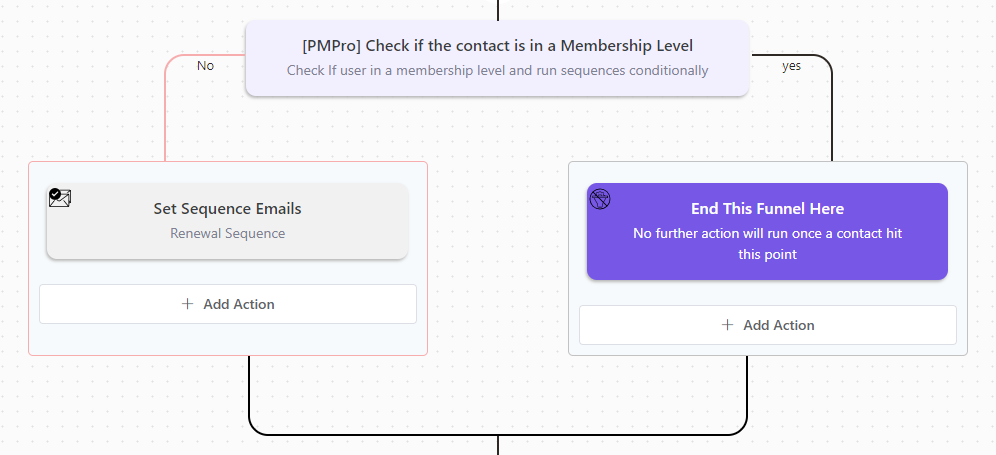
Time to add our sequence. But before we do that, let’s check whether our contact has renewed in the meantime or not. If they did, the automation ends there. And if they didn’t, our renewal sequence starts!
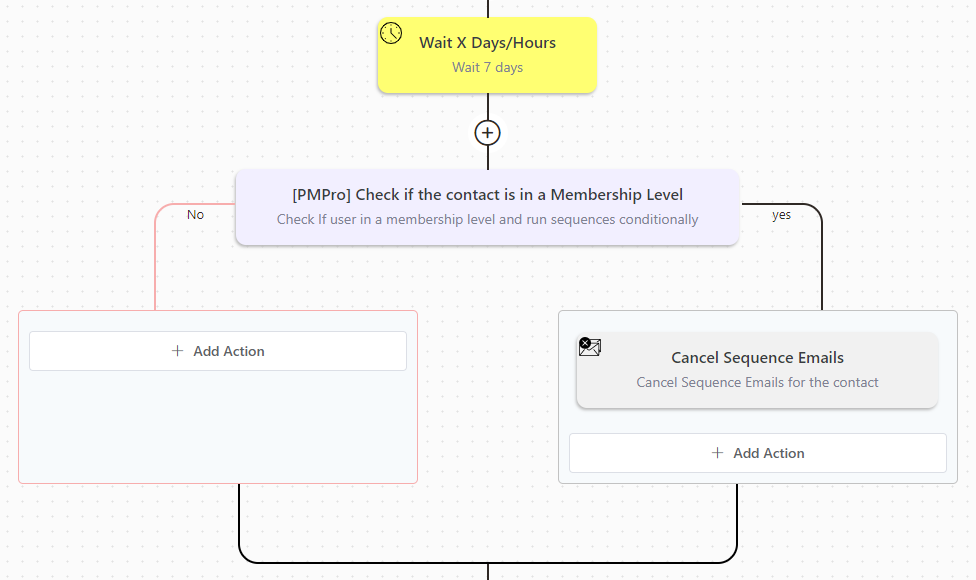
Like our earlier example, this sequence also needs to stop when a member renews his subscription. So let’s add a delay after our first email and check the contact’s subscription again. If they renew their subscription, the sequence gets canceled immediately.
As the renewal sequence is somewhat complicated, we’ve prepared this sequence with only two emails. But if you have more emails, you have to add this loop after every email goes out. And you’ll get your desired automation funnel!
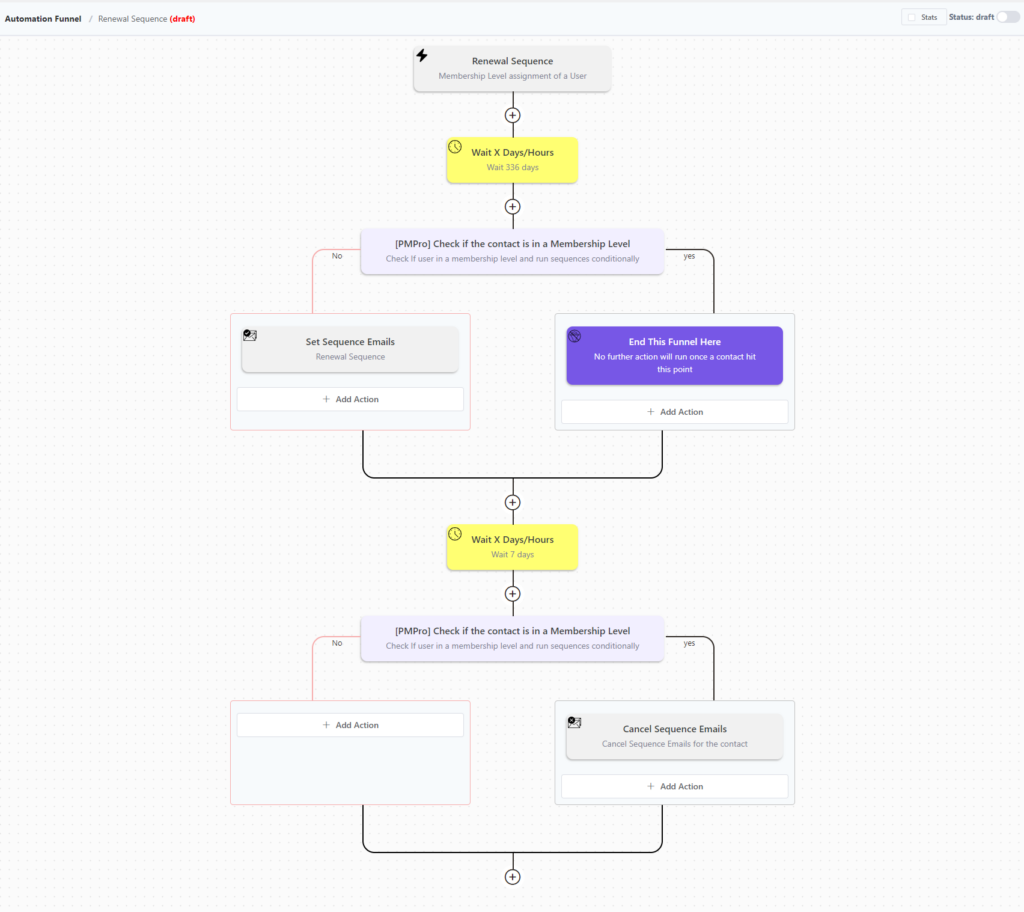
Now that our automation funnel is ready, let’s recap again: First, we’ve singled out our membership holders by their membership level and waited 48 weeks before checking whether our members have renewed in the meantime or not. If they didn’t, a two email renewal sequence starts. To ensure we’re not sending emails to those who renewed after receiving our first email, we’ve set a sequence cancellation in between our emails. And that finalizes our easy, functional renewal sequence automation!
Wrapping up
Every business needs to maintain a healthy relationship with its subscribers, leads, and customers. While these email sequences may be simple, they feel personal and timely – keeping your business on top of mind!
We hope you liked the email sequence examples and tutorials. If you aren’t using them yet, they are free to download! So download them right now and customize them in any way you like. Set your email marketing game on autopilot and watch them do the magic!
If you have any questions, feel free to ask in the comments section. Also, don’t forget to subscribe to our blog and follow us on Twitter!
Rasel Siddiqe
I write for WPManageNinja by day and code for Data analytics by night. Other than that, I’m mostly interested in sci-fi content and deep-founded music!
Table of Content
Related Articles and Topics
-
How to Send Automated Payment Reminder Using FluentCRM
Late payments are rarely dramatic. People forget, get busy, miss a date, or mean to…
-
20 Monthly Newsletter Ideas for When You’re Out of Ideas [+ Real-life Examples]
Even the best ideas fail if your newsletter never lands. Many marketers freeze at a…
Comments
-
What should the link click goal be to set or configured if I wanted the click to be used to unsubscribe from an email sequence?
-
Hi Antonio, you can copy the link and configure it just as you’d configure any other links however, once unsubscribed, your contact won’t receive any further emails.
-
-
When I import the samples to FluentCRM, it gets this error:
The provided JSON file is not valid. sequence key is required in the JSON File -
Thank you very much for these examples of uses of automation and sequences.

Leave a Reply