
Easily Add Comment Subscription Form to WordPress and Start Email Marketing


Building your email list is daunting nowadays. With almost every website asking people to sign up and bombarding people’s inboxes with irrelevant emails, people are afraid to leave their email addresses somewhere they don’t trust. Email may be the best channel to sell stuff and build relationships; however, there’s no email marketing without a good number of subscribers on your email list
Generally, most people add an email subscription form throughout their website and wait for people to sign up. But that’s just one way of building your email list. With the increasing competition over people’s inboxes, coming up with innovative strategies is more important than ever. And if you haven’t given any thought to it, the WordPress comment subscription form can be a great source of leads!
Think about this, people are afraid to leave their email somewhere they don’t trust. But when they comment, they are absolutely sure about engaging with that business. Plus, they don’t hesitate to share personal information like their name and email address as they comment on your blog. And that leaves you with an easy opportunity to connect with them via email and further enhance your relationships.
Sounds great?
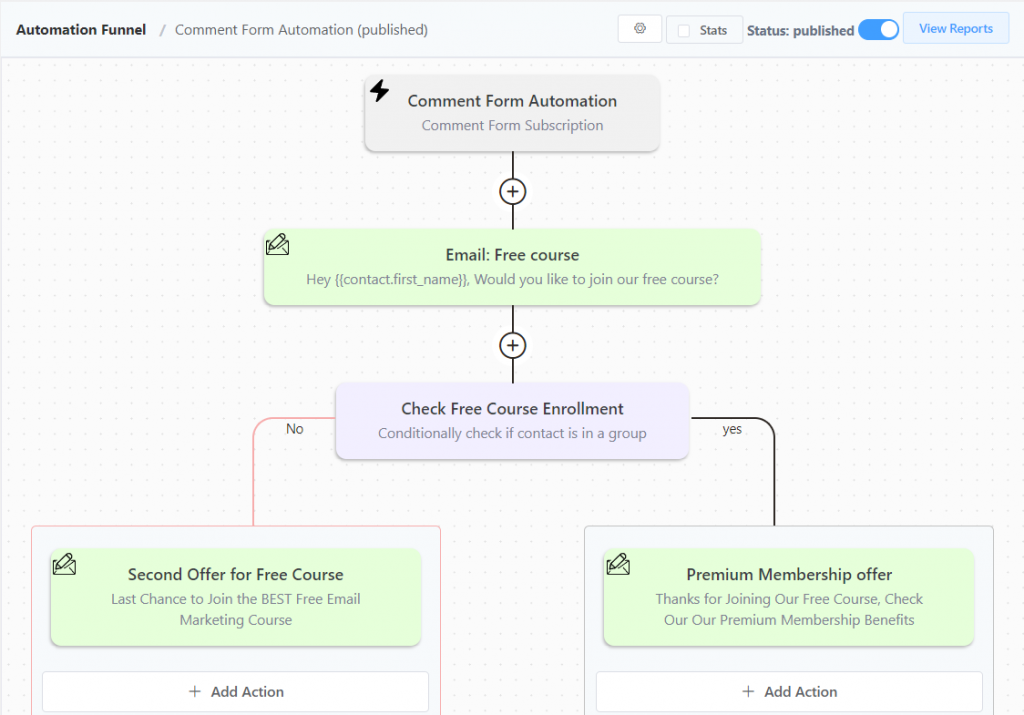
Not only can you easily do this easily with FluentCRM, but also create an email nurture sequence to connect with your email subscribers in a meaningful way.
So let’s get to how you can turn your basic comment form into a comment subscription form and start collecting more leads!
Ready?
Let’s begin!
Why Should You Add Comment Subscription Form to WordPress?
Building an email list is the key to growing your business. That’s why entrepreneurs and marketers spend a massive amount of time figuring out new ways of generating email leads.
Since content is a great source of leads, bloggers and marketers heavily focus on generating leads through content marketing. This is usually done by asking people to sign up using email subscription forms. They can appear on the noticeable parts of a website to boost email signups
WordPress comment forms, on the other hand, are usually added to the bottom of every post. Although some people disable comments, some use comment forms to collect valuable opinions from their readers.
If your blog is getting a good number of comments, it’s a good idea to ask people to sign up for your email list. That way, you’ll find some great leads that want to hear from you.
This can be done easily with a comment subscription form. Comment subscription forms allow you to collect leads and send data to your email marketing platform easily. They simply add a checkbox to the comment option asking people to sign up to your mailing list.
So let’s find out how you can turn your blog commenters into email subscribers with a comment subscription form.
What You Need to Add a Comment Form on WordPress?
The WordPress comment form is pretty basic. It only includes basic fields like email, website URL, and a plain text field for the comment. On the other hand, sending emails to people without their consent can be subject to a CAN-SPAM Act violation. Hence, you need two things before adding email subscriptions to WordPress comments:
- A plugin to replace the default comment form with a comment subscription form. Ideally, you want this to integrate with your email marketing platform.
- A comment policy to comply with the CAN-SPAM Act regulations.
Comment Subscription Form Plugin – FluentCRM
Generally, a subscribe to comments plugin refers to something that informs commenters whenever a new comment is added to a specific post. But in this particular case, we’ll need a comment marketing
FluentCRM. It’s a free plugin that allows you to start email marketing within your WordPress dashboard. It offers several ways to build your email list and more, you can send email campaigns, create email sequences, and set up automated marketing funnels. But for the purpose of this article, we’ll stick to adding an email subscription checkbox to the comment section of your blog posts and sending email campaigns to your email subscribers.

Comment Policy (Optional)
A comment policy outlines rules for user behavior in your comment section, ensuring a respectful community. Since subscriber details are collected through comments, it’s important to clarify that their information will be used for updates and newsletters, promoting transparency and compliance. It’s also a good idea to link the comment policy under your comment section so that the user can read it before they comment on your blog.
The comment policy is optional because most people will join your subscriber list by enabling the email subscription checkbox as they submit your comment subscription form. However, it’s still recommended to have a comment policy in order to gain the trust of your readers.
How to Add Comment Subscription Form to WordPress
With FluentCRM and a comment policy in place, you’re good to start collecting email subscribers from your blog posts. So, you can now get into adding the first piece of the comment marketing puzzle to your website —the comment subscription checkbox.
Let’s begin!
Install FluentCRM
First, you need to install FluentCRM. Installing the plugin is just as easy as installing any other WordPress plugin.
- Go to Plugins>Add New
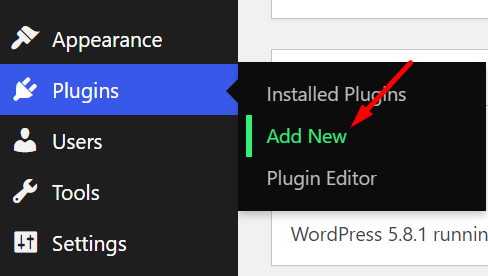
- Search for FluentCRM and click Install Now.
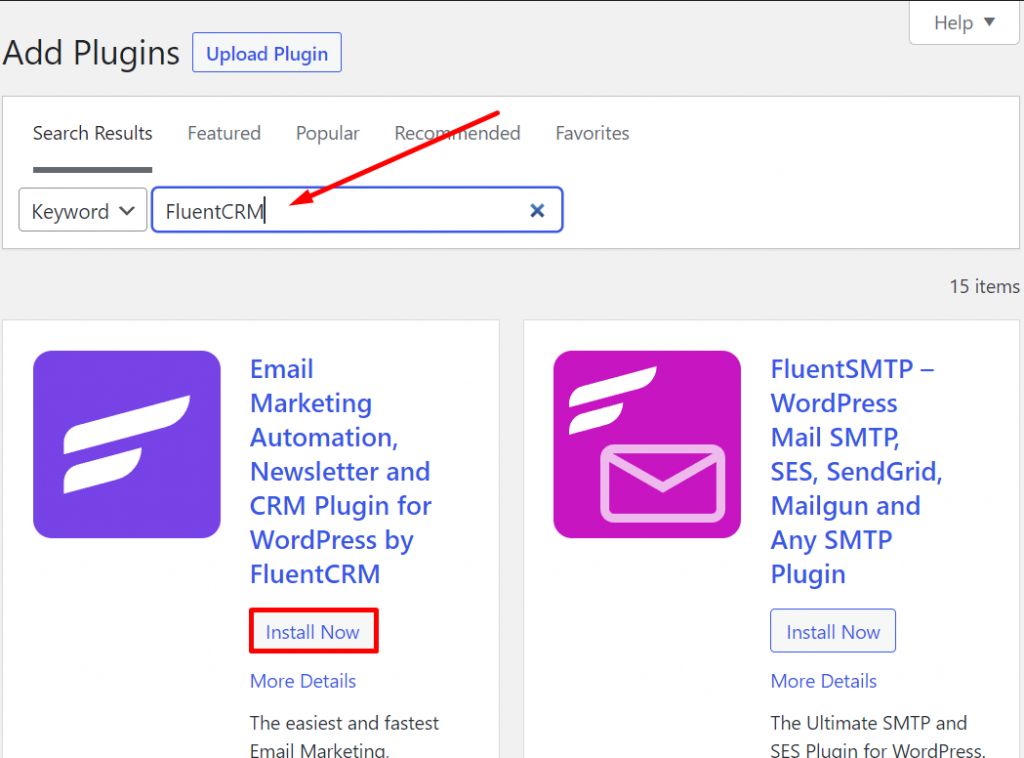
- Once installed, click Activate.
Complete FluentCRM Setup
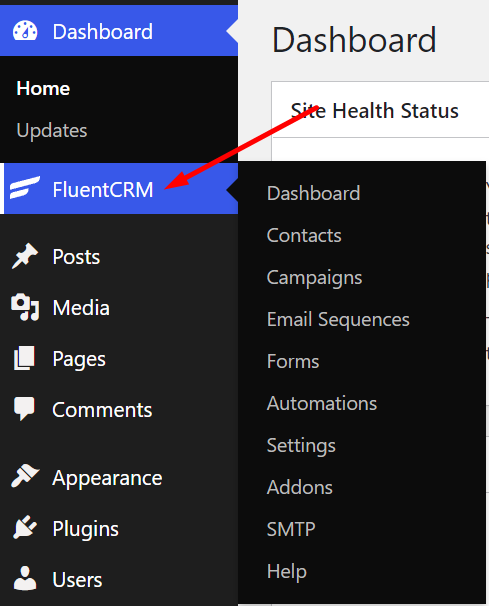
Once installed and activated, FluentCRM can be located from the right sidebar of your WordPress dashboard.
- Click the FluentCRM logo to start the setup wizard.
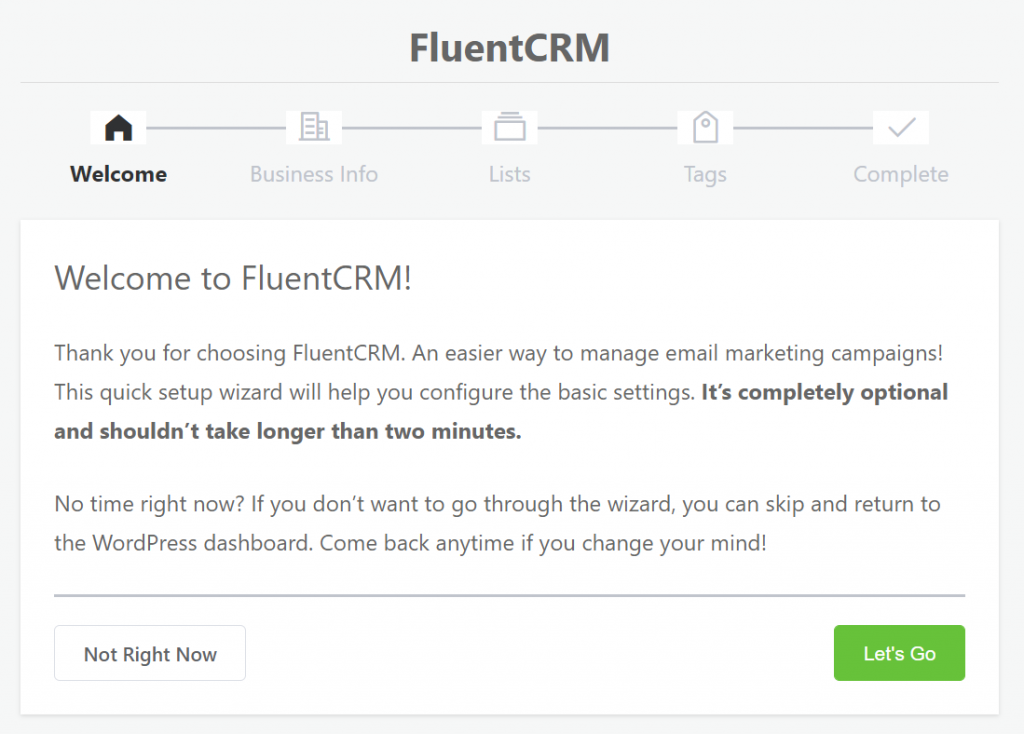
- When you click on the plugin, a setup wizard will open. Click the big green button to get started.
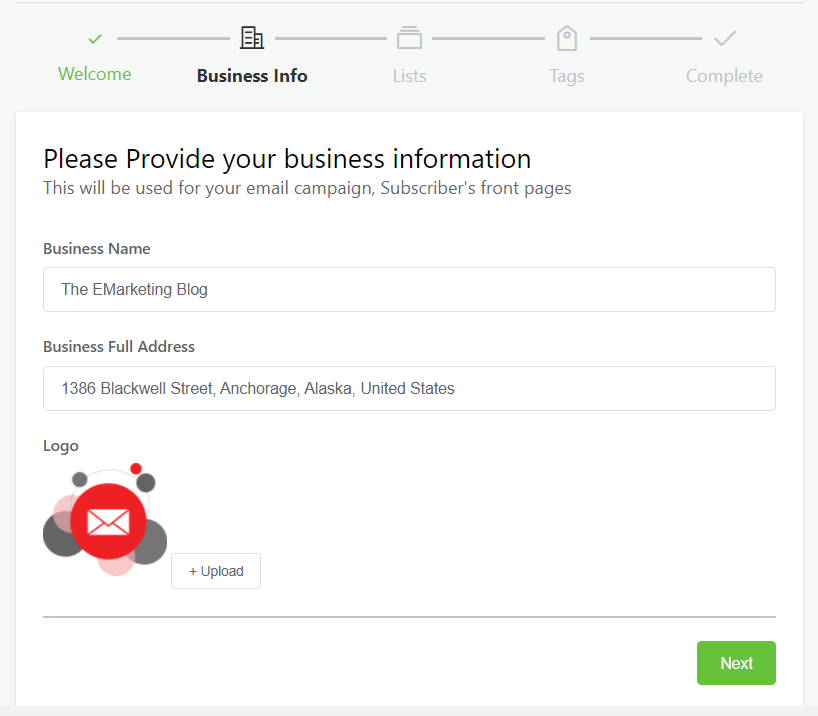
- In the next window, you need to insert your business info. Simply put your business name, address, and image for footer branding.
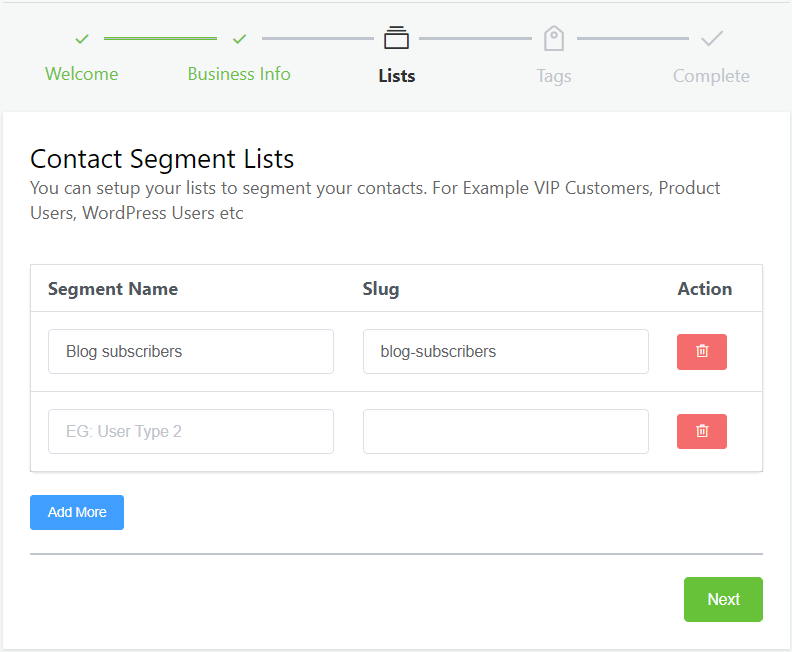
- Create a List to segment your subscribers. This will help you quickly filter and sort contacts to send email campaigns later.
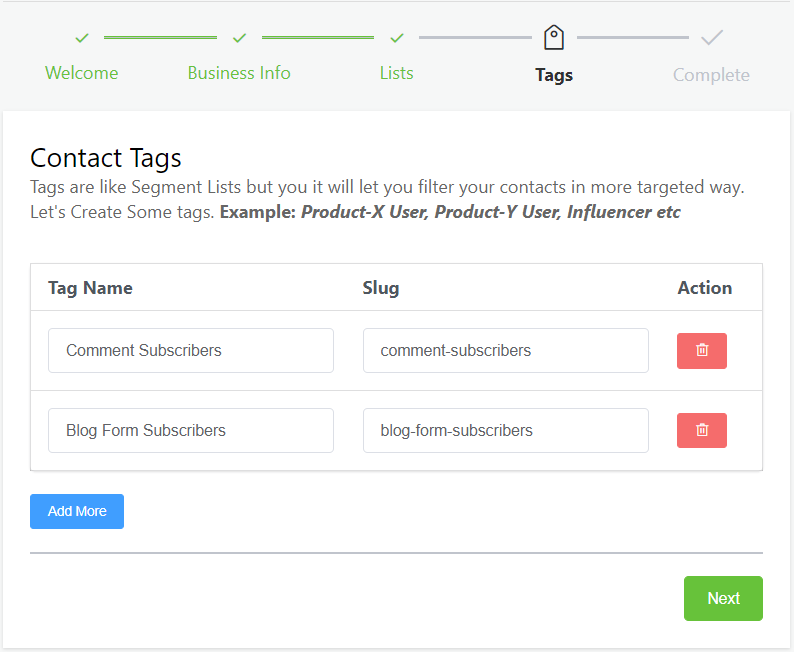
- Create a Tag to filter out your comment subscribers easily.
- In the next window, you’ll be asked to install Fluent Forms and complete the setup. Fluent Forms allow you to create contact forms to collect leads. So you might want to keep that option ticked to install and activate Fluent Forms automatically.
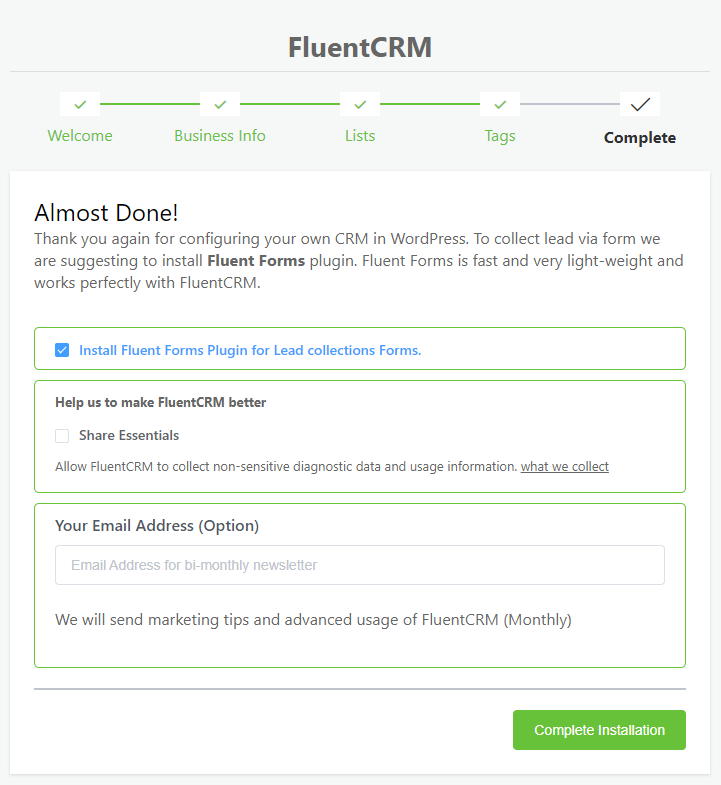
There is also an option to share anonymous data and your email address. But they are entirely optional.
Upon clicking the Complete Installation button to finalize the setup, FluentCRM will show you a congratulatory message from where you can import contacts or access the FluentCRM dashboard directly.
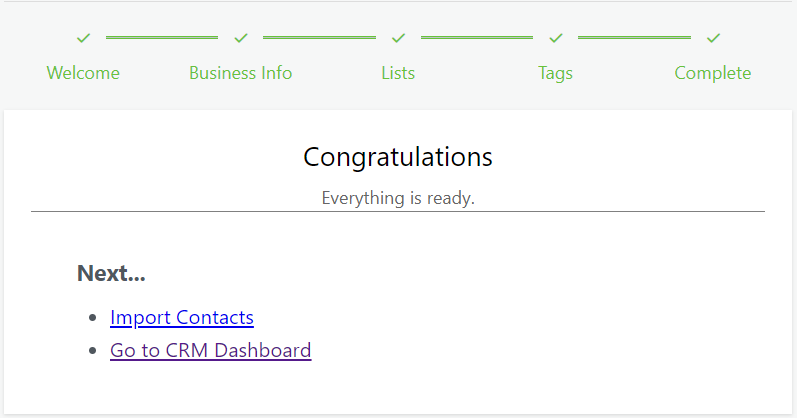
Once you’ve finished setting up FluentCRM, you are ready to import your contacts and start email marketing.
Make sure that you’re using a good email service for better email deliverability. FluentCRM depends on your WordPress site’s emailing functionality to send emails. Since that’s not too reliable, it’s a good idea to set up a good email service like Amazon SES for sending your emails reliably.
Enable Email Subscription to the WordPress Comments Form
Now that you’ve set up FluentCRM, you’re ready to collect email subscribers through a comment subscription form. To enable email subscription on WordPress comments:
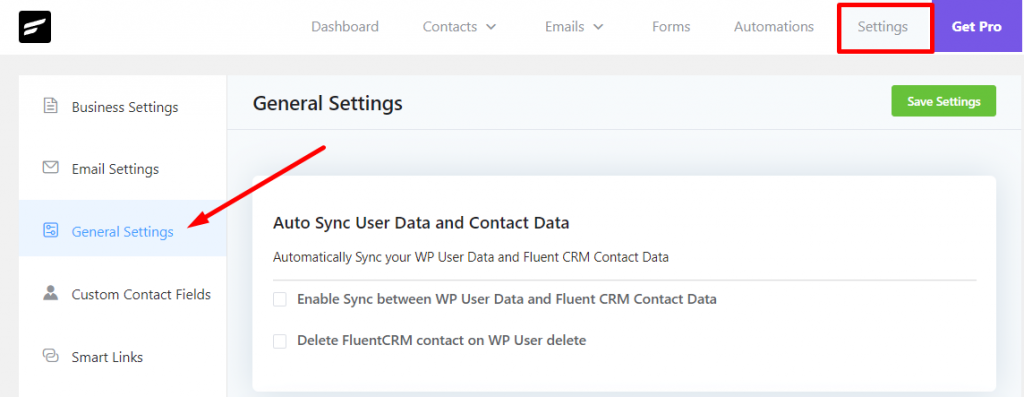
- Go to FluentCRM Settings>General Settings.
- Scroll down to Comment Form Subscription Settings and enable the checkbox. Then choose the List and Tags you want to assign to the contacts. You can also edit the Checkbox Label and Enable Auto-checked Status to boost comment form subscription. If you want people to go through the double opt-in process, you can also enable that here.
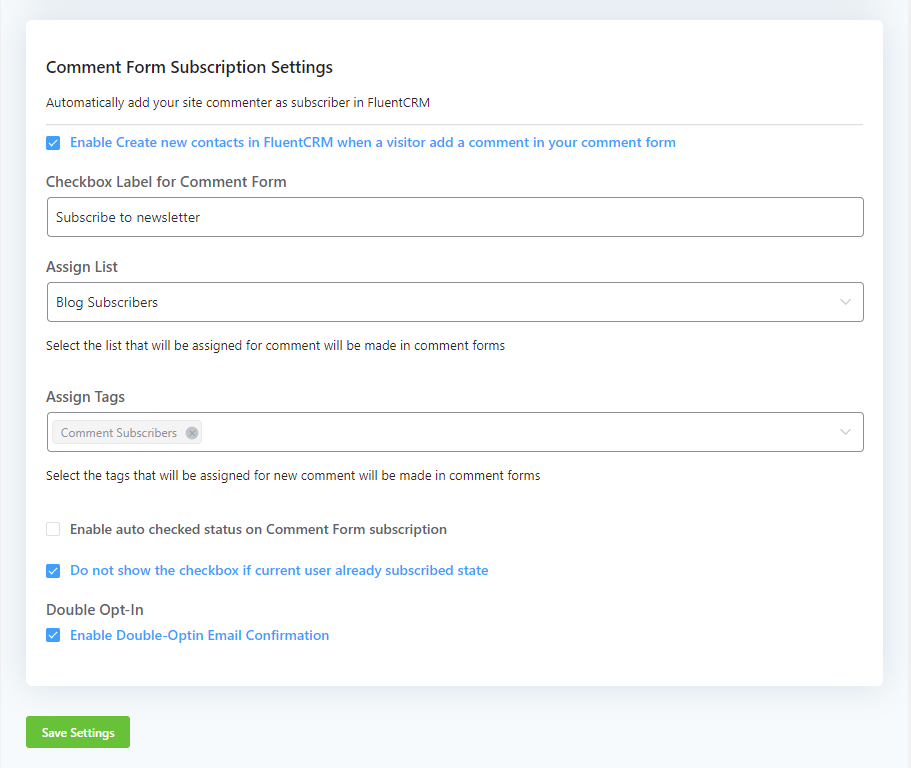
- Click Save Settings.
That’s it. Now, a small email subscription box will appear on your blog’s comment form. Here’s a preview:
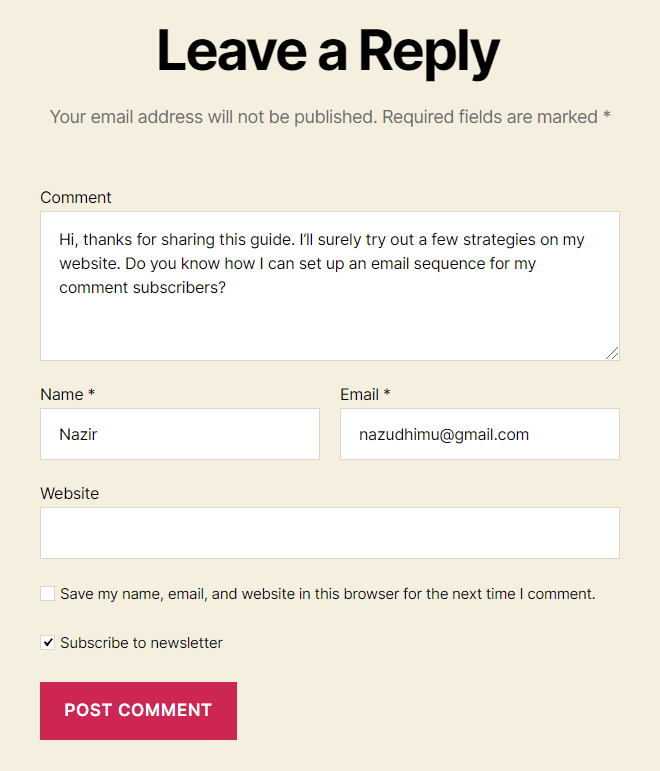
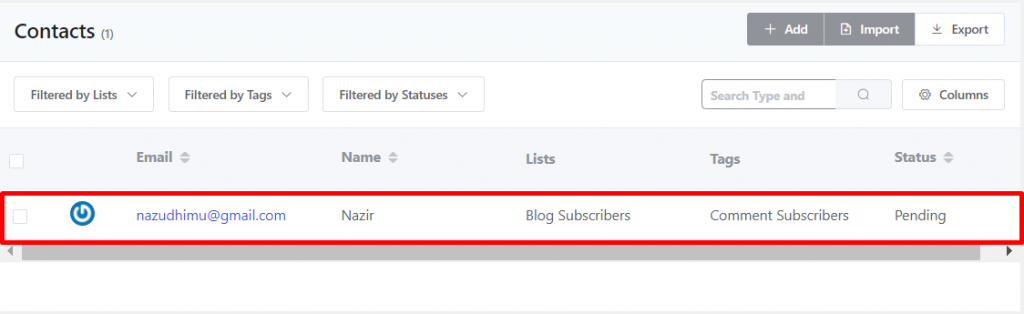
If someone comments with Subscribe to Newsletter enabled, they will be added to the email list you’ve specified in FluentCRM:
So that completes the setup process of your comment subscription form. Now let’s see how you can send email campaigns to comment subscribers!
Sending Email Campaigns to Comment Subscribers
Once you have some contacts, you’ll want to send email campaigns to your subscribers. FluentCRM makes it really easy to send email campaigns. To send email campaigns to your comment subscribers:
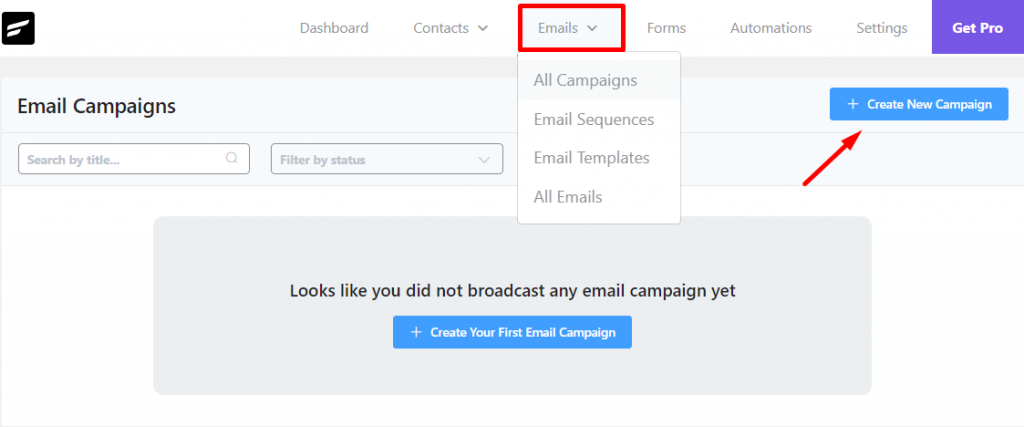
- First, go to Email Campaigns and click Create New Campaign.
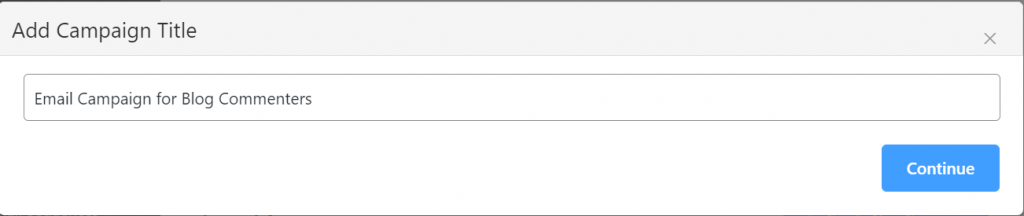
- In the pop-up, give a title for your email campaign. This will open up the campaign window.
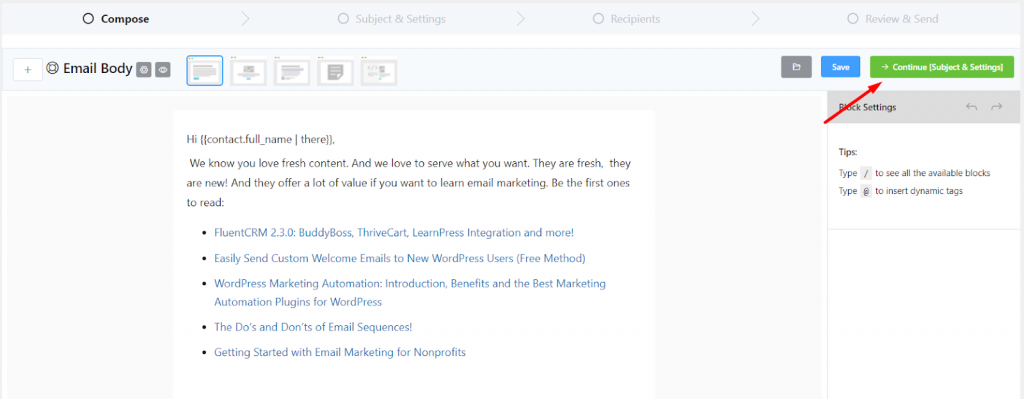
- Start composing your email with the block editor. It’s similar to writing a blog post in WordPress. Hit Continue once you’re done.
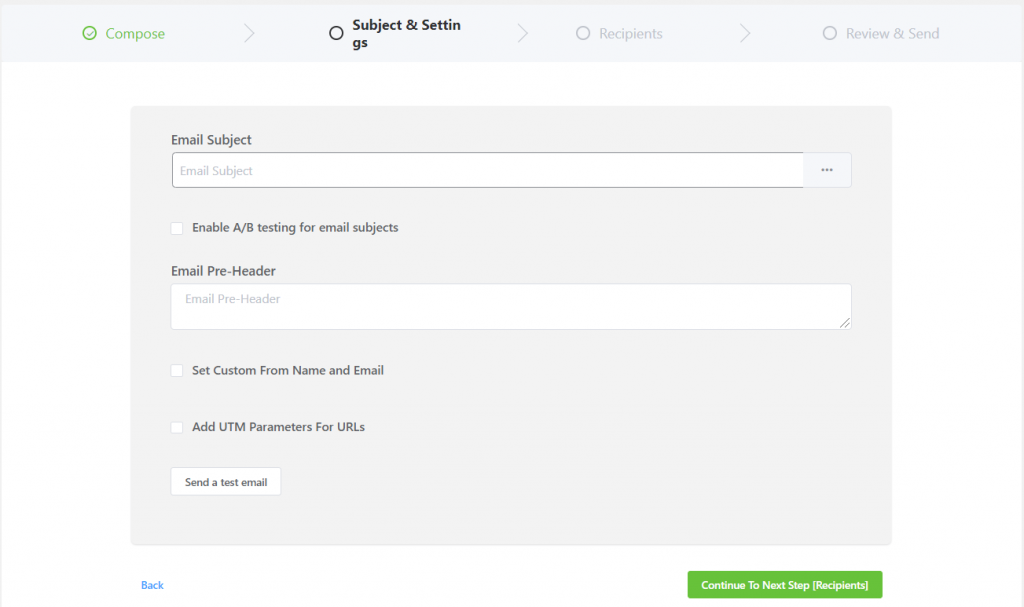
- In the next step, set your Subject Line, Pre-header, and other details. You can also enable A/B Testing to split test your subject lines if you use FluentCRM Pro.
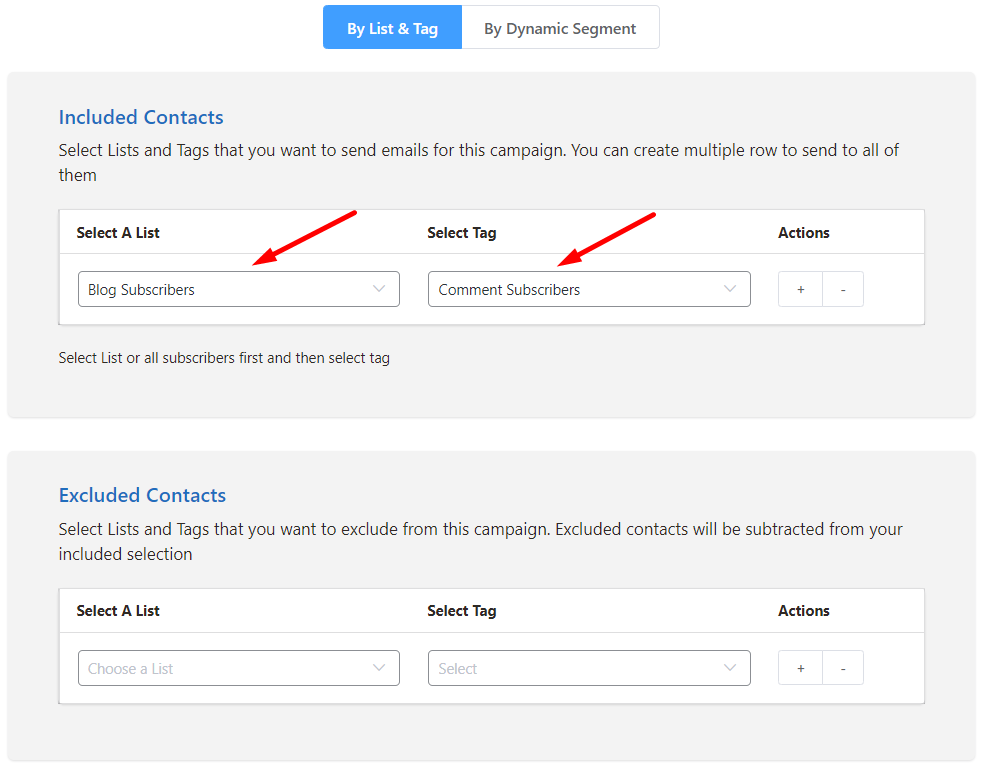
- In the Recipients section, filter out your Comment Subscribers and click Continue.
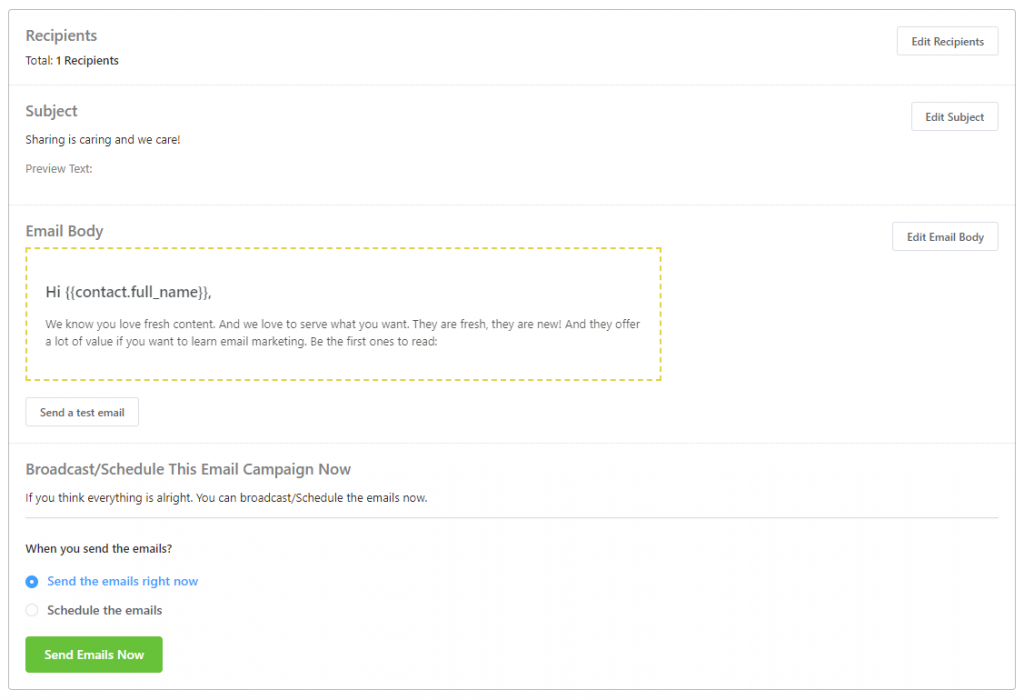
- Once you’ve finished all the steps, you’ll be able to review everything. If everything looks okay, you can send the campaign right away or schedule it for a later time!
Smooth, right?
What’s next?
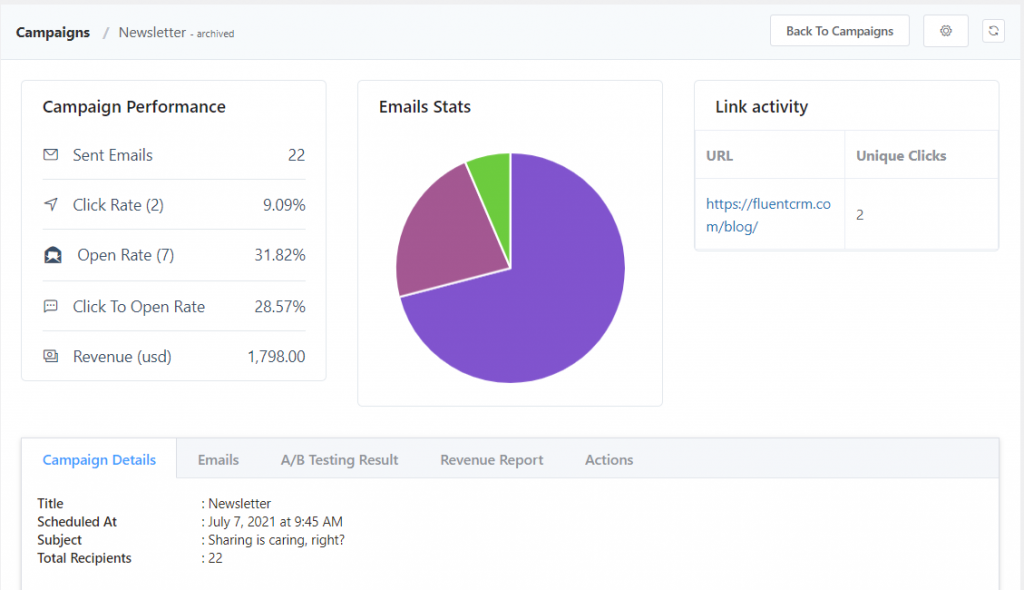
After you’ve sent an email campaign, FluentCRM has a comprehensive campaign reporting system to track how your campaign is performing.
While the free version has limited email marketing automation features, you can do a lot more with the Pro version.
So that wraps up our guide to adding email subscriptions to WordPress comments. If you liked the article, check out FluentCRM Pro. For more freshly brewed content and tutorials, subscribe to our blog and follow us on Twitter.

Nazir Himel
Product Marketing Lead
Hey! I’m an inbound marketing specialist focused on email marketing automation. I love turning complex features into clear, user-centric messaging and when I’m not shaping product stories, I’m experimenting with content frameworks, conversion journeys, and helping others communicate value without sounding salesy!
Table of Content
Related Articles and Topics
-
12 Lead Capture Landing Page Examples with Conversion Frameworks Used by Top Brands
Many businesses build landing pages, drive traffic, and place forms above the fold. Yet conversion…
-
7 High-Impact Lead Nurturing Email Templates with Real Life Examples that Successful Brands Use
Lead nurturing is often reduced to a swipe file of email templates. Pick one, paste…

This is great! Would it be possible to make the subscribe a required field so only people that subscribe can leave comments? That will make it helpful since most comments are for supporting readers.
Thanks Dougie. Unfortunately, you can’t make the comment subscription checkbox a required field. Looks like we need to add this capability. I will talk to our R&D.
Thanks for providing information. Very good information keep going.
If you want to start email marketing for your WordPress site, first you need to build an email subscribers list. You can also optionally turn on the “subscribe to site” feature, to enable visitors to subscribe to your site.
hi. i am new user
and i would to ask community, most powerful forum engine is?
mybb etc? thanks digg
Good article and excellent way to articulate. Keep it up
thanks for sharing the informative articles.