Automation is magic and FluentCRM is the magician. But anyone can be part of this. Following some steps, anyone can be part of this magic. In this article, we will show you, how you are able to add a custom condition in automation.
Condition
Conditions are essential for initiating email marketing automation. There are a lot of conditions that can start or initiate automation in FluentCRM. Using conditions you can track various activities in your WordPress ecosystem. Isn’t cool. Let’s dive deep to learn, how to create a custom condition in FluentCRM.
To make an automation condition, we need to use two filter hooks.
| Type | Hook | Description |
|---|---|---|
| Filter | fluentcrm_automation_condition_groups | This is a filter hook and this hook will add your custom condition to the automation condition list. |
| Filter | fluentcrm_automation_conditions_assess_custom | This is a filter hook and this hook will filter records according to your custom condition logic. |
To add a custom condition in automation, I am going to tell you step by step. This example will be using composer, you can do without composer too.
Step 1
First of all, I created a class named CustomCondition which will contain the full source code of this automation condition.
<?php
namespace Custom\Conditions;

class CustomCondition
{
    public function __construct()
    {
        add_filter('fluentcrm_automation_condition_groups', array($this, 'addAutomationConditions'), 10, 2);
        add_filter('fluentcrm_automation_conditions_assess_custom', array($this, 'assessAutomationConditions'), 10, 3);
    }

    public function addAutomationConditions($groups, $funnel)
    {
        $customerItems = [
            [
                'value'             => 'purchased_items',
                'label'             => 'Purchased Products',
                'type'              => 'selections',
                'component'         => 'product_selector',
                'is_singular_value' => true,
                'is_multiple'       => true,
                'disabled'          => false
            ]
        ];

        $groups['custom'] = [
            'label'    => 'Custom',
            'value'    => 'custom',
            'children' => $customerItems,
        ];

        return $groups;
    }

    public function assessAutomationConditions($result, $conditions, $subscriber)
    {

        // do something here

        return $result;
    }
}
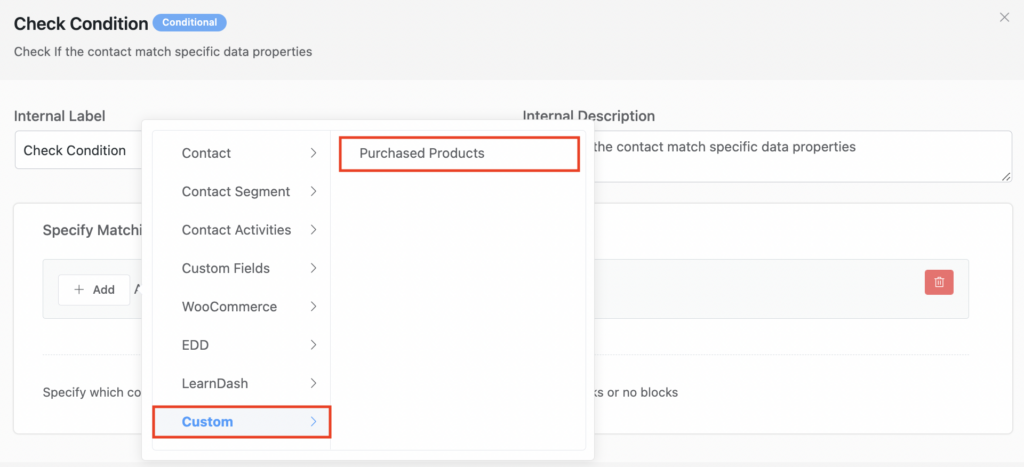
In the above example, you see, there is a method called addAutomationConditions. This method will filter records according to this condition logic. Let’s see the preview of this condition’s block and discuss it.

Step 2
Using the following code, You can able to add this custom action code in FluentCRM.
add_action('plugins_loaded', function () {
   if (defined('FLUENTCAMPAIGN_DIR_FILE')) {
      new \Custom\Conditions\CustomCondition();
   }
});


Where should the class be defined? Is it ok to do it in a plug-in?
Can you provide an example without Composer?
Does the function passed to fluentcrm_automation_conditions_assess_custom must return true / false?