
FluentCRM is a Customer Relationship Management and Email Marketing & Automation tool that manages customer contacts, and markets through email and also runs automation based on conditions & activities. In this documentation, we will see and learn how FluentCRM organizes contact data and some actions that are possible from the contact details page.
Individual Contact Overview #
At a glance #
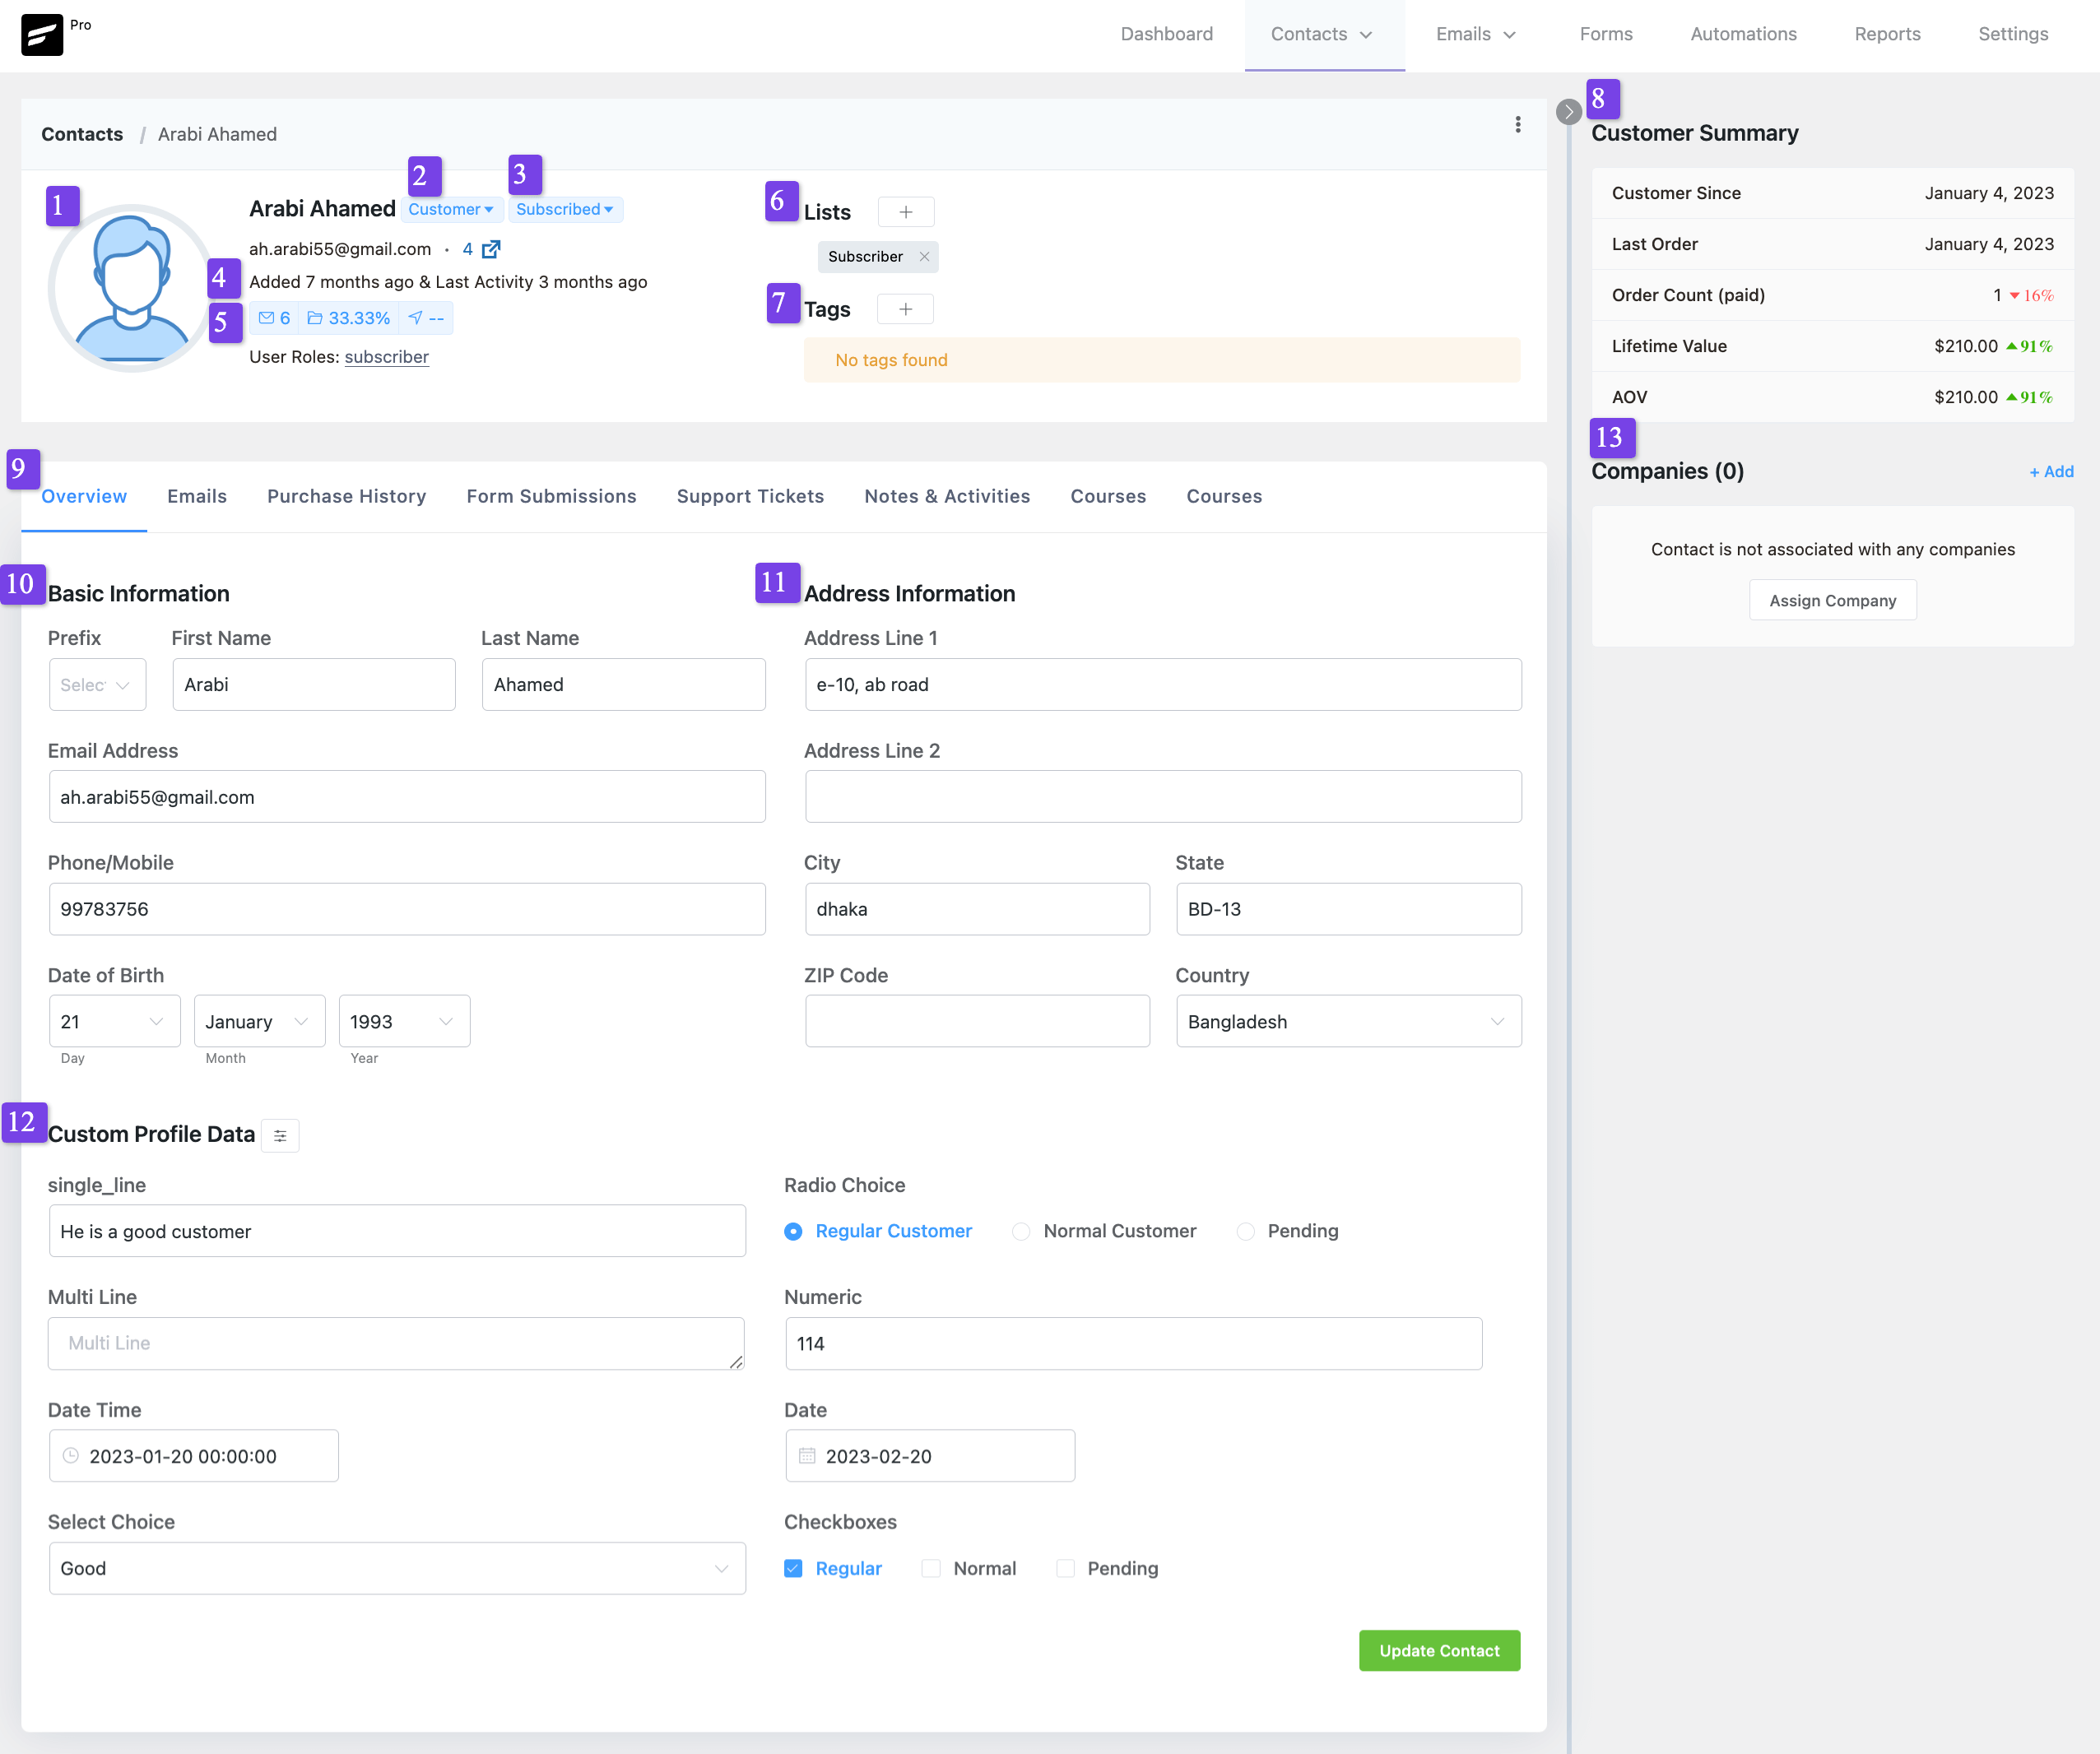
This section contains a quick overview of the contact and available details:
- Profile Image: Profile Images come from Gravatar. If no images are available for the user with the email address then a default placeholder image will be shown.
- Contact Type: 2 types of contacts are Customer and Lead. Contacts that come from e-commerce sources are the type of Customers and Leads are those that come from other sources like form submissions.
- Subscription Status: There are 5 types of contact subscriptions and more details are in FluentCRM Contact Status.
- Activity: This field shows you when the contact was added in the FluentCRM and the last activity of the email opened or clicked.
- Email Stats: This section contains the number of emails sent to the contact, the ratio of the unique email opens out of the total emails sent in percentage, and the unique email clicks out of the total emails sent in percentage.
Lists & Tags #
This section contains details regarding the Lists and Tags that are assigned to the contact. You can also add or remove the contact from a single or multiple Lists and tags by clicking on the + (Plus) icon. Additionally, you can also remove the assigned List or Lists & Tag or Tags by clicking on the x (Cross) icon as well.
Customer Summary #
This section is dependent on Woocommercea and provides a quick summary of the commerce values. The available fields are:
- Customer Since: The starting date when the customer was added to Woocommerce through the order or purchase.
- Last Order: The last date when the customer purchased something.
- Order Count (paid): The number of Orders. Besides, it will also show a growth rate in percentage comparing between the last 30 days.
- Lifetime Value: The total value of Orders in the default currency. Besides, it will also show a growth rate in percentage comparing between the last 30 days.
- AOV: The average Value of Orders in the default currency. Besides, it will also show a growth rate in percentage comparing between the last 30 days.
Information Groups #
This section contains information groups as tabs. Plugins and integrations like Woocommerce, LearnDash LMS, etc. will add more tabs regarding their information. Default tabs are:
- Overview: Contains basic contact information, address details, and customer profile data. More details are available in the Overview Section.
- Emails: Information regarding emails sent from Email campaigns, Sequences, and Automation. Detailed in Emails Section.
- Form Submissions: Form Submissions especially Fluent Forms data are present here. Detailed in Forms Section.
- Notes & Activities: Additional miscellaneous information is detailed in Notes & Activities.
Basic Information #
This section contains the very basic information of contact and the available fields are:
- Prefix: Mr, Mrs, and Ms depending on the person’s designation.
- First Name: First Name of the contact.
- Last Name: Last Name of the contact.
- Email Address: Email Address of the contact. This is false the minimum required field to add a contact in the FleuntCRM.
- Phone/ Mobile: Phone or Mobile Number that may contain or not contain the country code depending on how you added the information.
- Date of Birth: Date of Birth in YYY-MM-DD format.
Address Information #
This section contains the address information of the contact and the available fields are:
- Address Line 1: The primary address field and also the minimum or default field to store the address information of the contact.
- Address Line 2: Alternative field to store additional address information.
- City: City of the contact.
- State: State of the contact.
- Zip Code: Postal Code information of the contact.
- Country: Country of the contact.
Custom Profile Data #
This section contains the additional custom information of the contact and the available fields are dependent on the available custom fields added to FluentCRM as guided in the Custom Fields Settings.
Emails #
This section contains emails from different campaigns and automation, contacts added to Email Sequences, and automation.

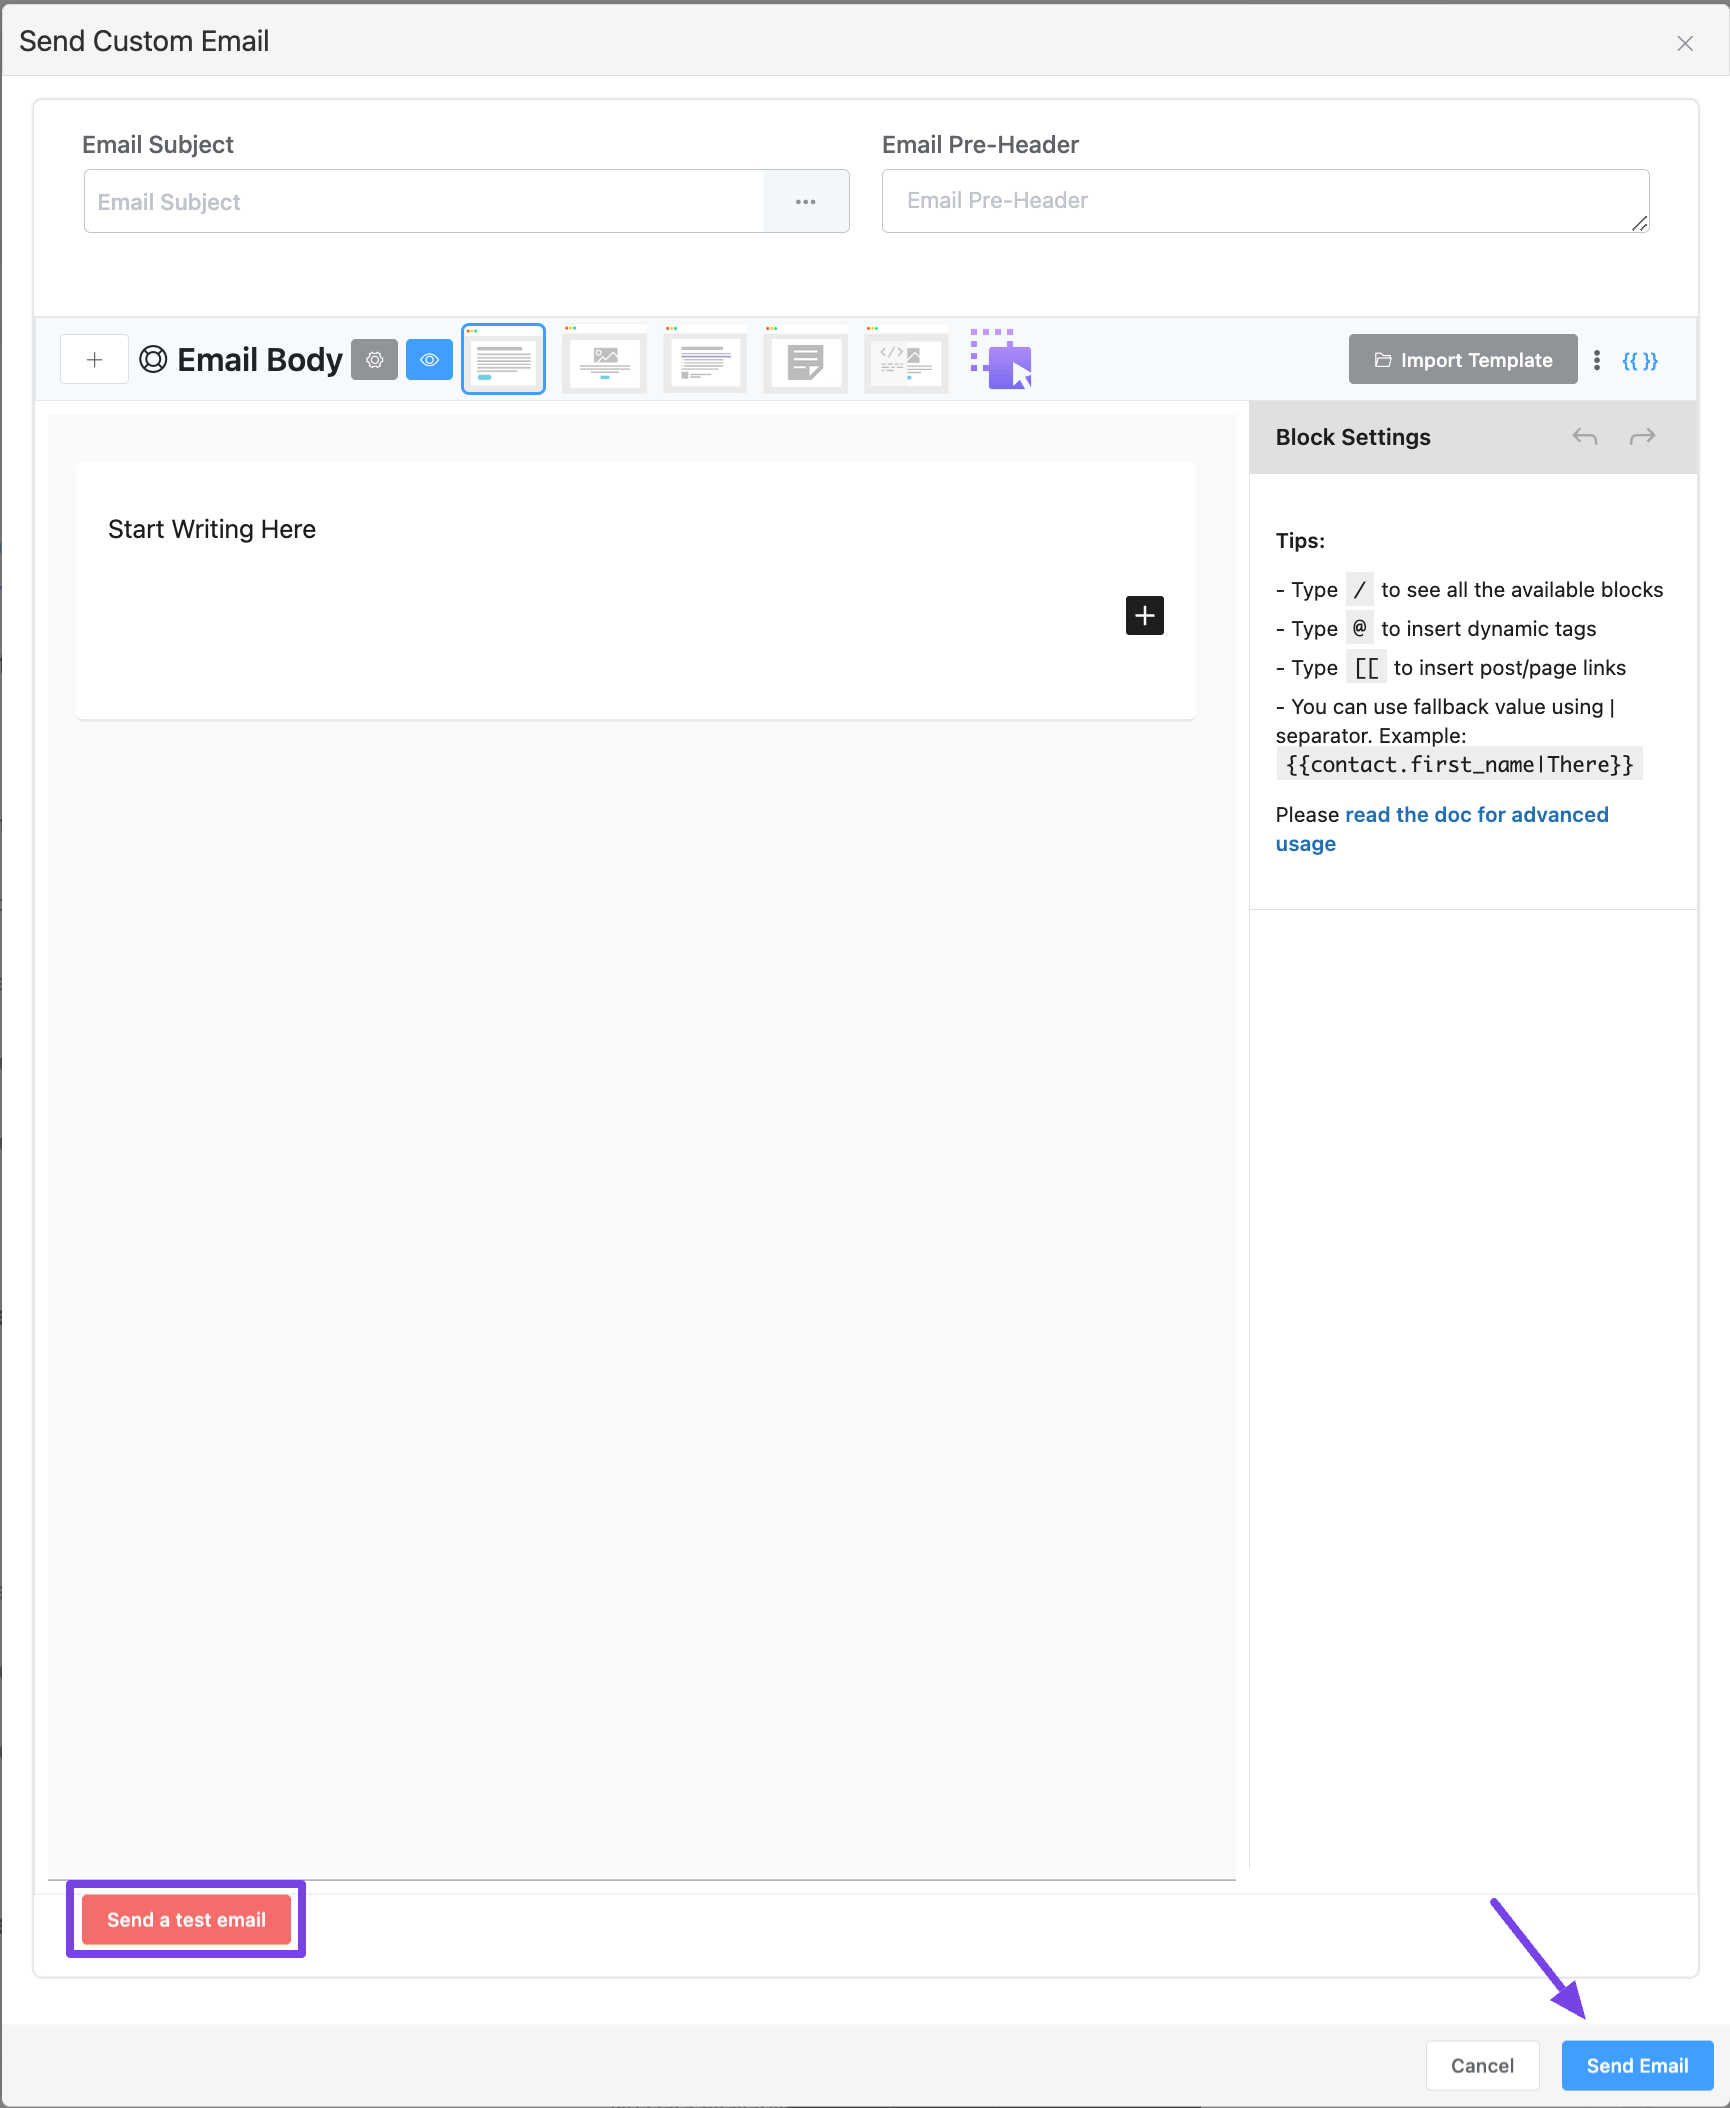
Sending a Test Email #
If you want to send a test email to the contact you can do so by Clicking on the Send Email button located at the top right corner in the Emails overview tab. Sending Test or any other emails will be only available for users with Subscribed Contact Status. Once you click on the button a modal will appear asking you to input the Subject Line, Email Pre-Header, and a Block Editor to customize the email content and Send Email button to send the Test Email.
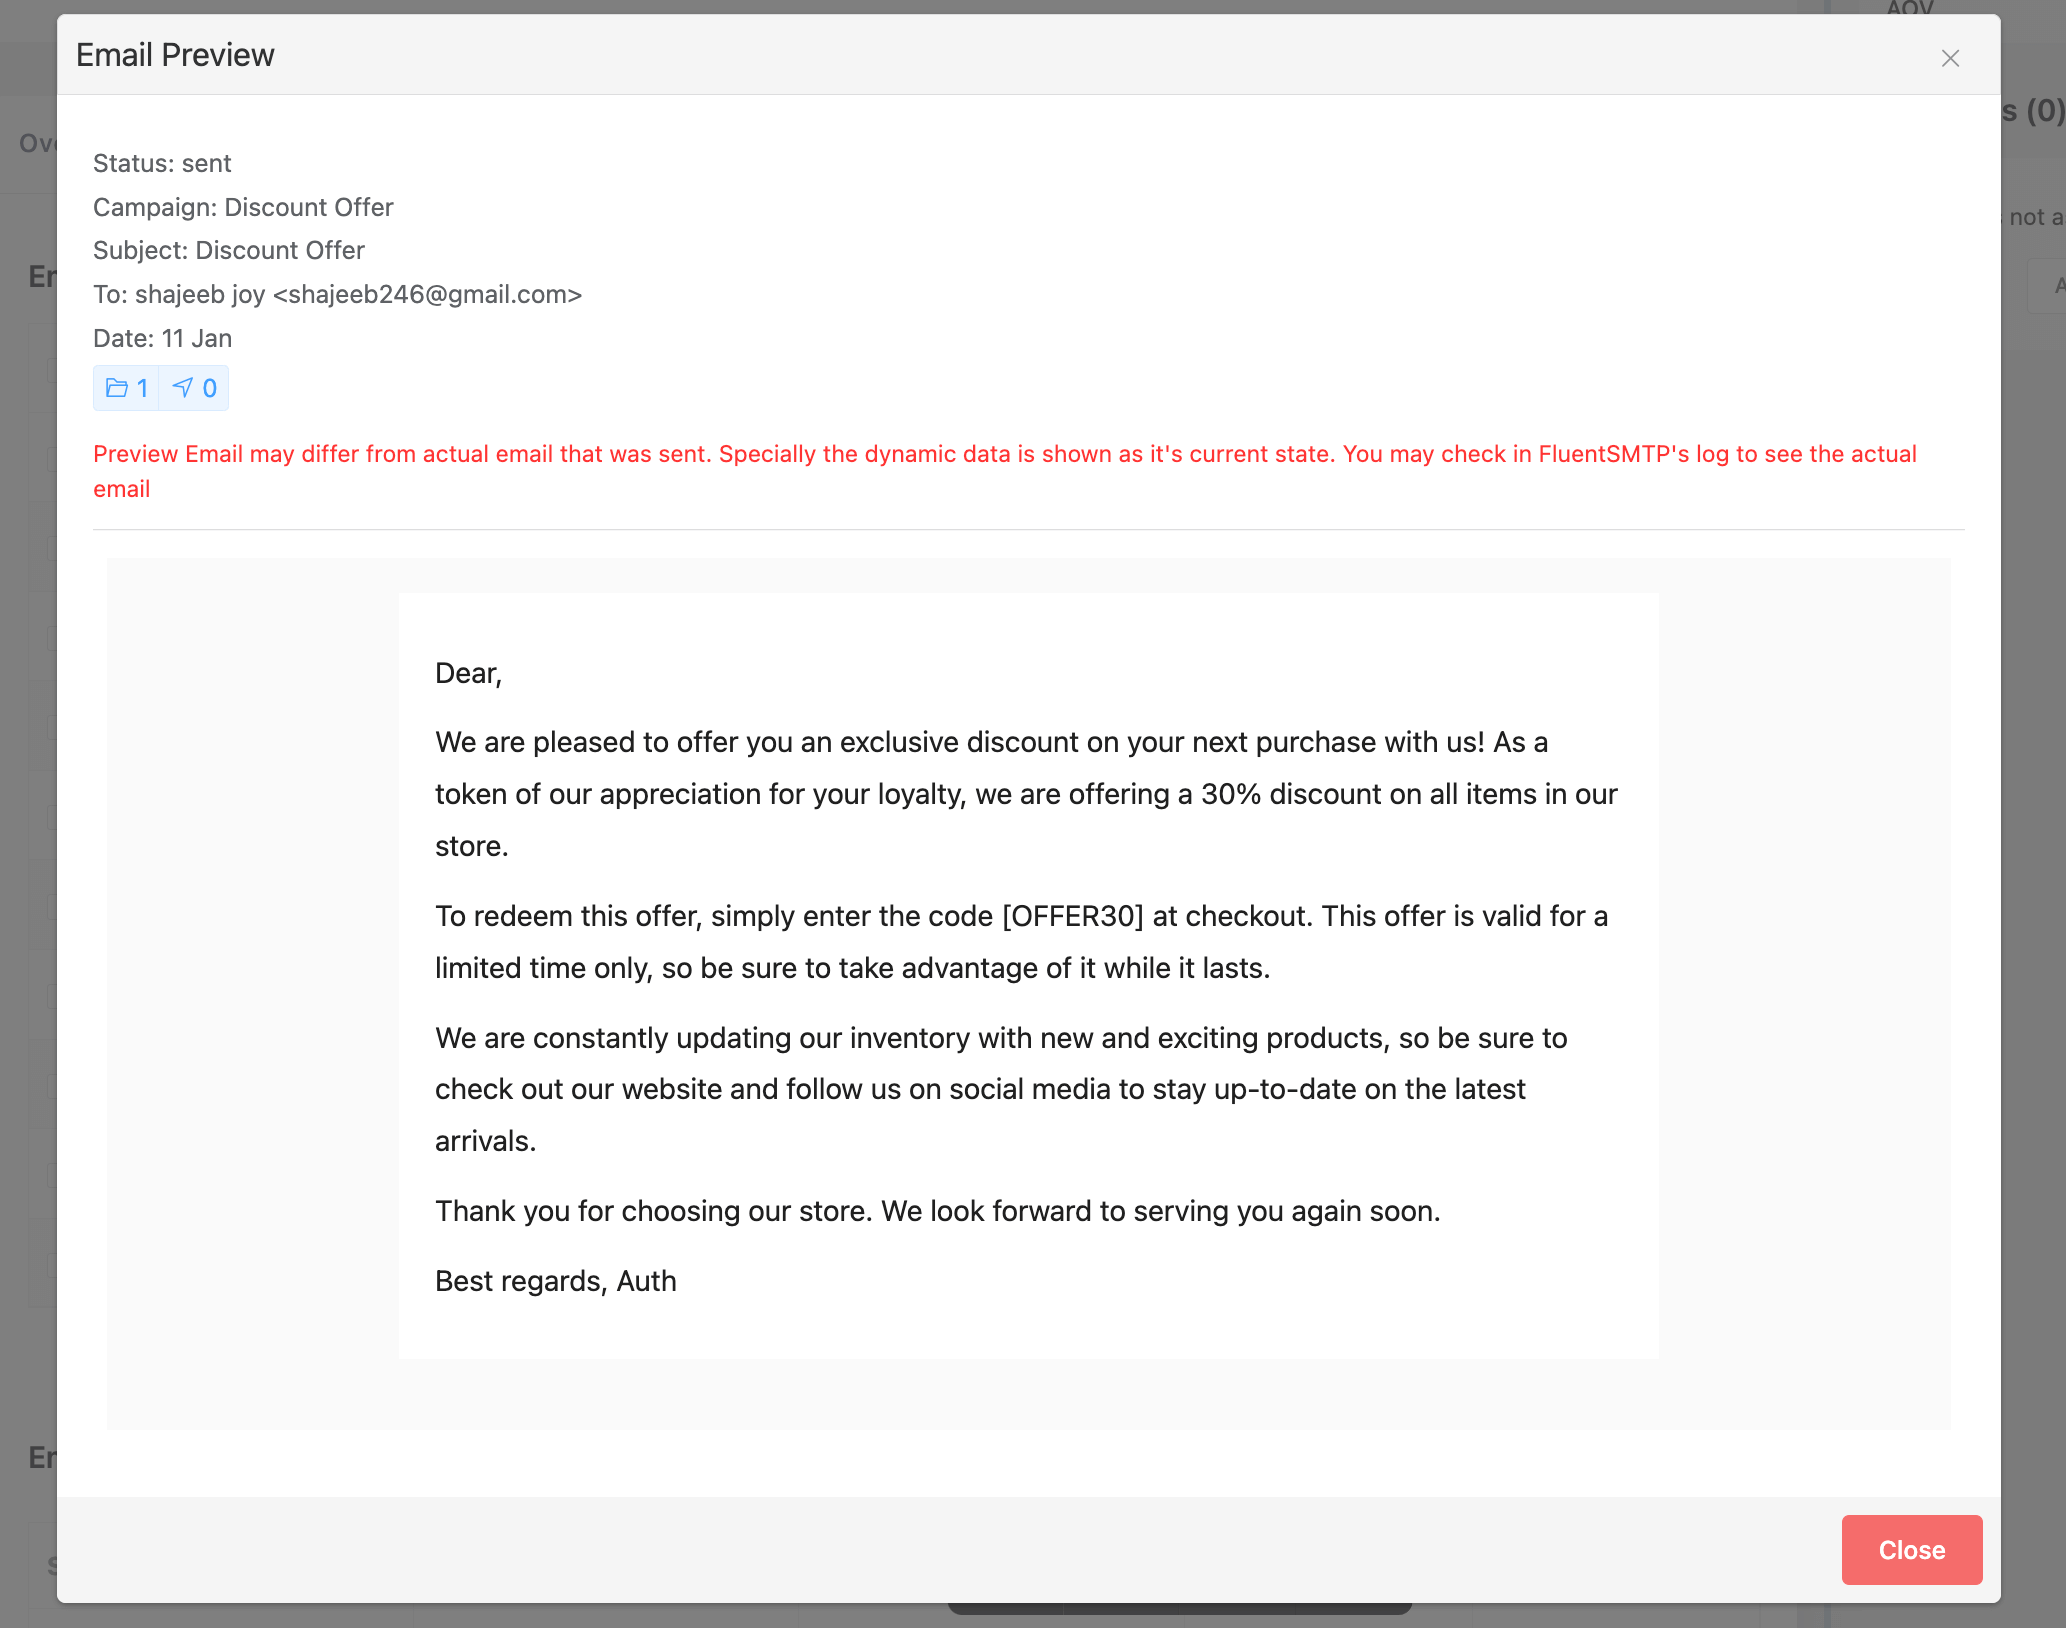
Emails from different campaigns and automation #
This section contains emails from different campaigns and automation. You will see the Subject Lines, Date of the emails sent, Status, and a Preview column where you will be able to view the email content along with links in the email & resend the email again as the below screenshot.
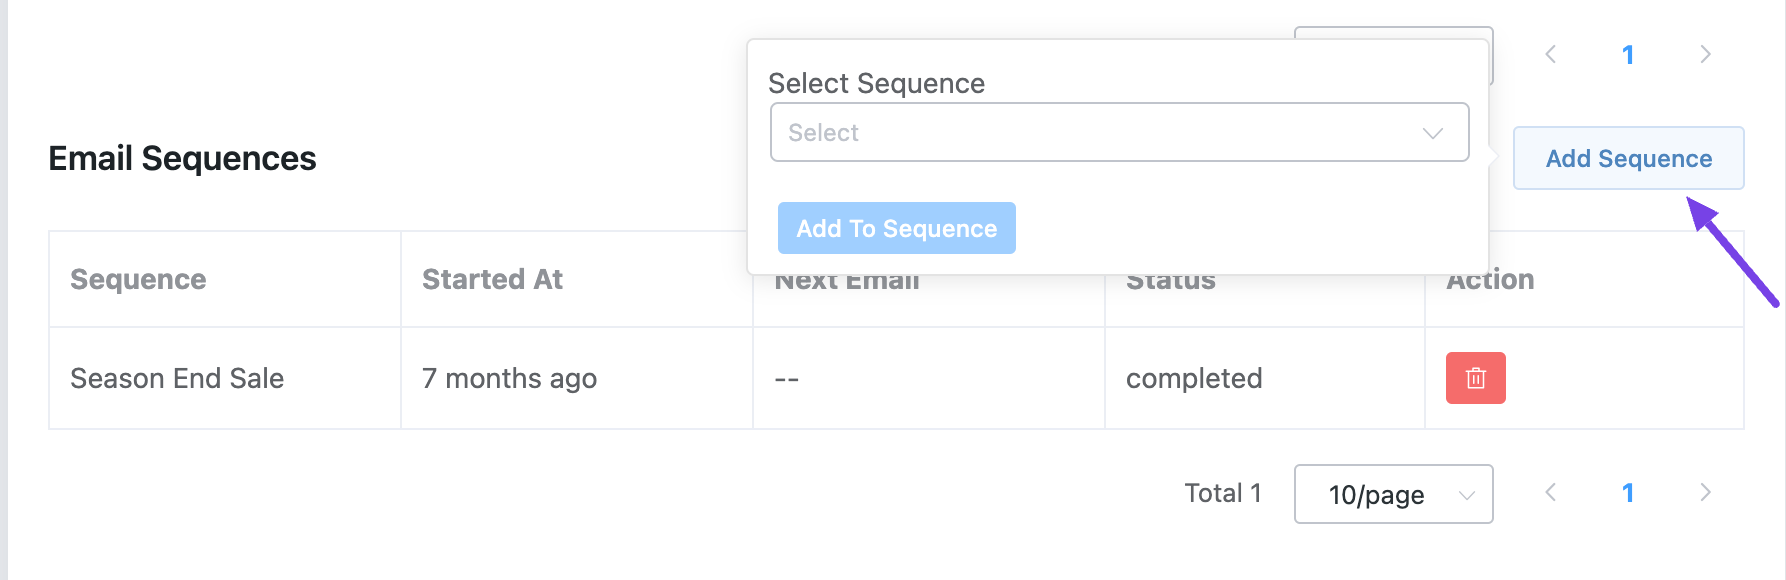
Email Sequences #
This section contains emails from email sequences. You will see the Sequence Name, Started at, Next Email, Status, and a Delete Button to delete the contact from the sequence as the below screenshot.
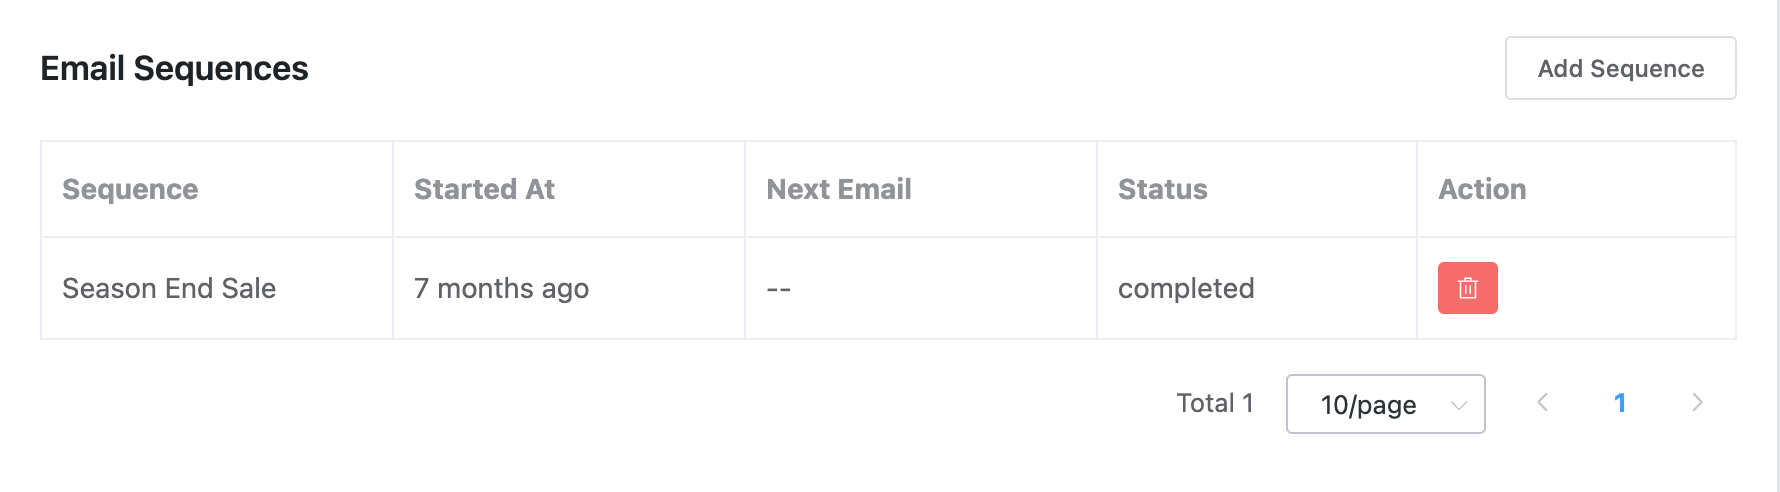
Manually Add contacts to an Email Sequence #
You can also manually add the contact to an email sequence by clicking on the Add Sequence button and then selecting the target Email Sequence from the dropdown as in the below screenshot.
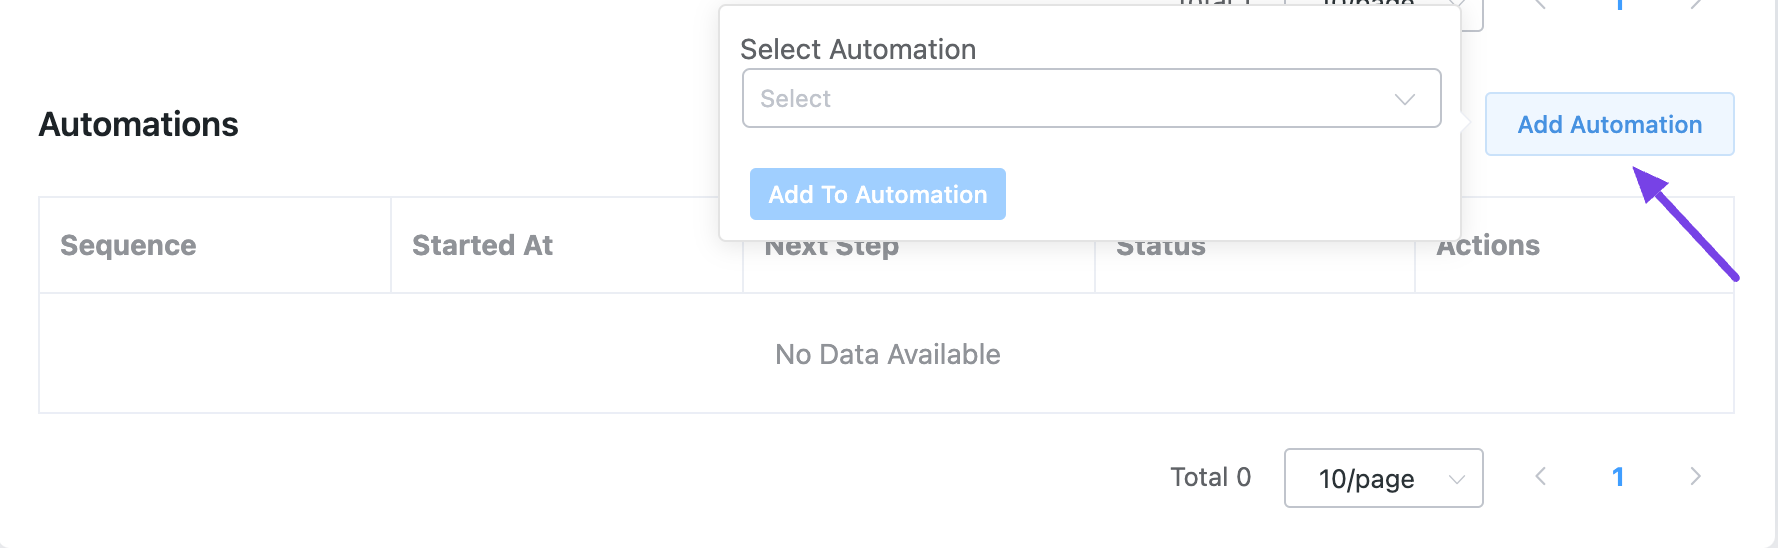
Automation #
This section contains emails from all automation that the contact was added to. You will see the Automation Name, Started at, Next Step, Status, and a Delete Button to delete the contact from the automation.
Manually Add contacts to an Automation #
You can also manually add the contact to automation by clicking on the Add Automation button and then selecting the target Automation from the dropdown as in the below screenshot.
Form Submissions #
FluentCRM has another great feature to capture leads and other data from users by another great plugin called Fluent Forms which is really an advanced and free plugin to use for most cases. The Form Submissions tab will let you see all the form submissions for the Fluent Forms that are connected to FluentCRM and received data from this contact.

This section is similar to the Fluent Forms Entries Dashboard as the below screenshot.
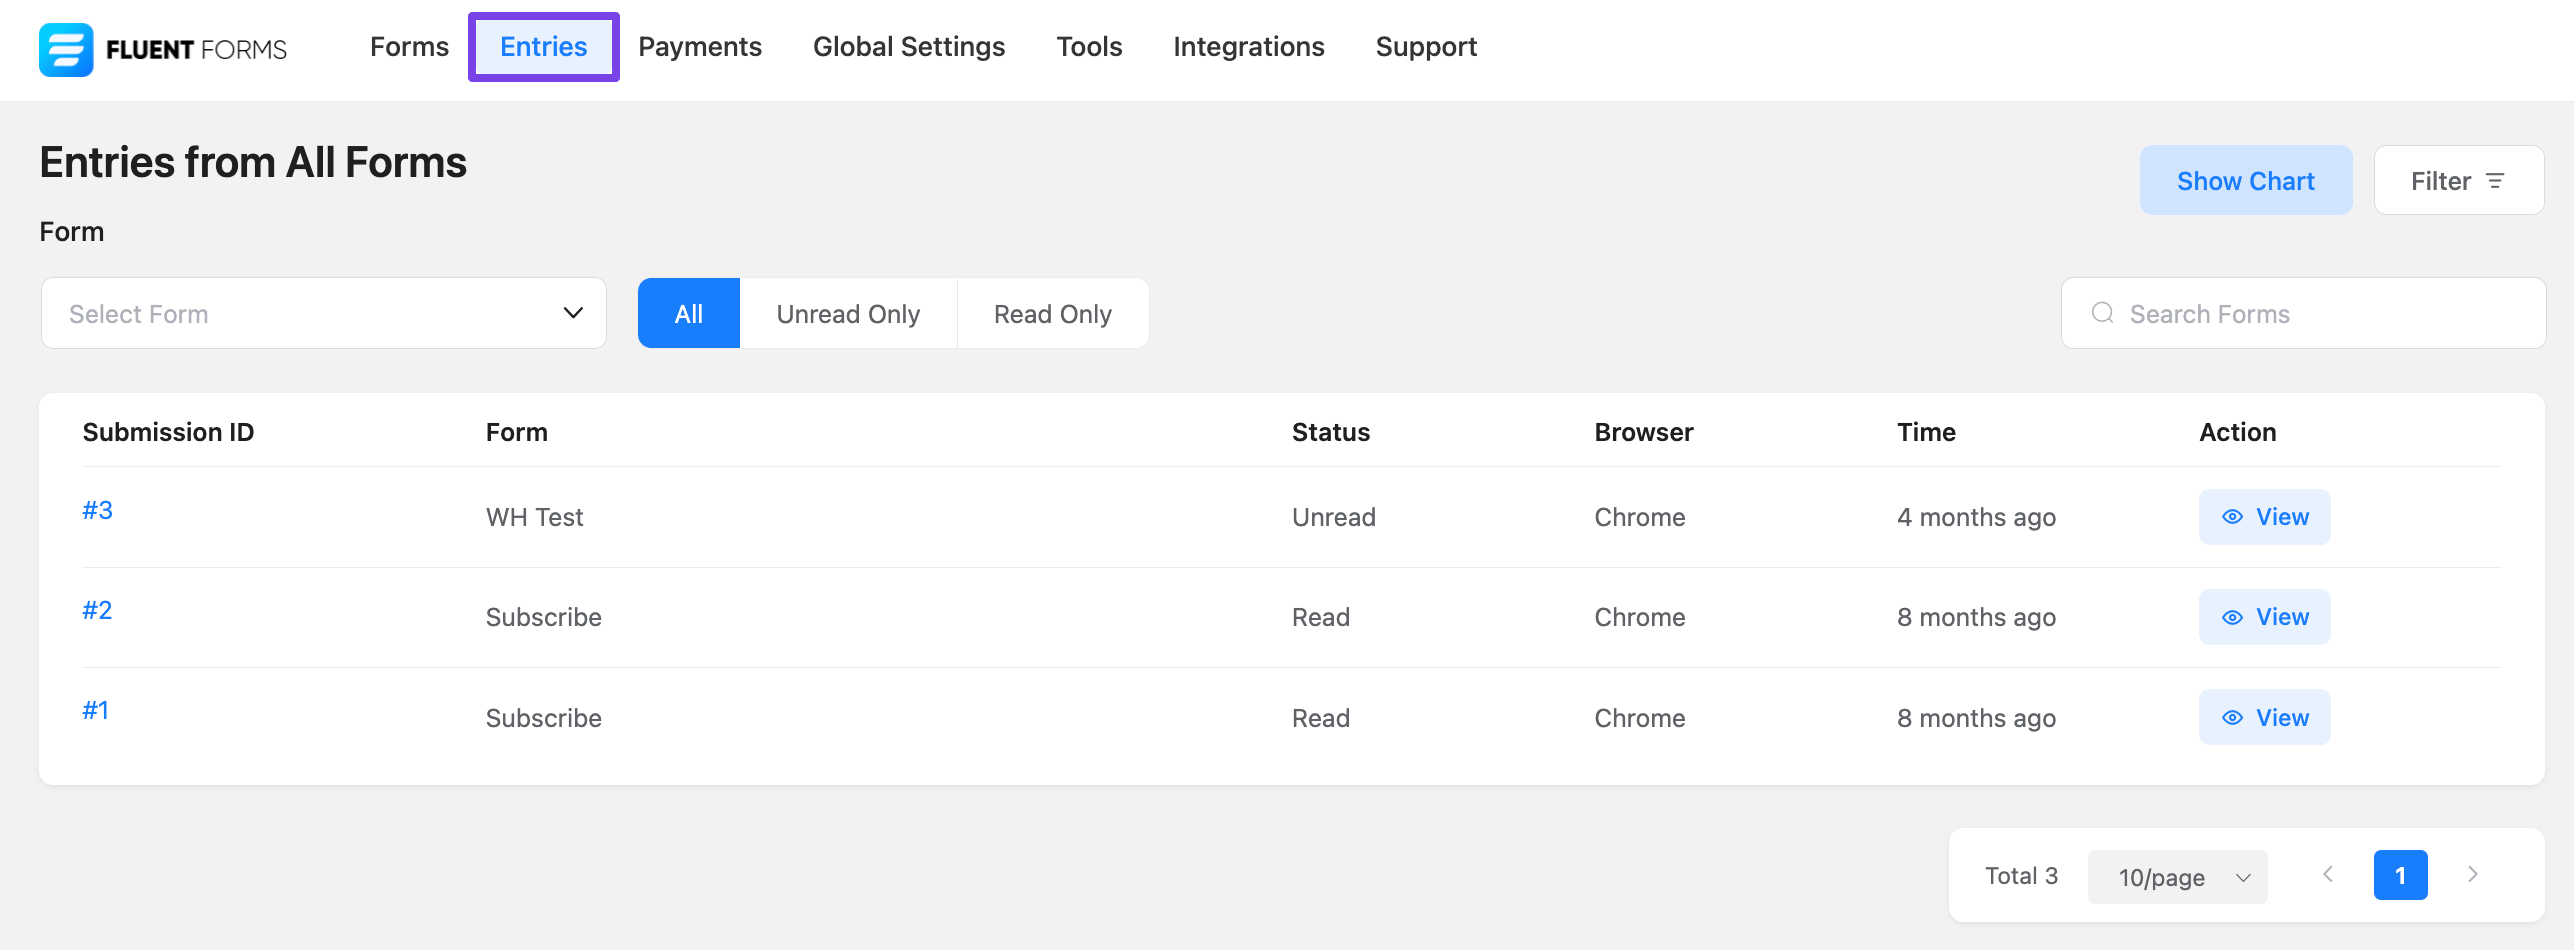
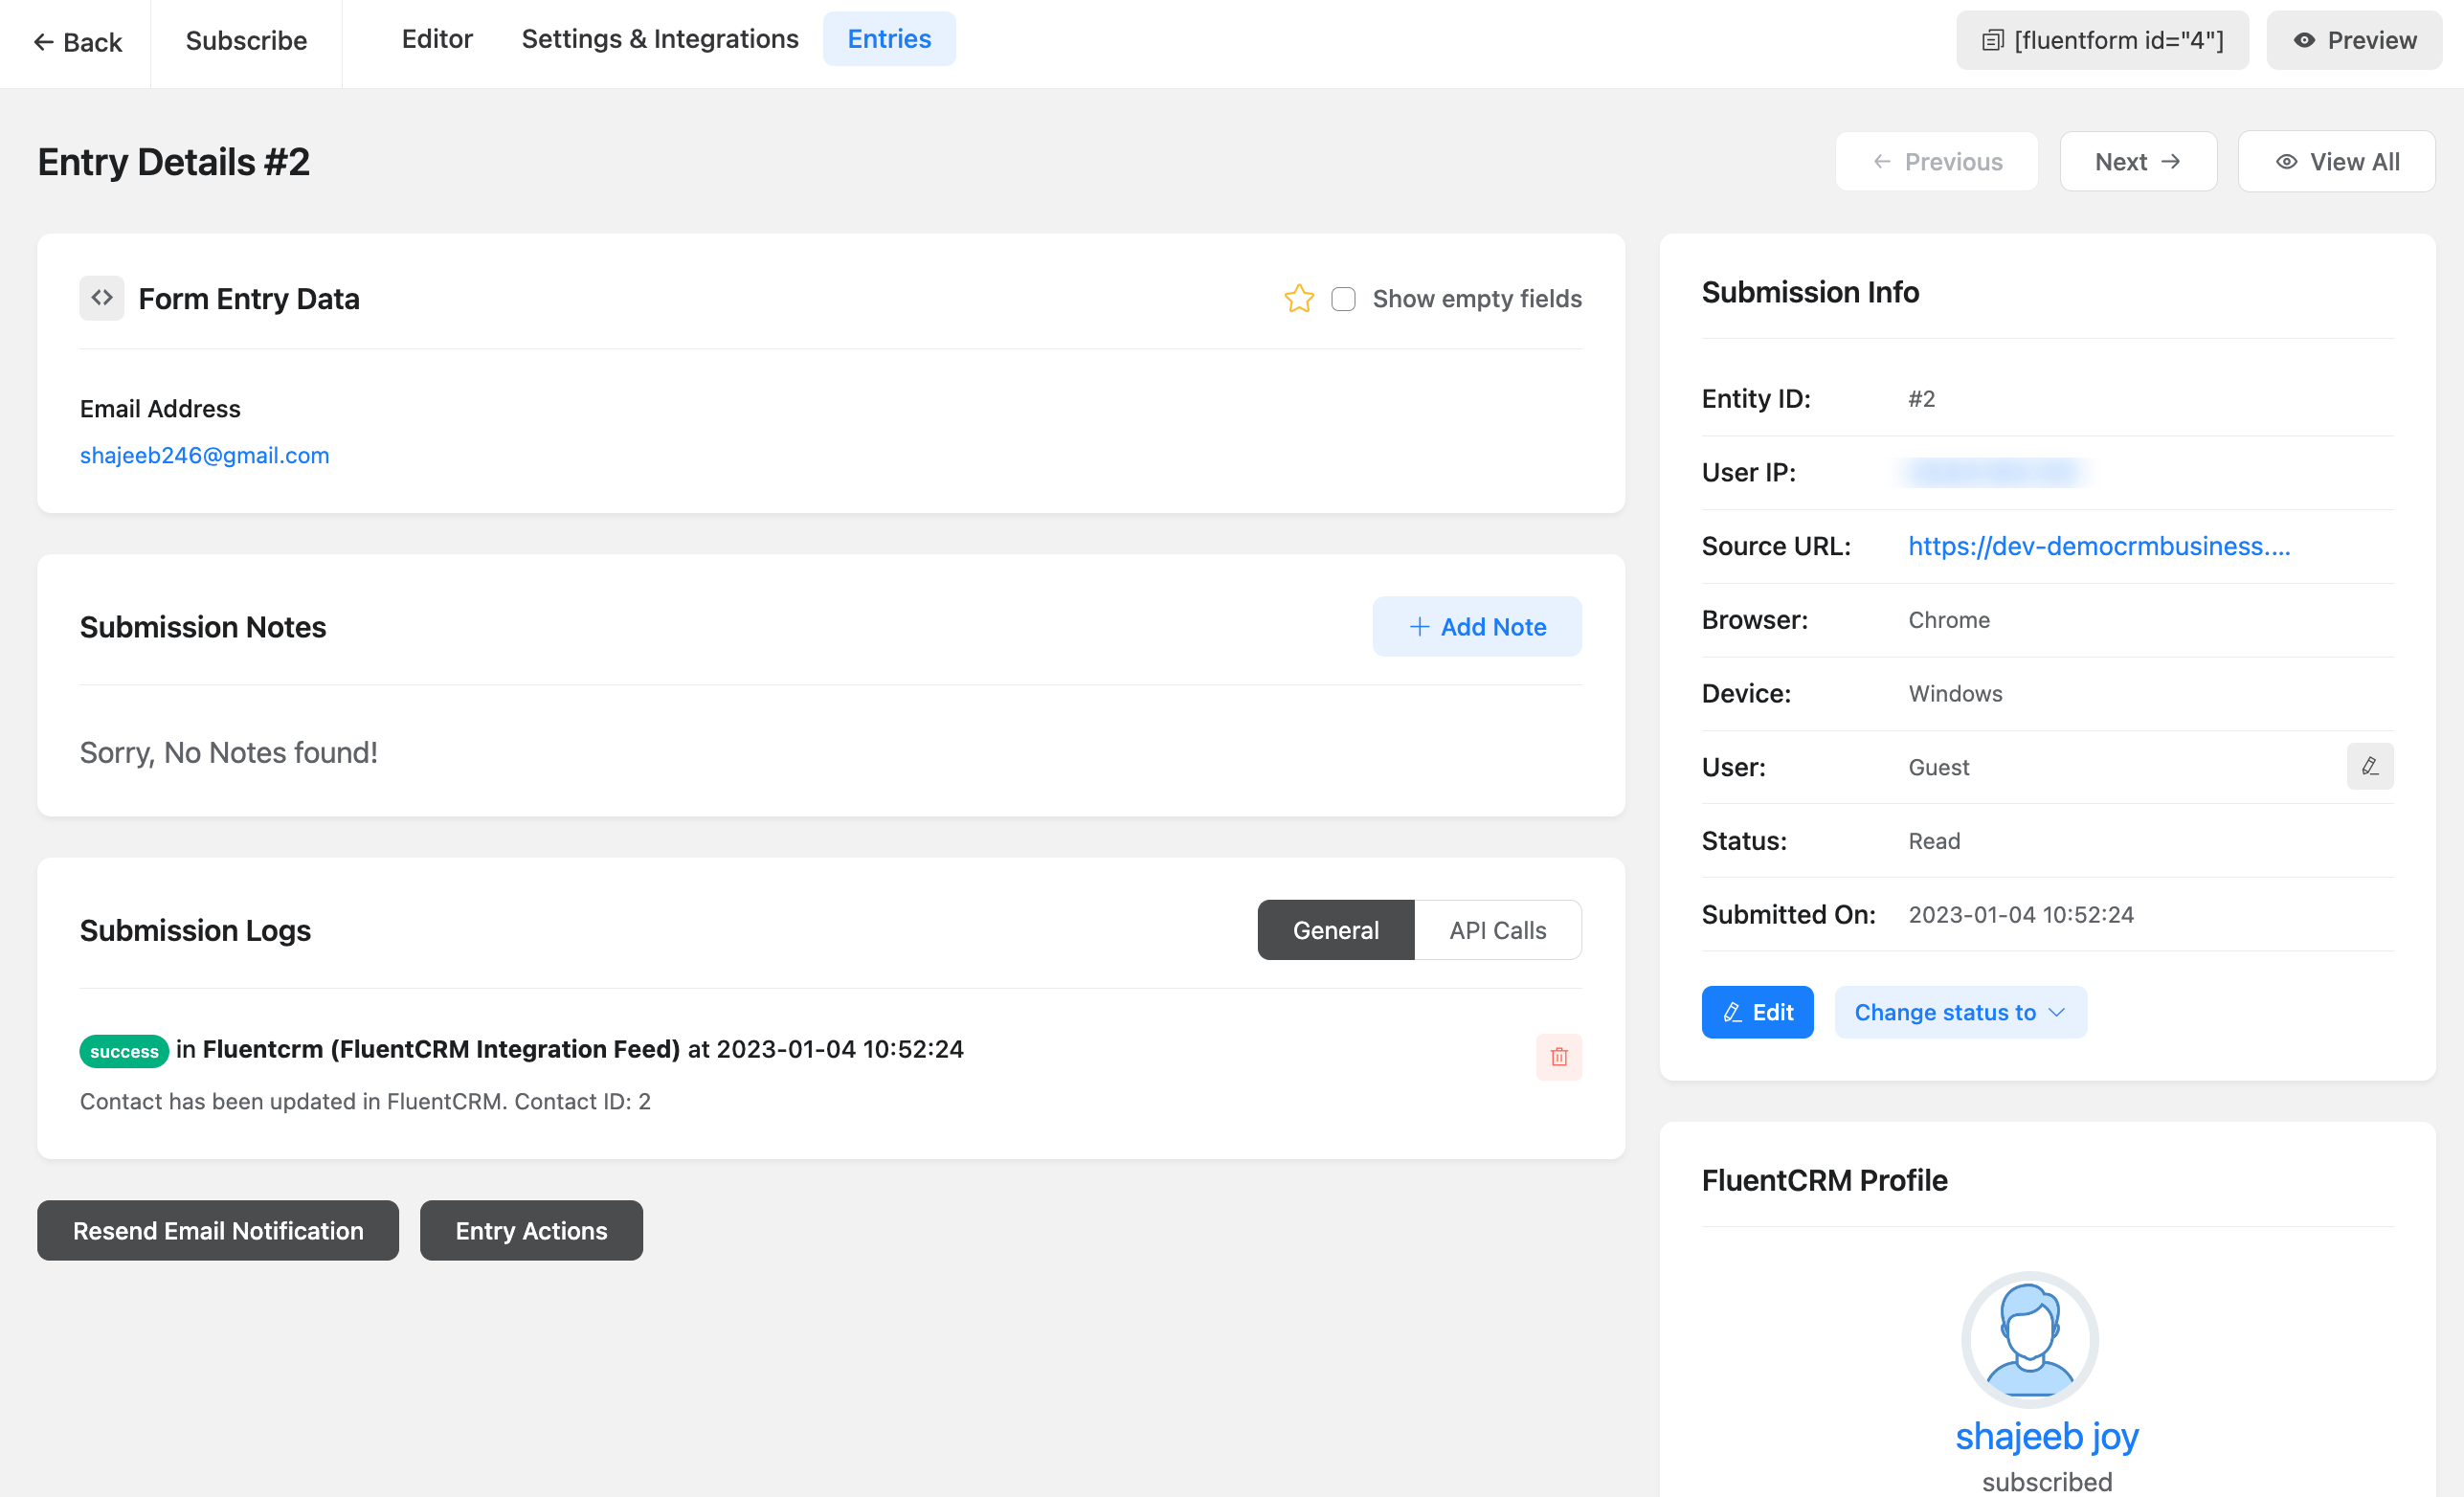
You will be able to see the Entry ID, Form Title, Status, Form Submission Data with Time, and an Action link to see the full entry inside the Fluent Forms plugin. The View Submission link will open up a new page with all the information submitted with the Form as the below screenshot.
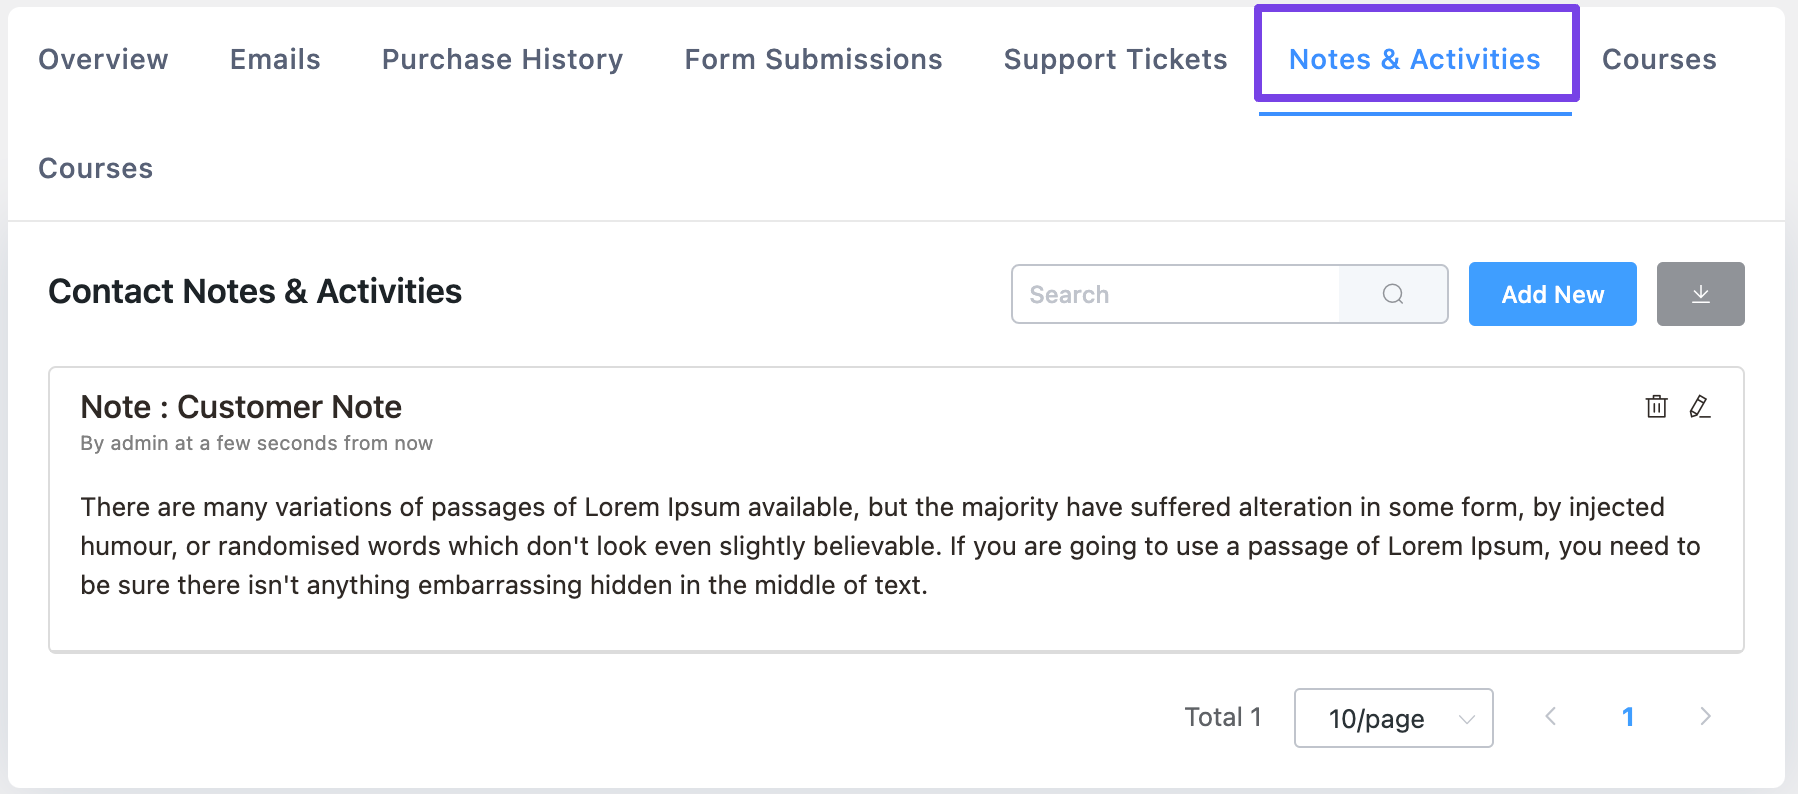
Notes & Activities #
FluentCRM also provides a feature to add custom notes for contacts. There are 15 types of Contact Notes available to be added.
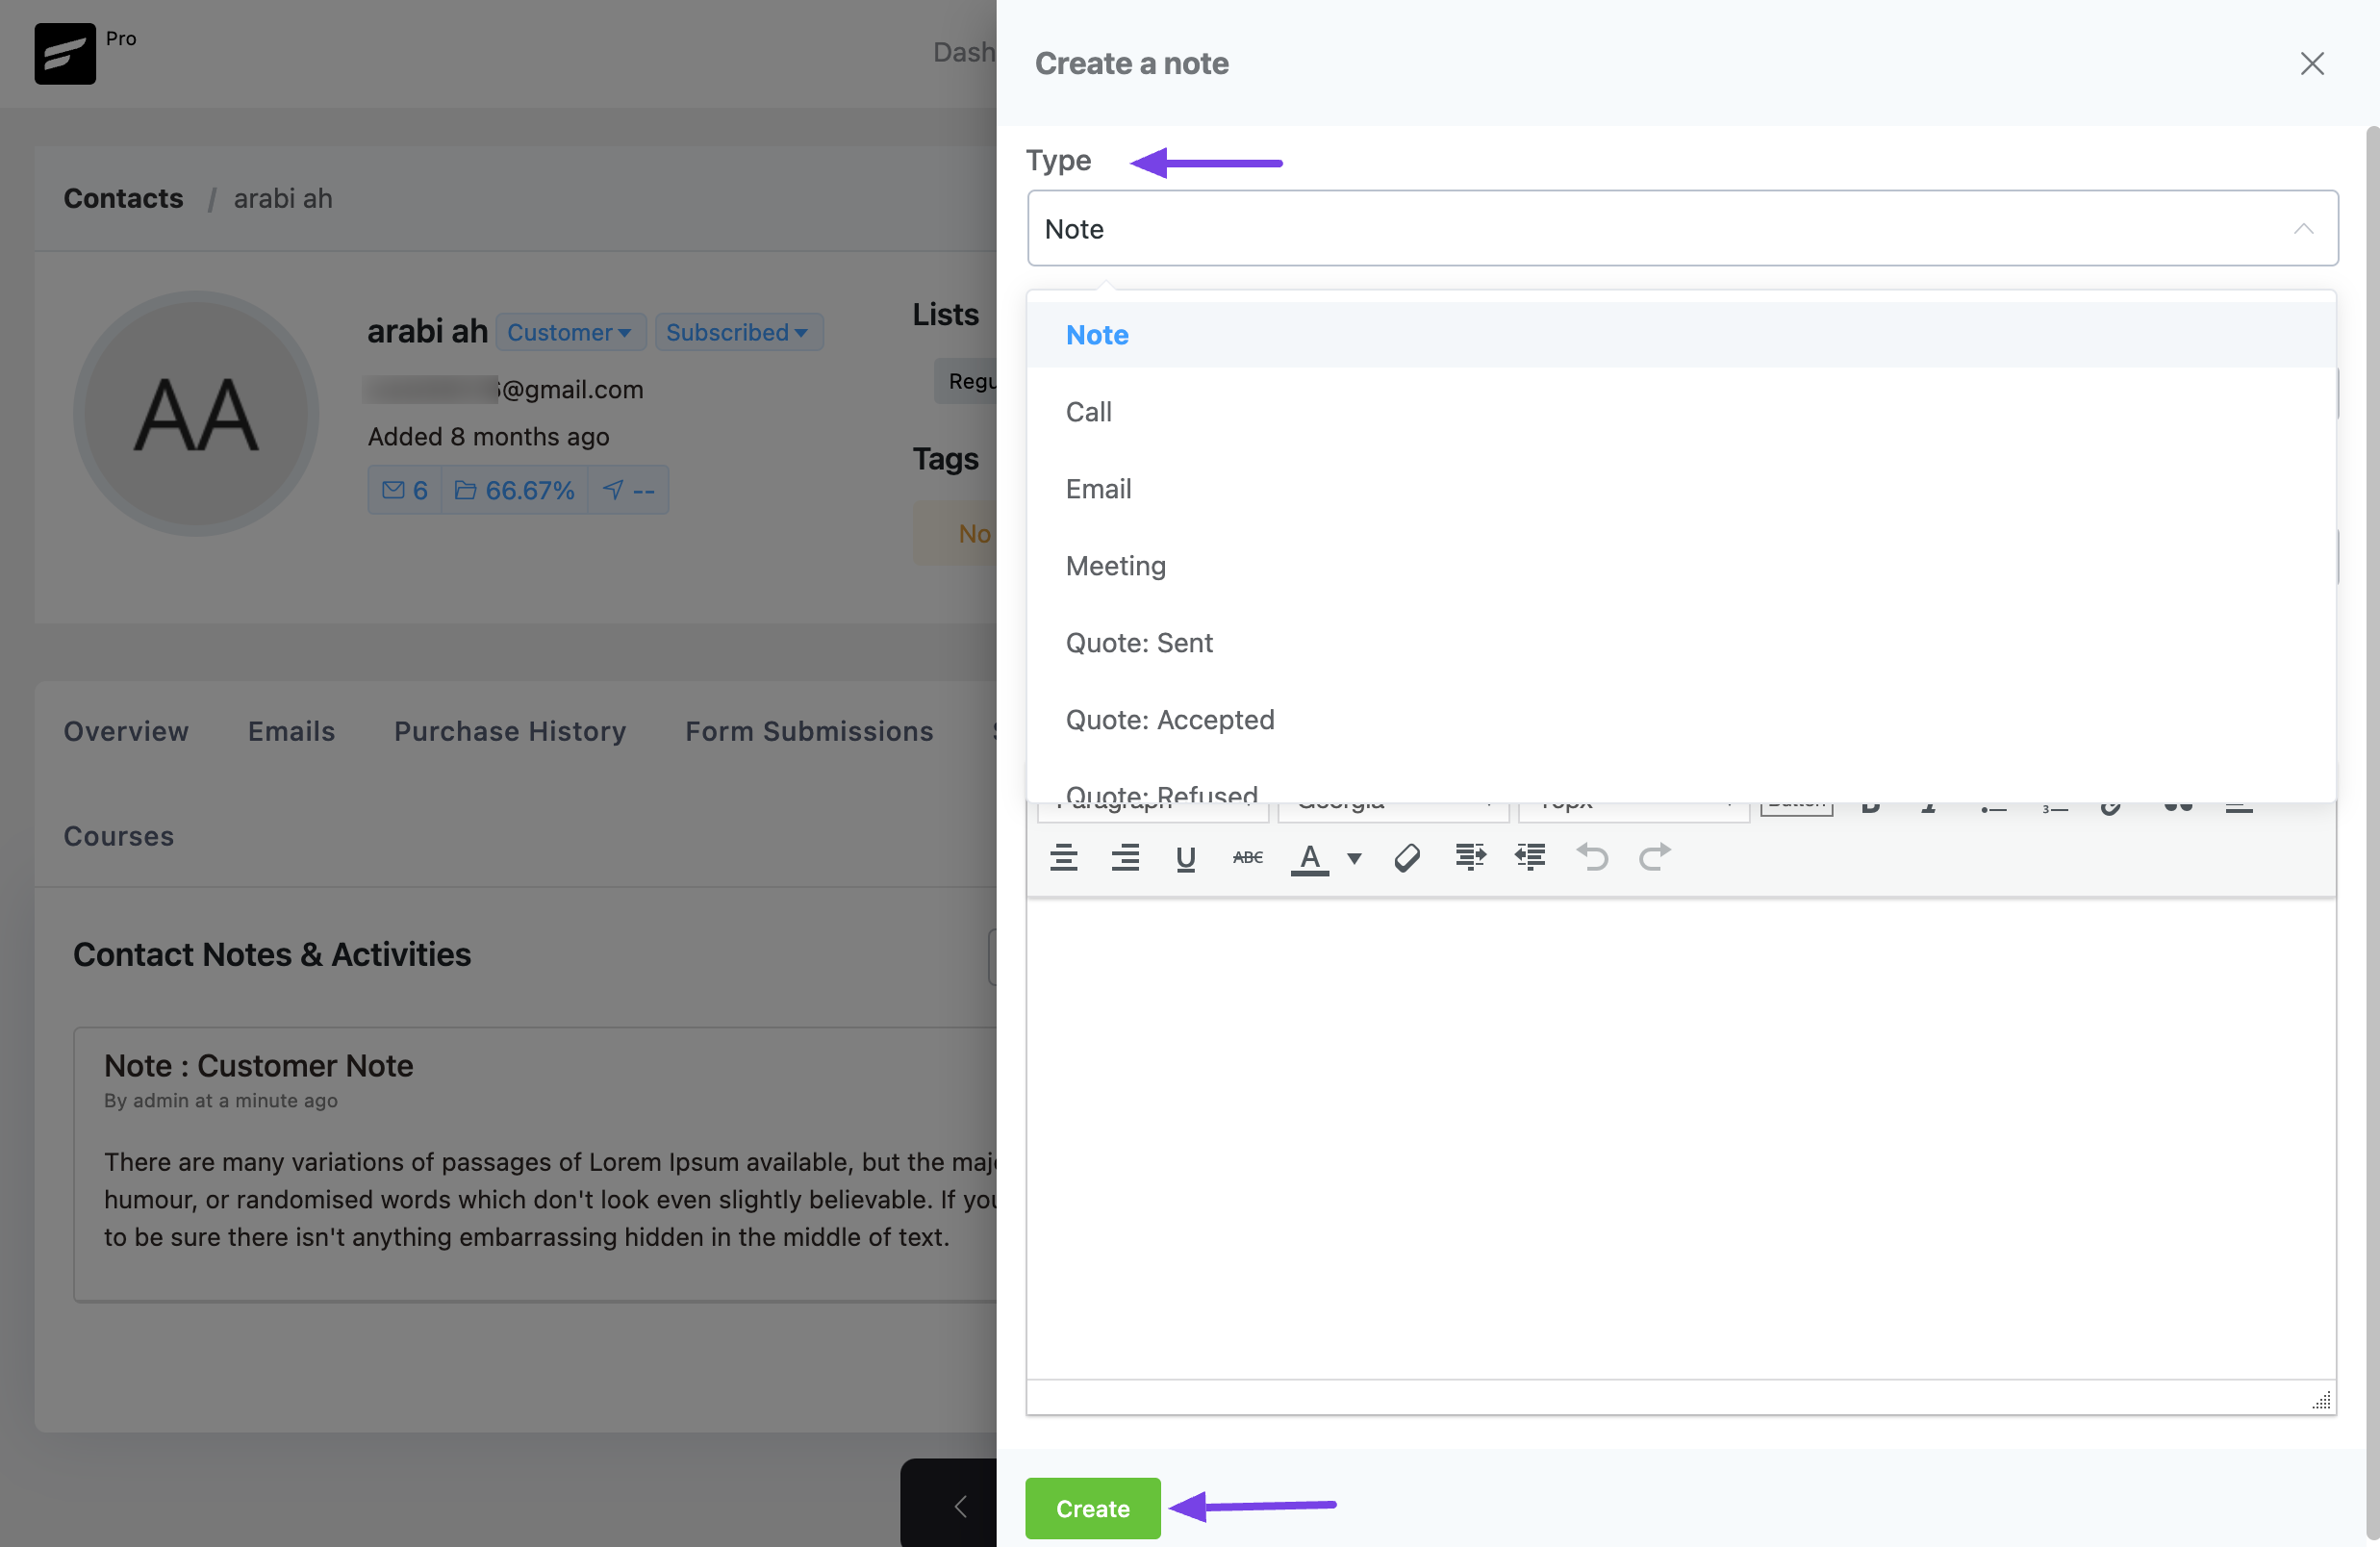
Adding a Contact Note #
To add a new custom note please click on the Add New button and you will see the options below to select the note Type, Date Time (keeping blank will record the current time), Title for the note, and Description as an editor box to add your Contact Note. Once the inputs are done click on the Create button to finish adding the Note.
Manage Contact Notes #
When a Contact Note is added you will see them listed under this Section. You will be able to Edit with the delete(recycle) button and also Edit with the edit button as well.
To export all the contact notes please click on the Download Button at the top right corner of the Notes & Activities section.


How can I set the type of the note list?
Please check the last screenshot
Is it possible to automatically add records to Notes & Activities when important user activities occur?
For example, I want to add something like “Complete XXX course” when a user completes a specific course in Learndash.
Is such a thing possible? Do you have hooks?