
Zapier is one of the best automation tools for automating tasks across platforms. FluentCRM’s webhook connectivity means you can achieve the following if you also have Zapier:
- Bring contacts and data to FluentCRM from other tools and platforms
- Send FluentCRM contacts and data to other tools and platforms
This integration will help you connect FluentCRM with thousands of other tools and platforms that integrate with Zapier and automate repetitive tasks like data import/export. Since this is a webhook integration, you can also connect multiple data sources(e.,g, tools you use on other websites) to FluentCRM.
Follow our simple guide to connect thousands of other tools to FluentCRM using Zapier.
Bringing Contacts and Data to FluentCRM(Incoming Webhook) #
The incoming webhook will help you bring contacts and data from other platforms to FluentCRM using Zapier. For demonstration, we’ll show you how to connect Google Sheets with FluentCRM using Zapier.
Get your Webhook URL from FluentCRM #
In order to connect FluentCRM to Zapier, you need to create a webhook URL on FluentCRM at first. To do so:
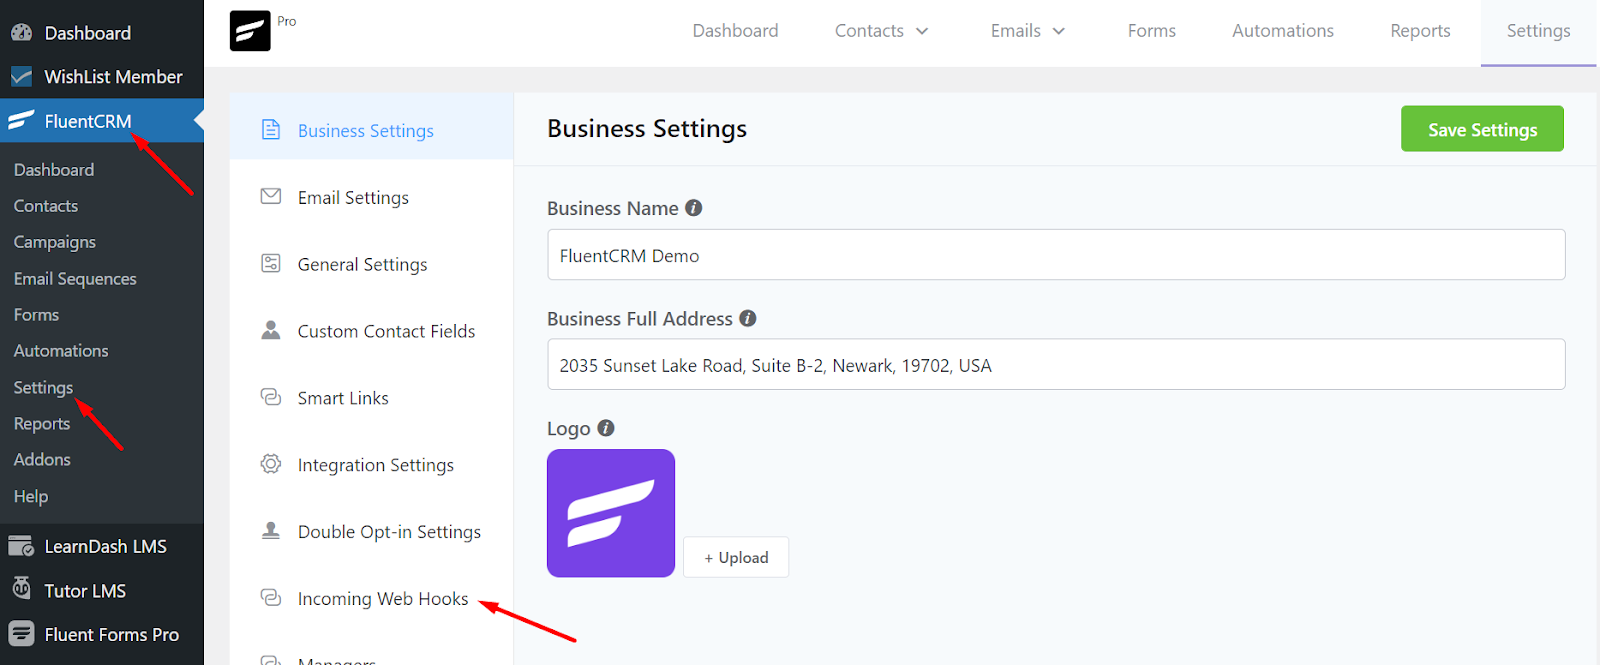
- Go to FluentCRM dashboard. From Settings, select Incoming Webhooks.
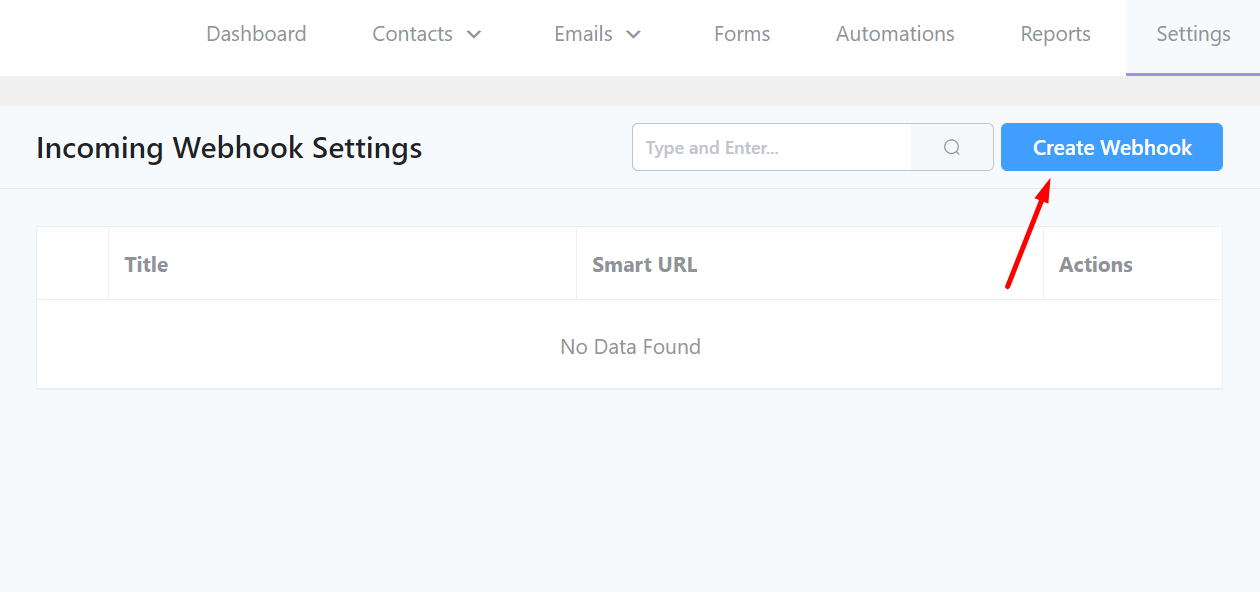
- Here you’ll get the option to Create Webhook.
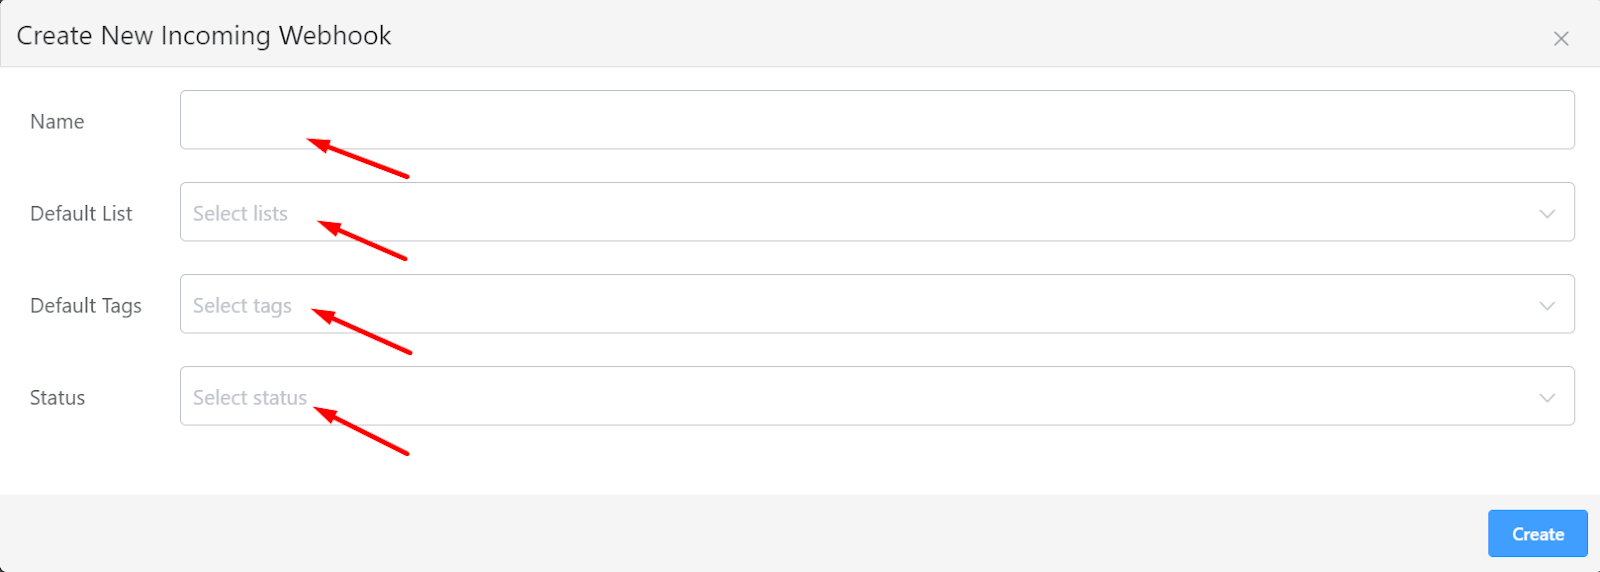
- Add a Name and Status to your webhook. You can also add a List and Tag. Set those and hit the Create button
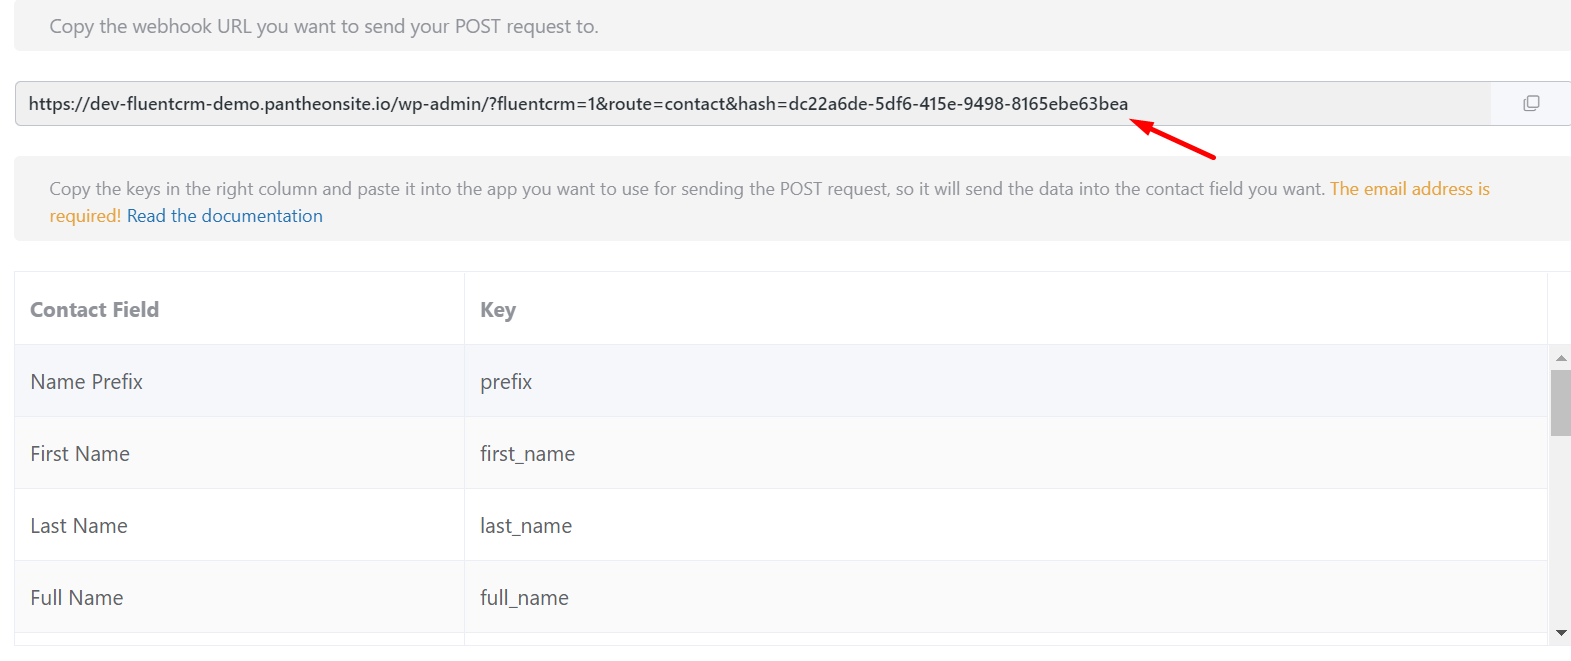
A URL will be generated. We are going to use this URL to connect Zapier.
Configure Trigger in Zapier #
After creating the webhook URL, you need to configure a trigger. A trigger means the automation will happen when the event happens on the other platform(in this case, Google Sheets).
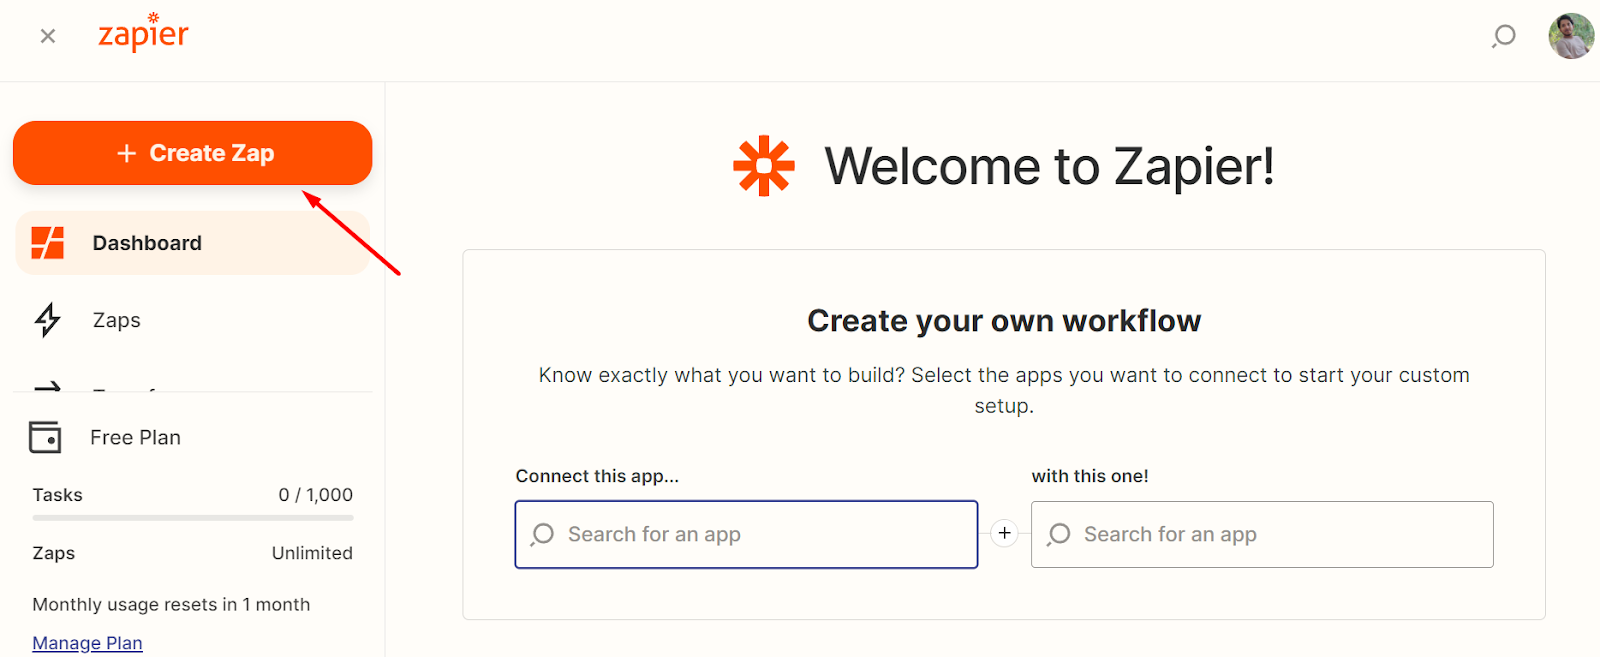
To do this, you’ll need to start by creating a Zap. Go to the Zapier Dashboard and follow the instructions. If you don’t have a Zapier account, you can create one in minutes.
- Click Create Zap from the Zapier account dashboard.
- You will be redirected to the Trigger page. To set the trigger, choose your data source. In our case, we’re choosing Google Sheets.
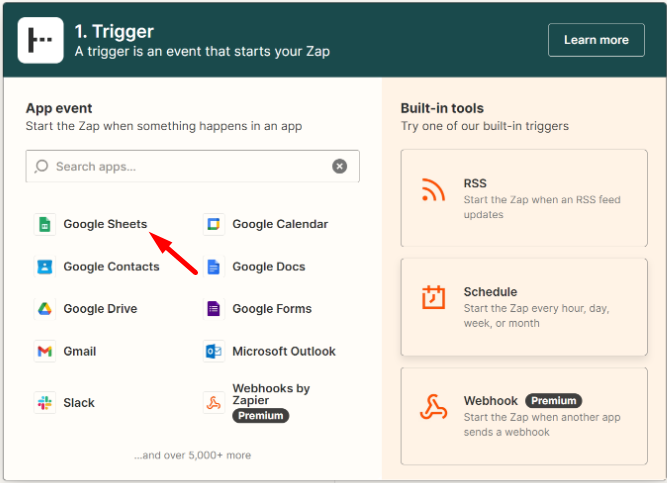
- After selecting this trigger, you have to define the Event. As the trigger, we will set New Spreadsheet Row. Click continue.

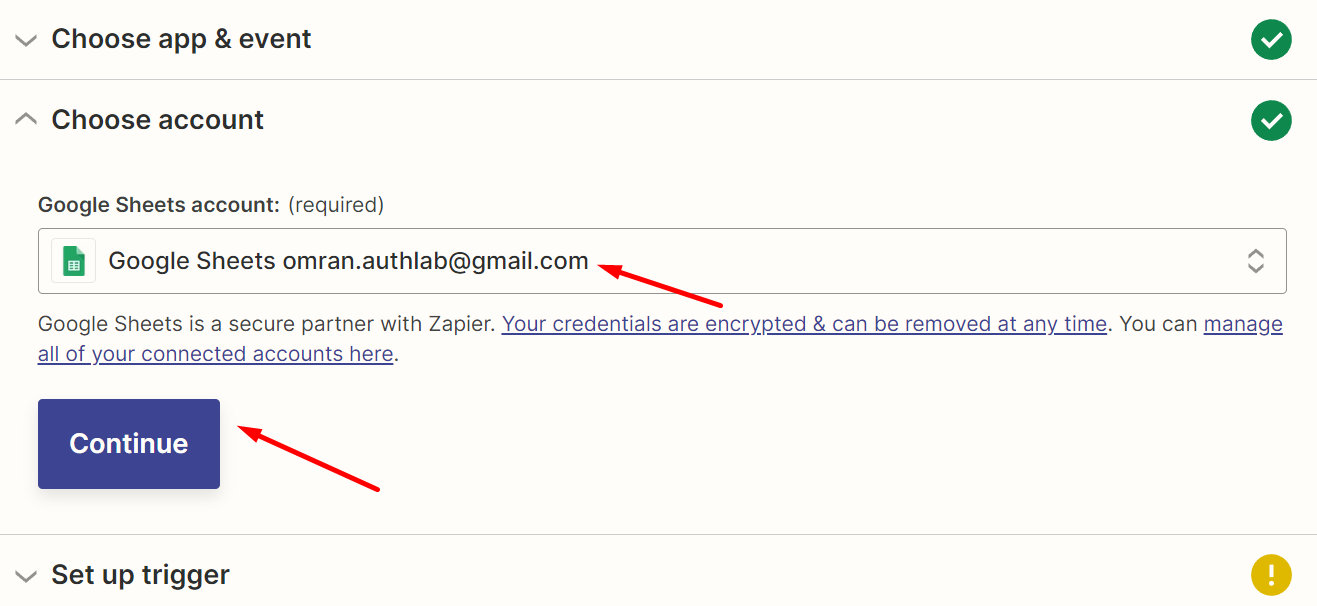
- At this point, You have to choose an account and click continue.
Note: You may need to allow permission to view and edit Google Sheets if you haven’t done it already.
- After selecting the account, you have to select the spreadsheet you want to import to FluentCRM. Select the field, choose a worksheet you’ve already created and click continue.
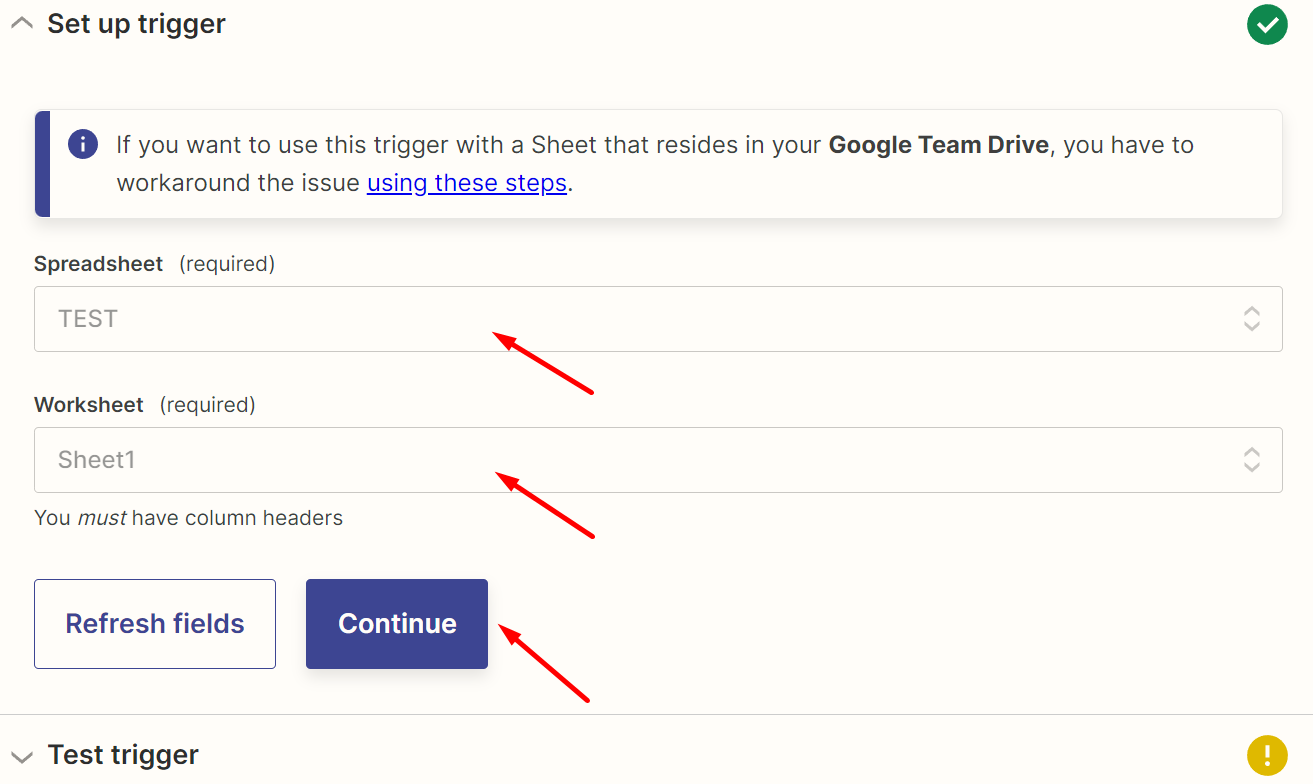
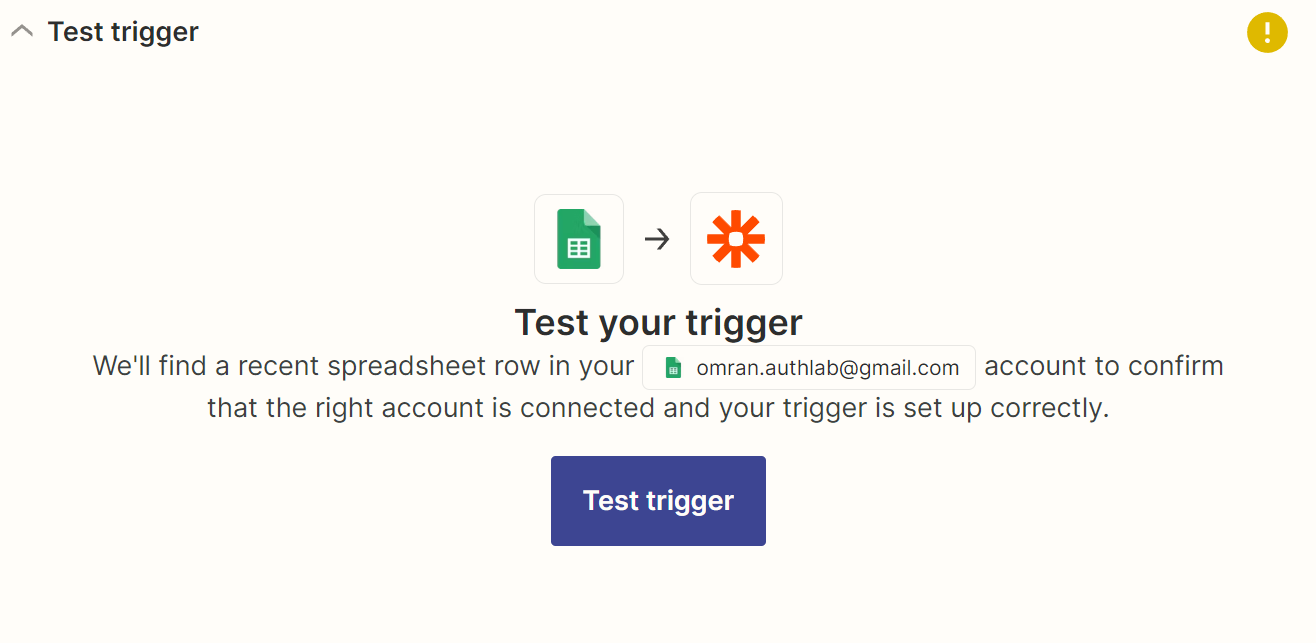
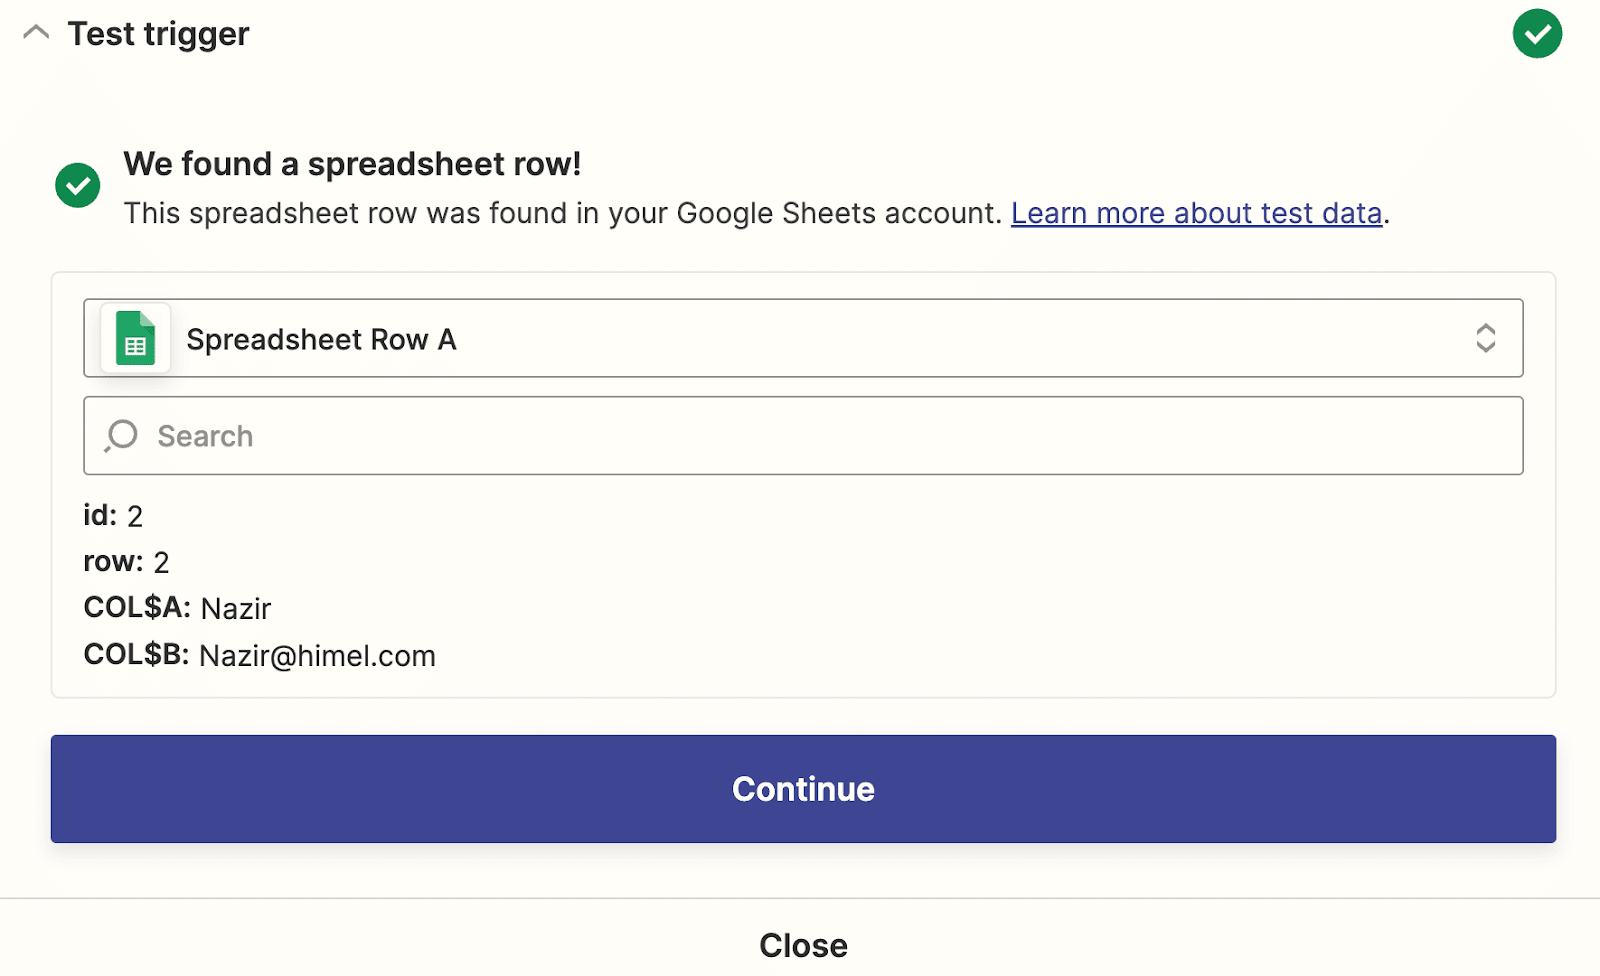
- Test Trigger before moving on to the next step. If you created any rows, the data should show up here.
A success message means that you’ve successfully configured the trigger.
Configure Action in Zapier #
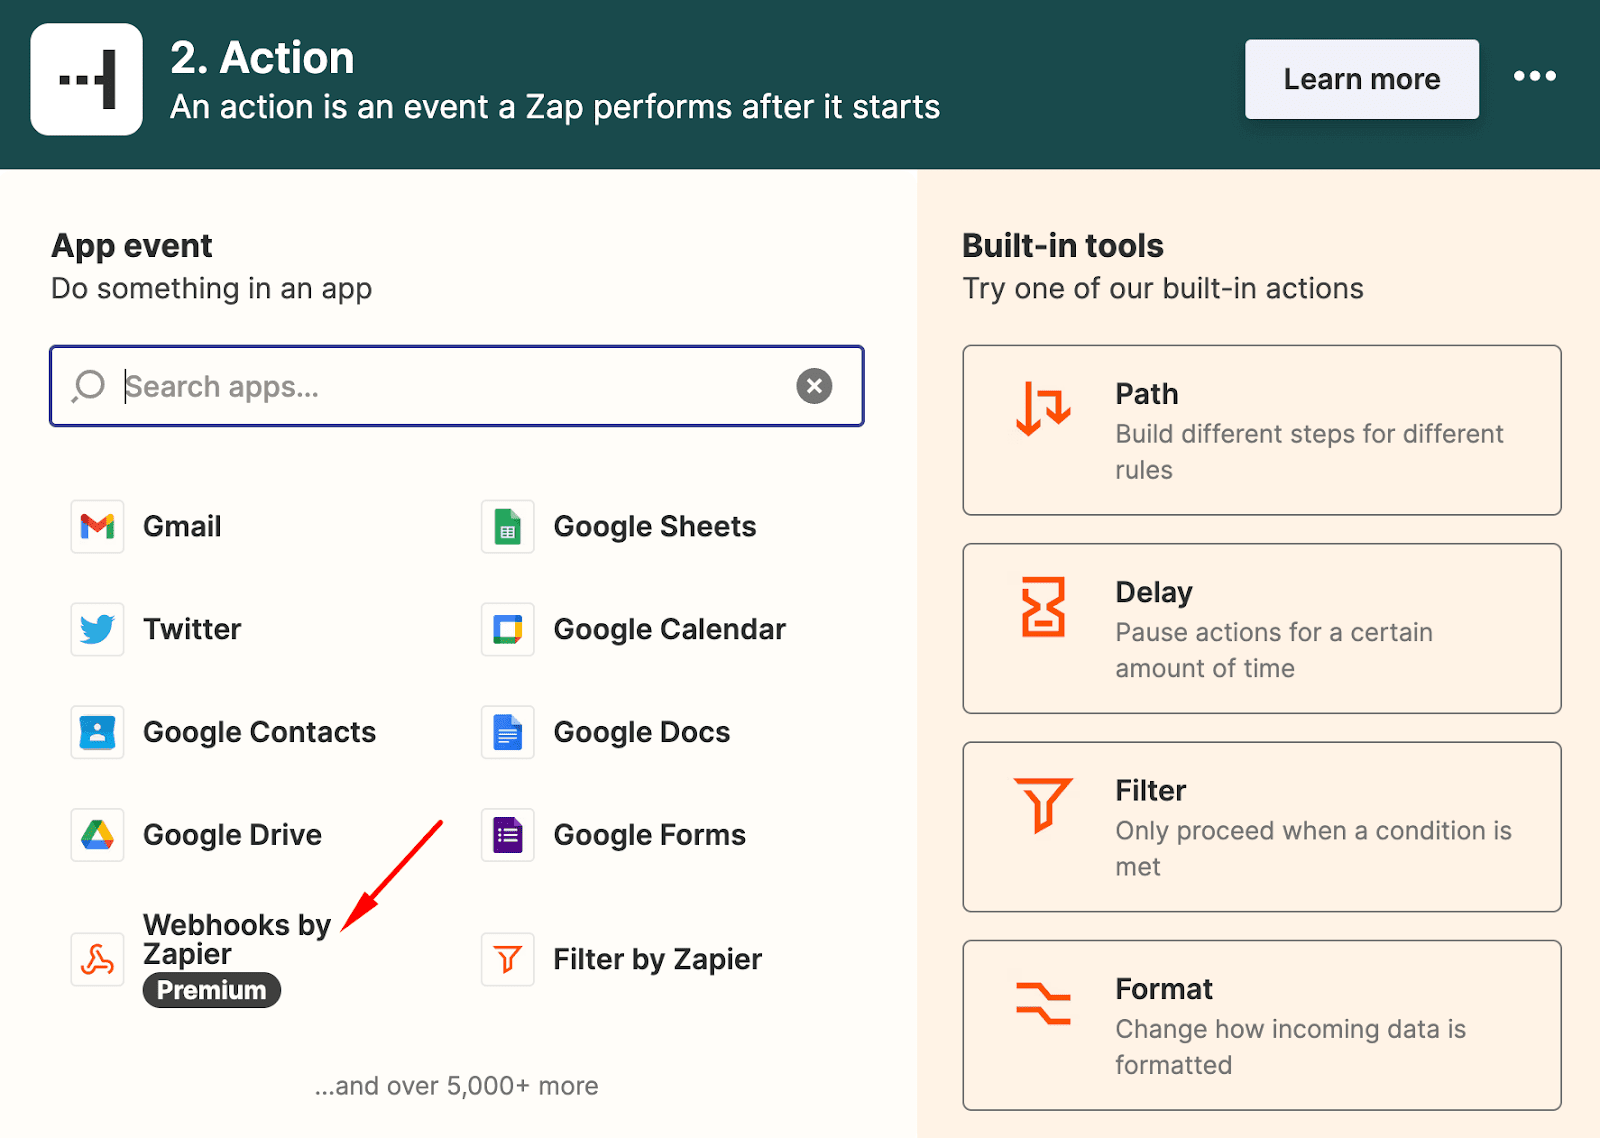
After successfully configuring the trigger, you need to configure the action so that FluentCRM can receive the data via the incoming webhook we’ve created in step 1. To do so:
- Click action and choose Webhook by Zapier.
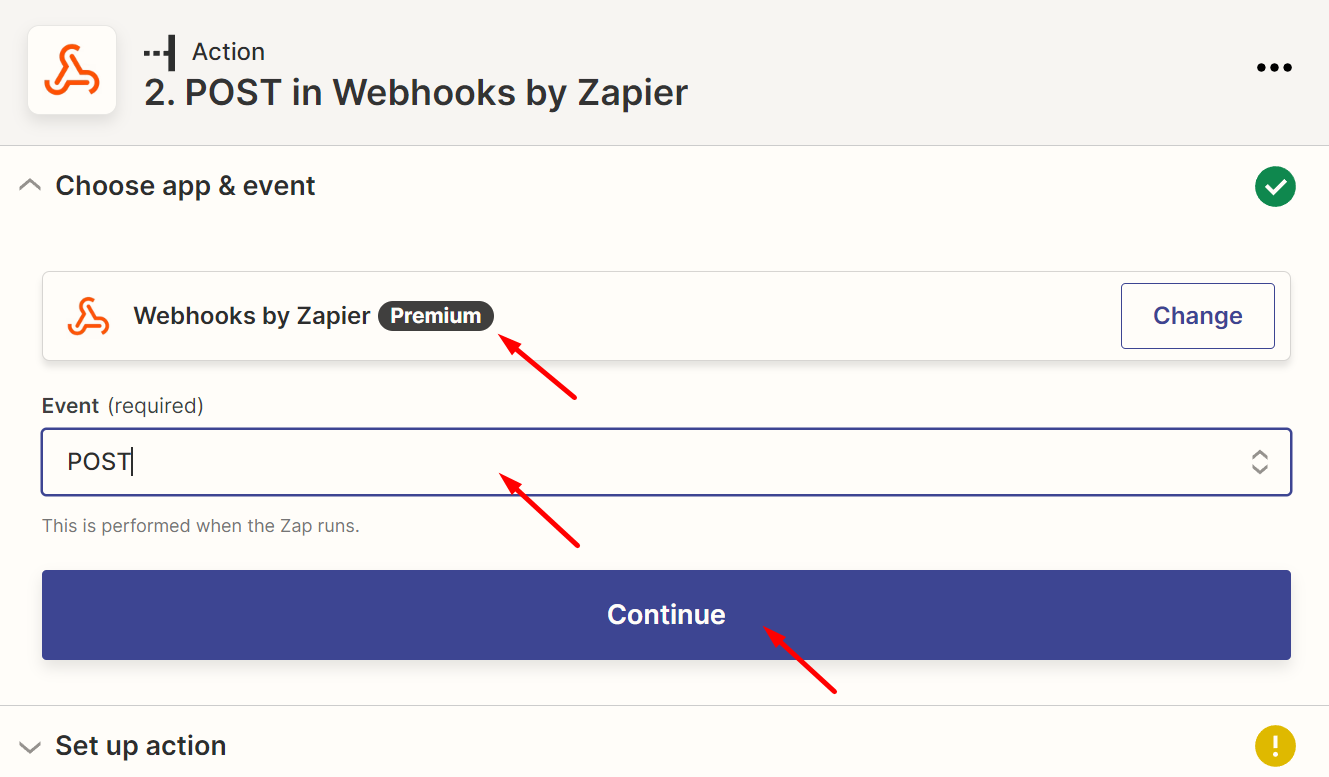
- Set the action event to Post and click continue.
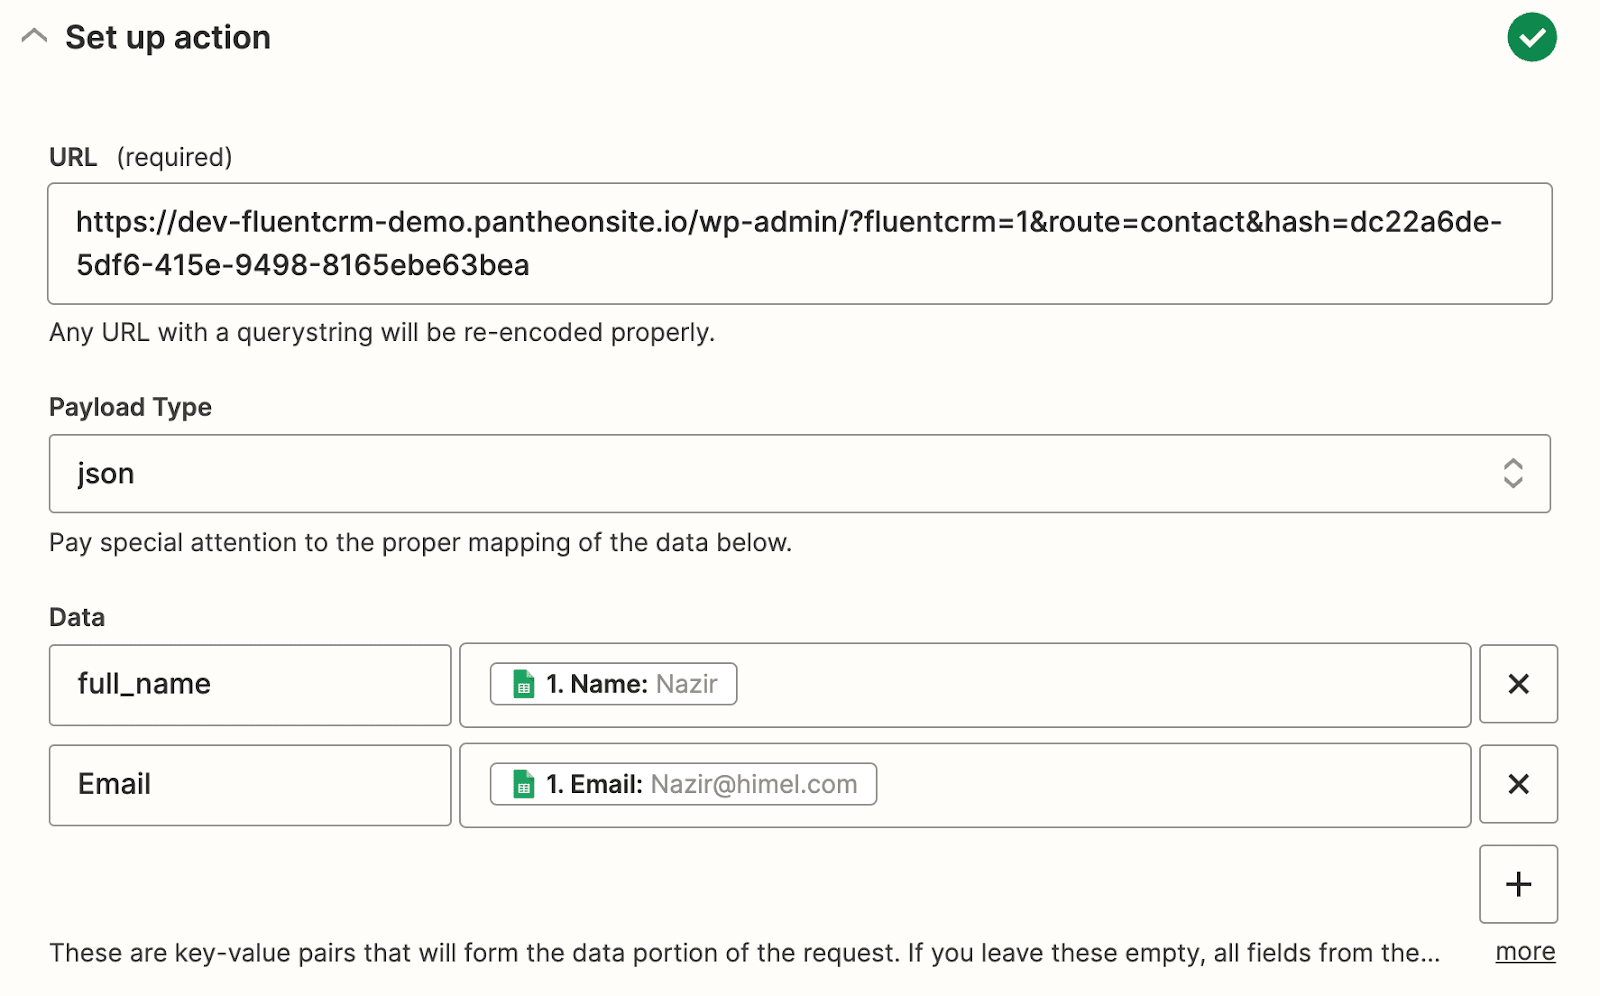
- Now you’ll be asked to enter the necessary details such as URL and Payload type. You’ll also need to map the data.
URL: Copy the URL generated by FluentCRM as we showed in step 1.
Payload Type: json
Data: Map the prefix keys and use Email for the contact’s email address
You can keep the rest of the fields as they are and click continue.
- Finally, click Test and continue to proceed. If it shows a success message, the data will be sent to FluentCRM
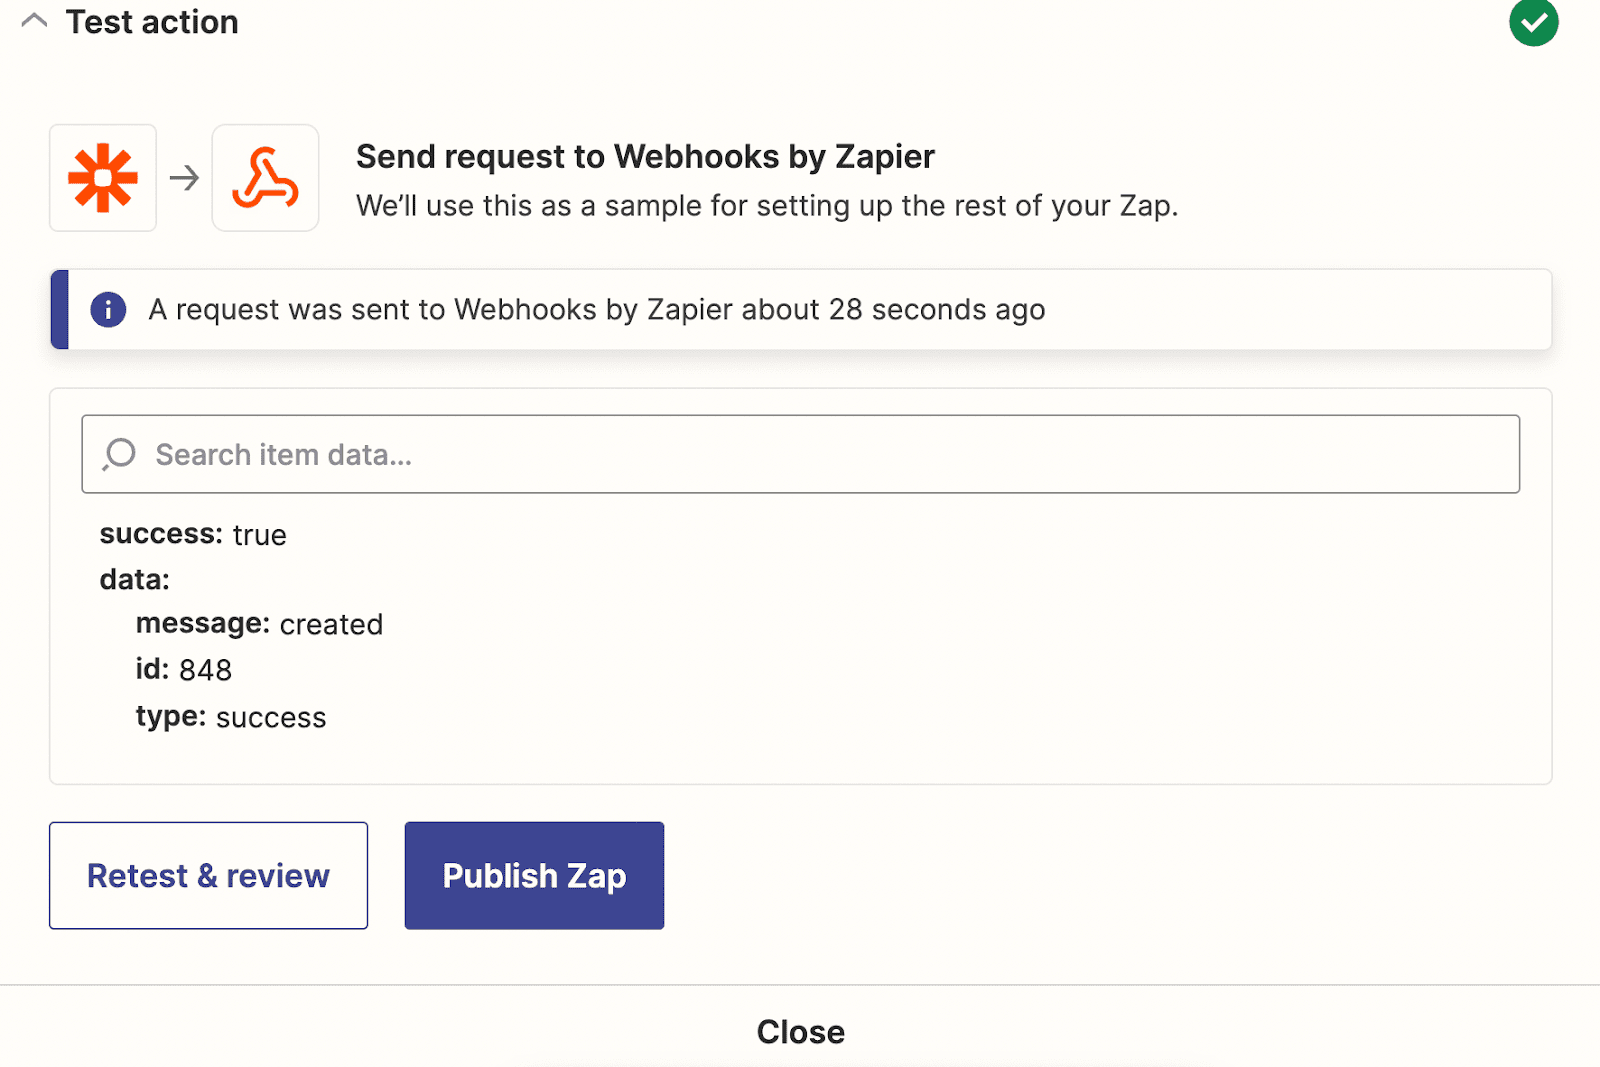
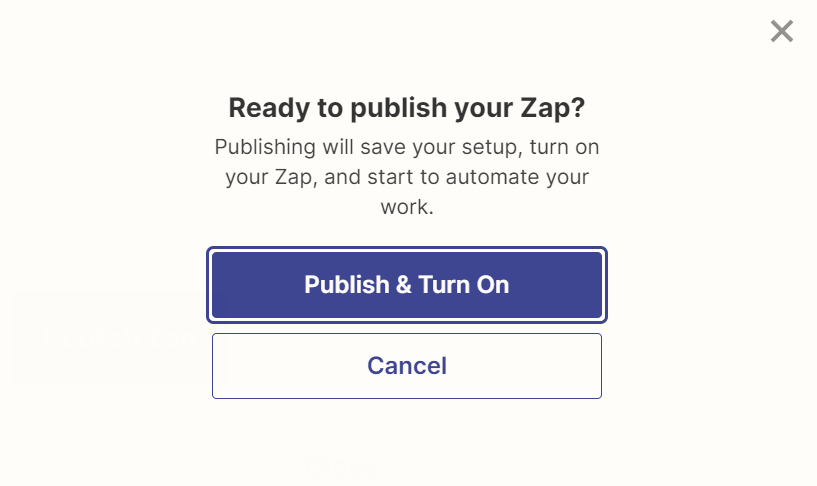
- If everything is working fine, it means that the data will be automatically added to FluentCRM whenever a Google Sheet row is added. Click Publish Zap to start automating contact importing!
Sending FluentCRM Data to Other Platforms(Outgoing Webhook) #
The contact and data you’ve gathered inside FluentCRM are valuable assets you have to keep safe and use for other purposes As a result, you might want to export it to 3rd party platforms. Connecting FluentCRM to Zapier using outgoing webhooks is undoubtedly a reliable way to do so!
To send FluentCRM data to other platforms, you’ll need to use an automation you’ve already created. Or you can create one from scratch. For demonstration, we’ll create one and show you how to send data to Google Sheets.
Set Up Incoming Webhook in Zapier #
At first, you need to set up an incoming webhook in Zapier. To get the incoming webhook URL:
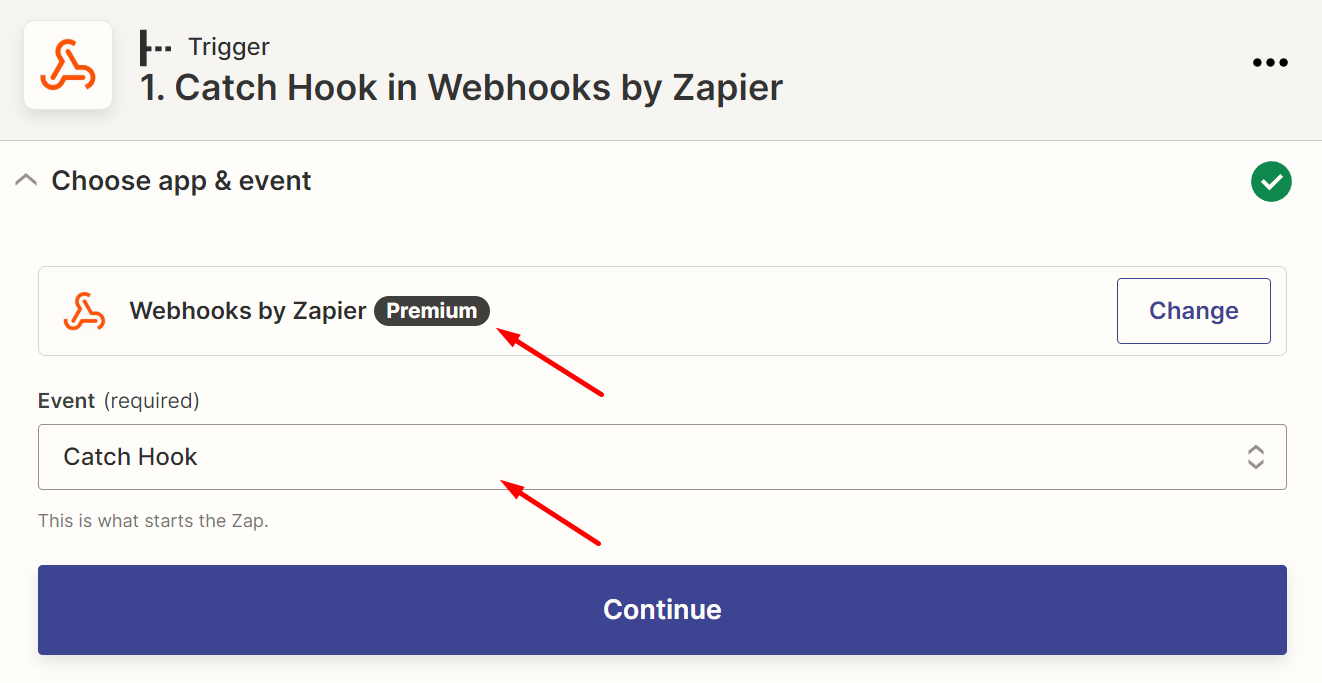
- Go to Zapier and click Create Zap. Then select Webhook as the trigger.
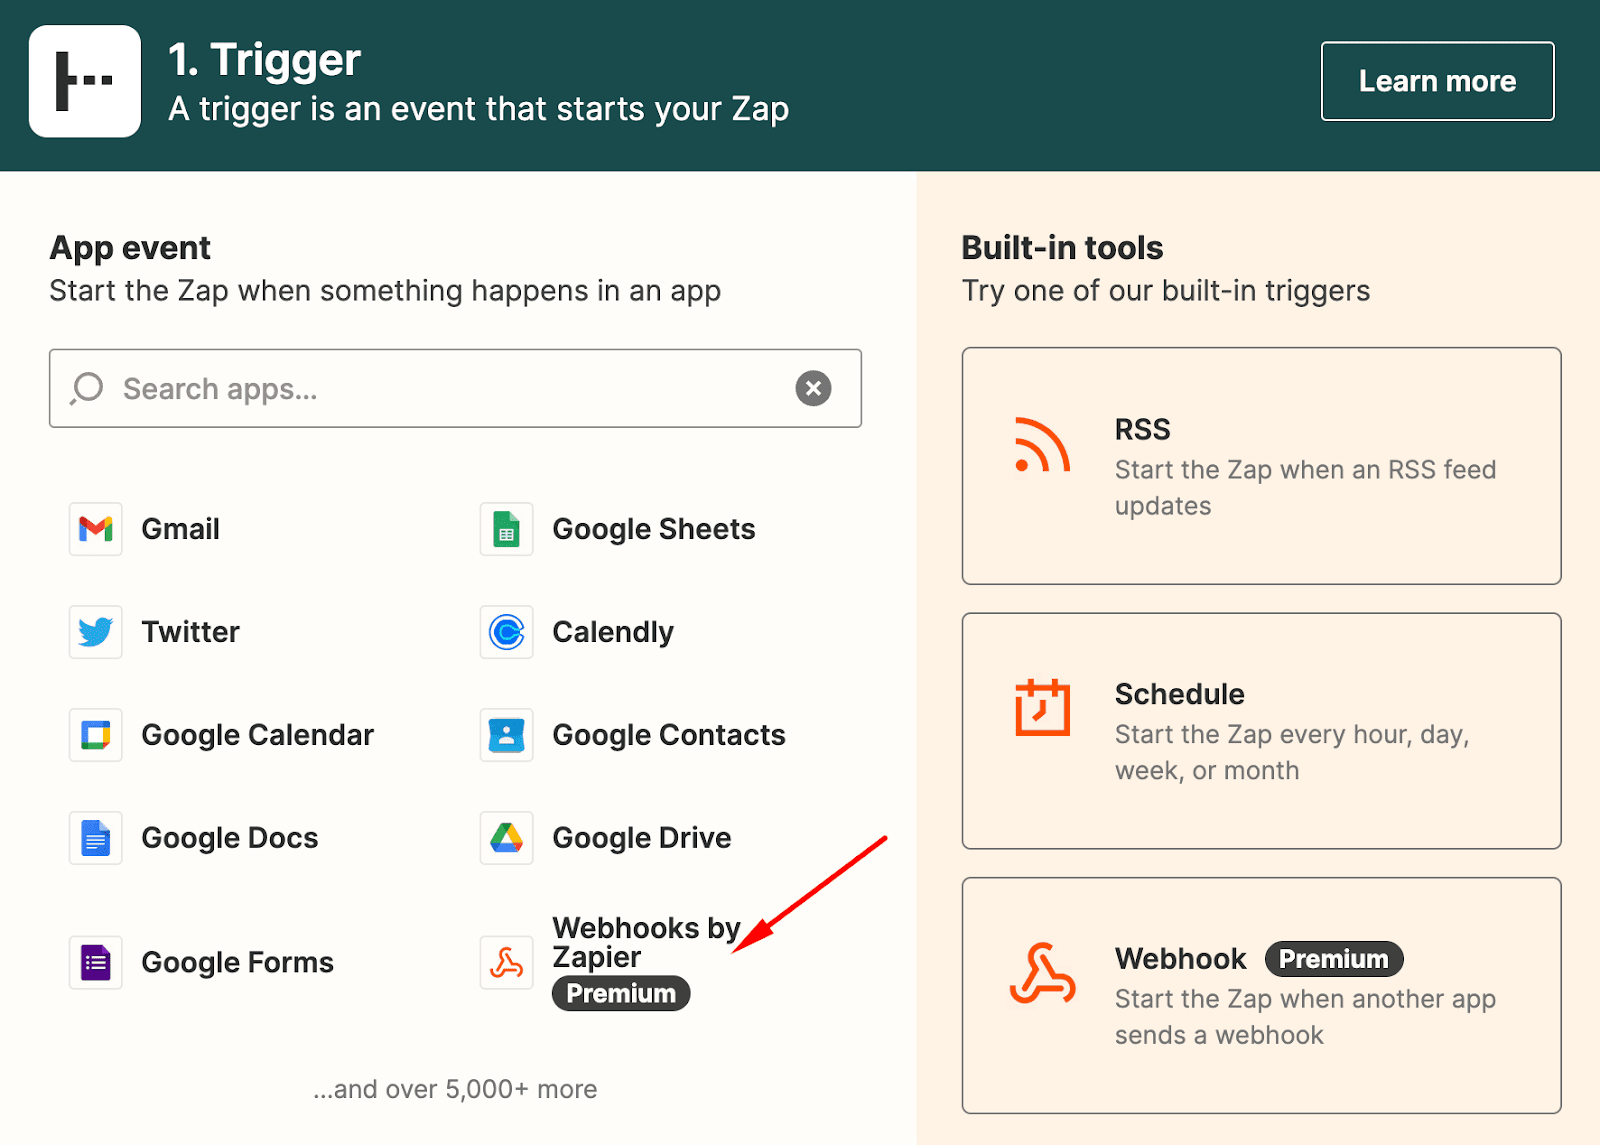
- For Action Event, choose Catch Hook.
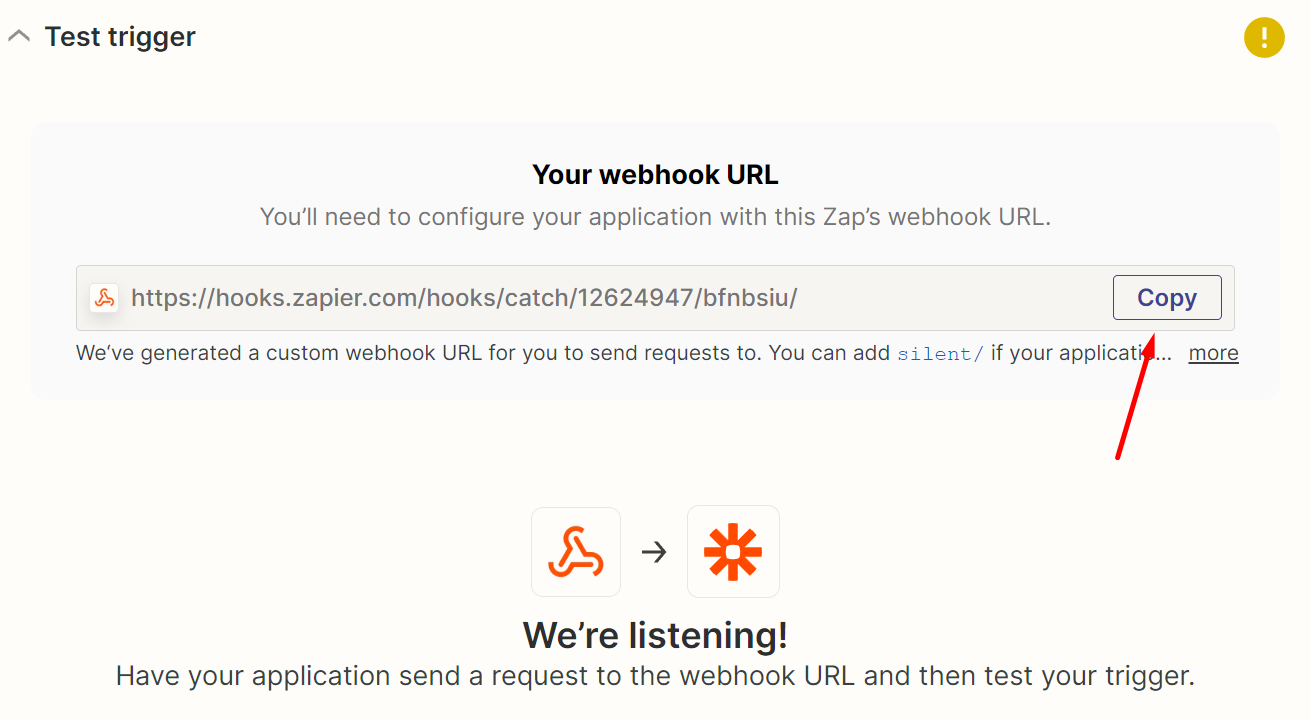
- In the next step, you’ll be asked to pick off a Child Key. Since this is optional, you can keep it blank and click Continue, you’ll be presented with a webhook URL.
Create Automation and Outgoing Webhook #
As we mentioned, you can only send contacts and data if you have an existing automation. We’ll start by creating one.
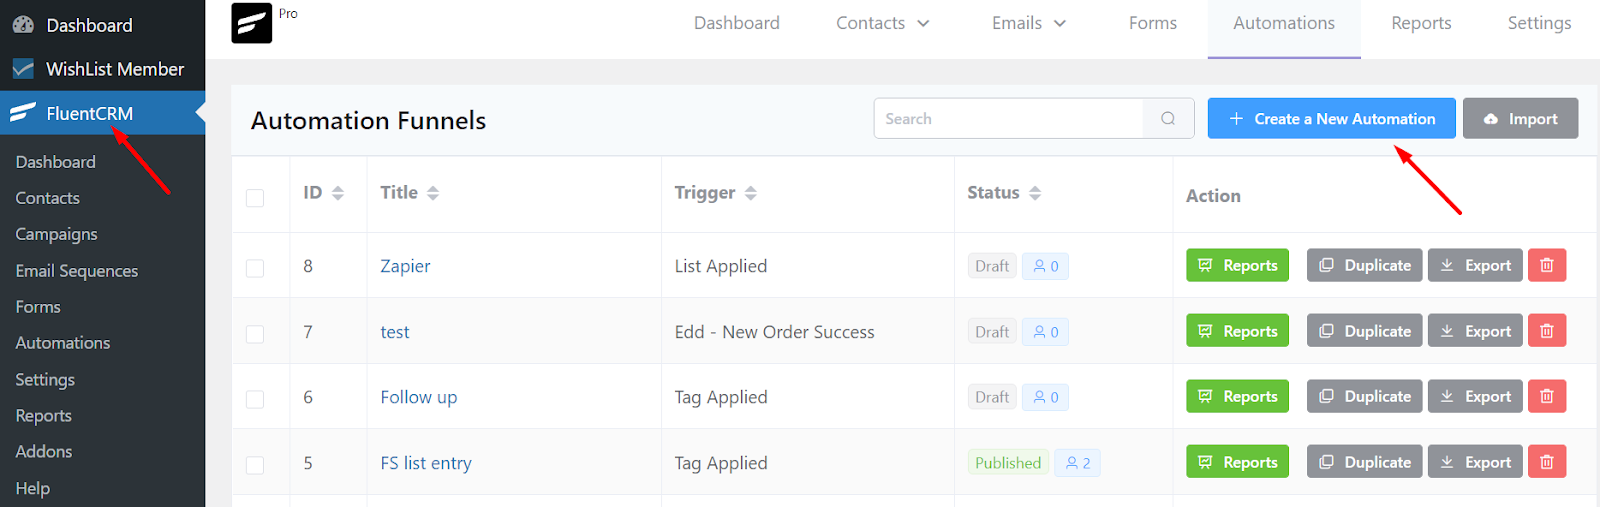
- Go to FluentCRM>Automations and click Create a New Automation.
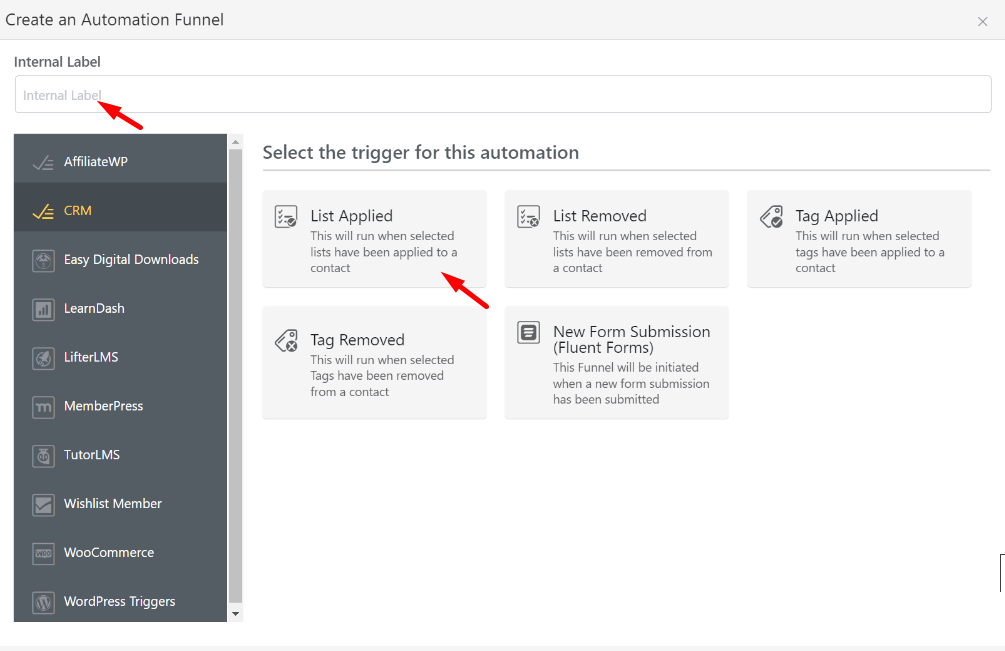
- Let’s set a trigger. We selected the list applied for this tutorial, named it, and selected the list. Click Save setting.
- Now, when the automation window is open, click (+) and choose Outgoing Webhook from the Action Blocks.
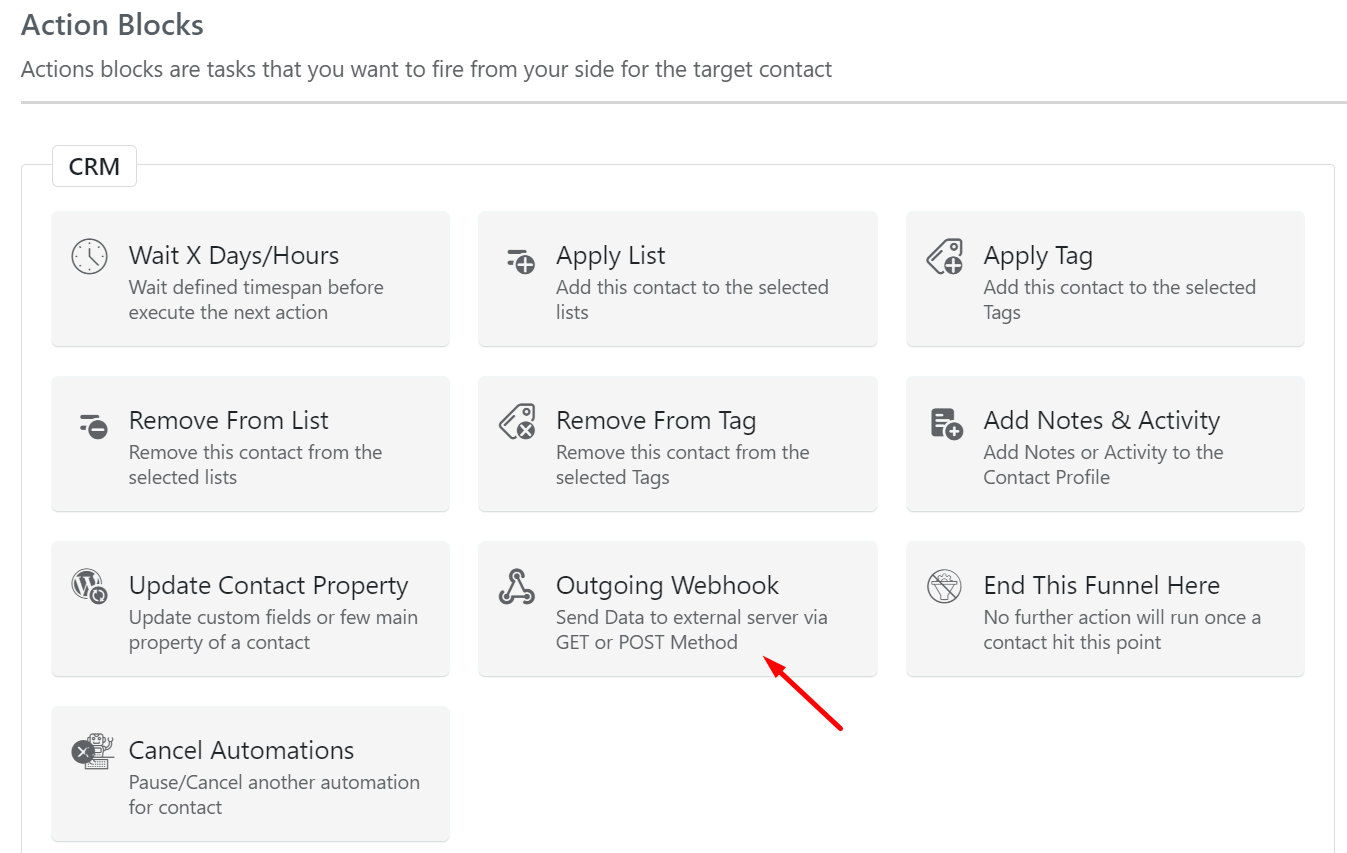
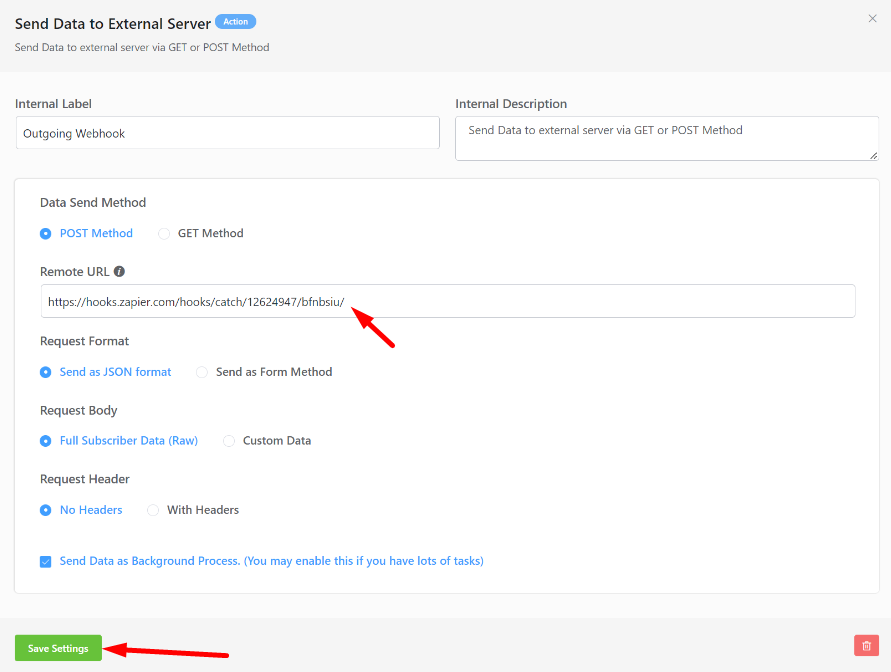
- The outgoing webhooks action needs to be configured properly before it can send your data to other platforms. You should configure it like the following:
Data Send Method: Post Method
Remote URL: The URL you’ve generated in Step 1.
Request Format: Send as JSON Format
Request Body: you can choose to load the Full subscriber’s data. If you don’t want all your data transferred, select Custom data.
Request Header: No Header
You can send additional data with the Request Header since it’s an optional field; we will skip this for now. To finish off, Save your settings.
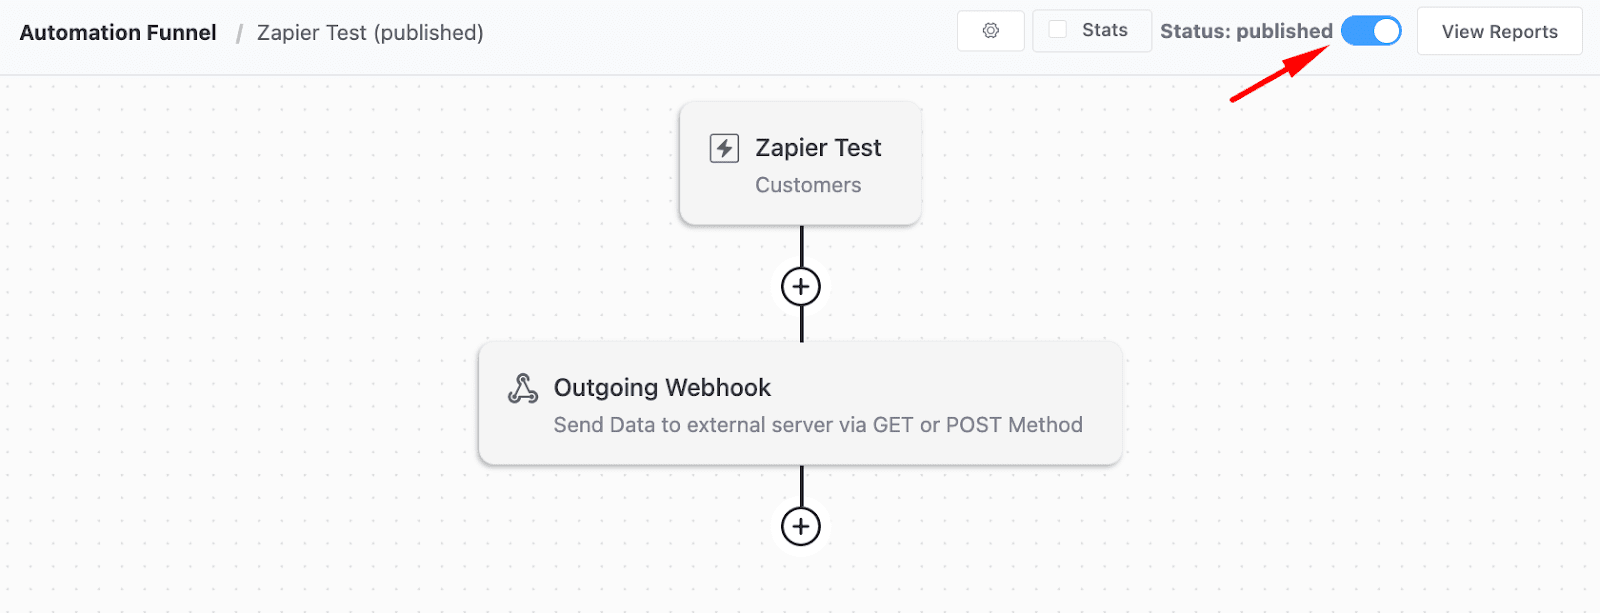
- Publish the automation to put it into effect.
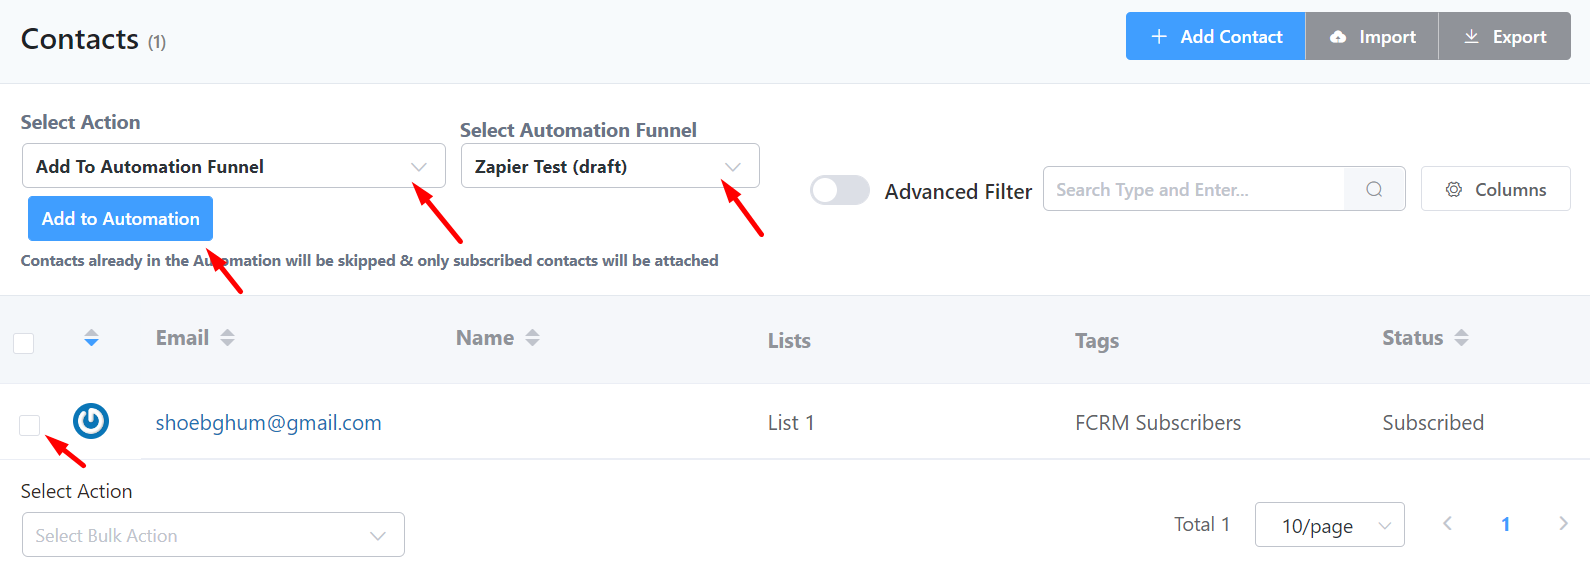
Note(Skip if you’re testing with existing automation): The automation is live. However, it doesn’t have any data to test our Zapier integration. So we’ll have to manually add a contact to the automation. To do so, go to FluentCRM>Contacts and select a contact. On the top of the screen, choose Add to Automation and choose the automation funnel you’ve created earlier. Finally, click Add to Automation to proceed to the next step.
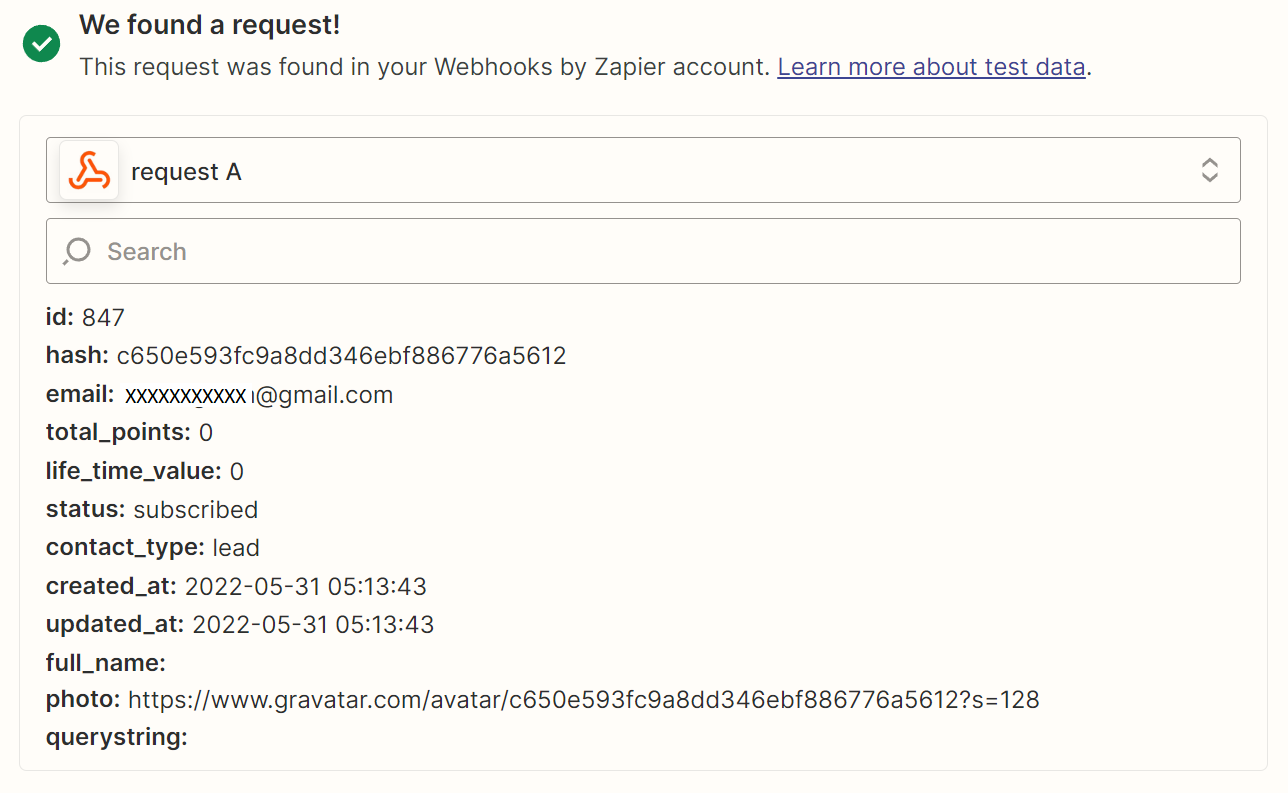
- Go back to Zapier and click Test Trigger now. If it returns with information, the trigger is configured successfully. Click Continue to save the automation.
Configure Zapier Action #
We can now move on to Action.
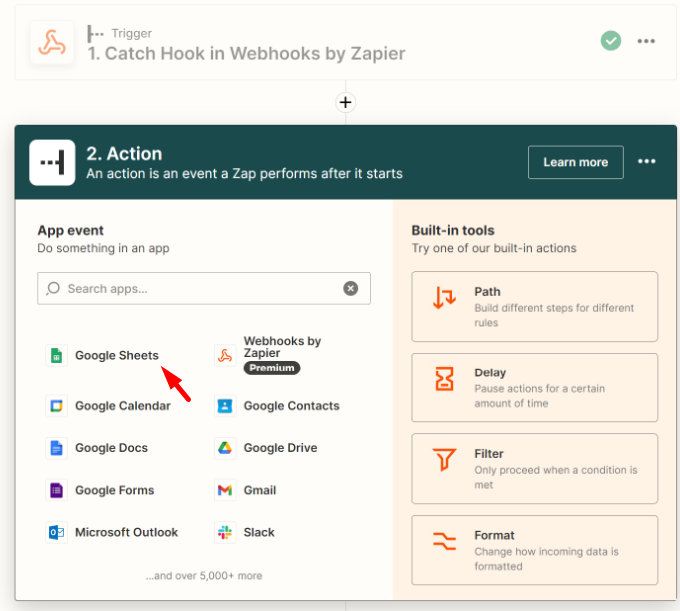
- From the Action menu, select whatever works for you. We want to export our FluentCRM data to Google Sheets, so we’ll select that.
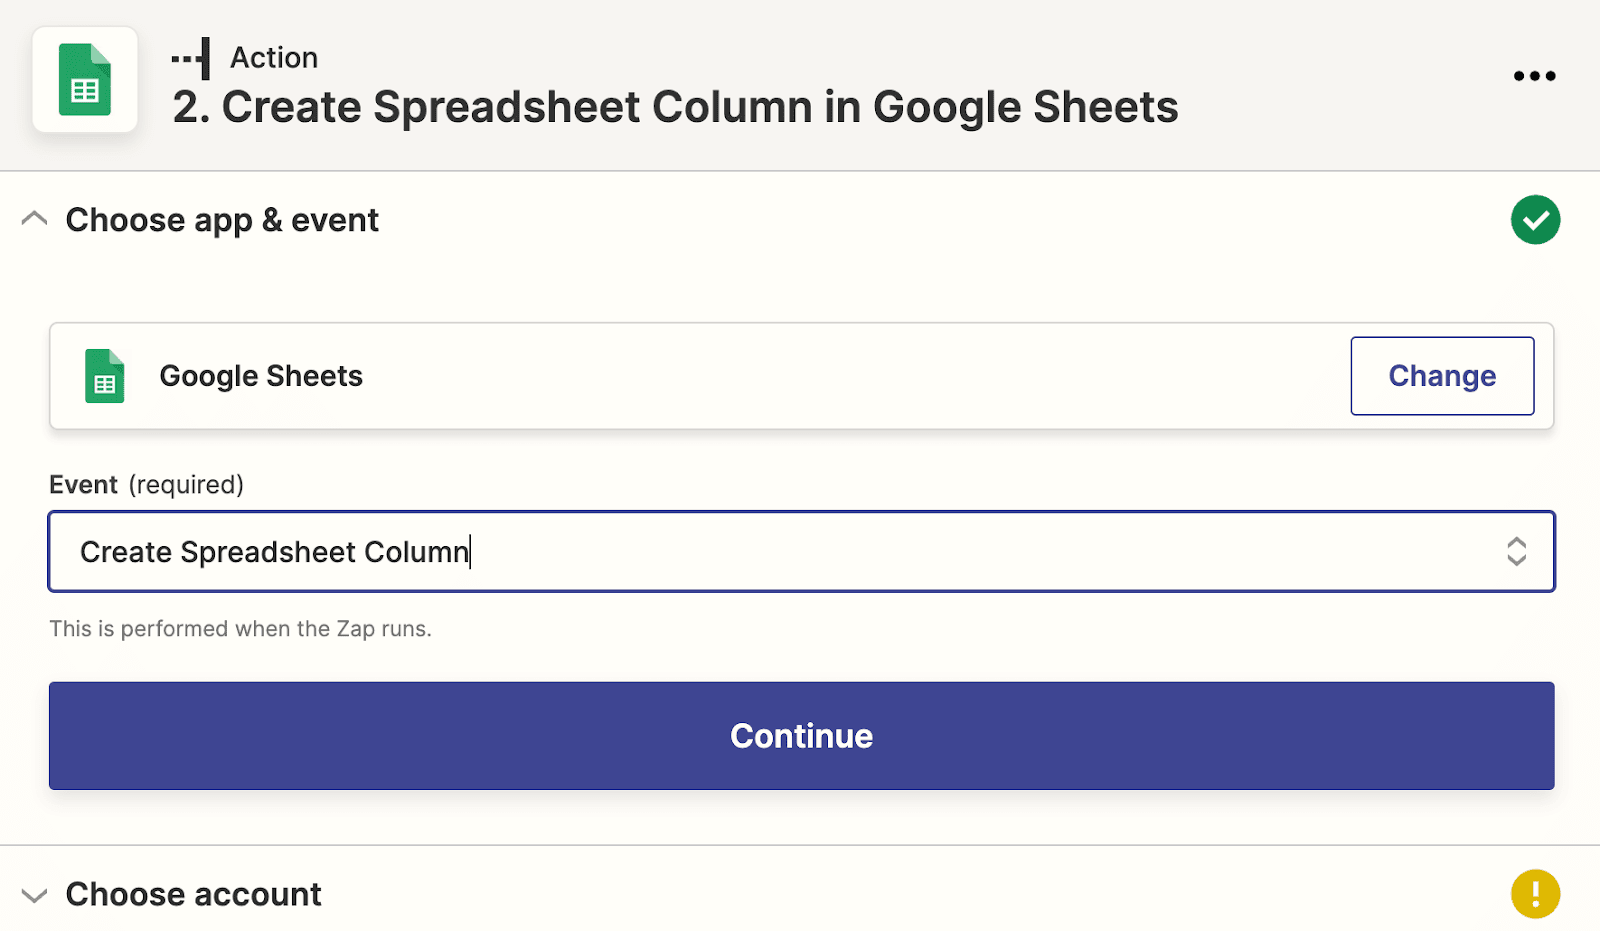
- Now select an Action that meets your need. We want to export our FluentCRM data in a demo sheet. So we’ll select Create Spreadsheet Column and click Continue.
- Now choose the account from which you want to select your spreadsheet and click Continue.
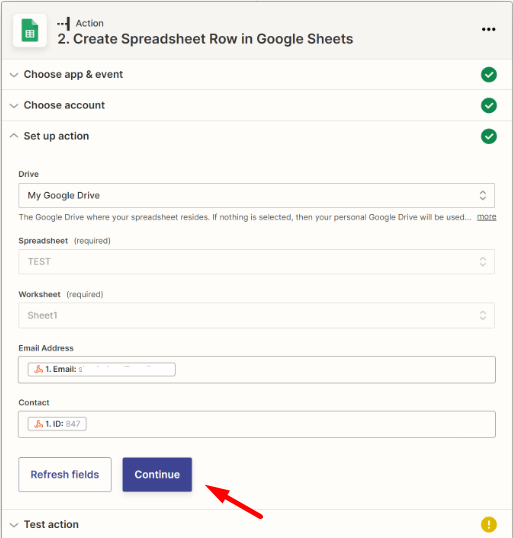
- Next, select your Drive, Spreadsheet, Worksheet, and Column Name. and click Continue. If you don’t have a sheet for this purpose, you’ll have to create it.
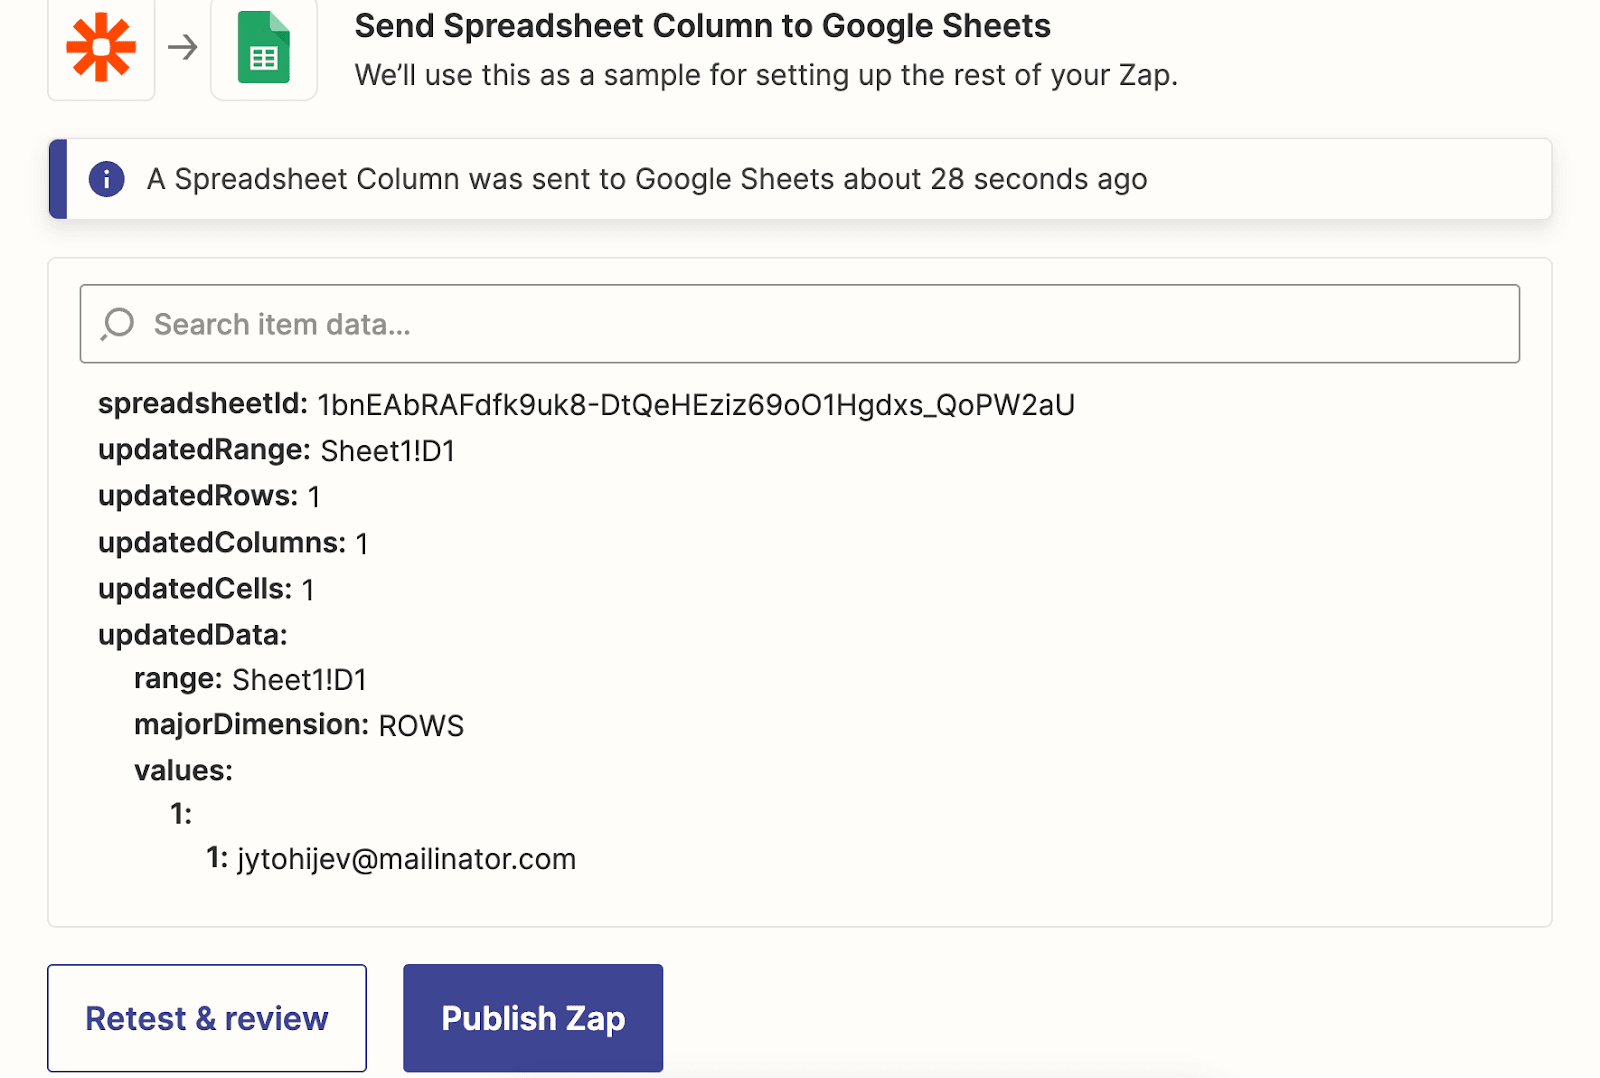
- Finally, click test and continue, If you get a success message like shown below, the integration is successful. Click Publish Zap to publish the automation.
So that completes our Zapier integration tutorial. If you get stuck or have any questions about the tutorial, feel free to comment below!
FluentCRM offers excellent webhook connectivity so that you can easily connect your data sources and automate tasks easily. Read our documentation for easy Webhook integration!


