FluentCRM offers another Advanced Features Configuration under the Global Settings tab where you will find different advanced settings that you can enable or disable anytime as per your needs. This article will guide you through the process of using this Advanced Features Configuration.
Advanced Features Configuration #
To learn how to use Advanced Feature Configuration, follow the steps with screenshots below accordingly –
First, go to Settings from the top right corner of the FluentCRM Navbar and click the Advanced Feature Config settings option.
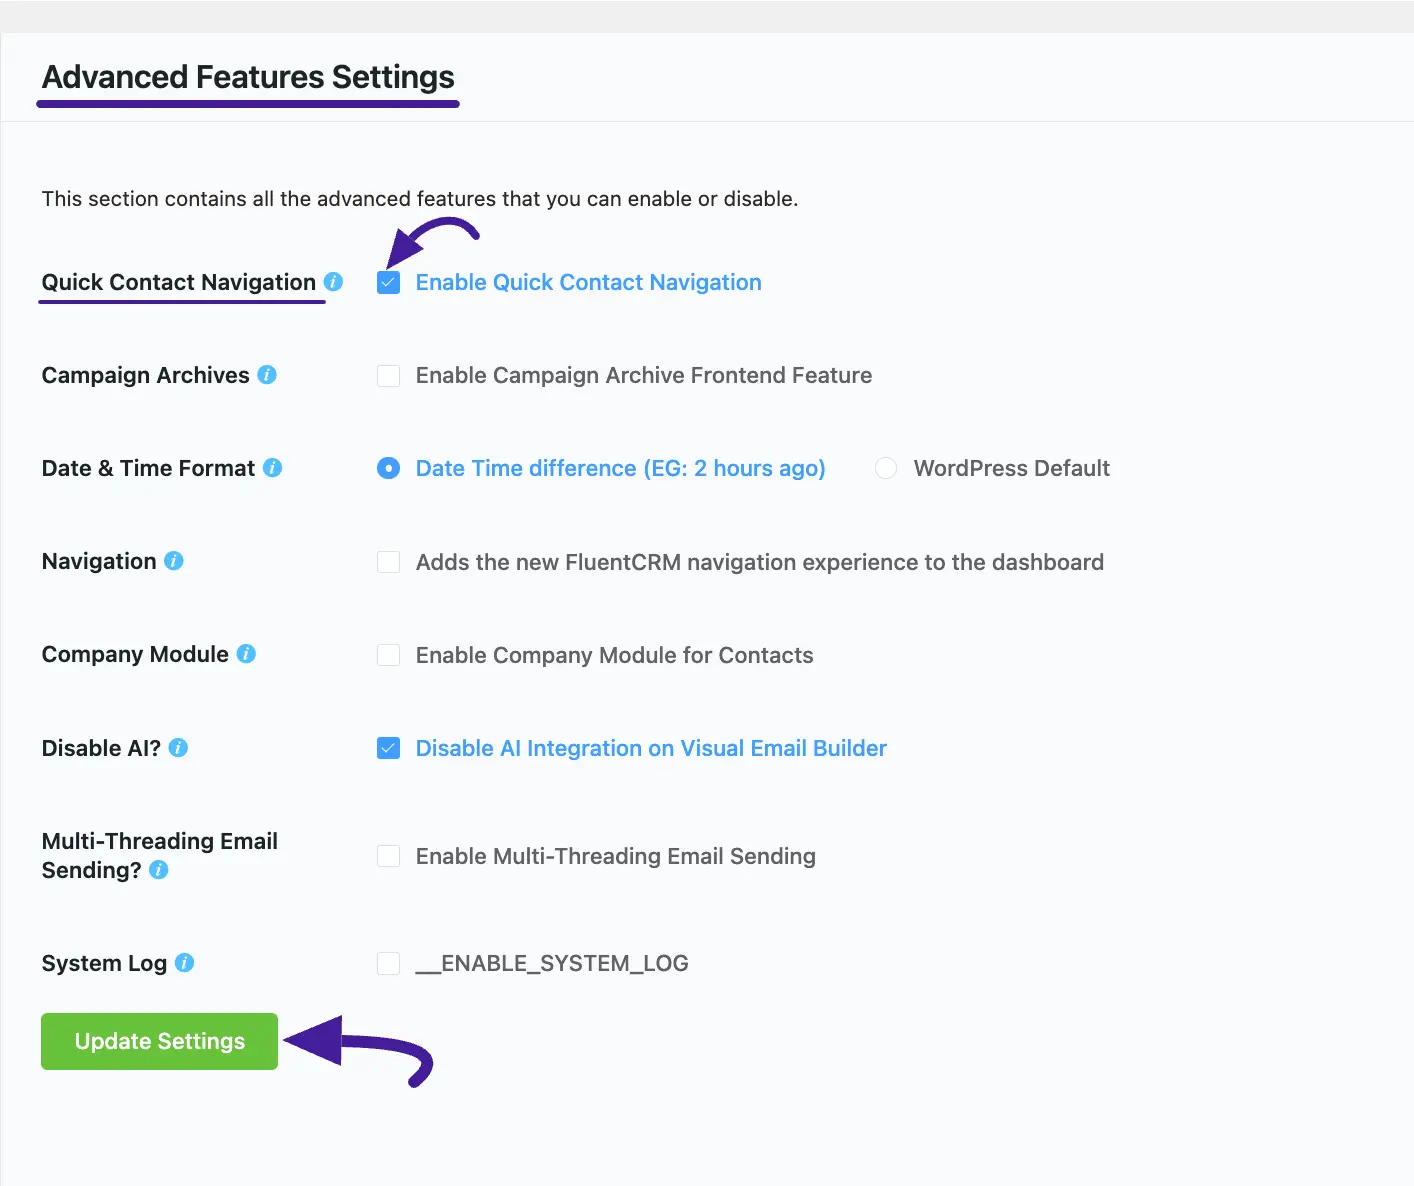
You will now get the advanced settings options inside the Advanced Features Settings page. These are:
- Quick Contact Navigation
- Campaign Archives
- Date & Time Format
- Navigation
- Company Module
- Disable AI?
- Multi-Threading Email Sending
- System Log

A detailed explanation of the Settings mentioned above is given below –
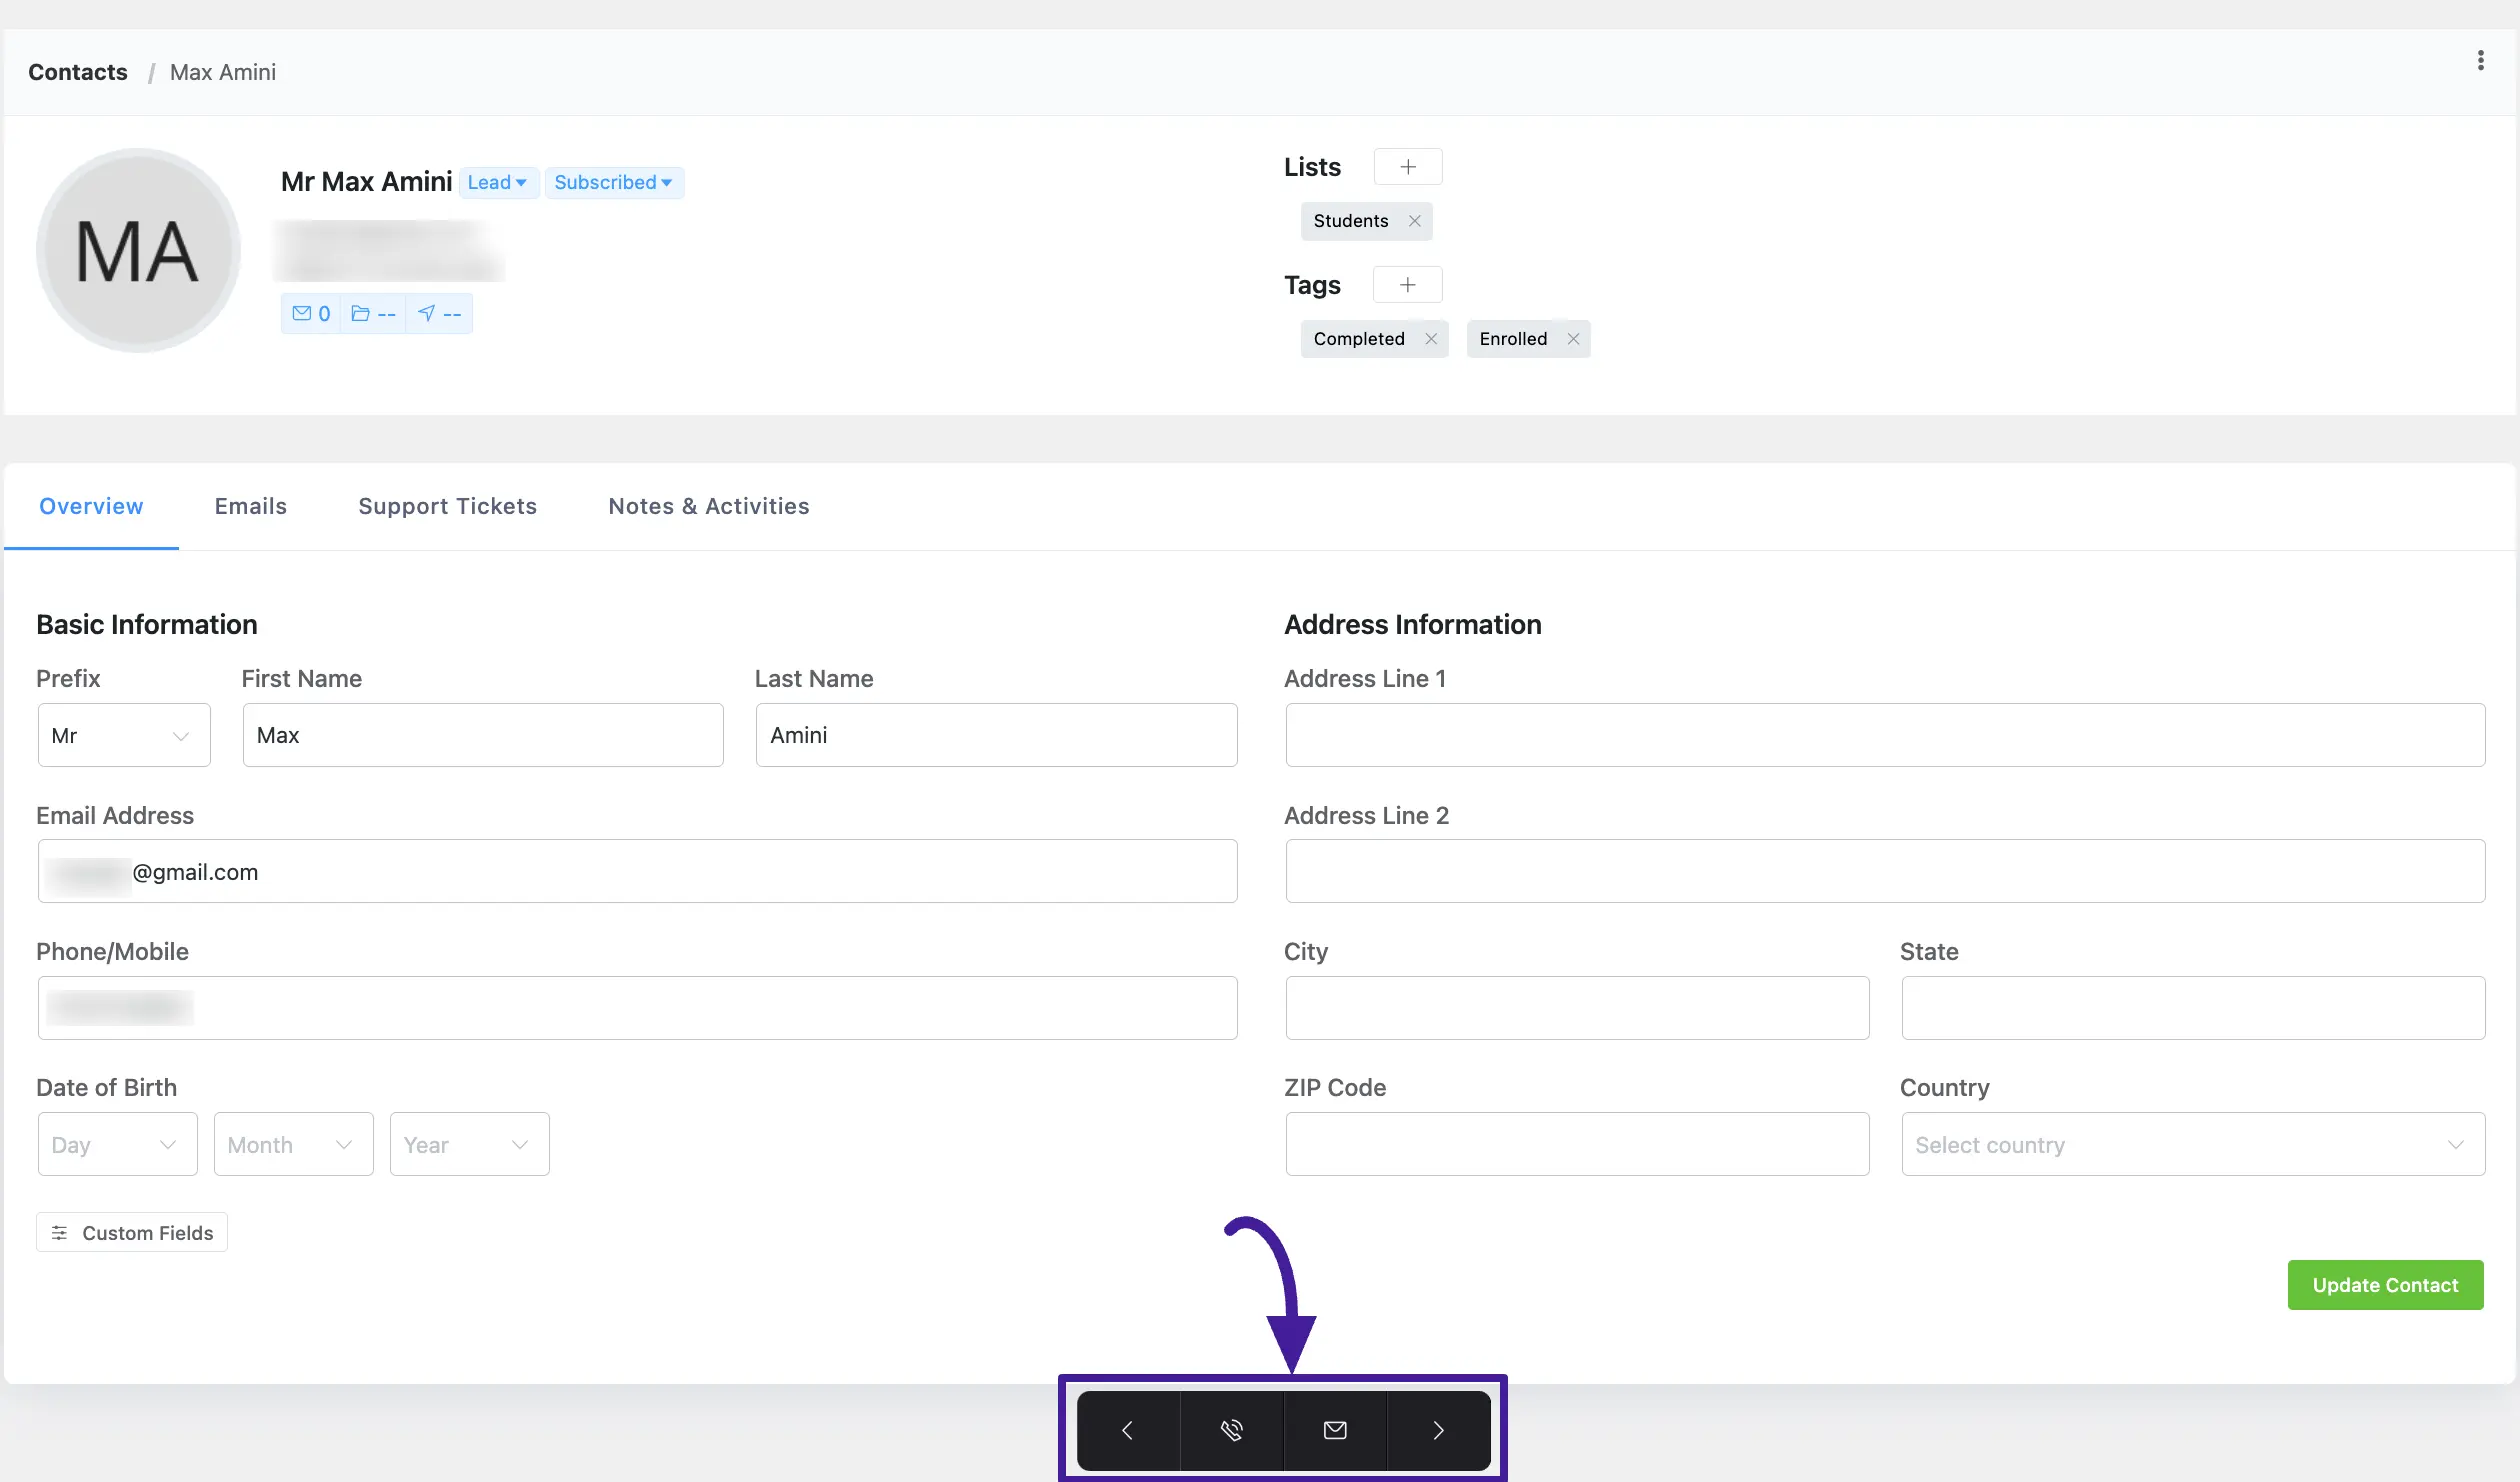
Quick Contact Navigation #
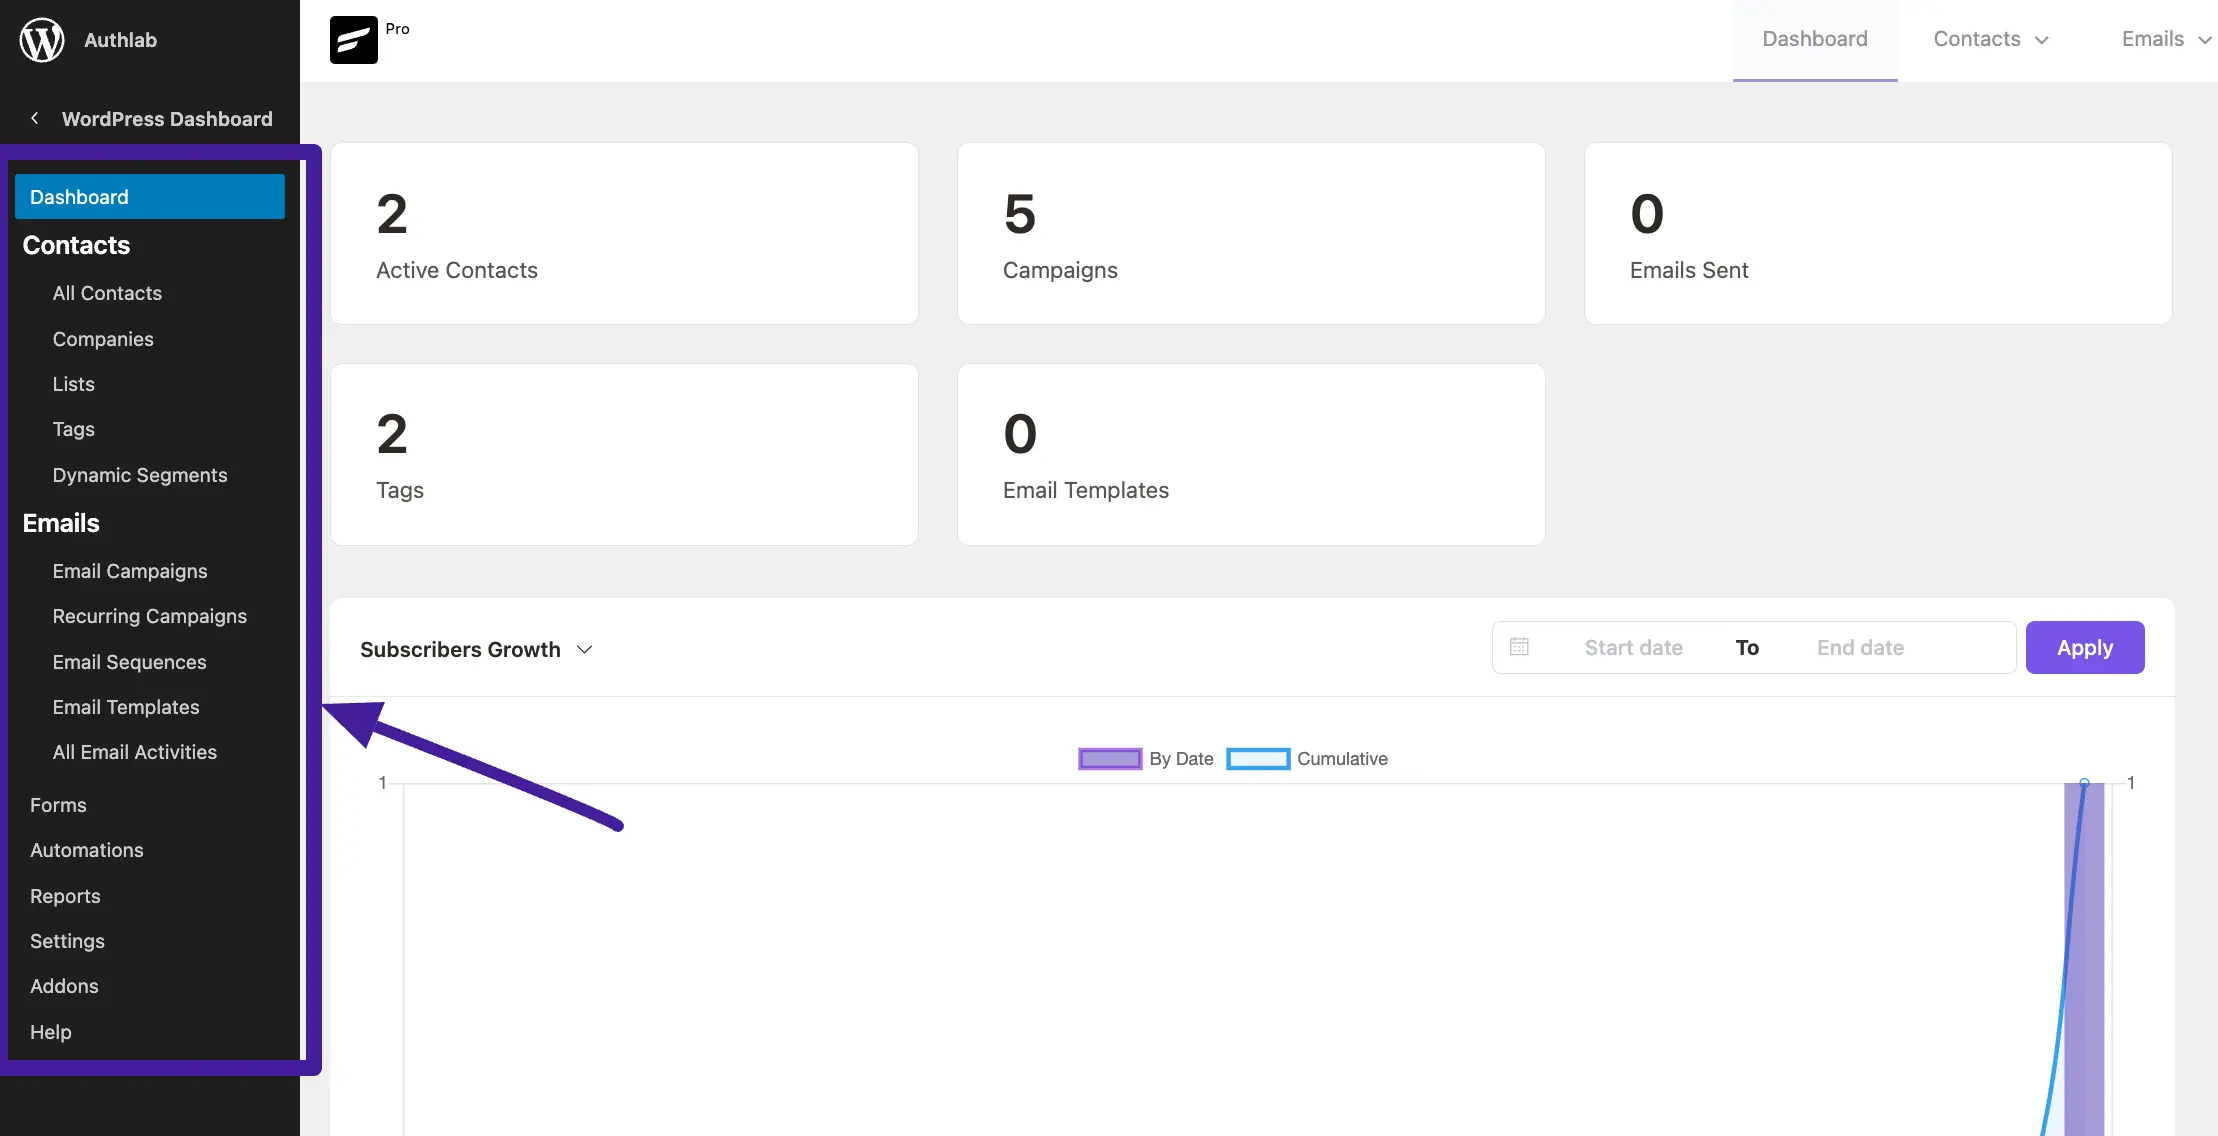
It’s a little navigation bar at the bottom of your contacts. You can make a direct call or mail from this navigation bar. Also, you can go to the next and the previous contacts from here.
To activate it, simply enable the Quick Contact Navigation checkbox inside the Advanced Features Settings page.
Then, you must click the Update Settings button to save the changes you’ve made.
Here is the Preview of Quick Contact Navigation.
Campaign Archives #
The Campaign Archives feature in FluentCRM allows you to display your past email campaigns on any page of your website. This is an excellent way to showcase your newsletters and create an accessible archive for your audience. You can display your campaigns by enabling the global archive settings or by using a flexible shortcode for more specific control.
Enabling the Global Campaign Archive #
To get started with the basic archive functionality, you first need to enable it in the FluentCRM settings.
- Navigate to your WordPress dashboard, go to FluentCRM > Settings > Advanced Features. You can also enable the Campaign Archives feature using the Addons section from your FluentCRM sidebar.
- Find the Enable Campaign Archive Frontend Feature and check the box to enable it.
- Upon enabling, a popup will appear with a general shortcode and settings.
- From here, you can configure the global display settings:
- List the campaigns if the title match the provided keyword: You can filter campaigns by keywords that appear in the campaign title.
- Select Campaigns: Select the campaigns you want to show from the dropdown.
- Filter by Status: Choose which types of campaigns you want to display (e.g., Archived, Published).
- Max Campaigns to list: Set a limit for how many campaigns will be displayed on the archive page. The maximum is 50.
- Click the Update Settings button to save your changes.
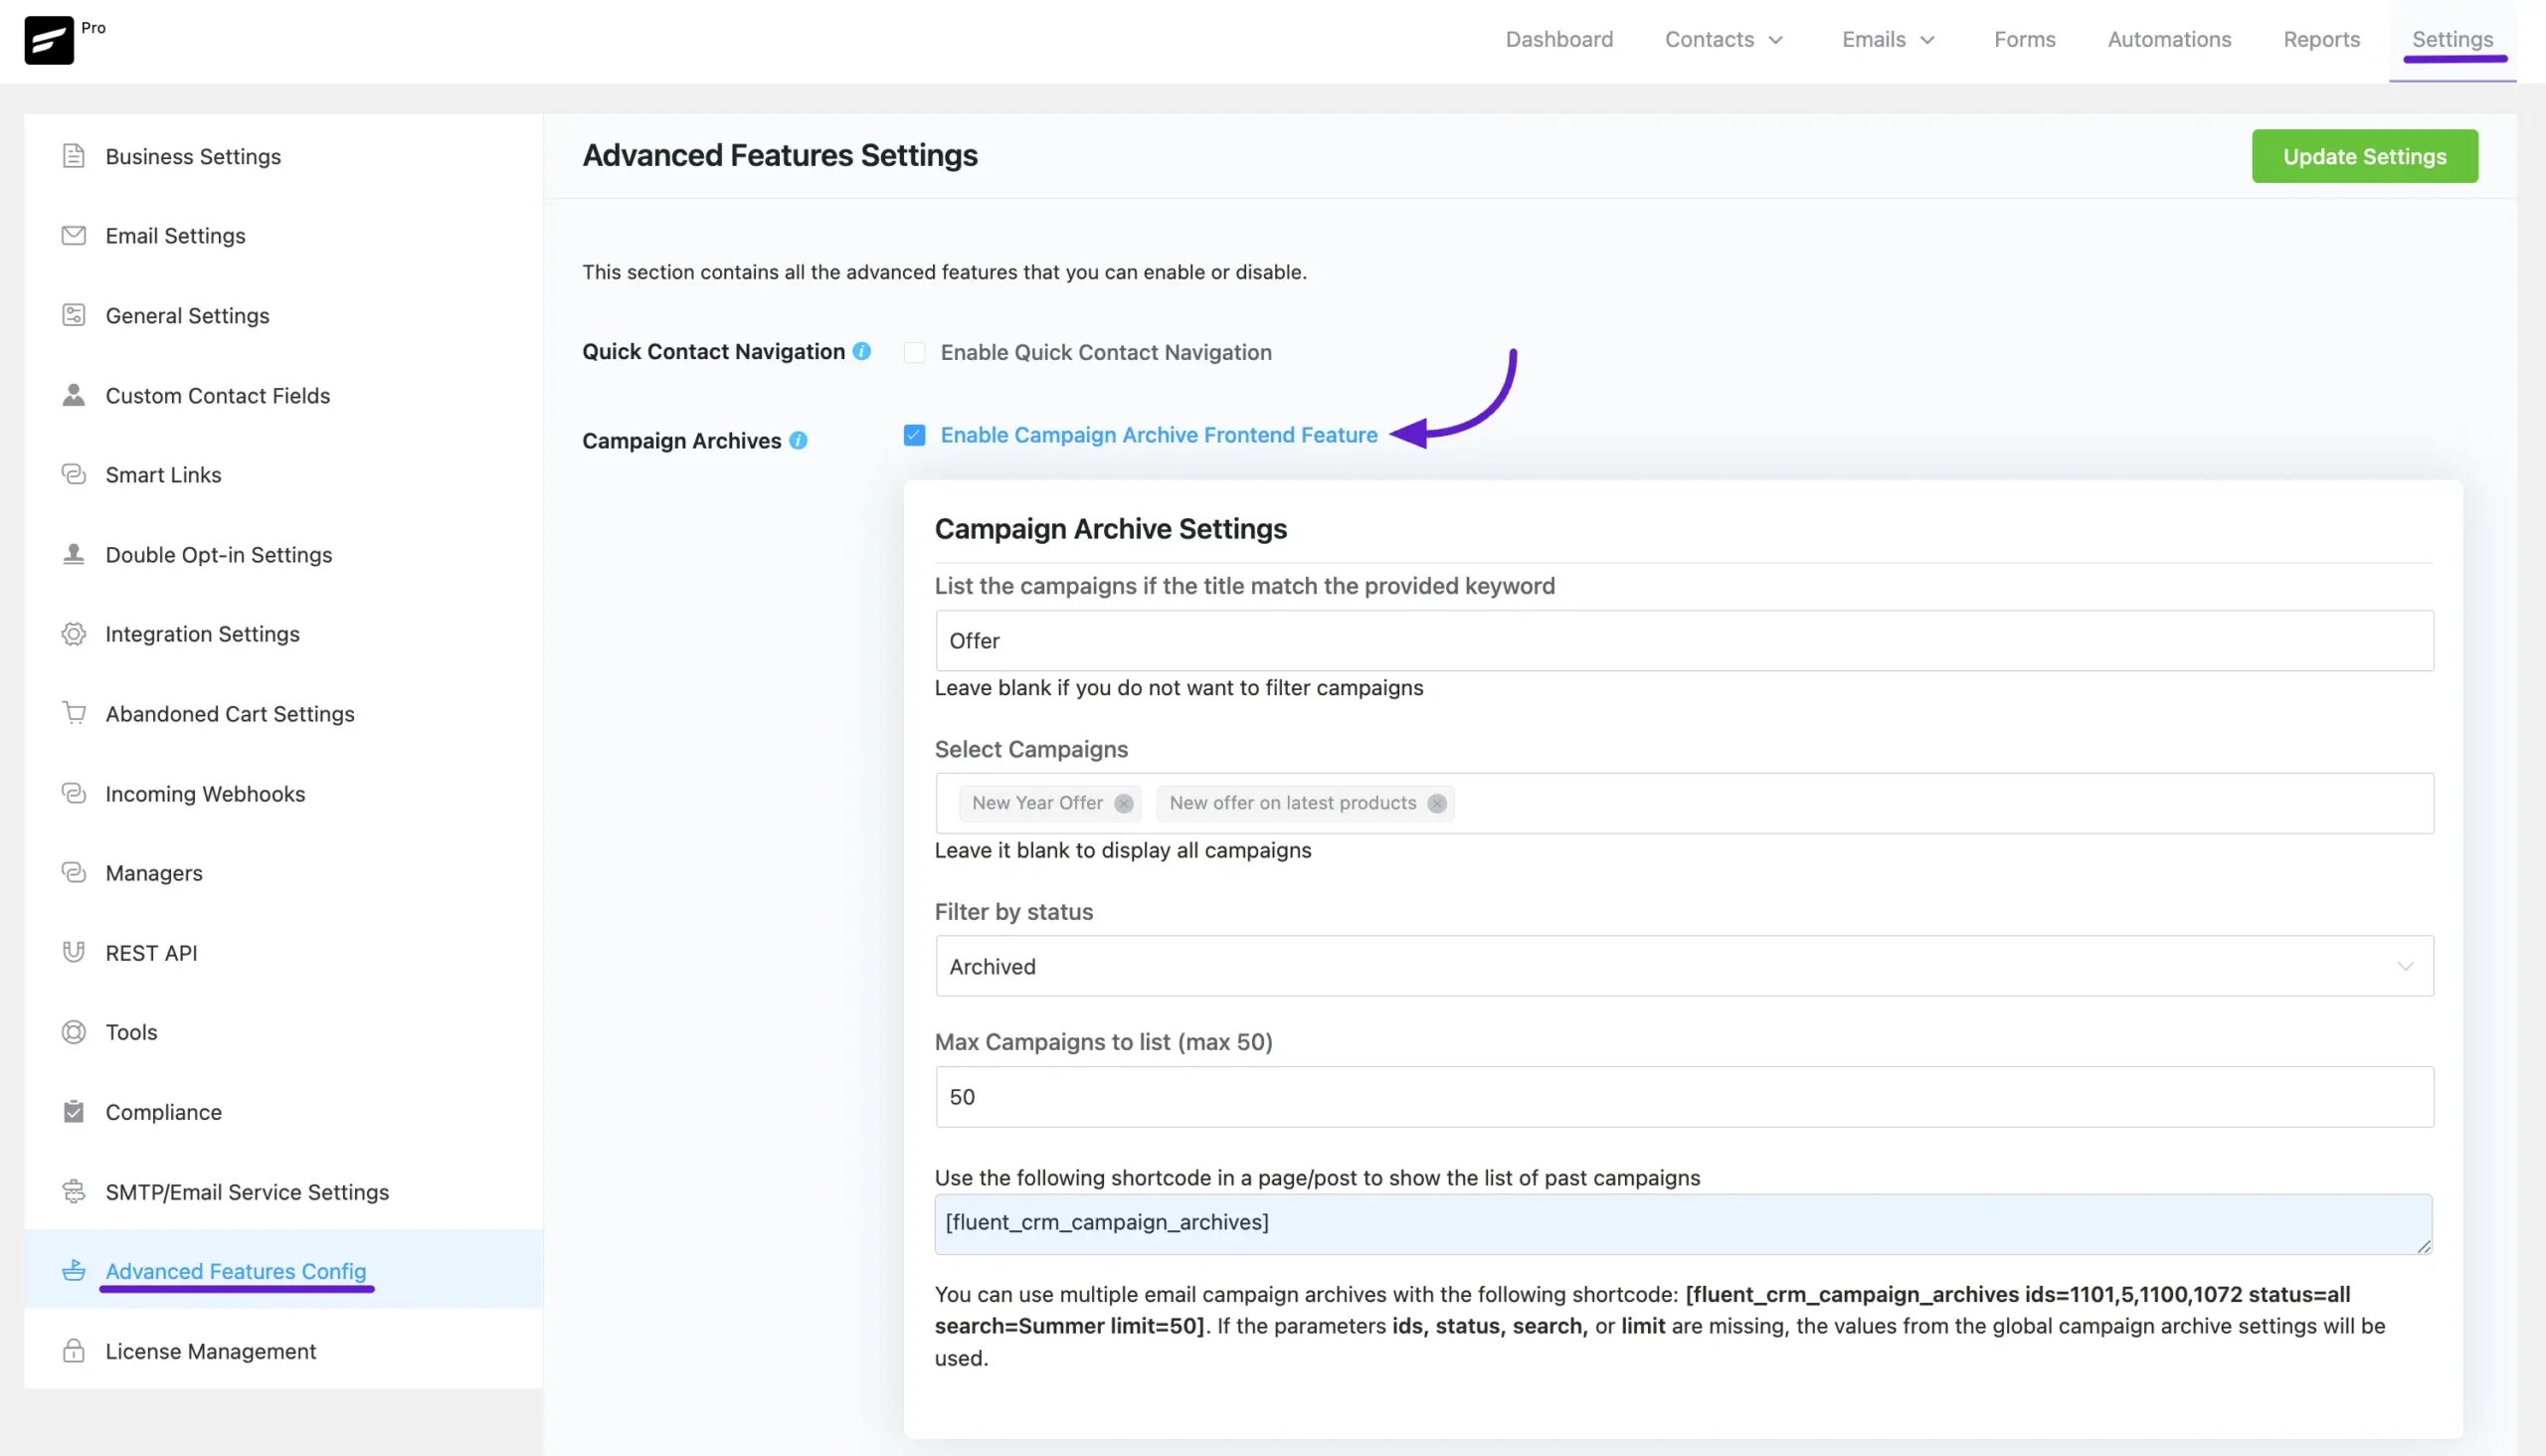
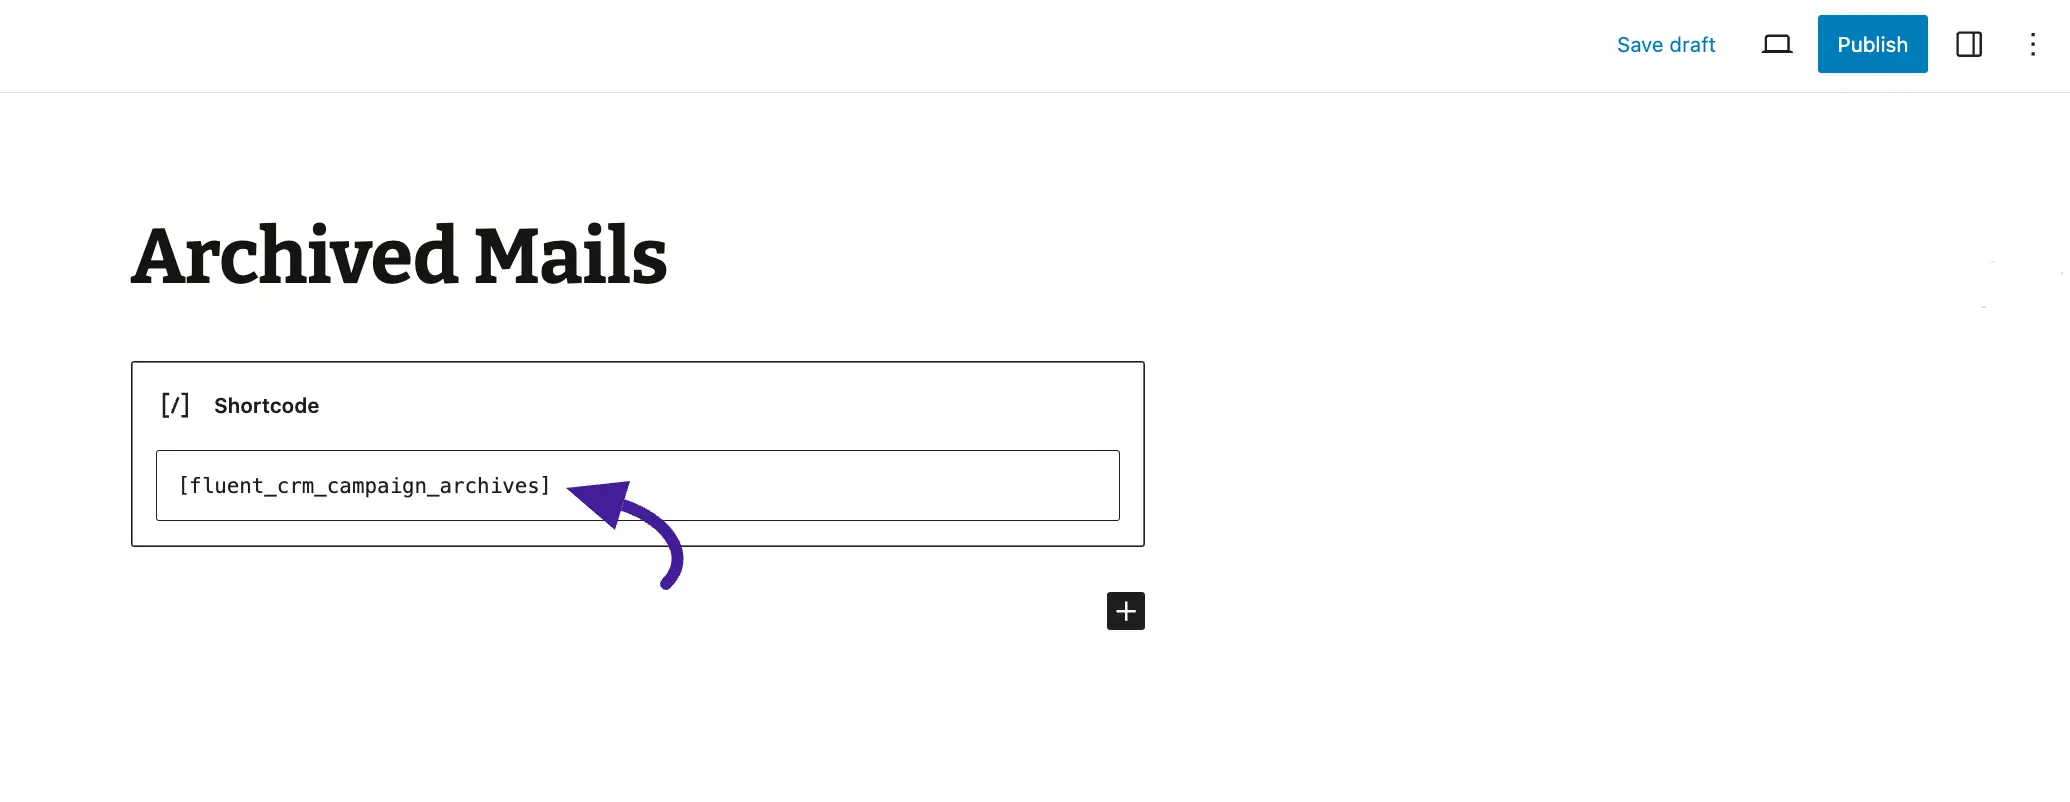
Use this shortcode in a page/post to list past campaigns #
Use this Shortcode into a Page/Post where you want to show your archived emails. You will see the results on your desired web page or you can preview them to see the result.
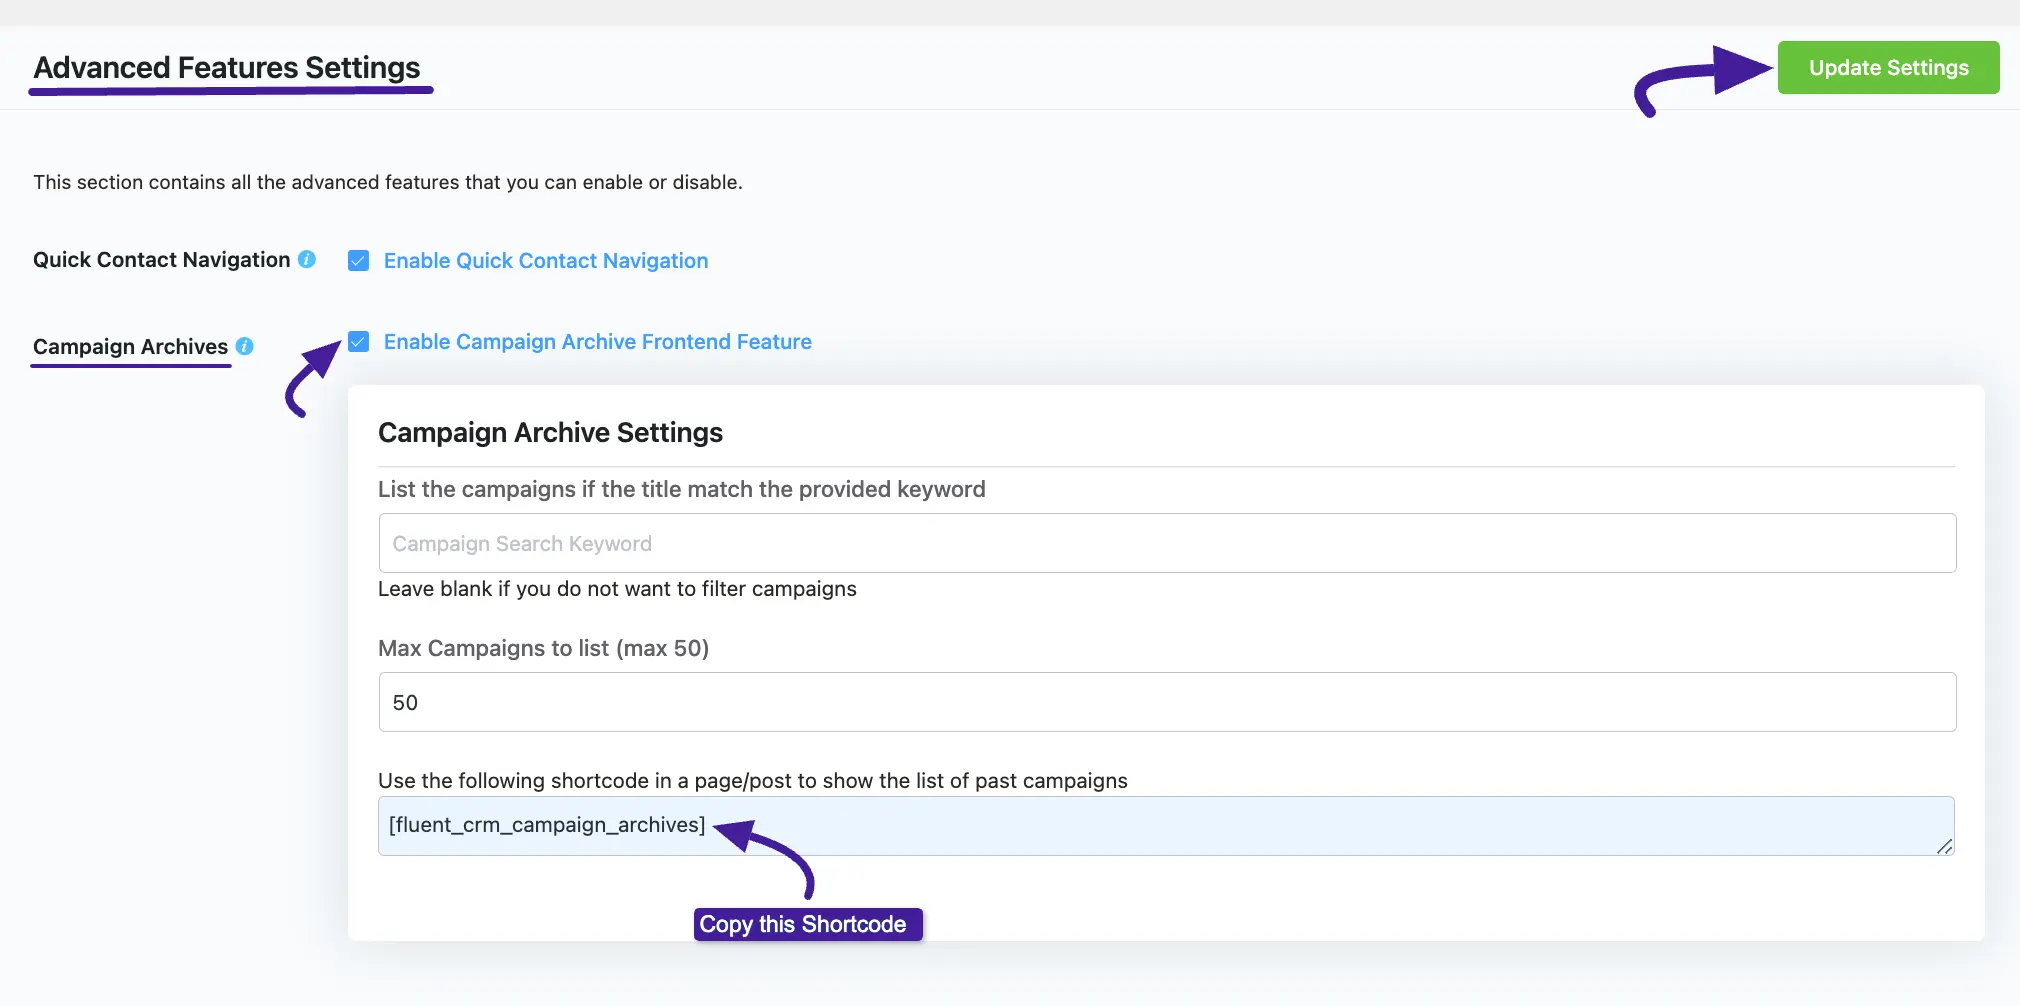
Now, paste the Shortcode into a Page/Post where you want to show your archived emails. You will see the results on your desired web page or you can preview them to see the result.
Advanced Campaign Archives with Shortcodes #
For more granular control, you can use a powerful shortcode to display specific and multiple campaign archives. This method allows you to override the global settings on a case-by-case basis.
The shortcode format is as follows:
[[fluent_crm_campaign_archives ids="1101,5,1100" status="all" search="Summer" limit="10"]]Shortcode Parameters: #
You can customize the archive display by using the following parameters within the shortcode:
- ids: (Optional) Specify the exact campaign IDs you want to display, separated by commas. If you use this parameter, only the campaigns with these IDs will be shown.
- status: (Optional) Filter the campaigns by their status. If this parameter is omitted, the status from your global settings will be used. Available statuses are:
- all
- draft
- pending
- archived
- incomplete
- purged
- processing
- pending-scheduled
- scheduled
- search: (Optional) Display only the campaigns whose titles match a specific keyword.
- limit: (Optional) Set the maximum number of campaigns to display for this specific archive. The maximum limit is 50.
Important Note: If any of the parameters (ids, status, search, or limit) are not included in the shortcode, FluentCRM will automatically use the values you have configured in the global Campaign Archive settings. This allows for a flexible system where you can have a default archive and create custom ones as needed.
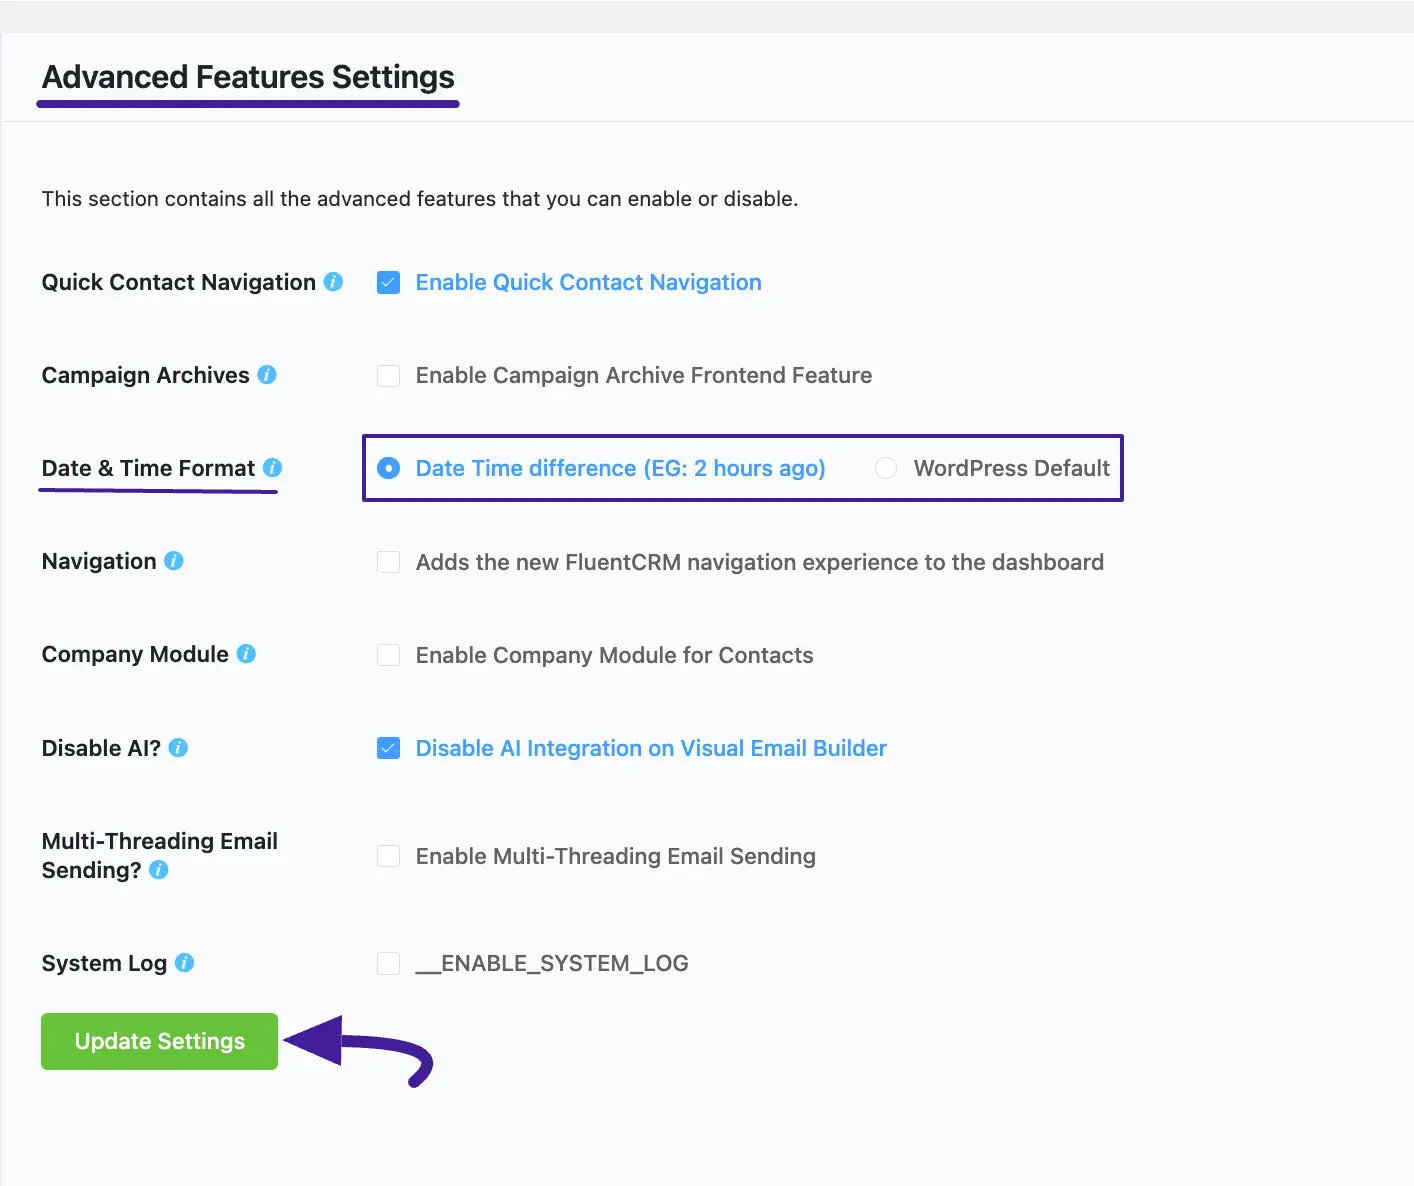
Date & Time Format #
This setting allows you to select the date and time format for the CRM plugin according to your needs. There are two formats for FluentCRM to view time in WordPress. These are:
- Date Time difference: It will show your FluentCRM campaign, contact, and other times format like (EG: 1 hour ago)
- WordPress Default: It will show the exact time of your FluentCRM activity. (EG: 5 January 2023, 14:15)
Once you select the desired date and time format, click the Update Settings button to save the changes you’ve made.
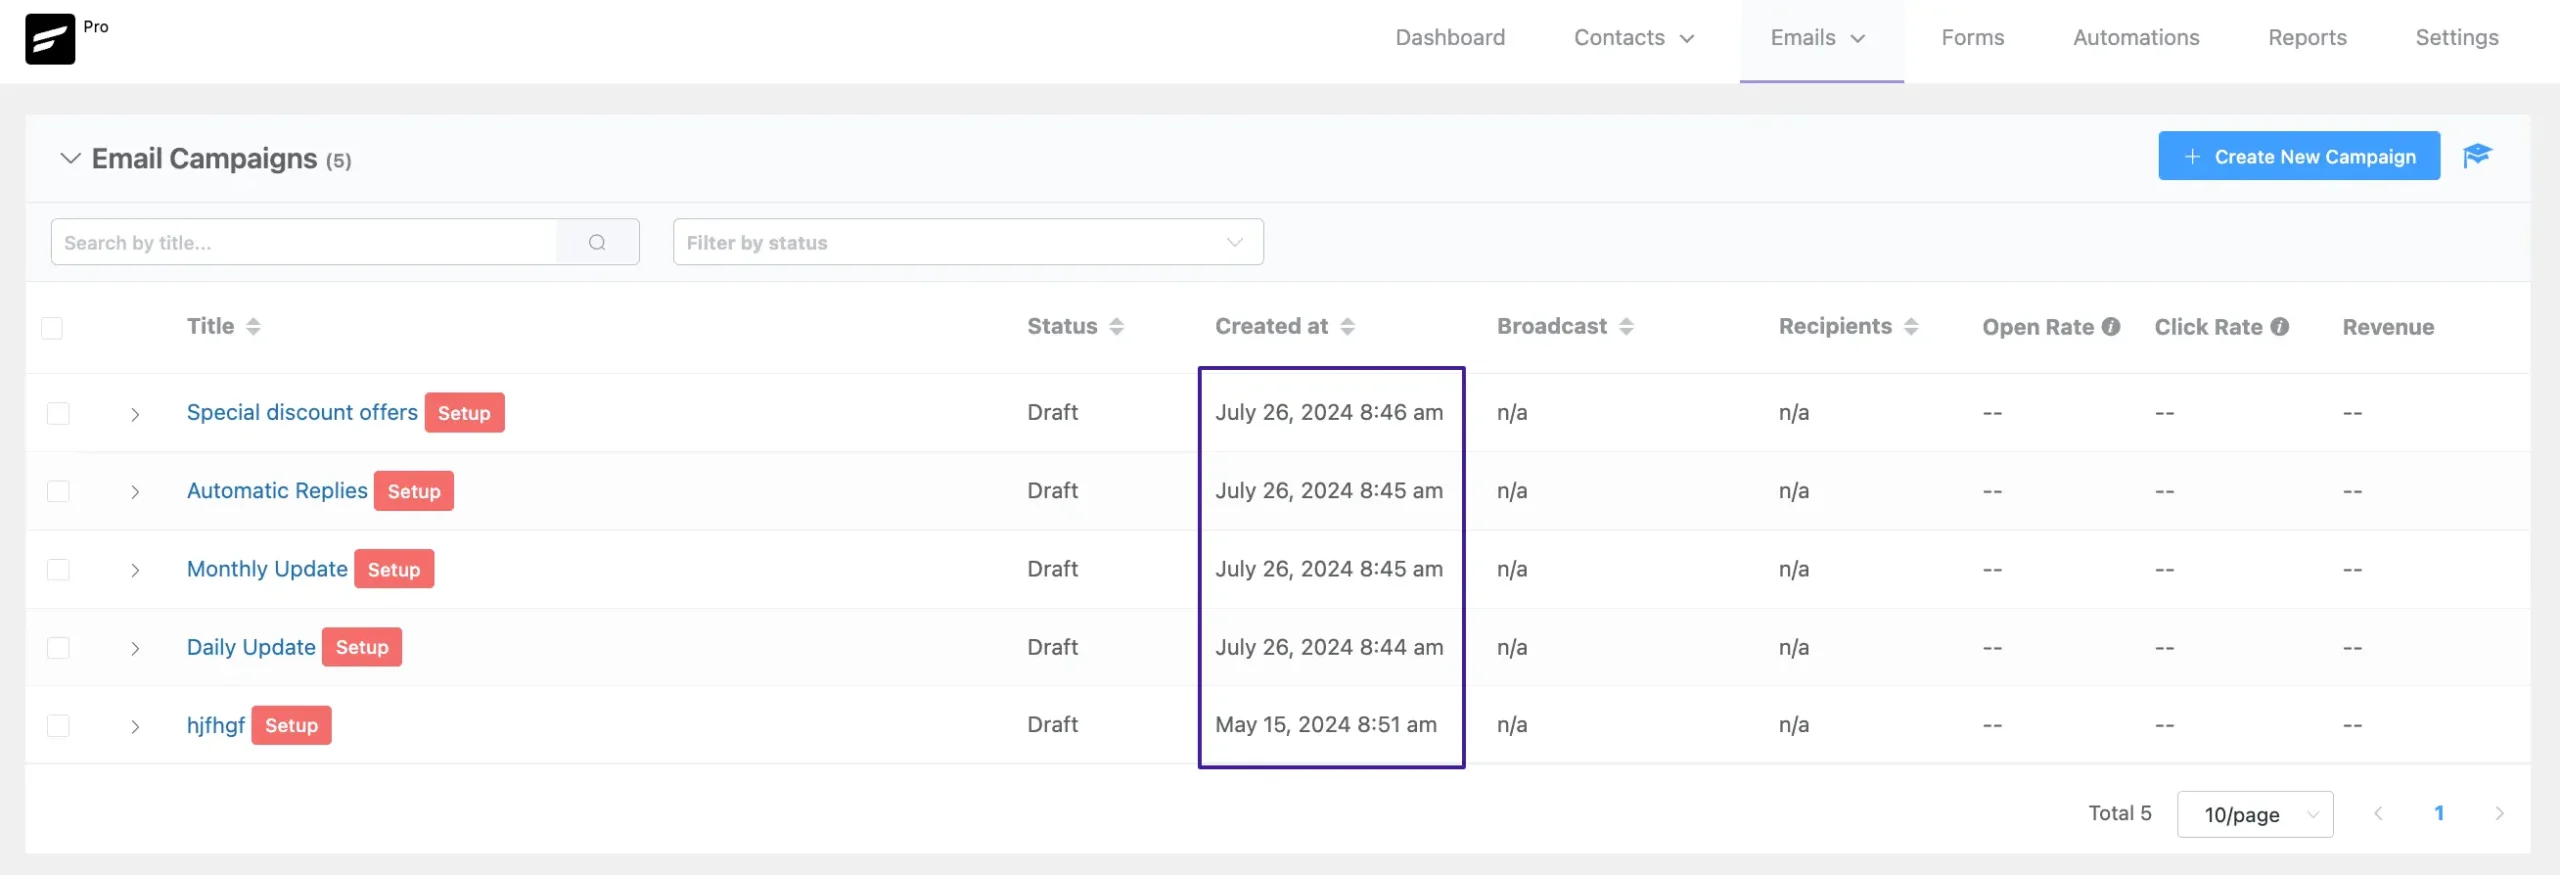
It will show up on your FluentCRM email campaign, contacts, and other places like this.
Navigation #
By enabling this option you will get a full Navigation for this CRM plugin in the left sidebar when you will click on the Fluent CRM from the WordPress Admin Panel.
Once you are done, click the Update Settings button to save the changes you’ve made.
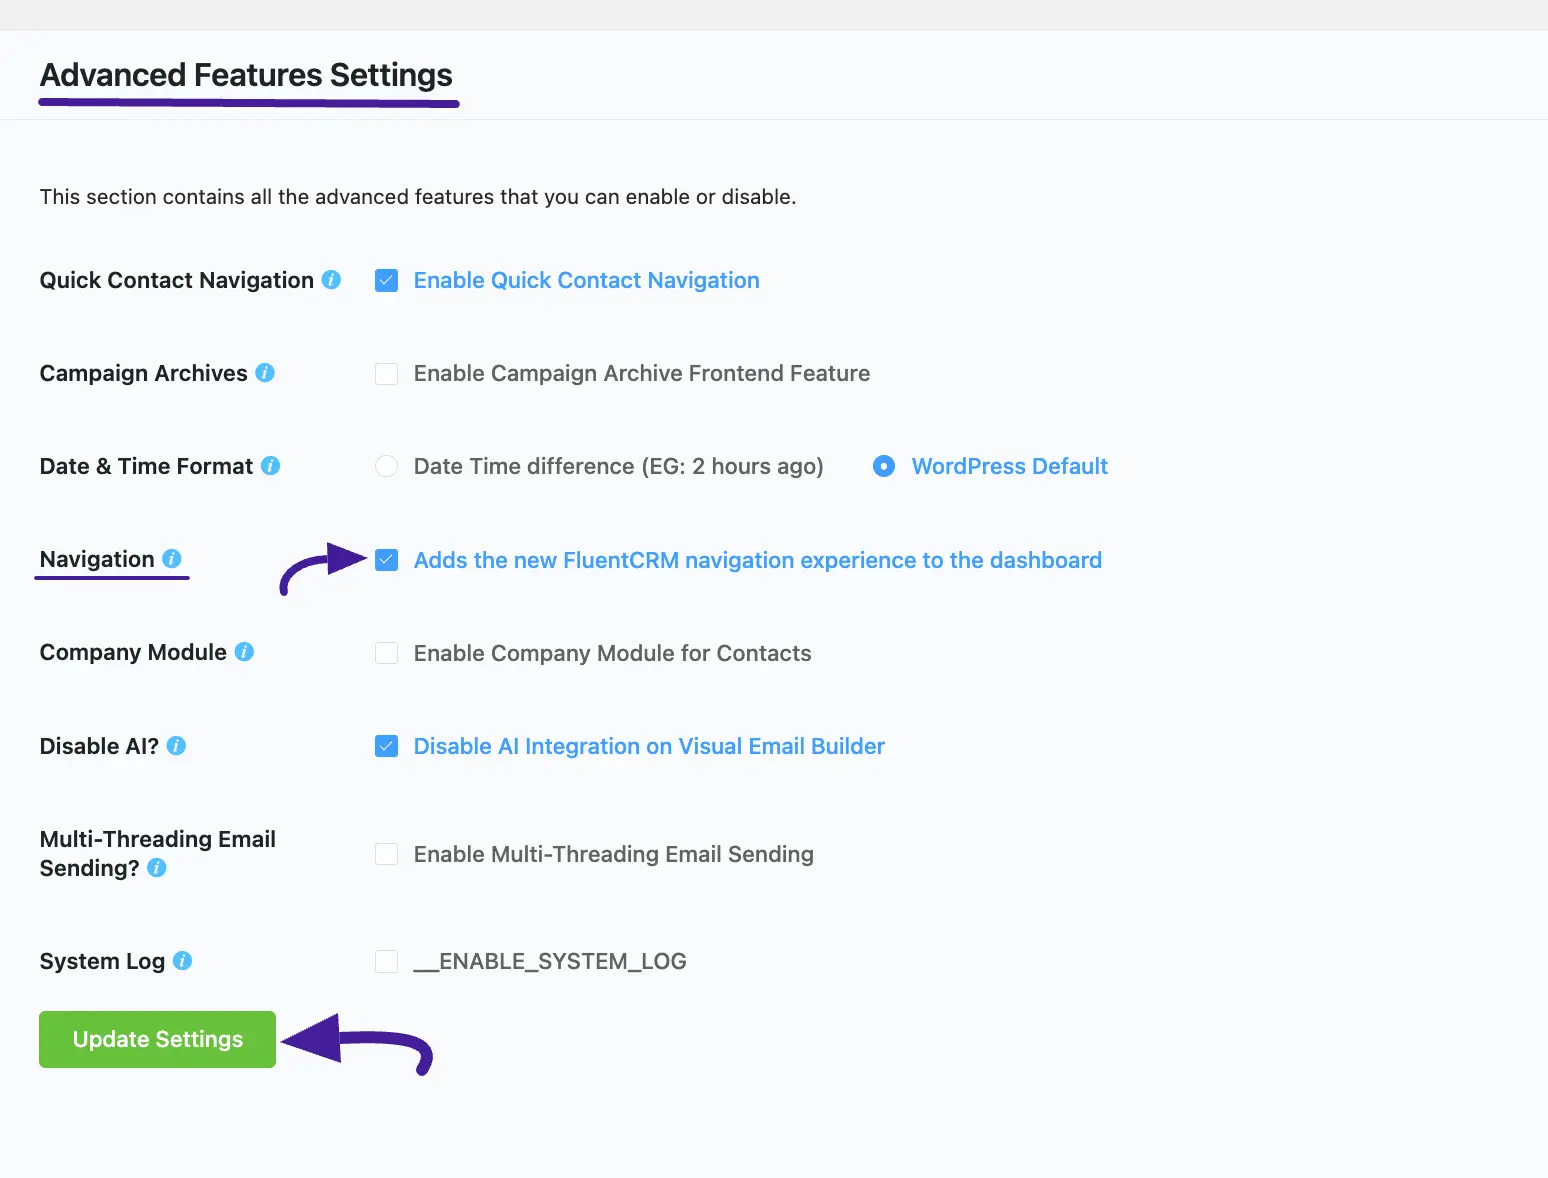
Here is the Preview of the Navigation Settings option.
Company Module #
Enabling the Company Module option allows you to add it to your Contacts section dropdown of the Fluent CRM Navbar. Also, fetch the company logo automatically by providing the website URL of the company.
You can also enable the Company Module feature through the Addons section from the Fluent CRM Sidebar.
To learn the process in detail, click here.
Once you are done, click the Update Settings button to save the changes you’ve made.

Here is the Preview of added Company module into the Contacts section dropdown and the Company Logo that is fetched automatically through the Website URL.

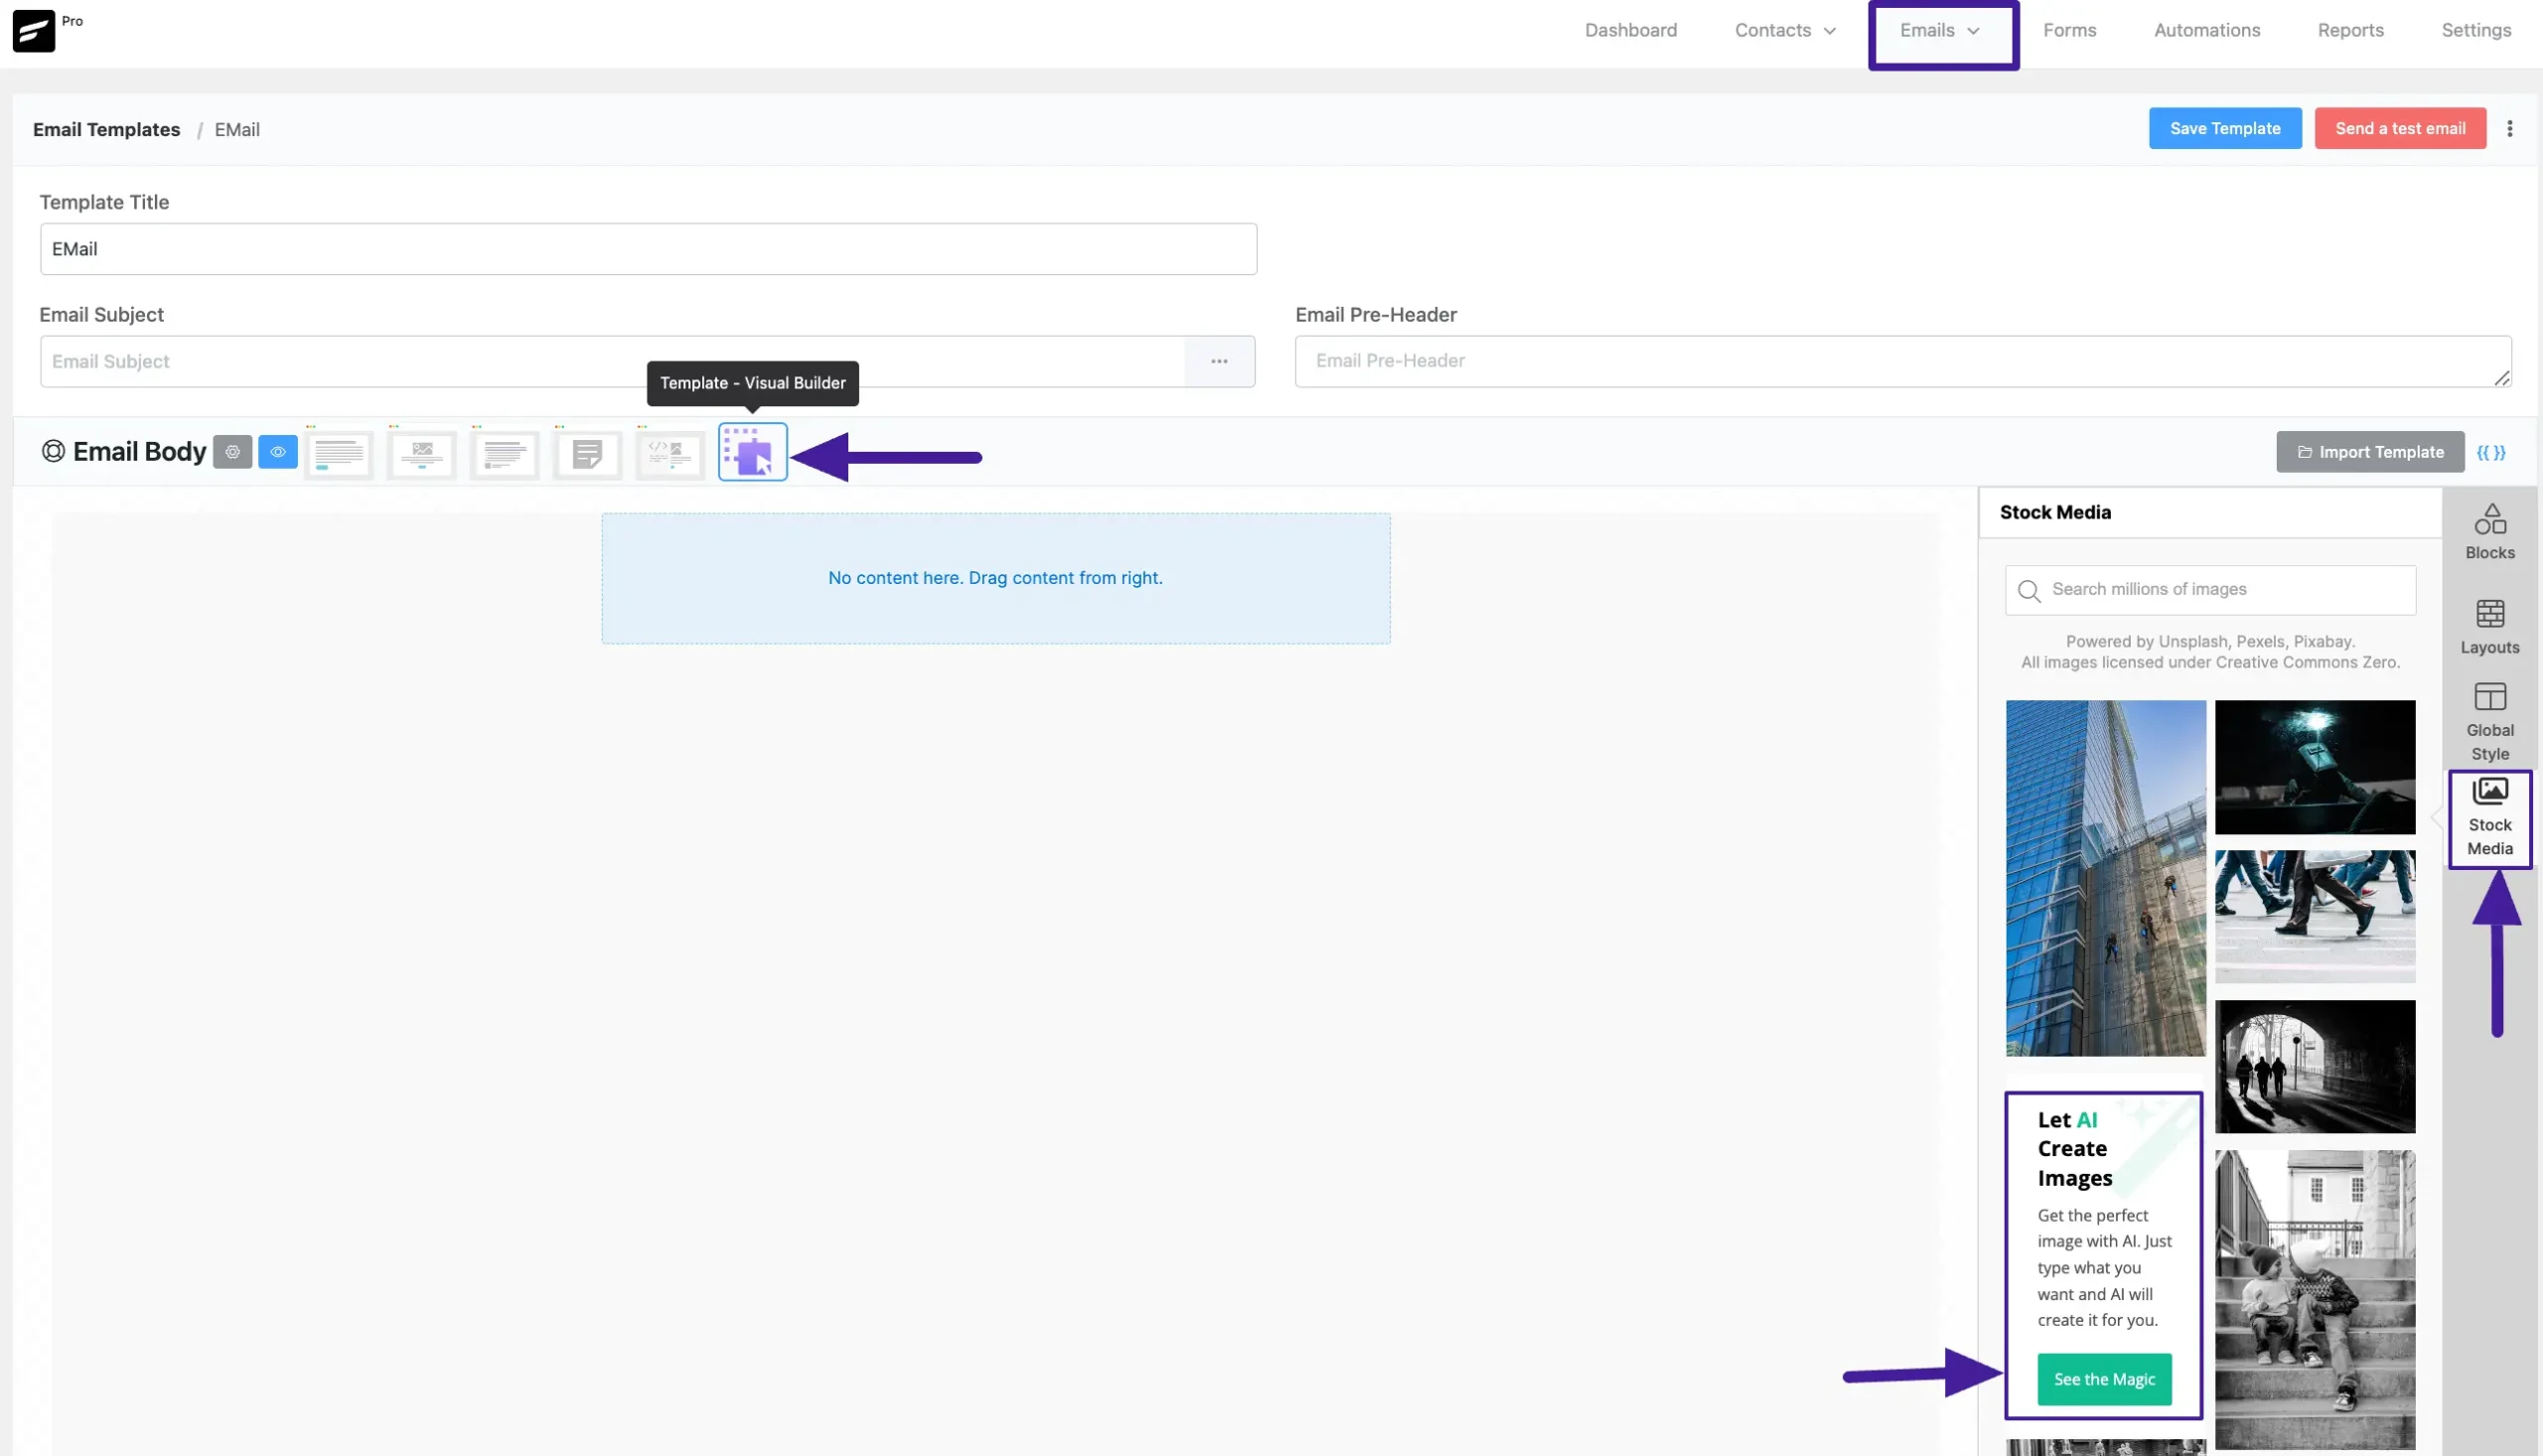
Disable AI? #
Fluent CRM has an AI Prompts feature inside the Email Template option for only Image Generation. You will find this option is already enabled which you can Disable anytime by clicking the checkbox.
Once you are done, click the Update Settings button to save the changes you’ve made.
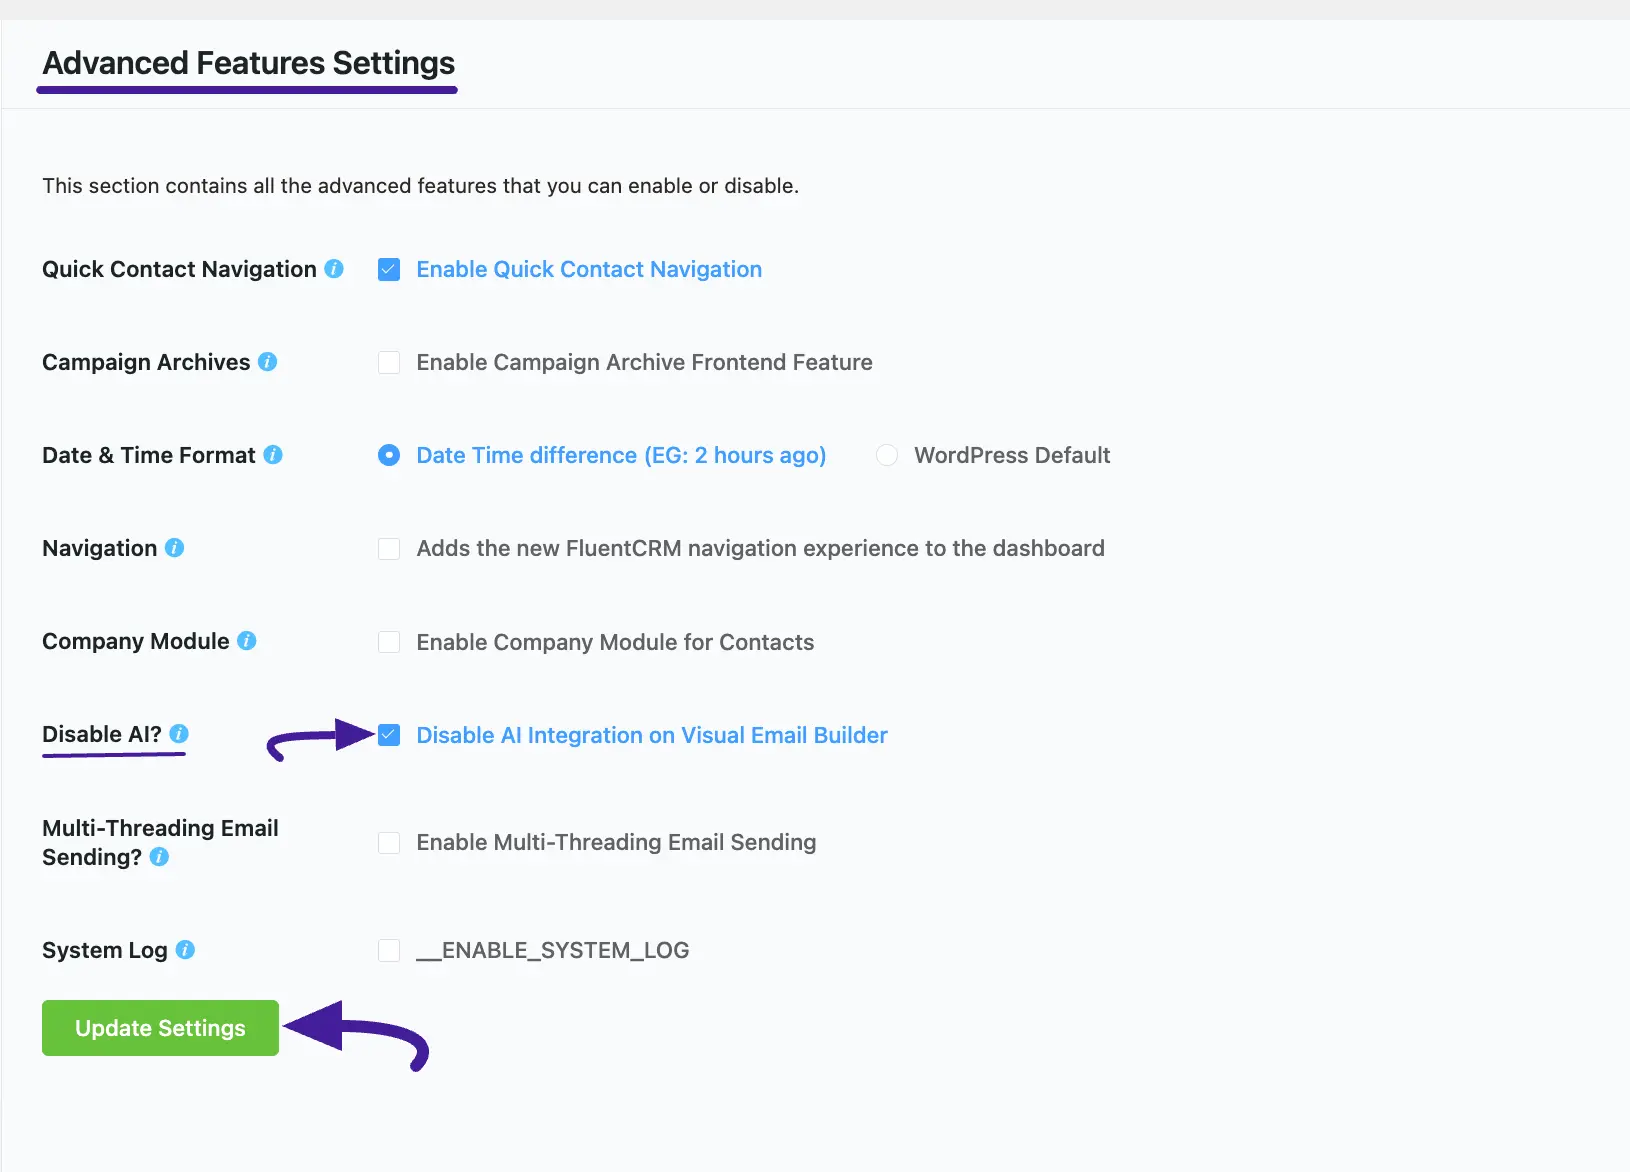
Here is the Preview of the Image generating AI option which you can disable by clicking the Disable AI checkbox.
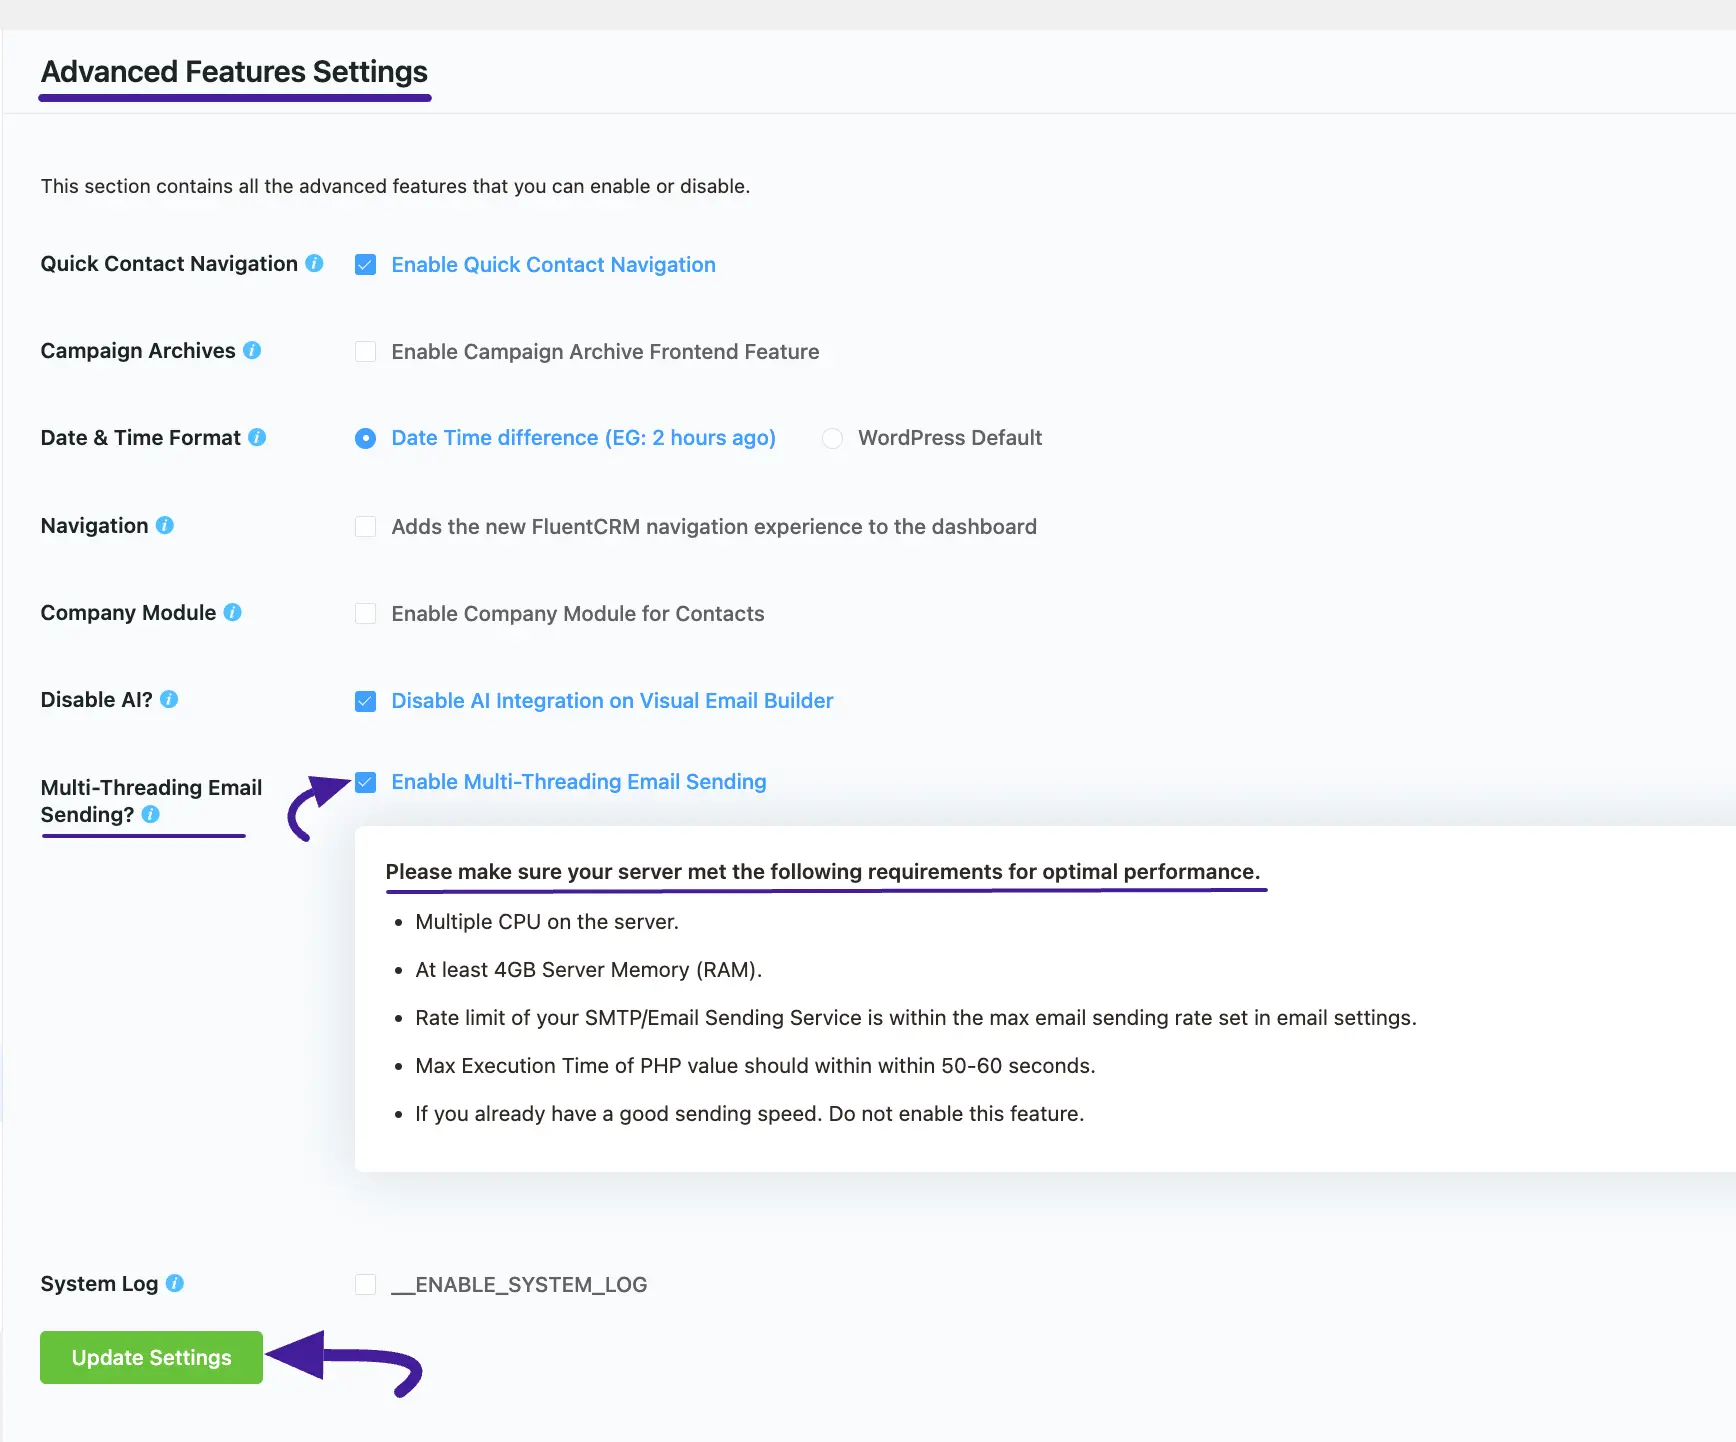
Multi-Threading Email Sending? #
This setting option allows you to send the emails in a different process which will also make the sending speed around 2X.
To use this feature, ensure your server meets the requirements mentioned in the screenshot for optimal performance.
Once you are done, click the Update Settings button to save the changes you’ve made.
System Log #
Enable this option, if you want to add the System Log in your left sidebar under Settings. This System Logs are useful for debugging purposes.
Once you are done, click the Update Settings button to save the changes you’ve made.
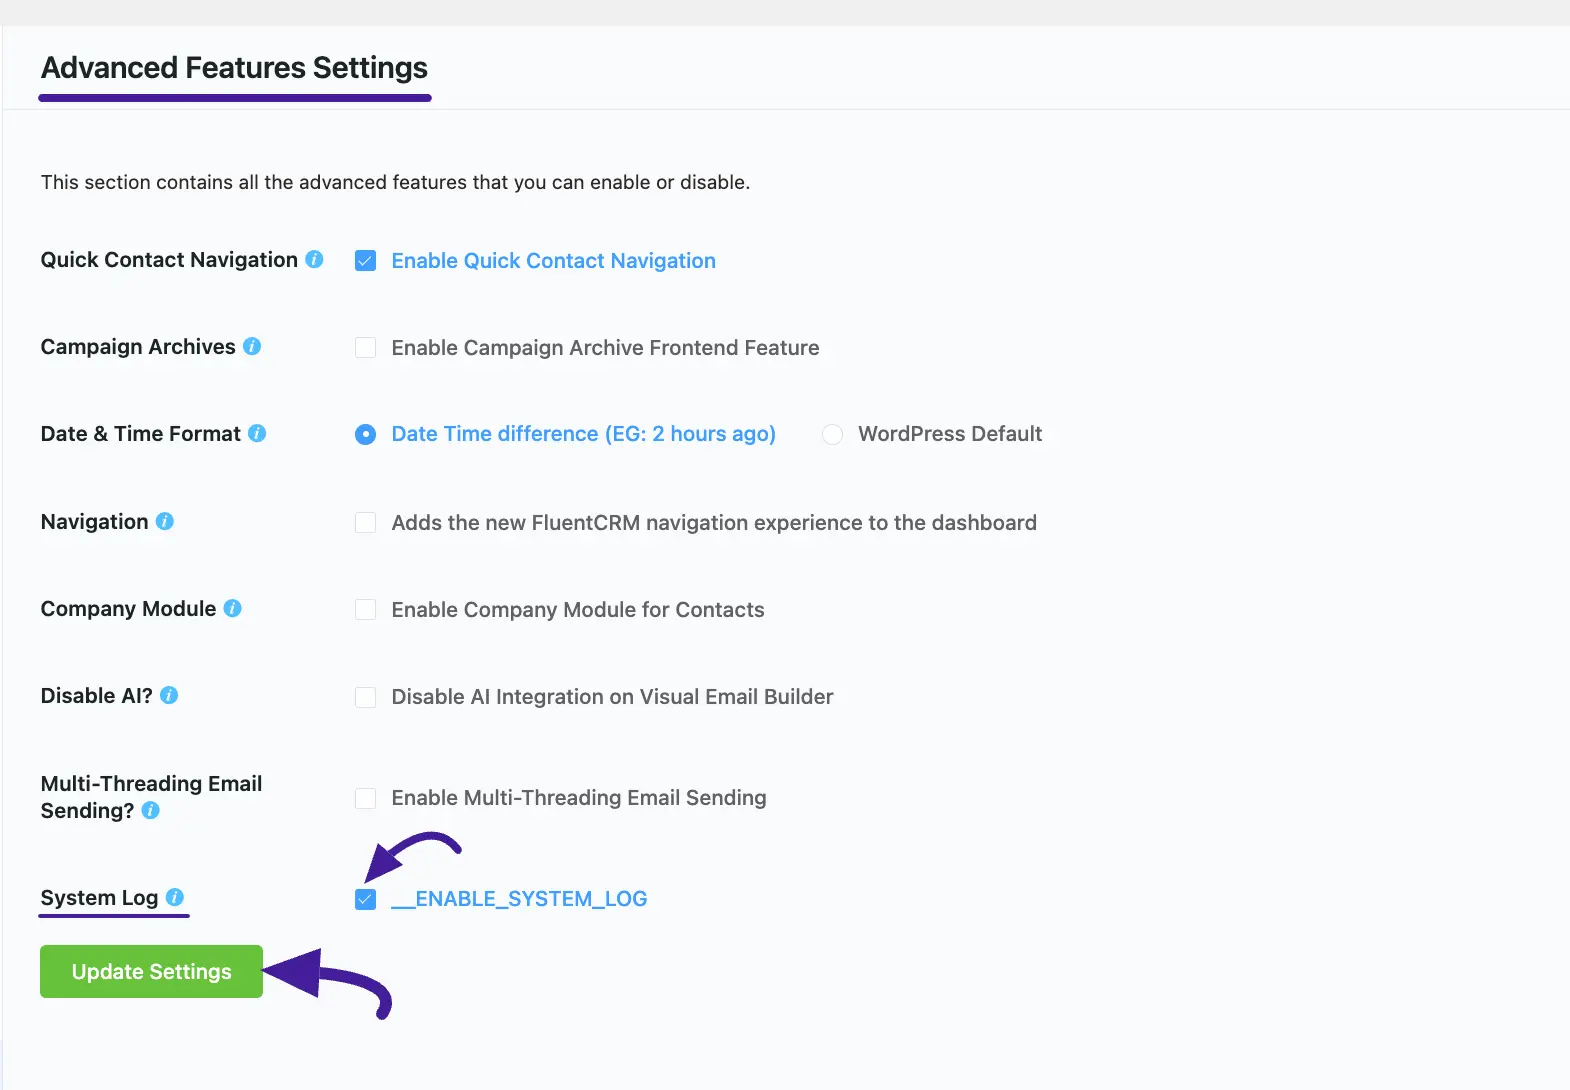
Here is the Preview of the System Logs settings option.

If you have any further questions, concerns, or suggestions, please do not hesitate to contact our @support team. Thank you.


Hi there. Will archived email campaigns send if it is part of an automation?
I sent a campaign to current users, but want the same email to be triggered for future users. However, after the campaign is completed it is set to archive status. Can an archived email campaign be triggered to send?
Yes, archived campaigns can be sent if you’ve set it to automate.