SMTP2GO helps ensure reliable email delivery by effectively handling bounces or returned emails. Follow these steps to set up bounce handling with FluentCRM.
Configure SMTP2GO in FluentCRM #
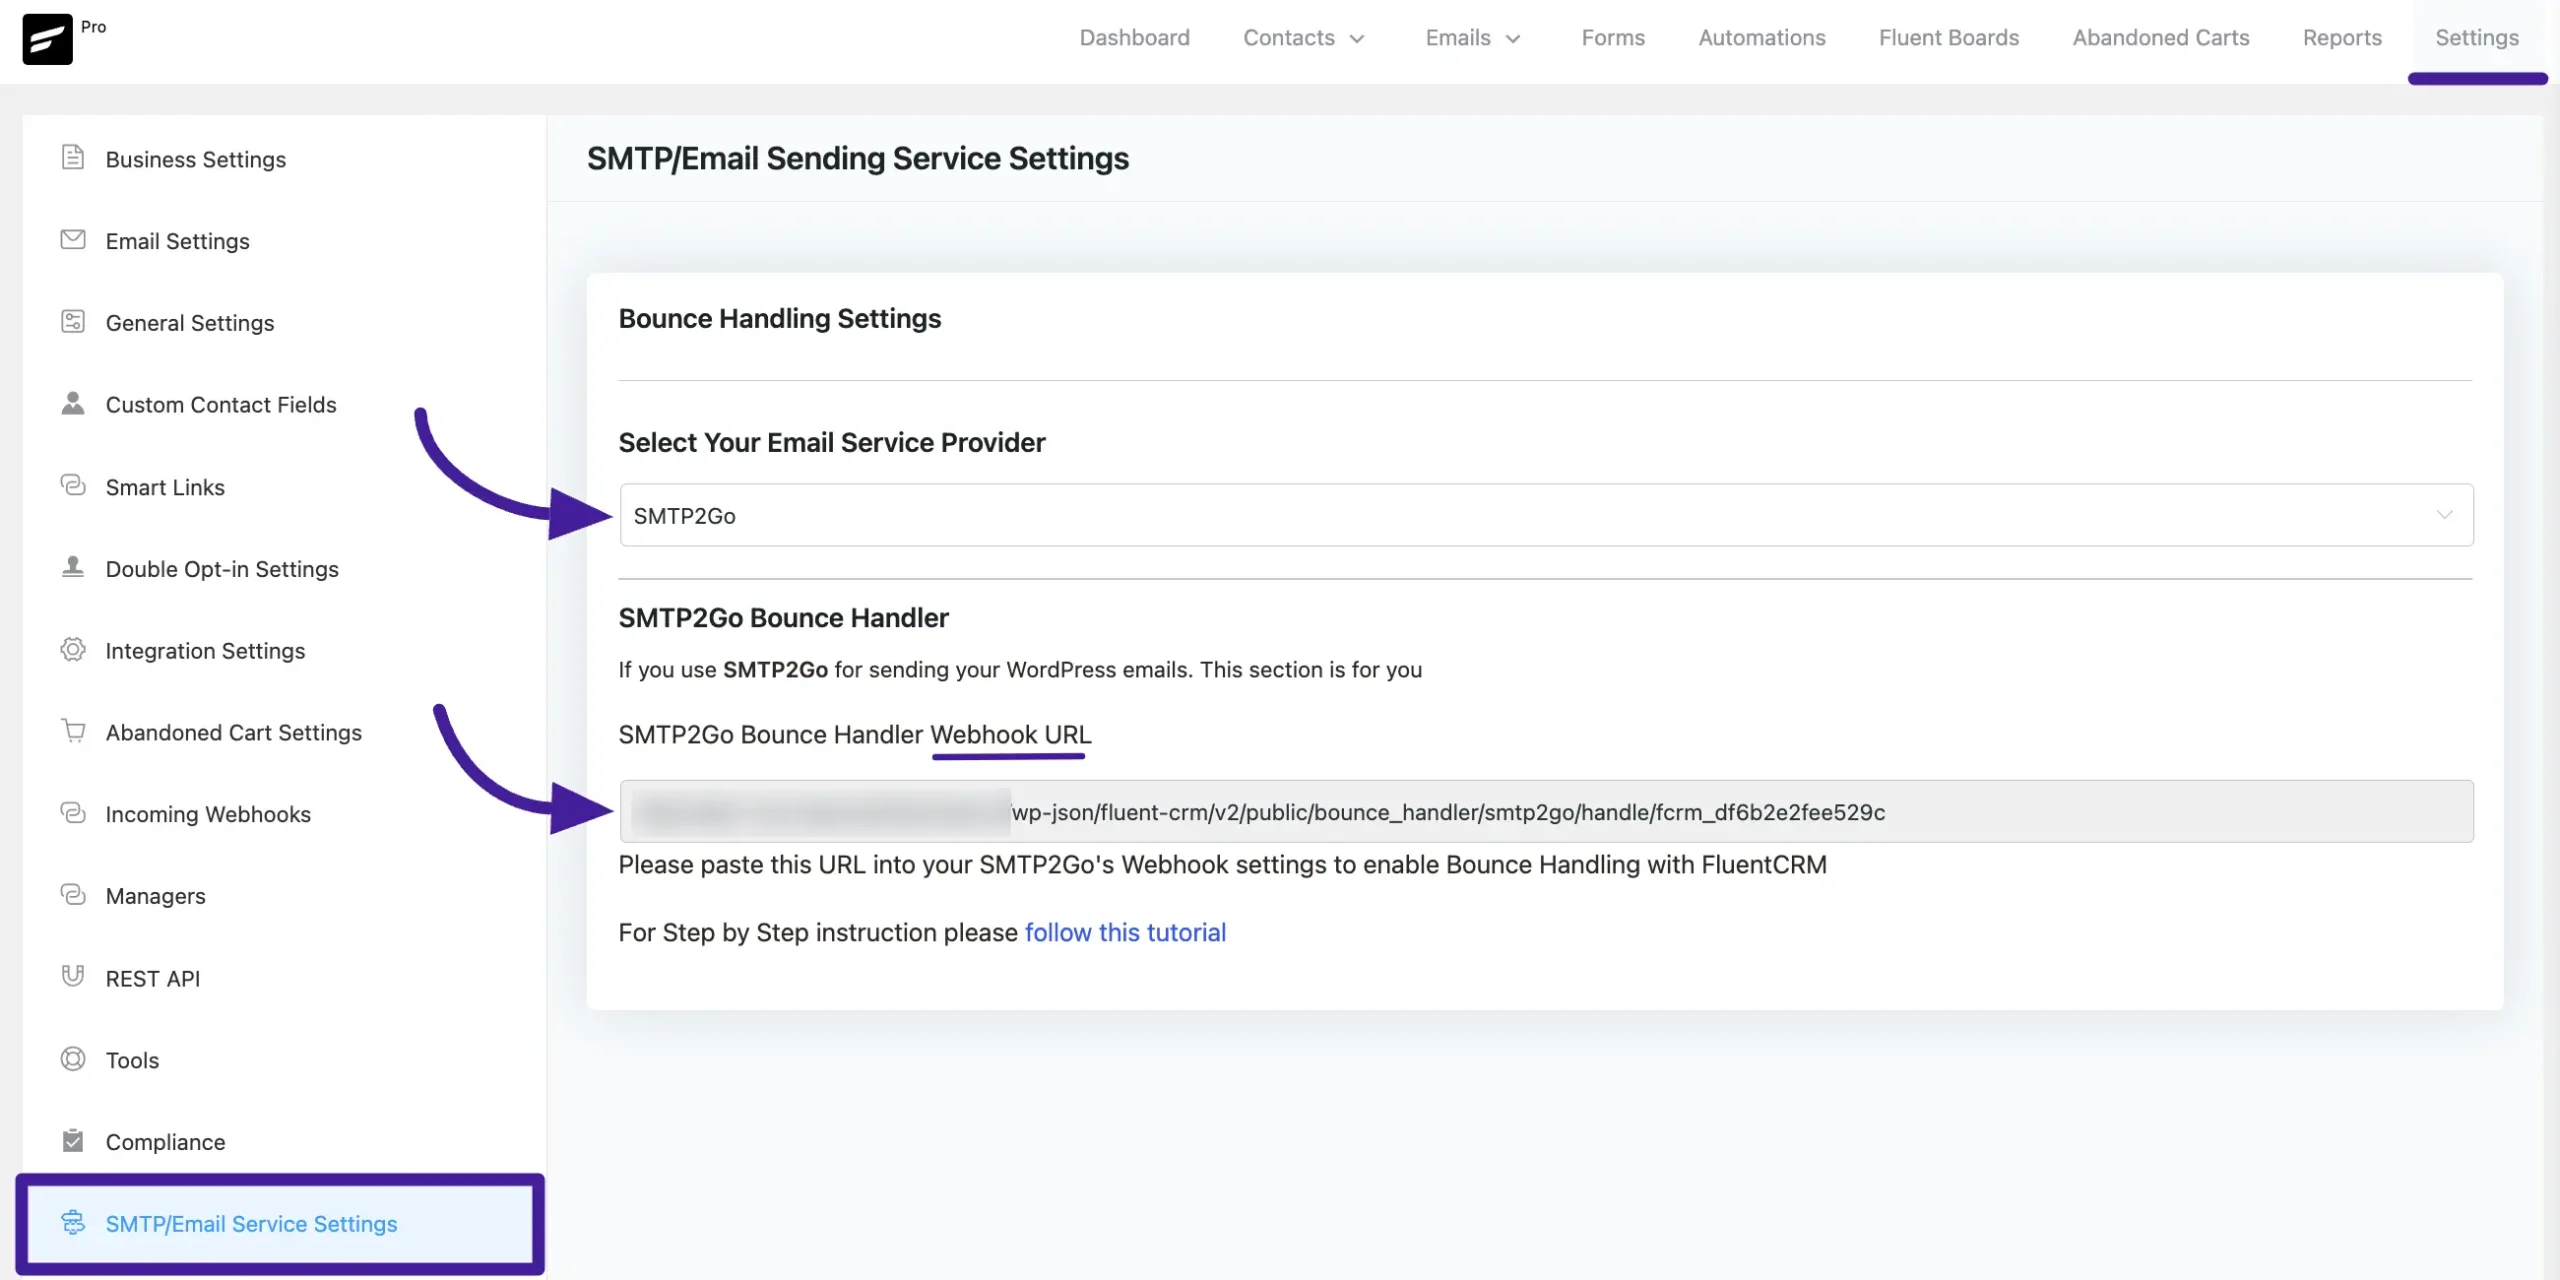
To configure, go to your FluentCRM dashboard, navigate to the Settings tab, and click the SMTP/Email Service Settings from the left sidebar.
Select your email service provider, SMTP2GO Server, from the drop-down menu. Next, copy the SMTP2GO Server Bounce Handler Webhook URL for future use.
Set Up Webhook in SMTP2GO #
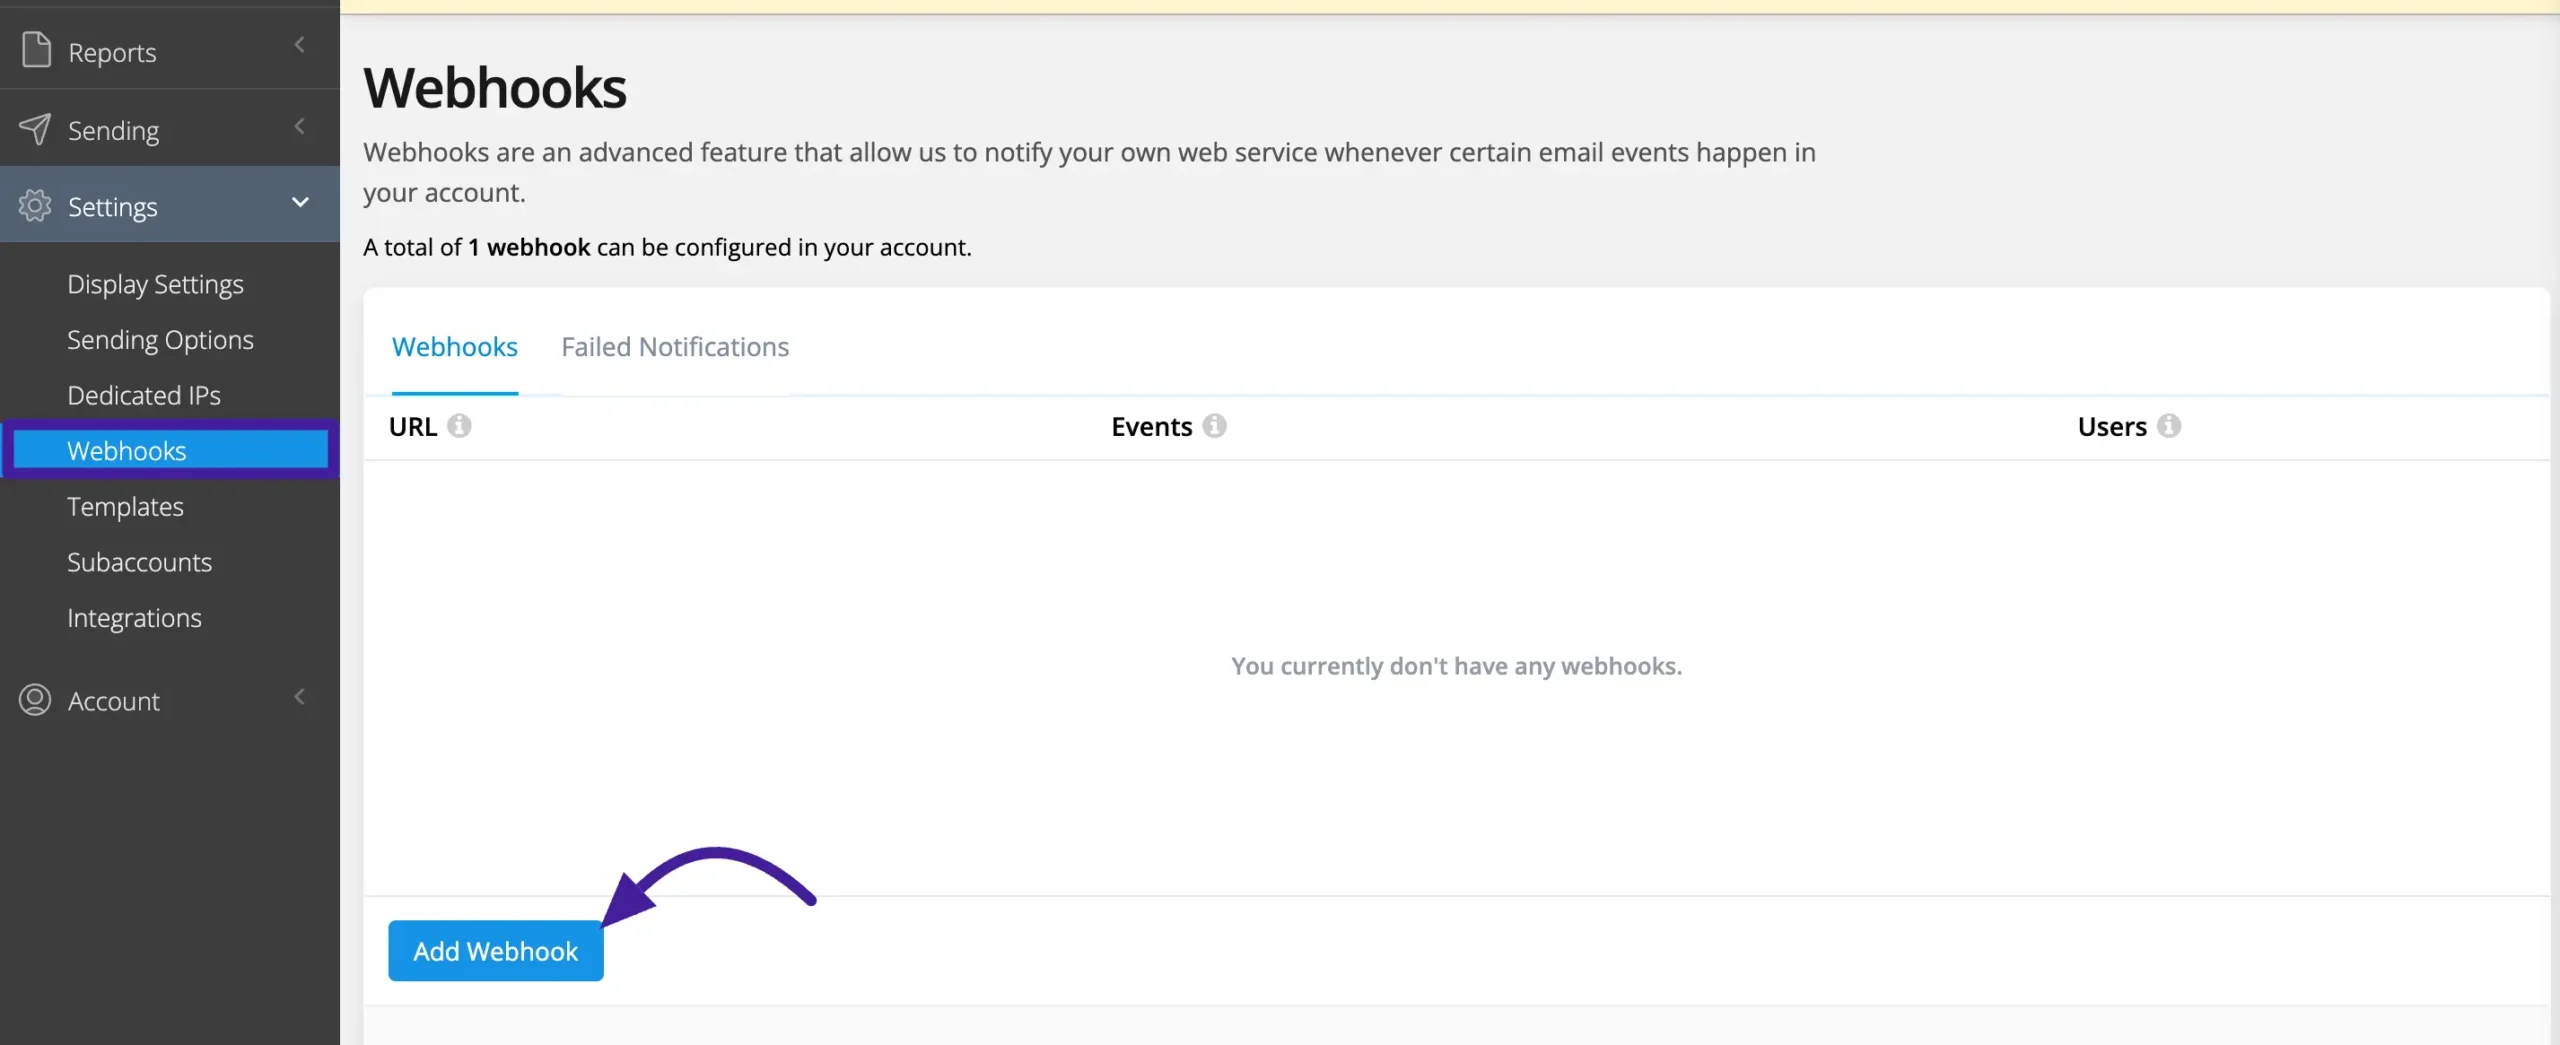
Now log in to your account or create a new SMTP2GO Server. Then navigate to the Settings>Webhooks settings section and click Add Webhook.
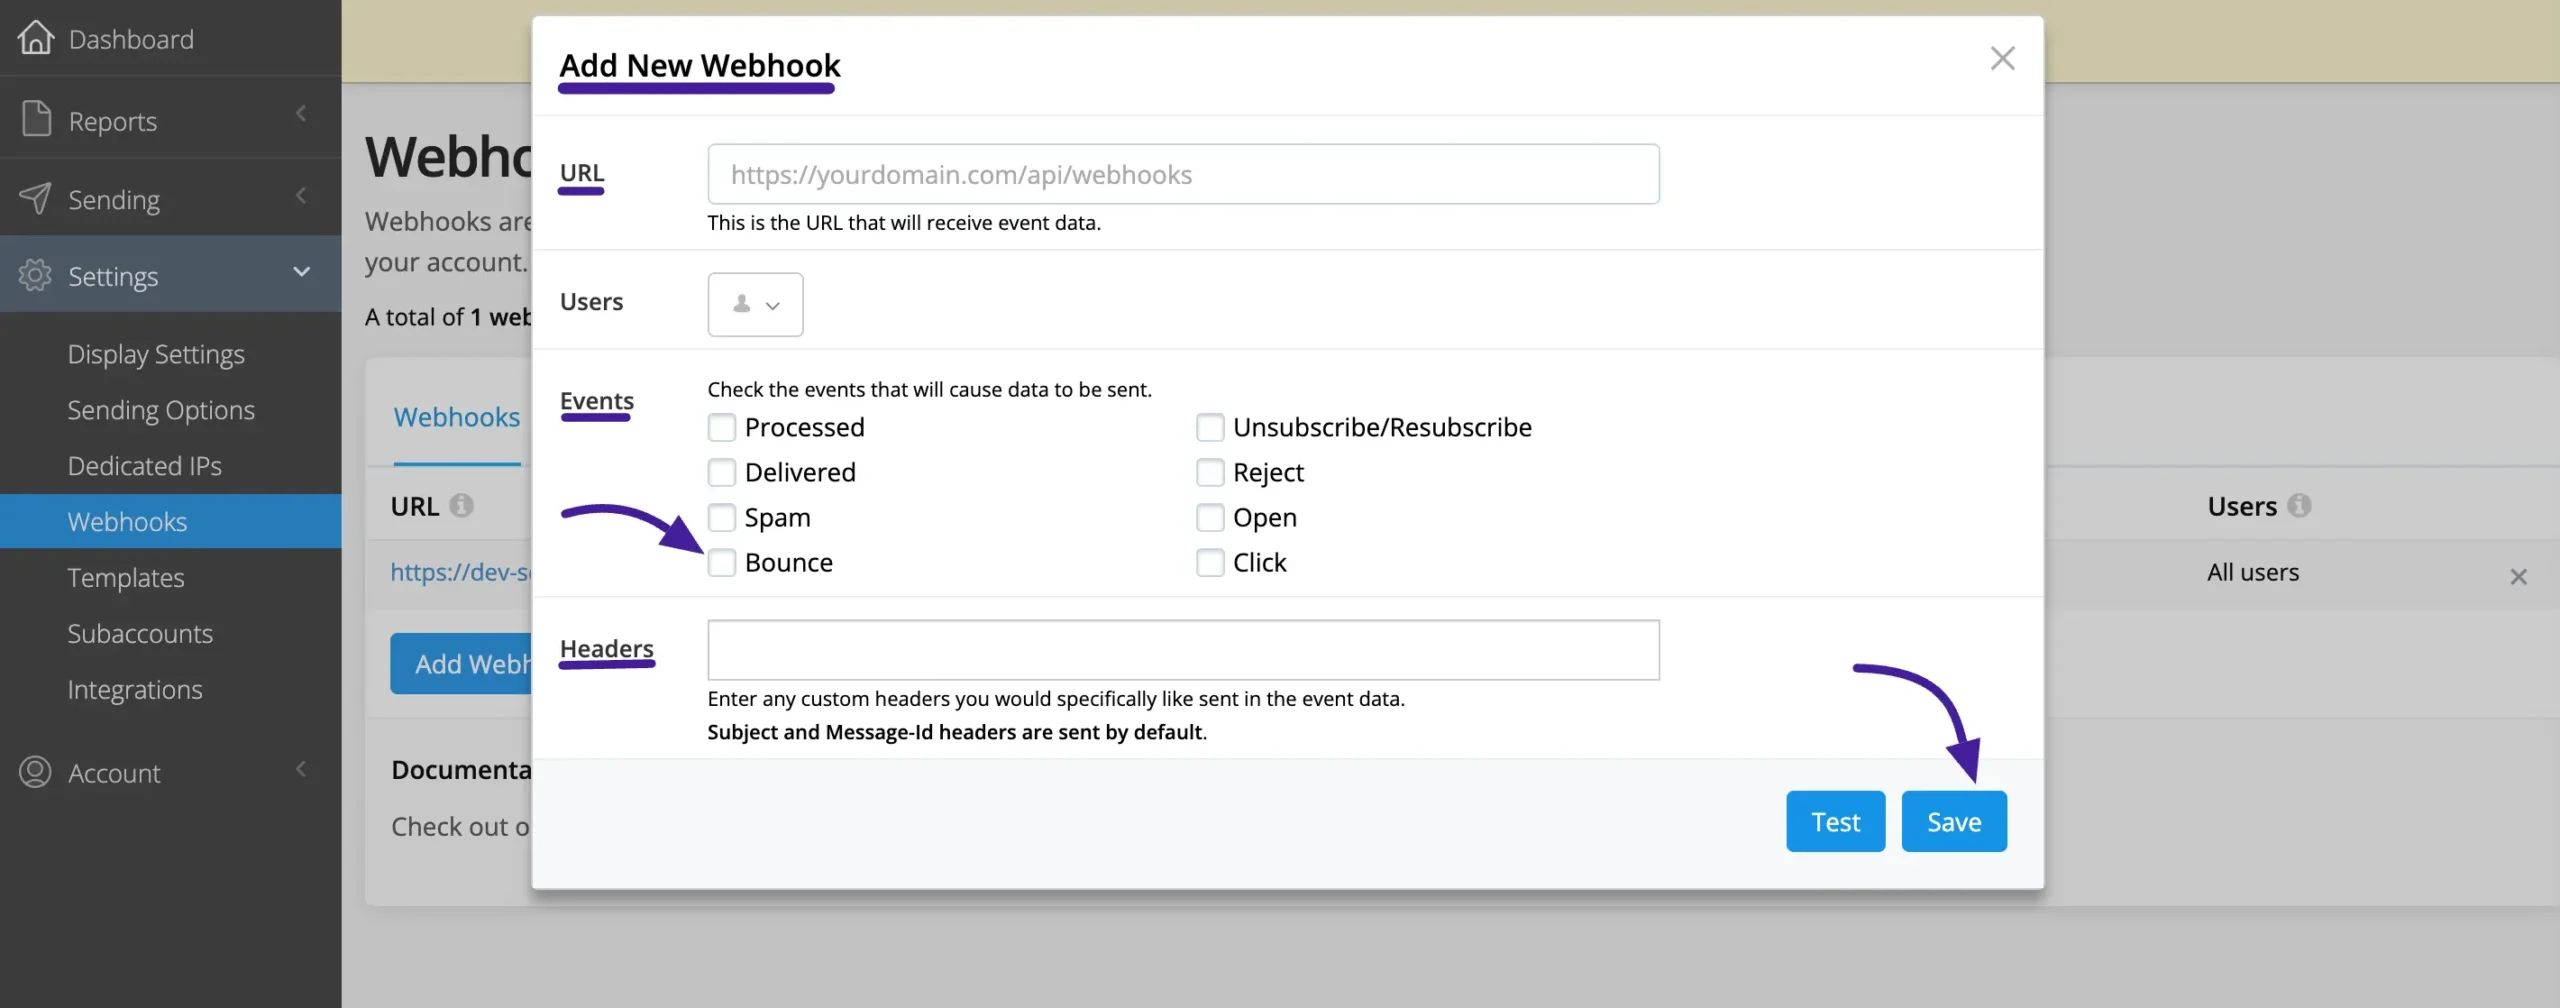
Here appears a popup Add New Webhook. Here you’ll see:
URL: Paste the Webhook URL that is copied from your FluentCRM Websites.
Events: Check the Bounce box for bounce handling.
Headers: Enter a header that you want to be sent explicitly to event data.
Now, Save your webhook settings and use the Test button to ensure the setup works.
Viewing Bounced Contact #
To view bounced contacts in FluentCRM, go to Contacts, choose Filter by Status, and select Bounced.

This setup helps you track bounced emails and manage your email campaigns efficiently. If you have any questions, please contact us.


