After running an Email Campaign, you can see all the campaign stats from the Campaign Details screen. You can check each recipient’s interaction, whether they opened the email or not if they clicked on the link that you added to your email body.
Once all the emails are delivered you will then see the campaign summary with the statistics and some other actions.
Dashboard #
When you go to the Email Campaigns Dashboard, you will find all the campaigns listed.
Data Columns #
There are some other data properties available to view for all the campaigns listed in the dashboard.
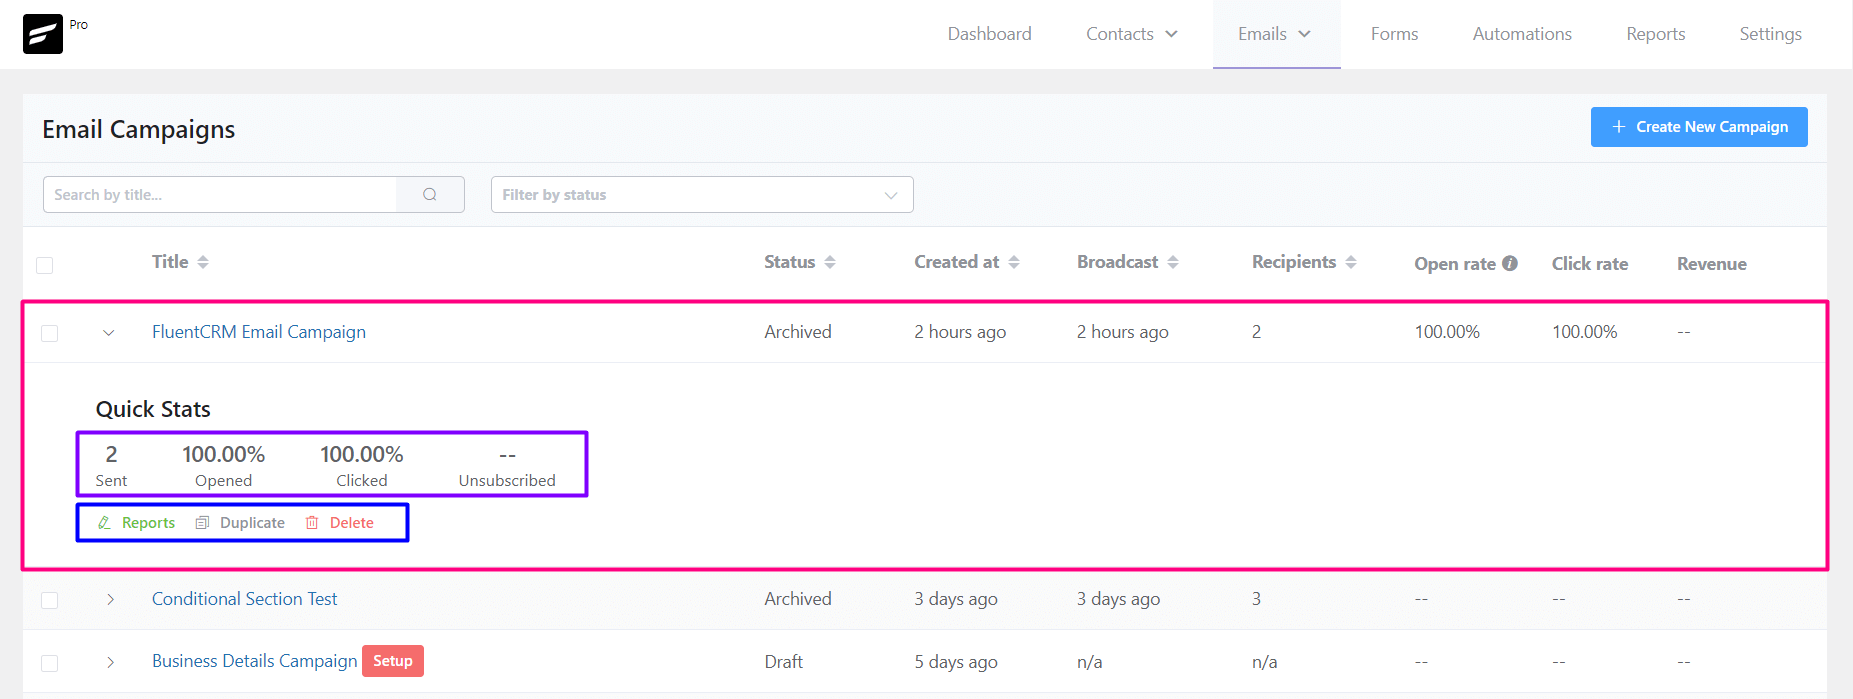
- Title: The title for the Email Campaign.
- Status: Status of the Campaign to identify if the campaign is sent or in draft mode.
- Created at: When the campaign was created.
- Broadcast: When the campaign is sent or to be scheduled.
- Recipients: Total number of recipients.
- Open Rate: Percentage of the email opens.
- Click Rate: Percentage of the link clicks.
- Revenue: This is e-commerce-based data. The data comes from Woocommerce purchases by the links used in the campaign.
Quick Stats #
Expanding any campaign that is sent you will be able to see the Reports, Duplicate, or Delete the campaign as well. The summary of the Total Emails Sent, Email Opened in percentage, Email Link Clicked in percentage and Unsubs are also available to see from here.
Brief Overview #
This is the basic overview of the sent campaign. It shows some statistics on link clicks and email opens.
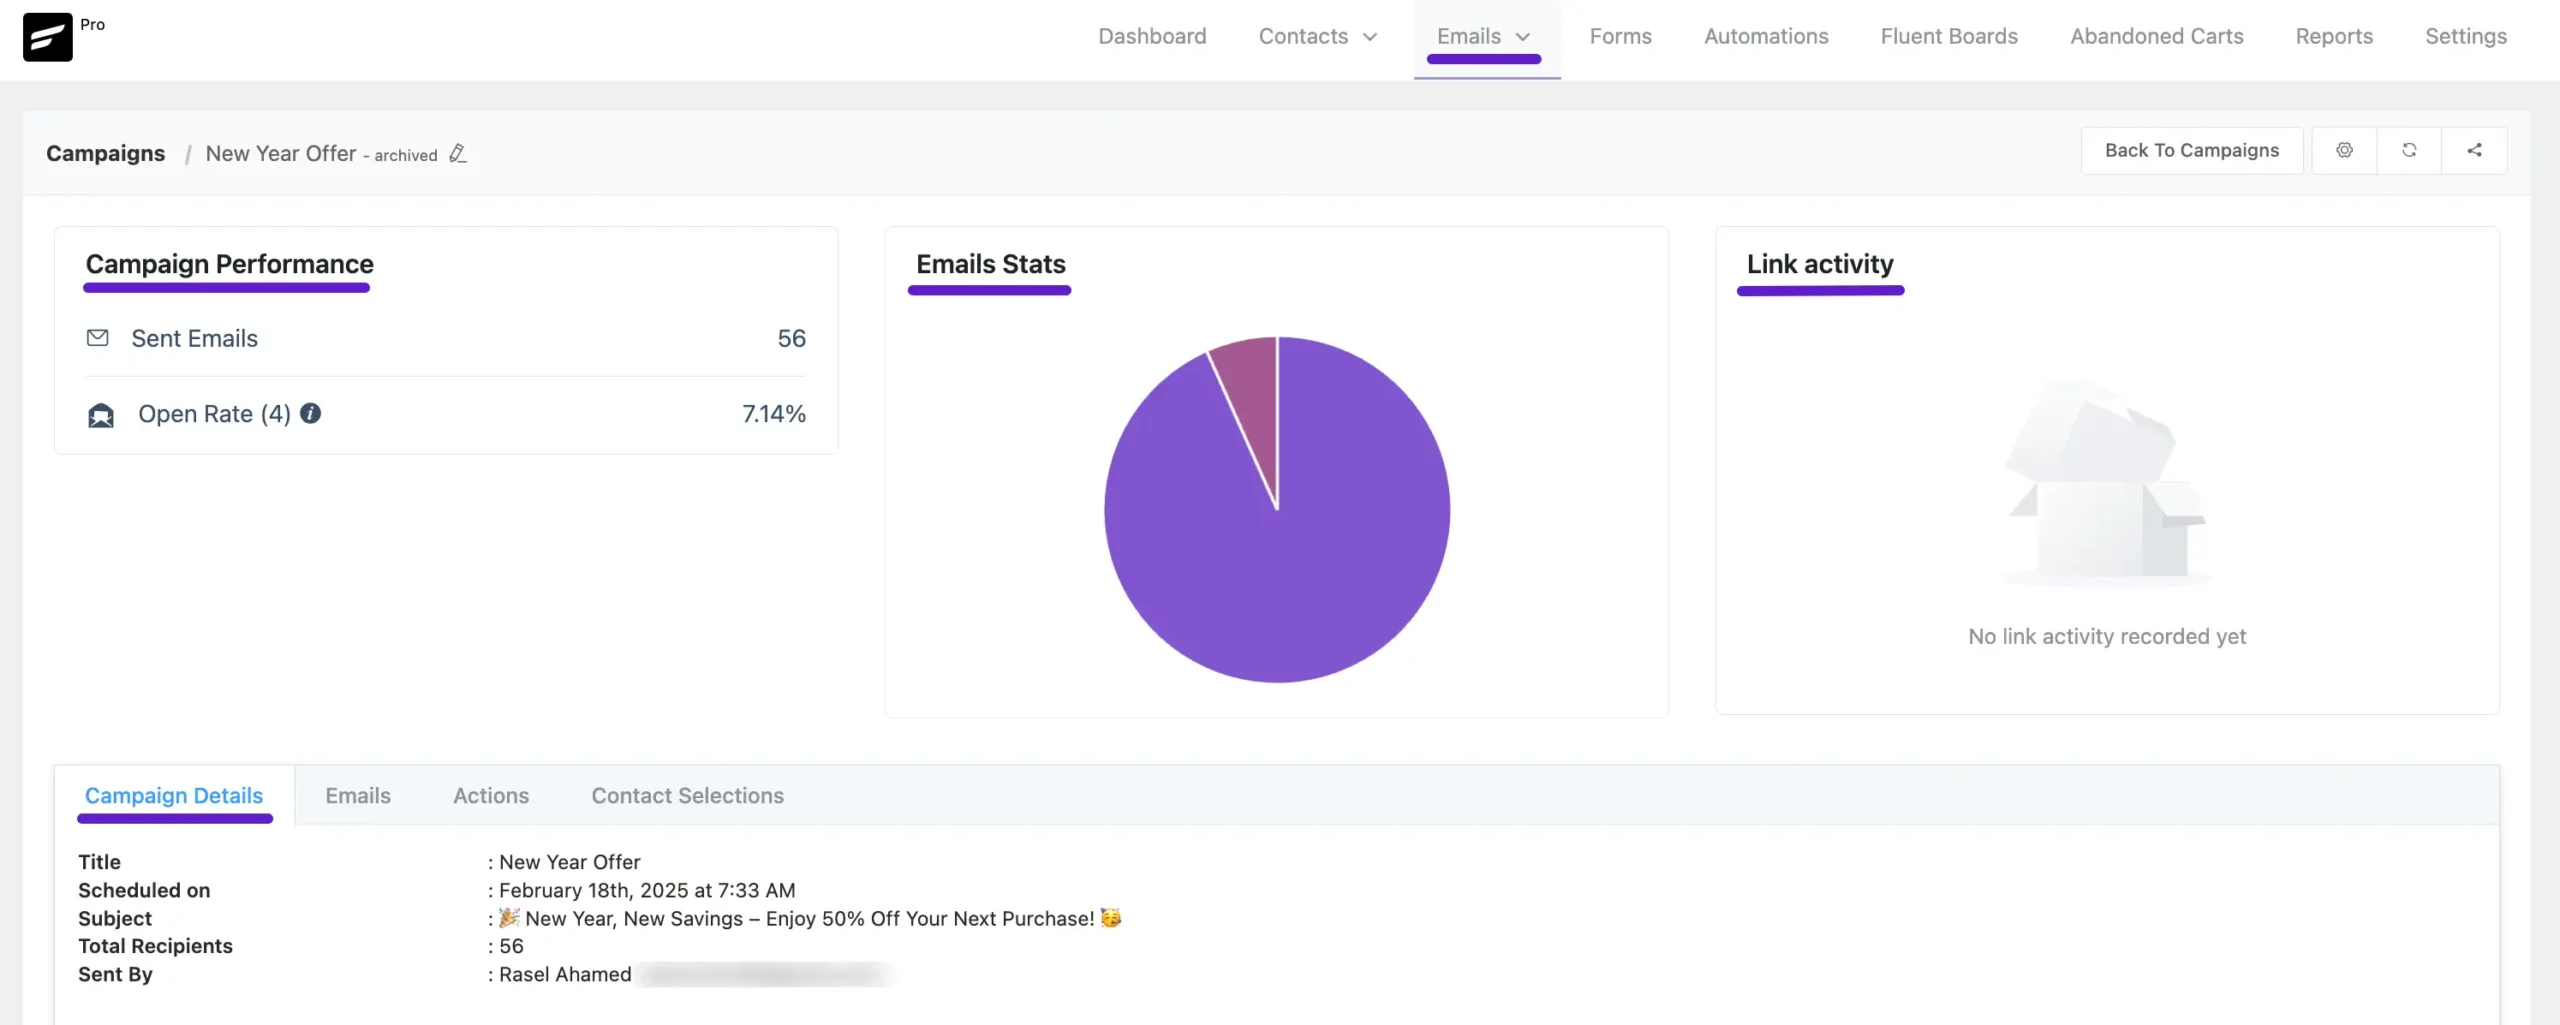
Campaign Performance #
This section records the very basic summary of a campaign and they are:
- Sent Emails: Total number of sent emails.
- Click Rate: Number of link clicks and ratio calculated in percentage against total emails sent.
- Open Rate: Number of email opens and ratio calculated in percentage against total emails sent.
- Click to Open Rate: Calculated Ratio of Total link Clicks vs Email Opens. This is also known as CTR or Click Through Rate.
Email Stats #
A graphical pie chart to show the Total Emails Sent, Link Clicks, and Emails open.
Link Activity #
This section logs the Unique Clicks per URL.
In-depth Overview #
From this section, you will be able to details of the campaign and also apply some actions to subscribers.
Campaign Details #
The available details are:
- Title: The Campaign Title.
- Scheduled at: The Date and Time when the campaign was sent or scheduled to be sent.
- Subject: The Email Subject Line (Primary).
- Total Recipients: The total number of recipients.
- Email Body or Content: A small window preview the email body or content of the Email Campaign.
- Sent By: You can check which WordPress user sent the email campaign in the campaign details.
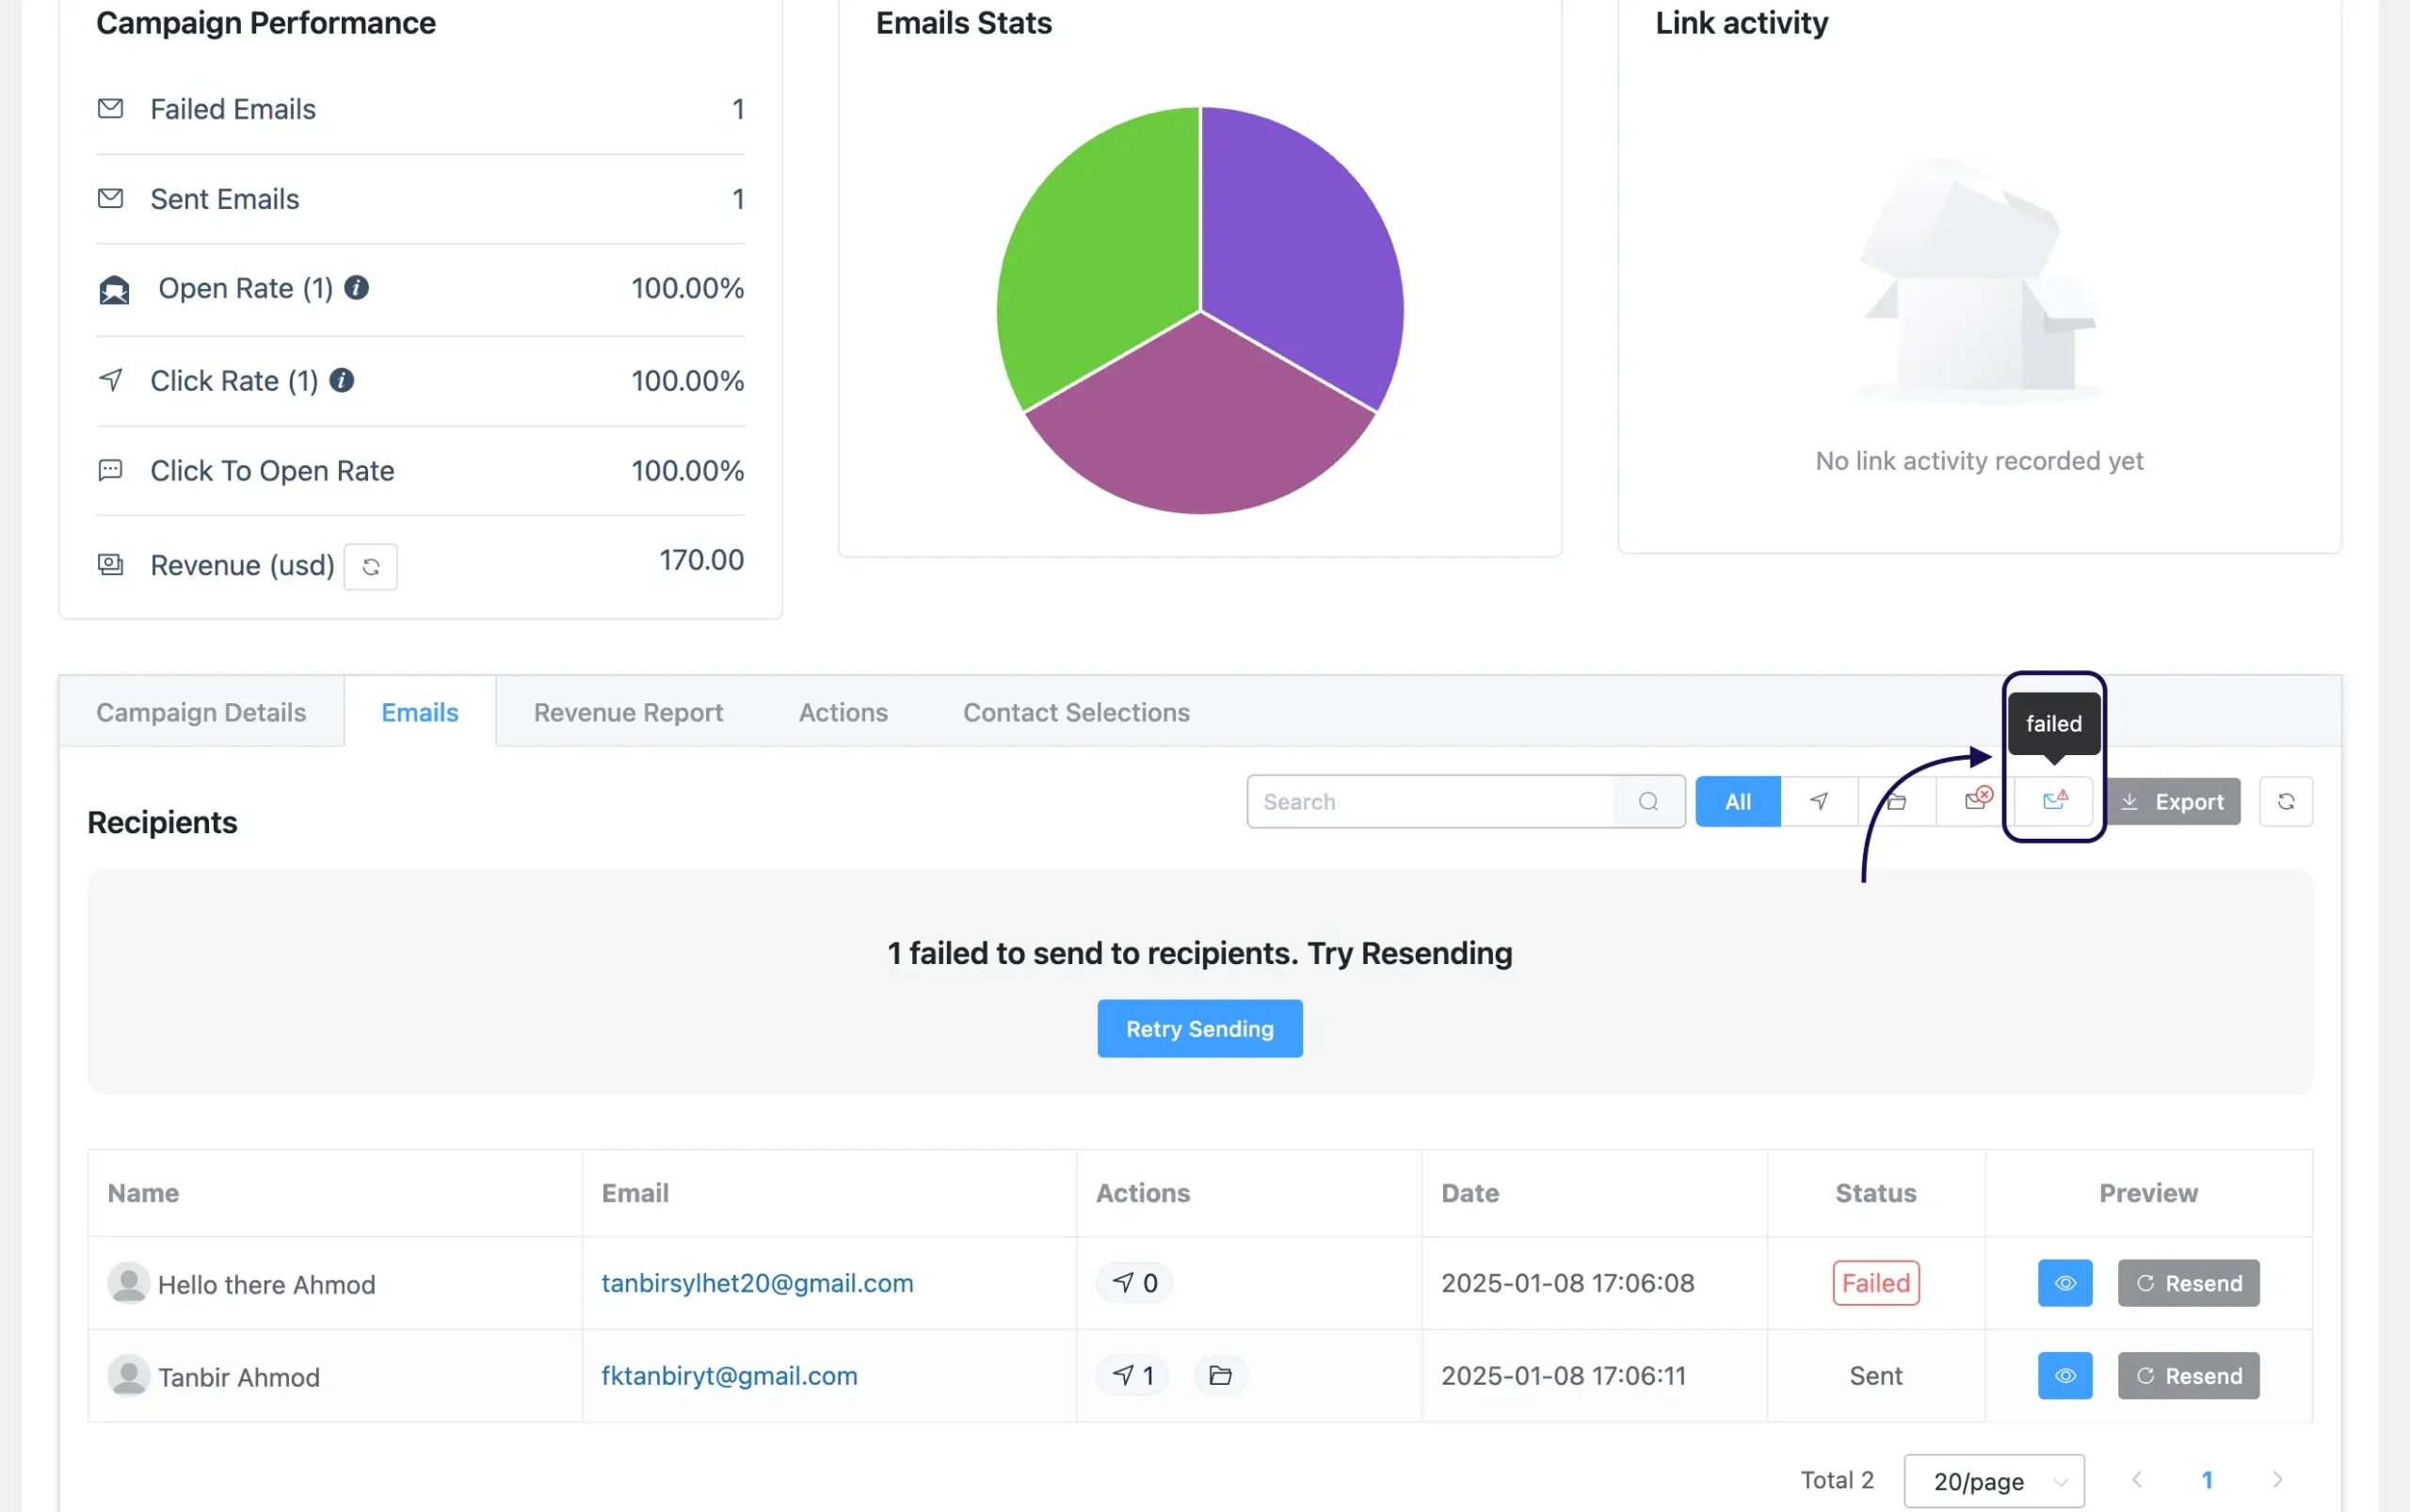
Emails #
In this section, you can view all recipients, along with filter options and fields that display recipient details, which are explained below.
Search Bar: Use the search bar to find specific emails that have been sent to your contacts.
Filter Options: Next to the search bar, you’ll find filter options to refine your email list based on:
- Clicked – Emails that recipients have clicked on.
- Viewed – Emails that have been opened.
- Unopened – Emails that haven’t been opened.
- Failed – Emails that failed to send.
Export Button: Click the Export button to download the campaign’s overall details in CSV format.
Refresh Button: Use the Refresh button to update and reload the campaign details.
The available fields are:
- Name: Name of the recipient.
- Email: Email address of the recipient.
- Actions: Numer of link click.
- Date: The date and time of the email delivery.
- Status: Status of the delivery of the Email Campaign.
- Preview: You can preview the email content by clicking on the View Icon. If you want you can again resend the email to the recipient by clicking on the Resend Button.
A/B Testing Results #
This section lets you see the result of the Total Emails Sent, Open Rate Percentage, and Link Clicks Percentage for Each Email Subject. If you do not use any A/B testing option as described in Primary Subject & A/B Subjects then you will only see the Primary Subject and results.

Actions #
Using the Campaign Actions, you can Add/Remove the Tag of your Contacts based on email interaction.
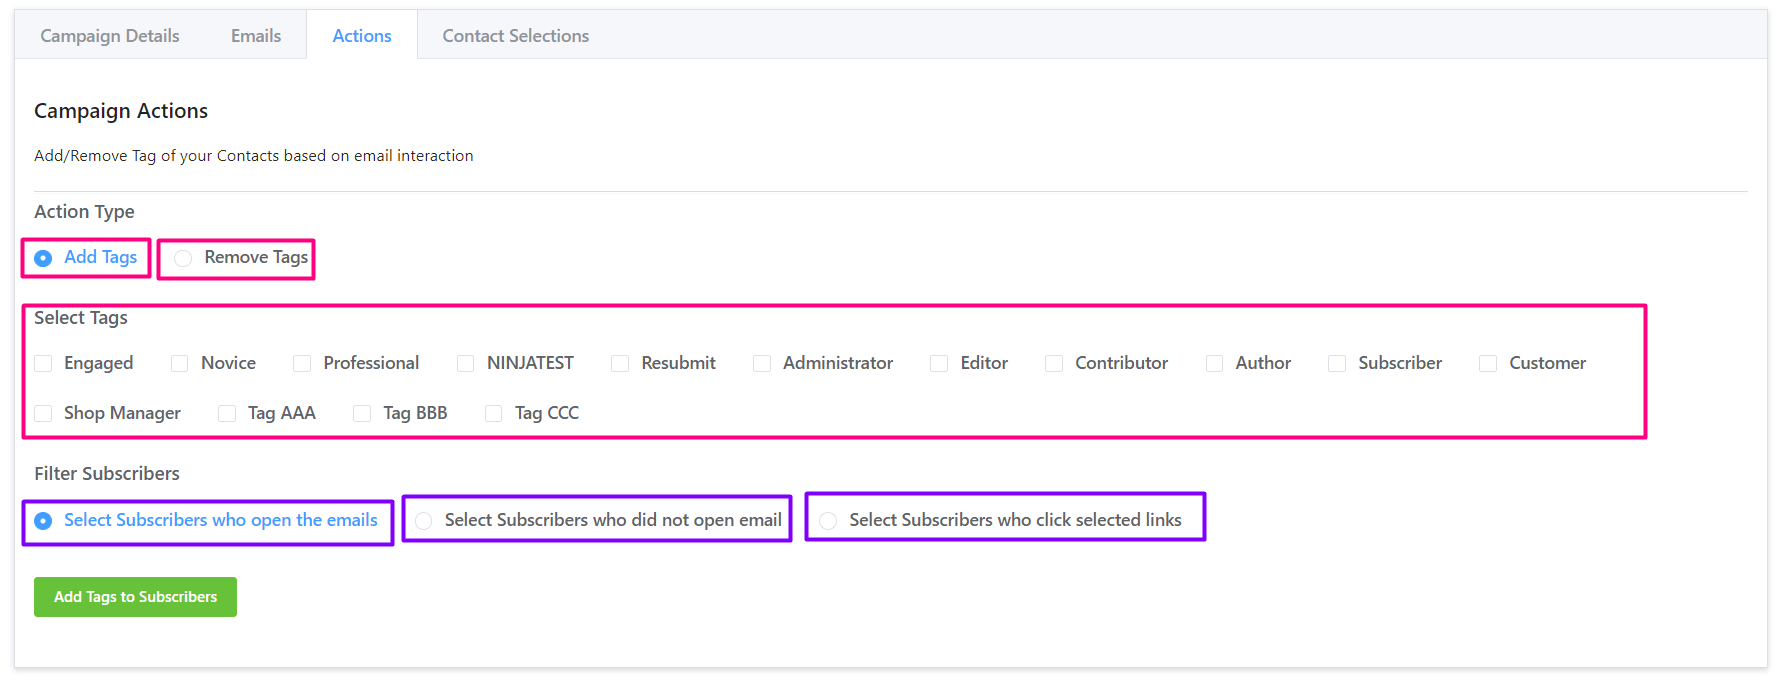
Add or Remove Tags on Campaign Activity #
You can either Add Tags or Remove Tags by selecting the available Tags and filtering them by the below options:
- Select Subscribers who open the emails: You can filter the subscriber who did open the campaign email.
- Select Subscribers who did not open the email: You can filter the subscriber who didn’t open the campaign email.
- Select Subscribers who click selected links: If your email body has links, you can filter the subscriber based on each link they clicked.
Contact Selections #
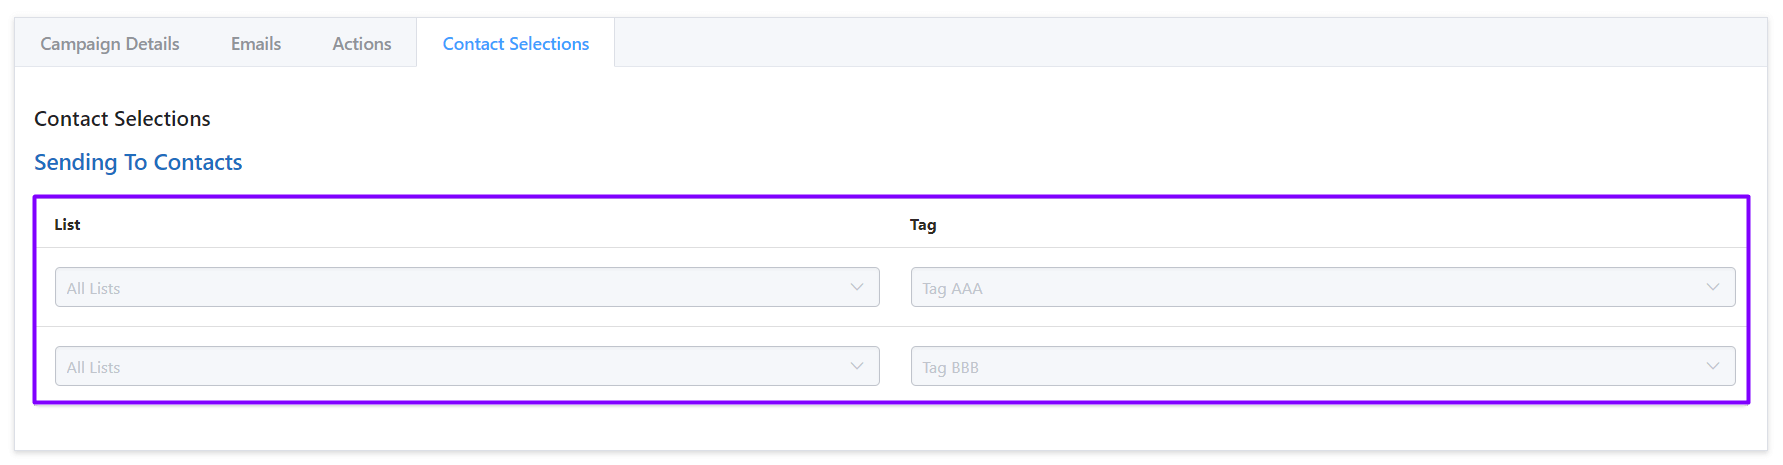
This section represents the conditions applied to filter the recipients in the Recipients Setting of the Email Campaign.


May i know how to disable the calculation for revenue because when i open /wp-admin/admin.php?page=fluentcrm-admin#/email/campaigns , it take around 30seconds just show this page.
Hi Jong, there’s no built-in option to disable revenue calculation at this moment. You may contact our support for additional assistance: https://wpmanageninja.com/support
I’ve set up a set of email campaigns and started to send them out. The first four displayed open rates, click-through, link activity, etc…no problem. the next 4 campaigns launched, but no data is coming back. What may be causing this?
Hello David, kindly contact with our support team: https://wpmanageninja.com/support
My Email campaign emails are stored in my internal database, But I need to store an external database. So external database email store option is available?
Please help me
Hi Vignesh, no, you can’t do that with FluentCRM. The data needs to be stored in your internal database.