FluentCRM integrates with FluentBooking to simplify automation and contact management. It enables you to add FluentBooking attendees to your leads and run automation based on booking events like creation, completion, cancellation, and rescheduling. This integration ensures smoother contact management and more efficient workflow automation. Let’s dive into the step-by-step guide to configuring Fluent booking with FluentCRM.
To integrate FluentCRM with Fluent Booking, you have to start the process through the Fluent Booking Plugin on your website.
Go to your WordPress dashboard admin panel and navigate to Fluent Booking from the WordPress sidebar menu to access Fluent Booking.
Enable FluentCRM in Fluent Booking #
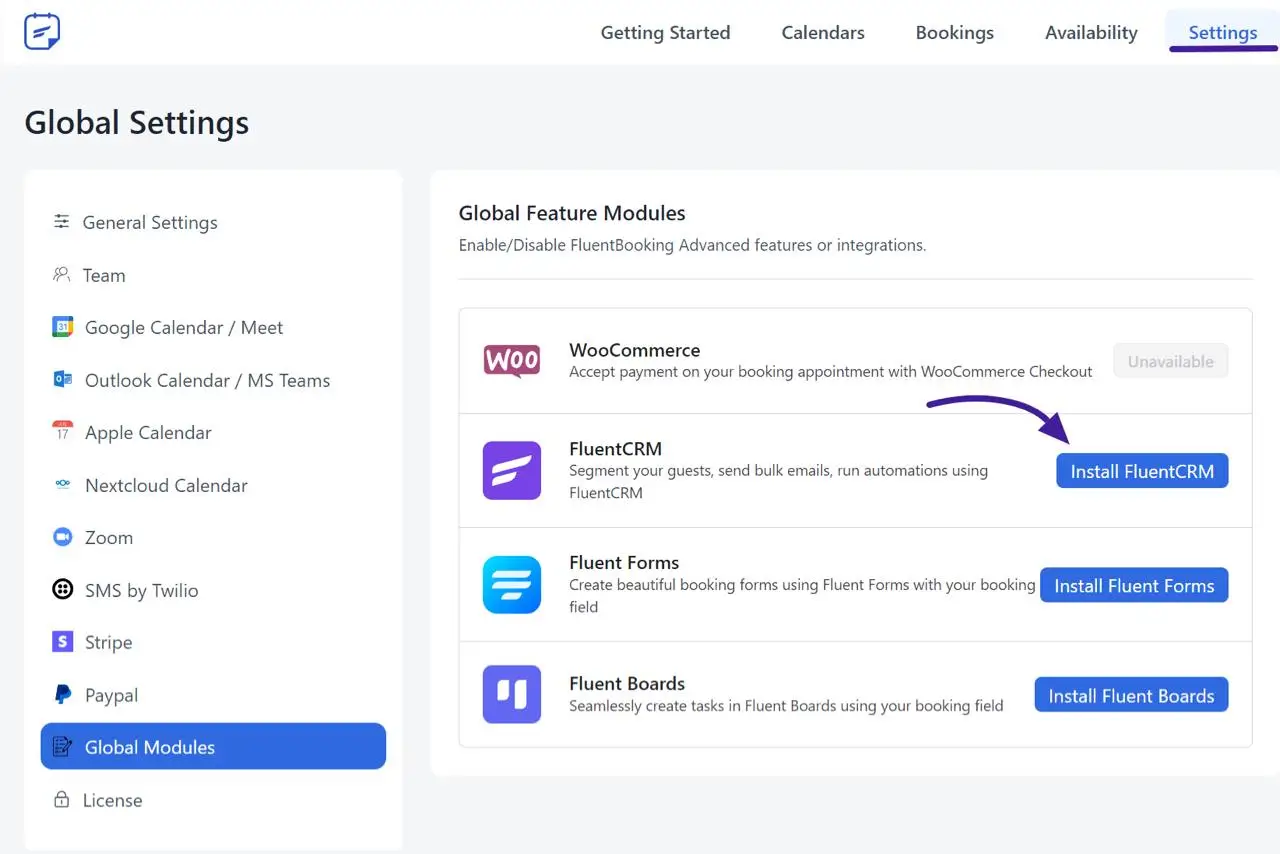
From the Fluent Booking Dashboard click on the Settings from the navbar. Then click on the Global Module and Install FluentCRM. After FluentCRM is enabled it shows System enabled.
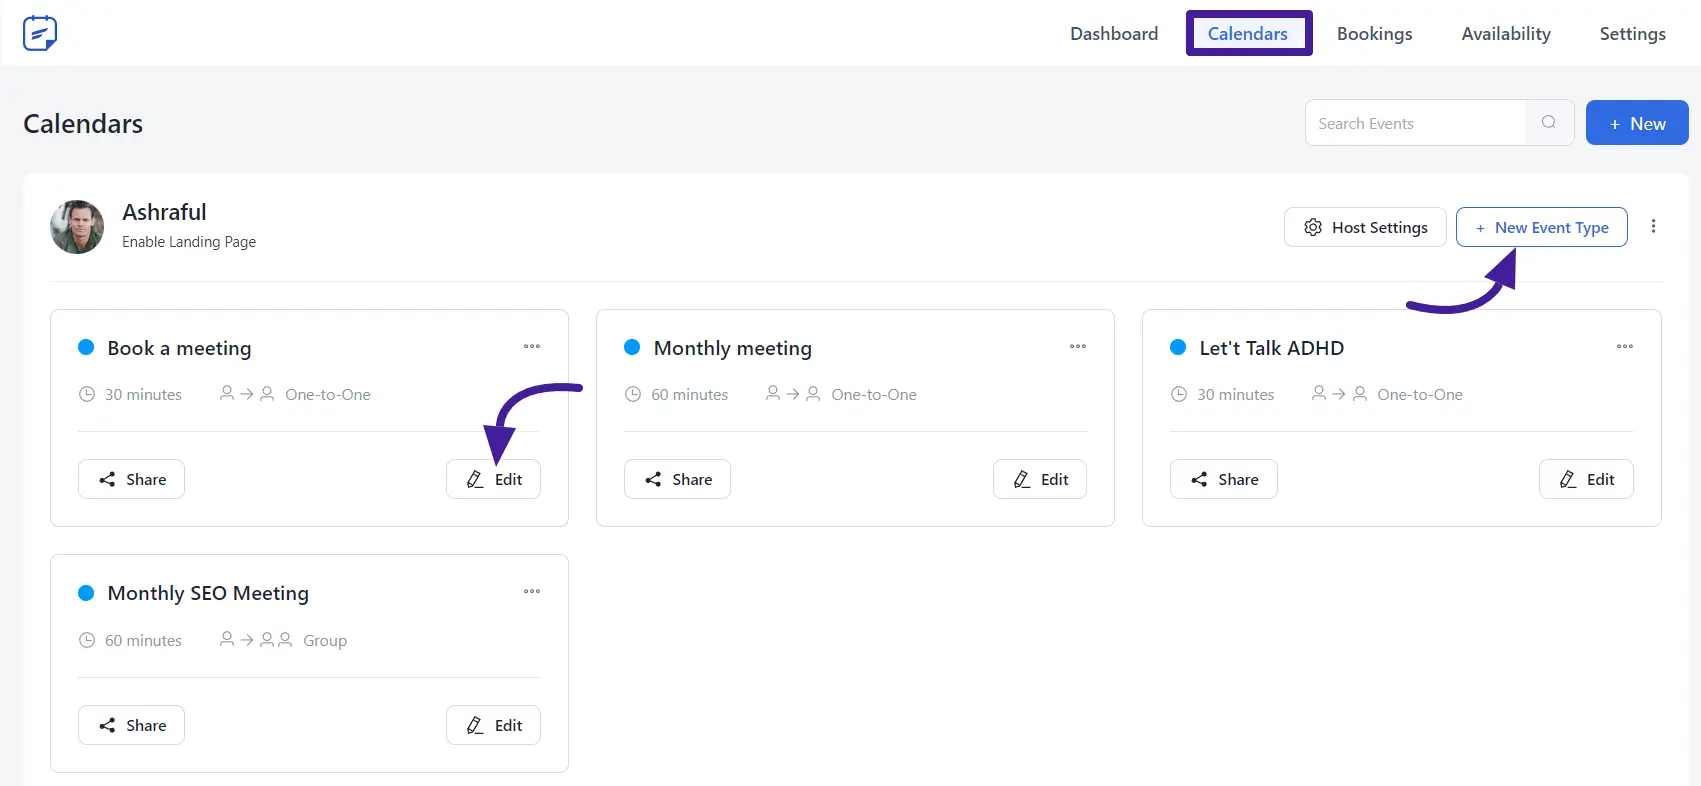
To create or edit a booking event go to Calendars and click the New Event Type for a new event create or click on the Edit button to edit the existing event.
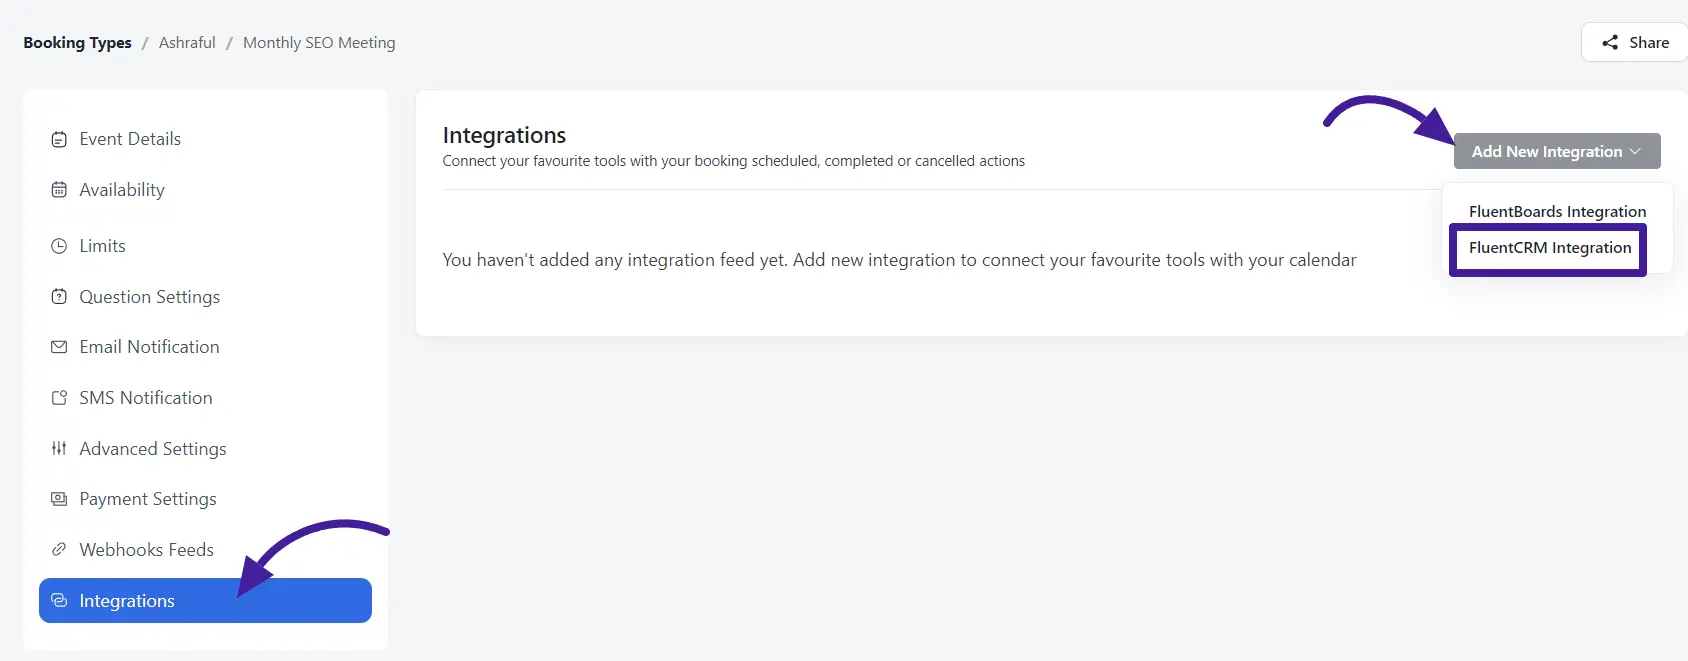
In the event editing Section, look for the Integrations section. Click on Add New Integration and select FluentCRM Integration.
FluentCRM Integration Feed and Field Mapping #
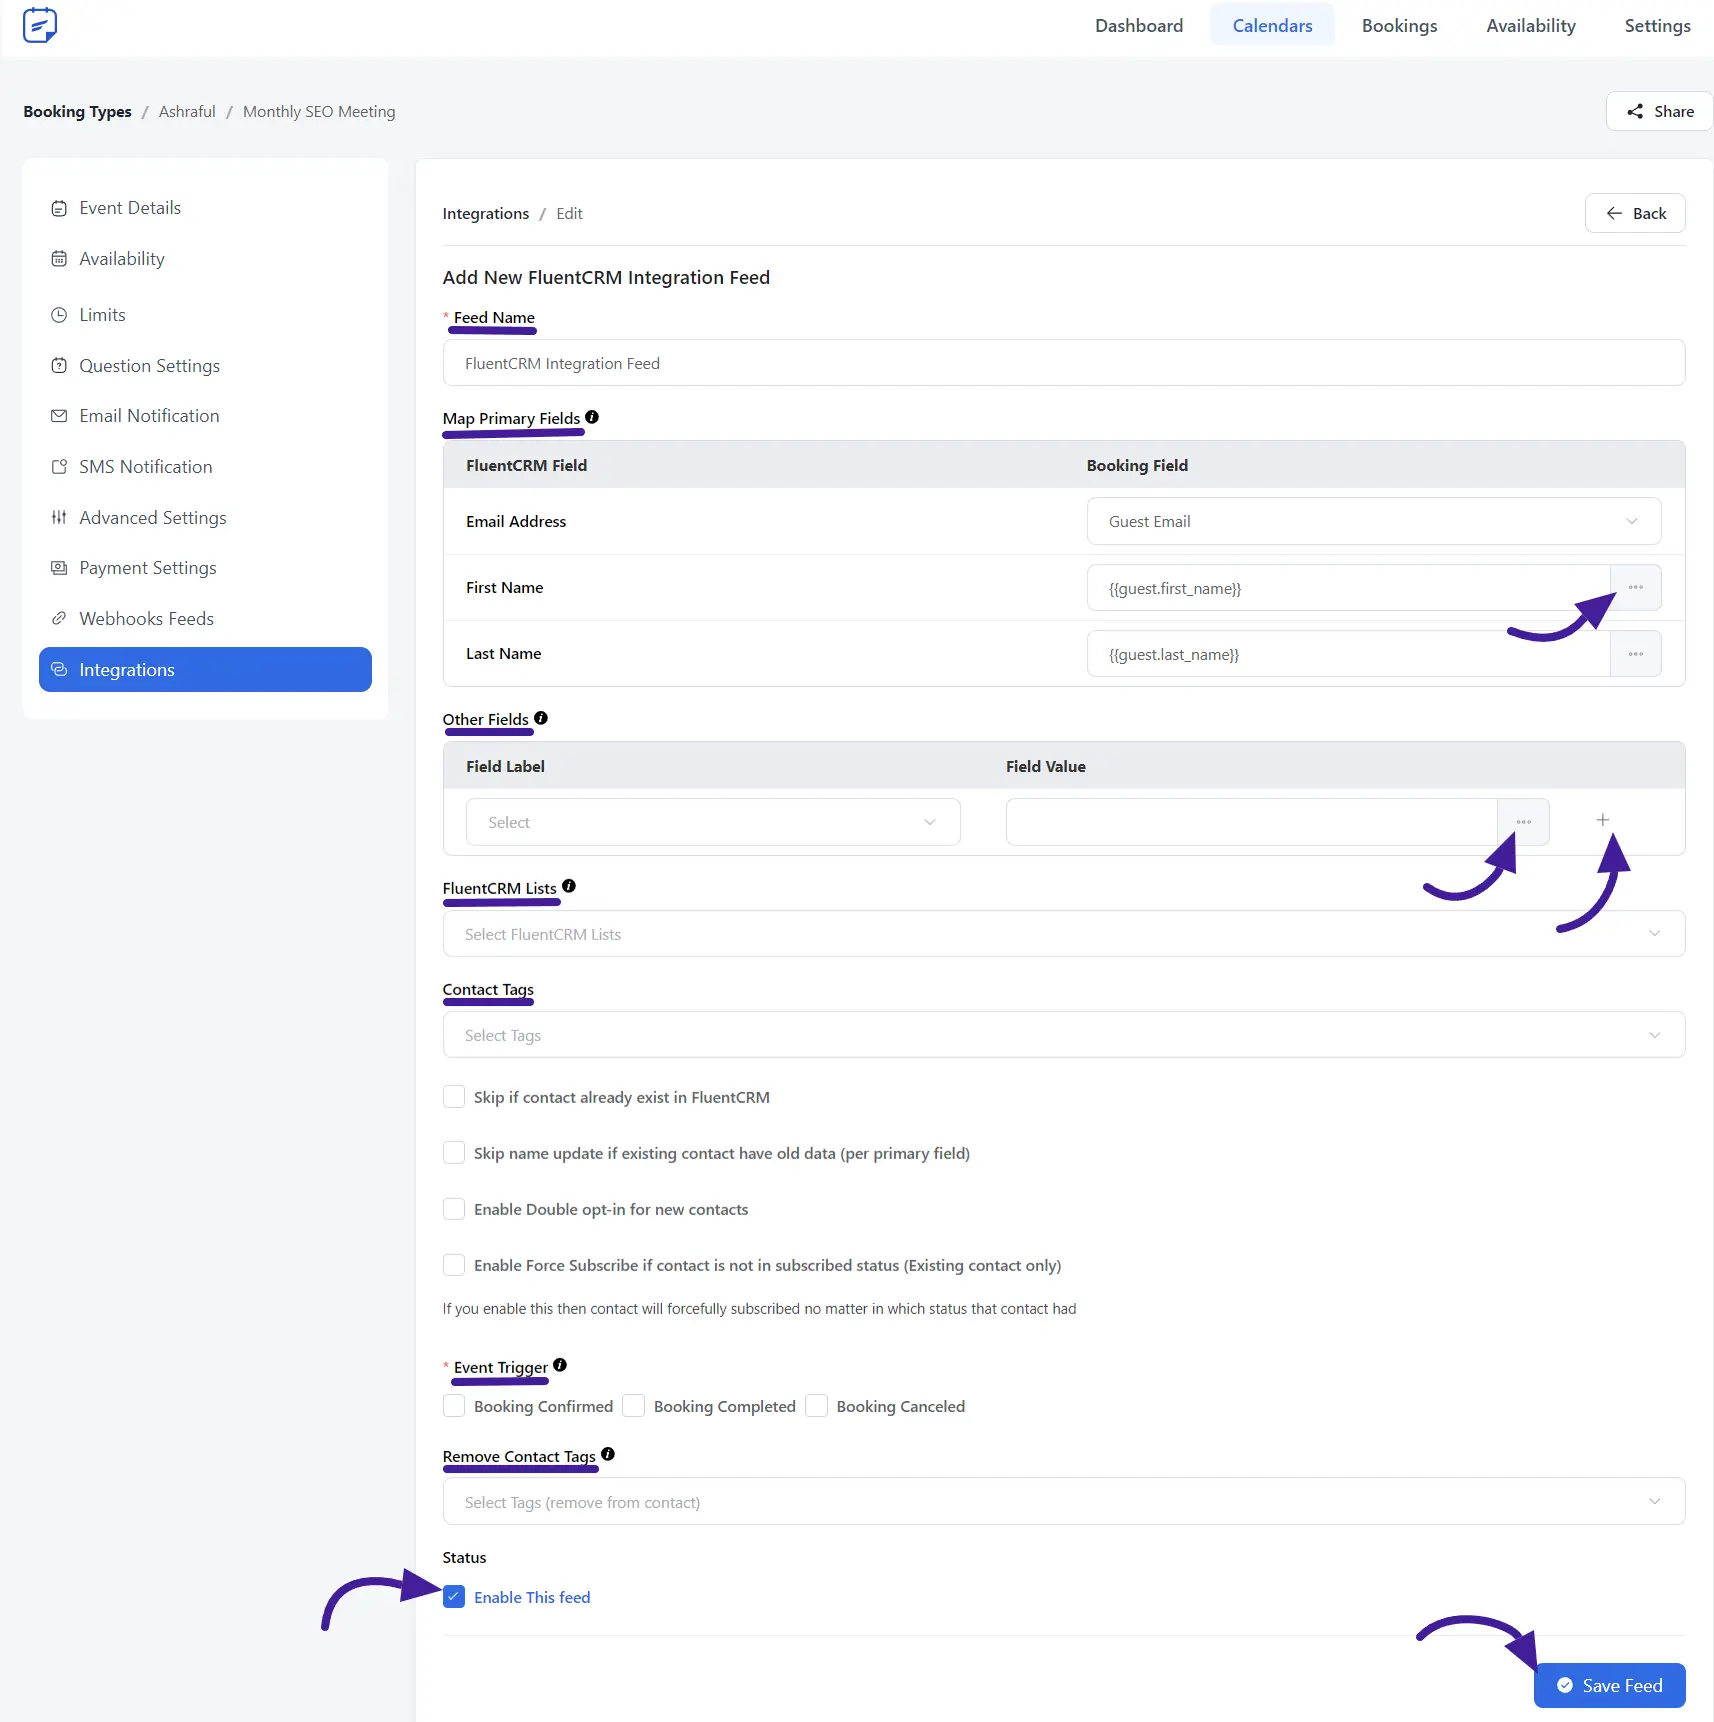
A new section will appear to configure the integration. Customize your integration feed following the option below:
Feed Name: Add the Feed name.
Map the Primary Fields: Here you can collect data from booking fields. Also, utilize shortcodes for further guest information on the three dots on the right side as shown in the screenshot below.
Other Fields: You can add labels that contain store fields. Here to add more information click the plus icon from the right side. You can use shortcodes by clicking the three dots.
FluentCRM list: Here you can select the invites you want.
Contact Tag: Assign Tags to attendees.
In Fluent Booking, these FluentCRM list and Contact tags are similar to those FluentCRM Contact list and tags.
After that, you’ll find some dynamic checkbox options here to customize your invitees for FluentCRM customer lists.
Event Trigger: Activate this Event Feed based on triggers: Booking Confirmation, Booking Completed, and Booking Canceled.
Remove Tag: Here you can remove your contact tags by selecting the tags.
Active integration: After that, Tick the Enable Feed and click the Save Field.
Automation Setup in FluentCRM #
Go to the FluentCRM dashboard and click the Automation section from the navbar to create a New Automation.
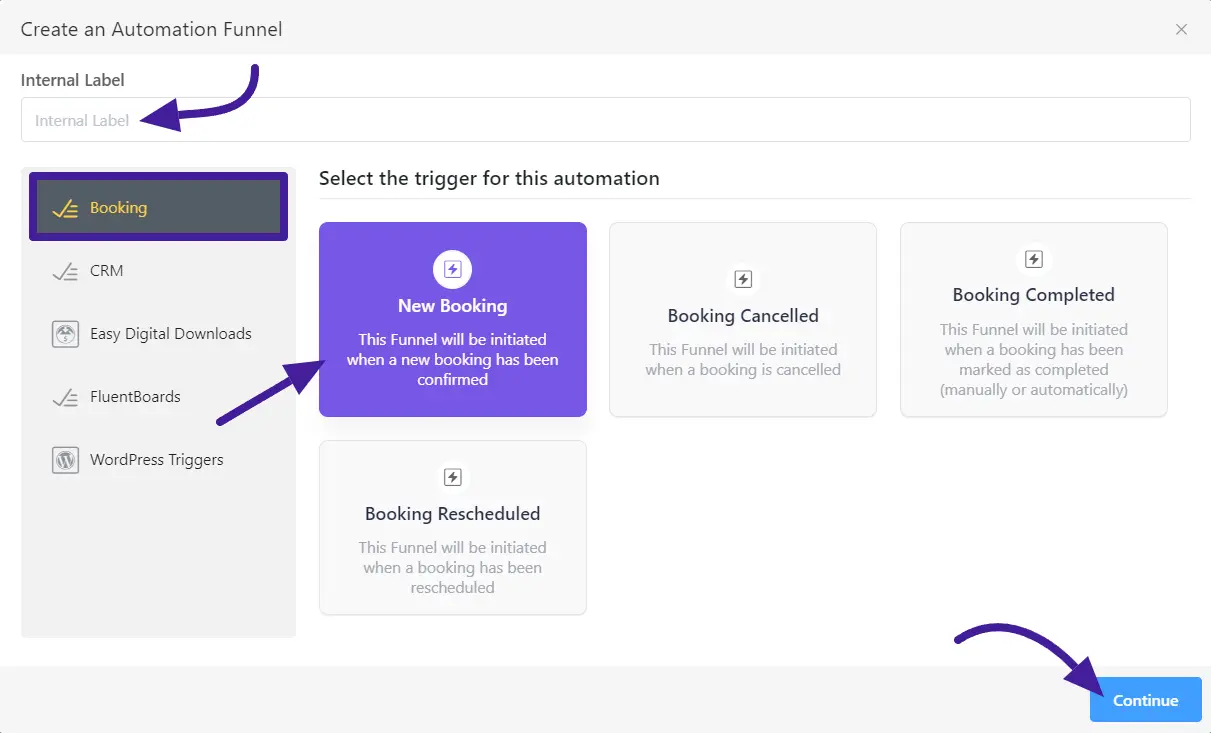
A popup will appear. Set the Internal Label Name and select Booking from the sidebar. Choose a trigger from the list to run your automation. Here are some Triggers you will see.
- New Booking: This trigger will be initiated when a new booking has been confirmed.
- Booking Cancelled: This funnel will start when a booking is canceled.
- Booking Complete: This funnel will start when a booking is completed manually or automatically.
- Booking Rescheduled: This trigger will start when the original booking is changed to a new date or time.
Now click on the Continue button to start the Funnel.
Now a popup will appear and here give the necessary information about the funnel.
Automation Name: You’ll see the automation name here. You can also edit it.
Internal Description: Place the automation Internal Description.
Booking Calendar: Here you’ll select the booking Calendar name that you created before.
Subscription Status: Now select your Contact Status any of those you want to run your automation. Here shows three statuses: Subscribed, Unsubscribed, and Pending.
Conditions: If Tick the Checking box then run this automation only once per contact. If left unchecked, it allows new data or configurations to take the place of the current ones in the flow.

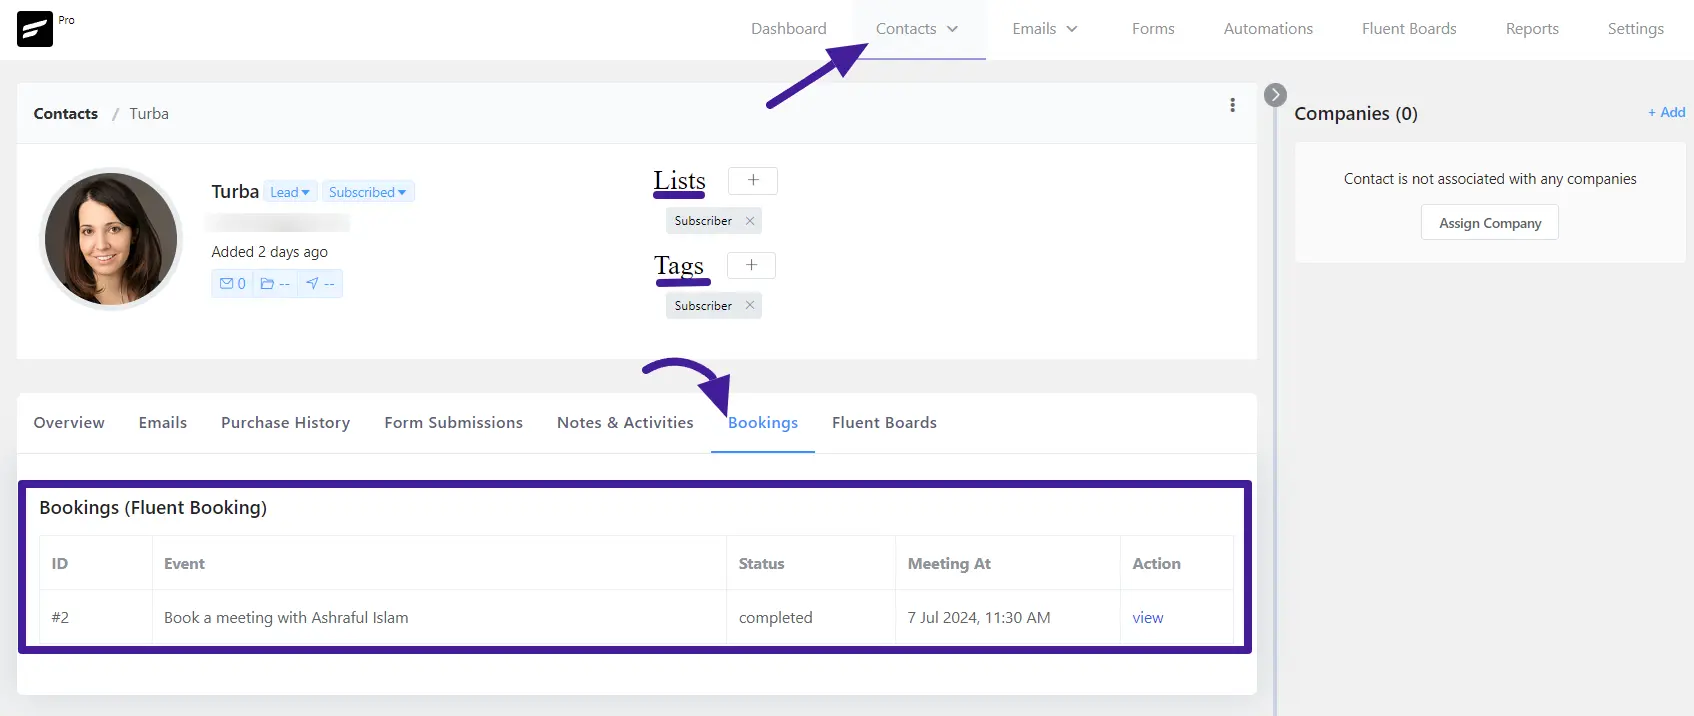
To see the Booking Contact list in FluentCRM, go to FluentCRM Contact then click on the List that you applied before Booking In FluentCRM list or Contact Tag.
If you have any questions about Fluent Booking Integration with FluentCRM, please contact us.


