FluentCRM offers Action blocks (i.e., tasks that you wish to trigger automatically from your side) specifically for WooCommerce marketing automation. This article will provide detailed information about all Action blocks for WooCommerce Automation in FluentCRM.
Actions for WooCommerce Automation in FluentCRM #
To learn how you can use these WooCommerce Actions in your Fluent CRM, follow the steps with screenshots below –
Before you proceed, you need to set up the WooCommerce in your WordPress Site to get all the WooCommerse-related Triggers and Actions.
Additionally, to get all WooComerce Subscription-related triggers, you can install the WooCommeerce Subscription Triggers Add-on.
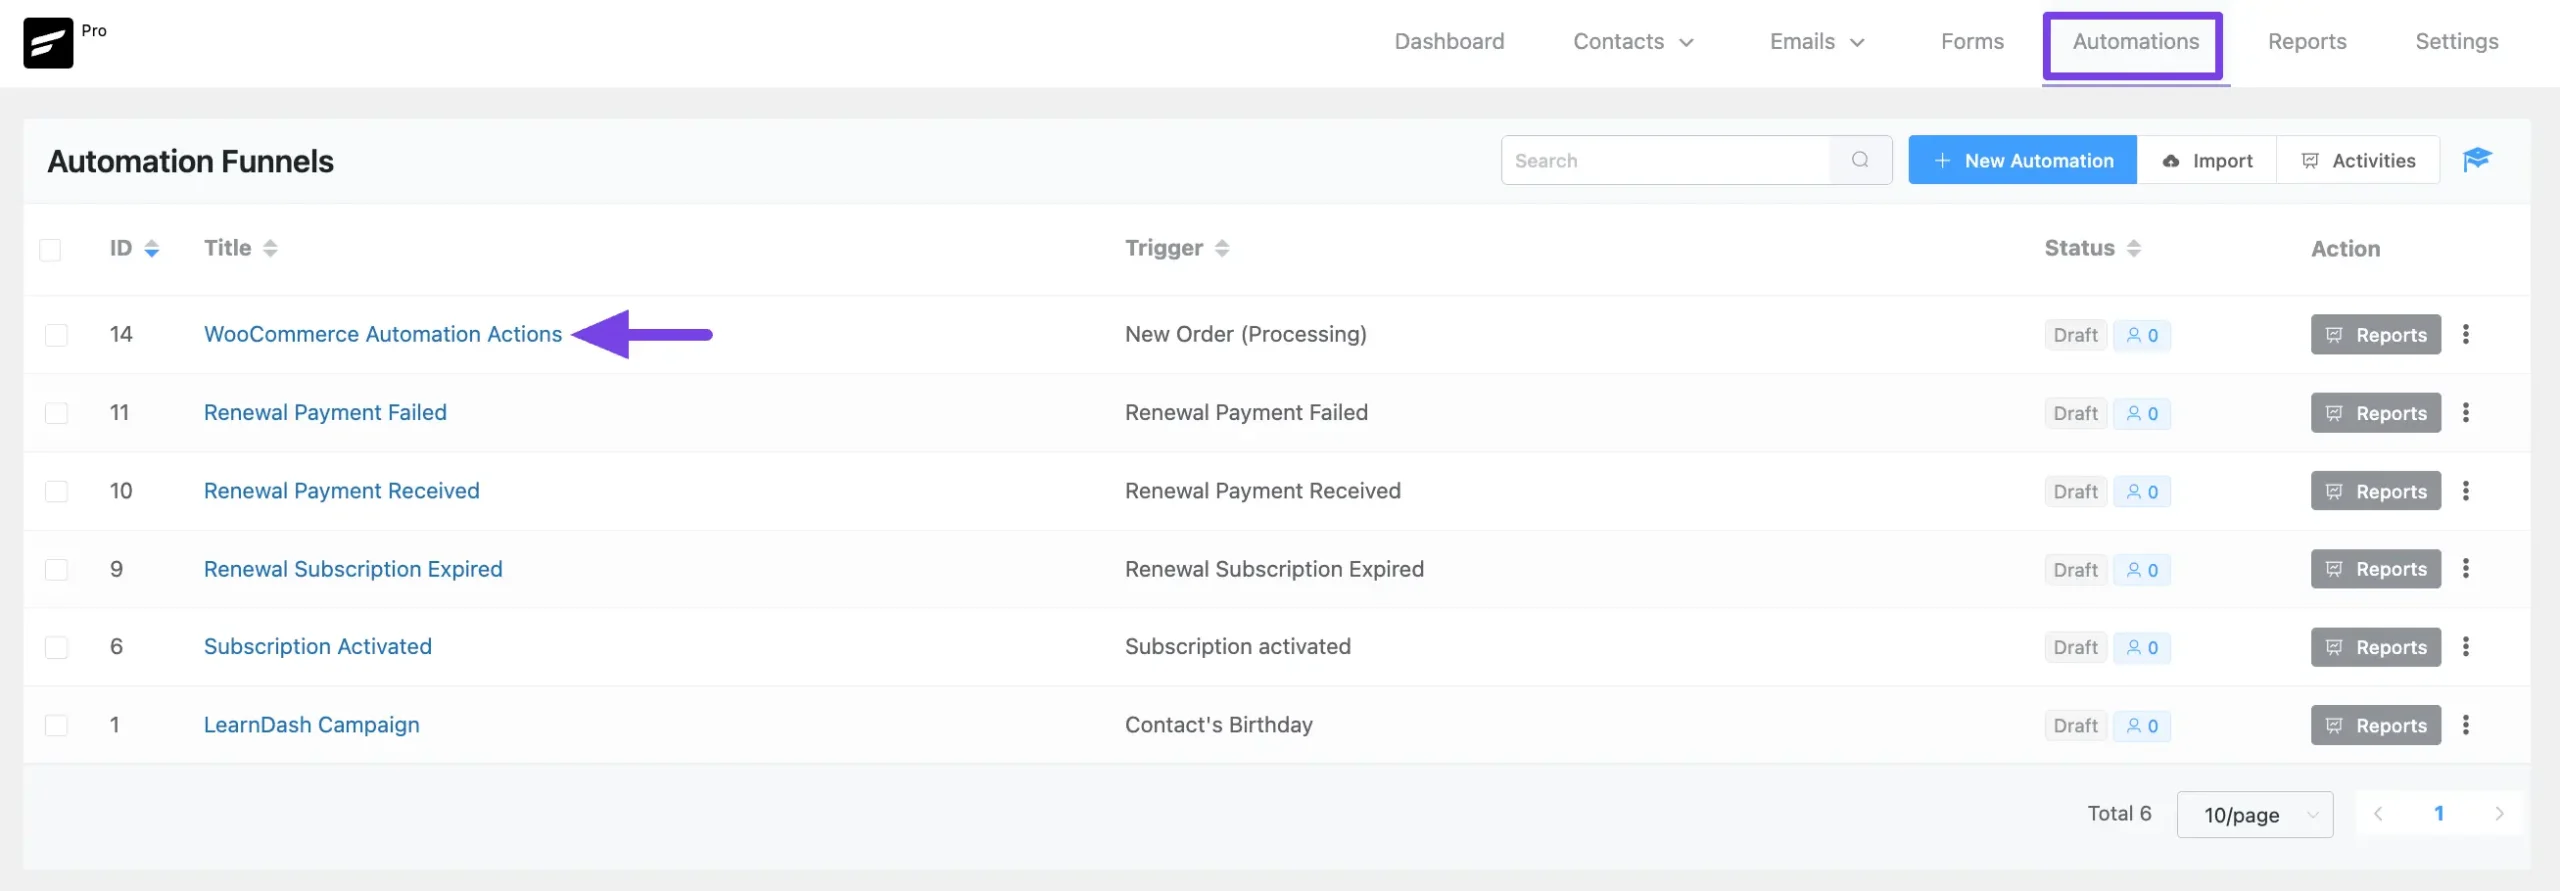
First, go to the Automation section from the Fluent CRM Navbar, and open your desired Automation by clicking on its title.
Now, click the Plus Icon on the automation funnel page.
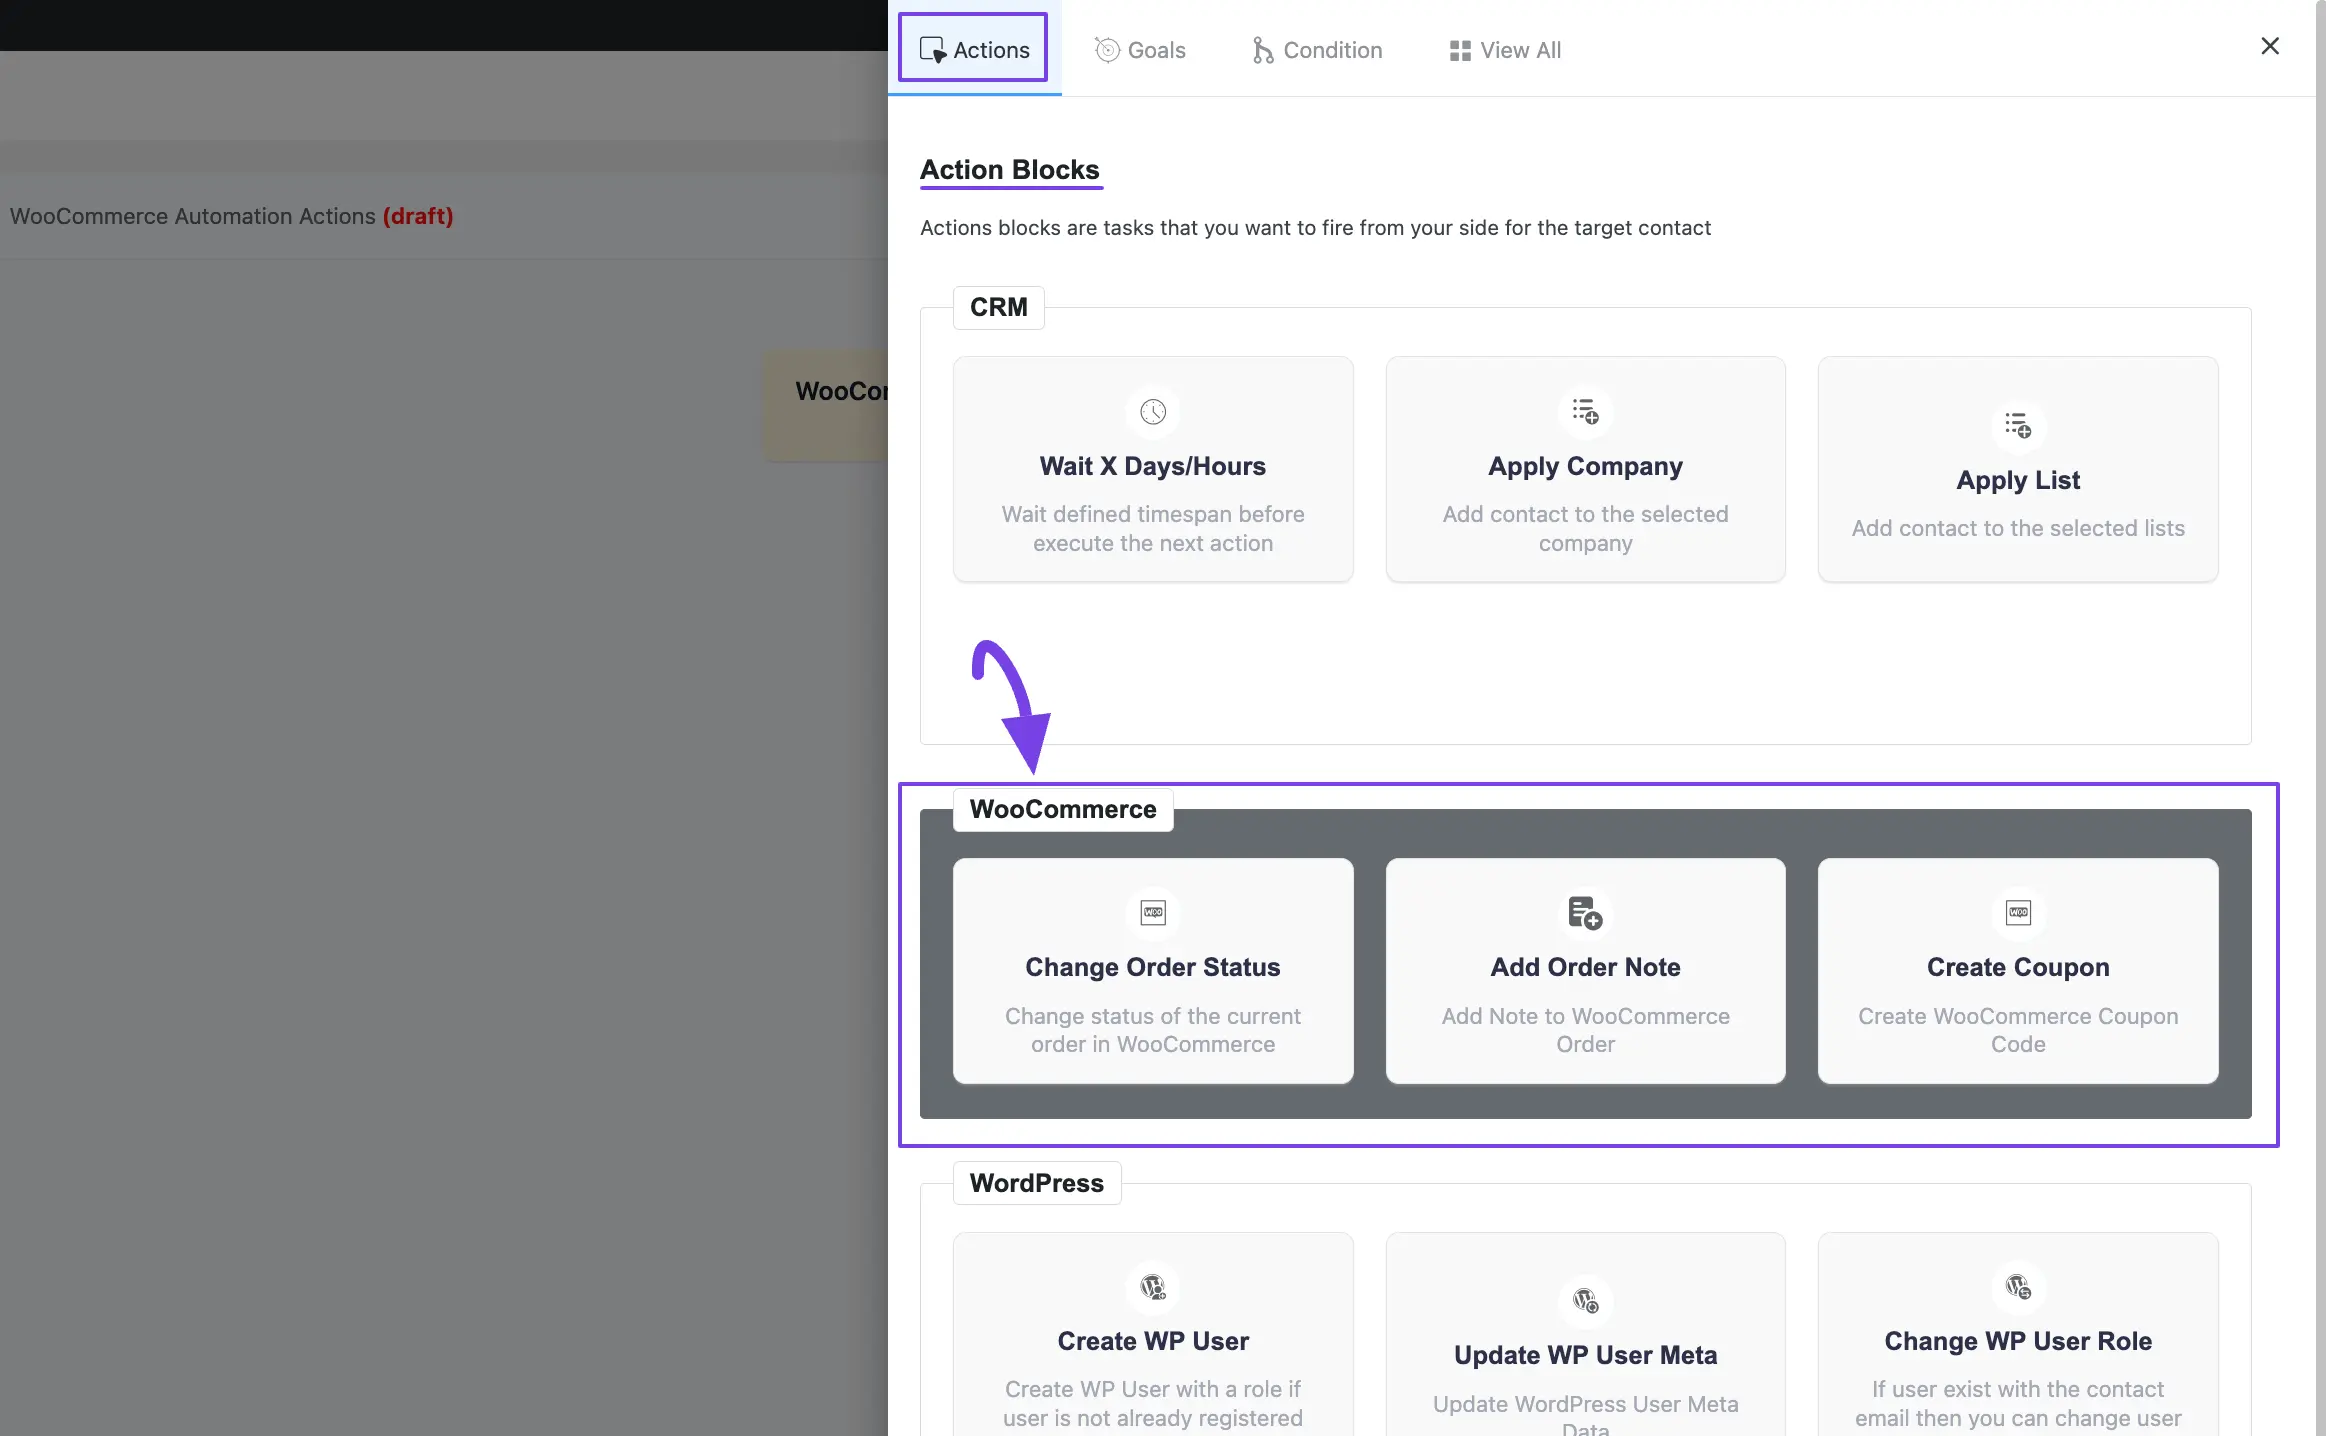
A pop-up page will appear with a set of Action blocks to choose from, scroll down and you will get the Actions dedicated to WooCommerce. These are:
- Change Order Status
- Add Order Note
- Create Coupon
A detailed explanation of the Actions mentioned above is given below –
Changer Order Status #
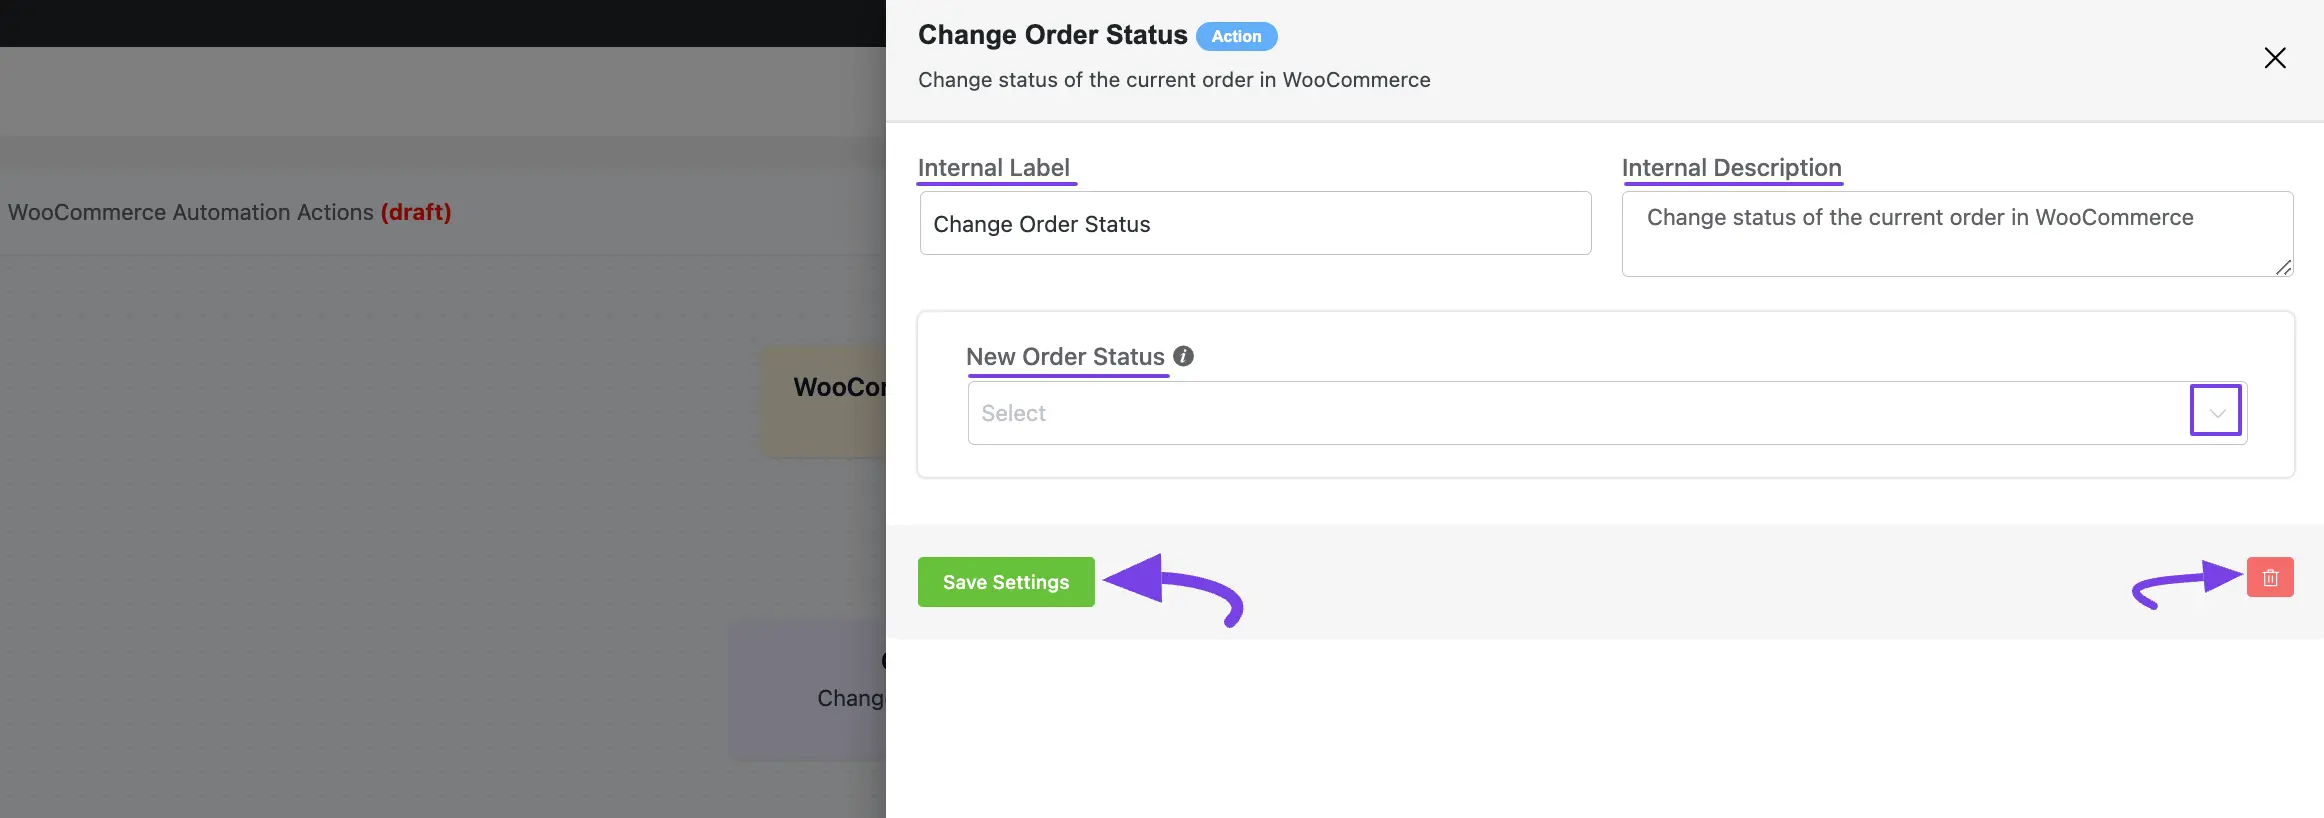
This action lets you change the order status in WooCommerce for the contacts within the automation funnel.
A brief explanation of the options in the screenshot is given below:
- Interval Label: A Name for the Action so that you may find it later easily.
- Internal Description: A description of the Action that will be used as a Subtitle.
- New Order Status: Change the Order Status from the Dropdown list (e.g., pending payment, completed, canceled, etc.).
Once you are done, click the Save Settings button to save all your changes.
You can also Delete the action by clicking the Trash Icon if needed.
Add Order Note #
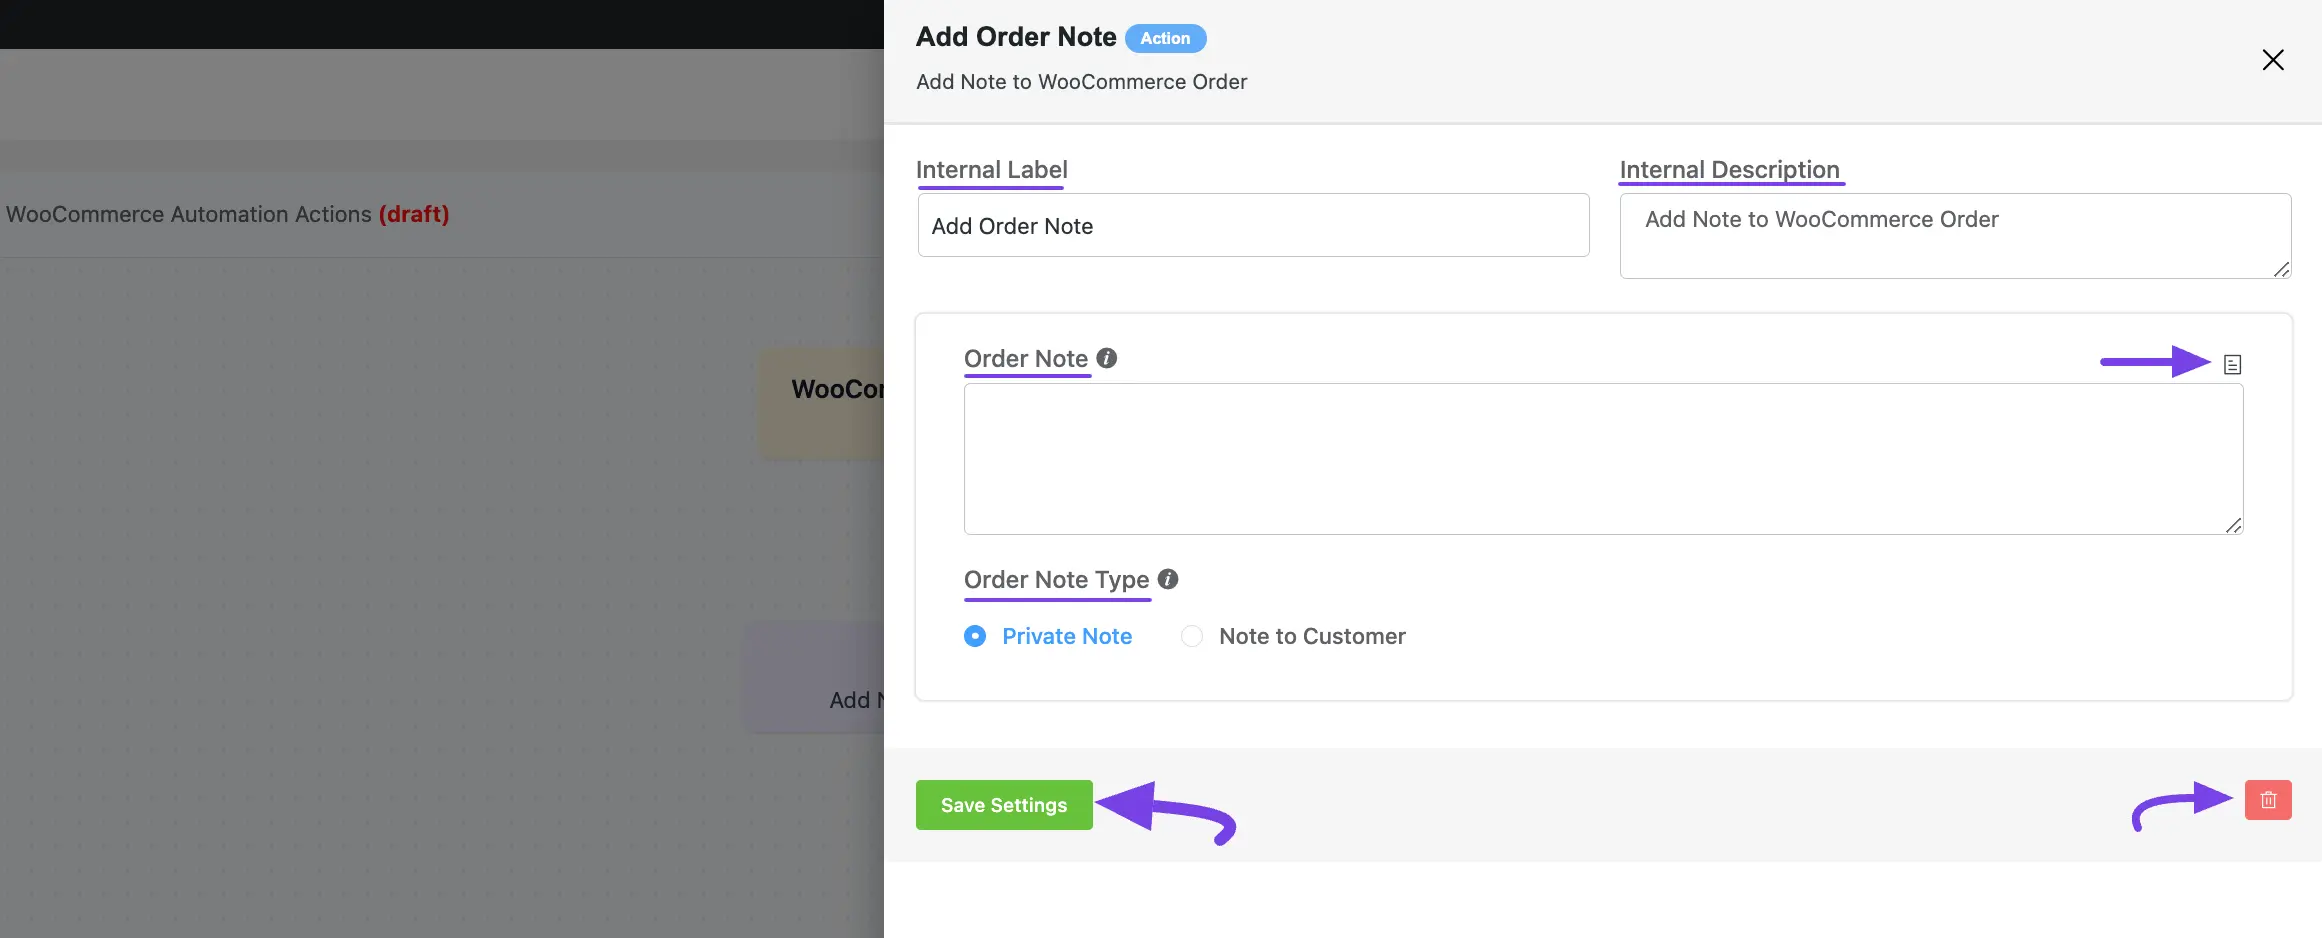
This action lets you Add Notes to the Customer in WooCommerce for the contacts within the automation funnel.
A brief explanation of the options in the screenshot is given below:
- Interval Label: Provide a Name for the Action so that you may find it later easily.
- Internal Description: Write a description for the Action that will be used as a Subtitle.
- Order Note: In this field, write your desired note. Also, you have the Smartcodes options on the right-hand side to include essential data automatically in your notes from the customers’ Contacts.
- Order Note Type: You have two options for adding notes either the Private Note for yourself or the Note to Customer for your WooCommers Users.
Once you are done, click the Save Settings button to save all your changes.
You can also Delete the action by clicking the Trash Icon if needed.
Create Coupon #
This action lets you Add your Coupon in WooCommerce for the contacts within the automation funnel.
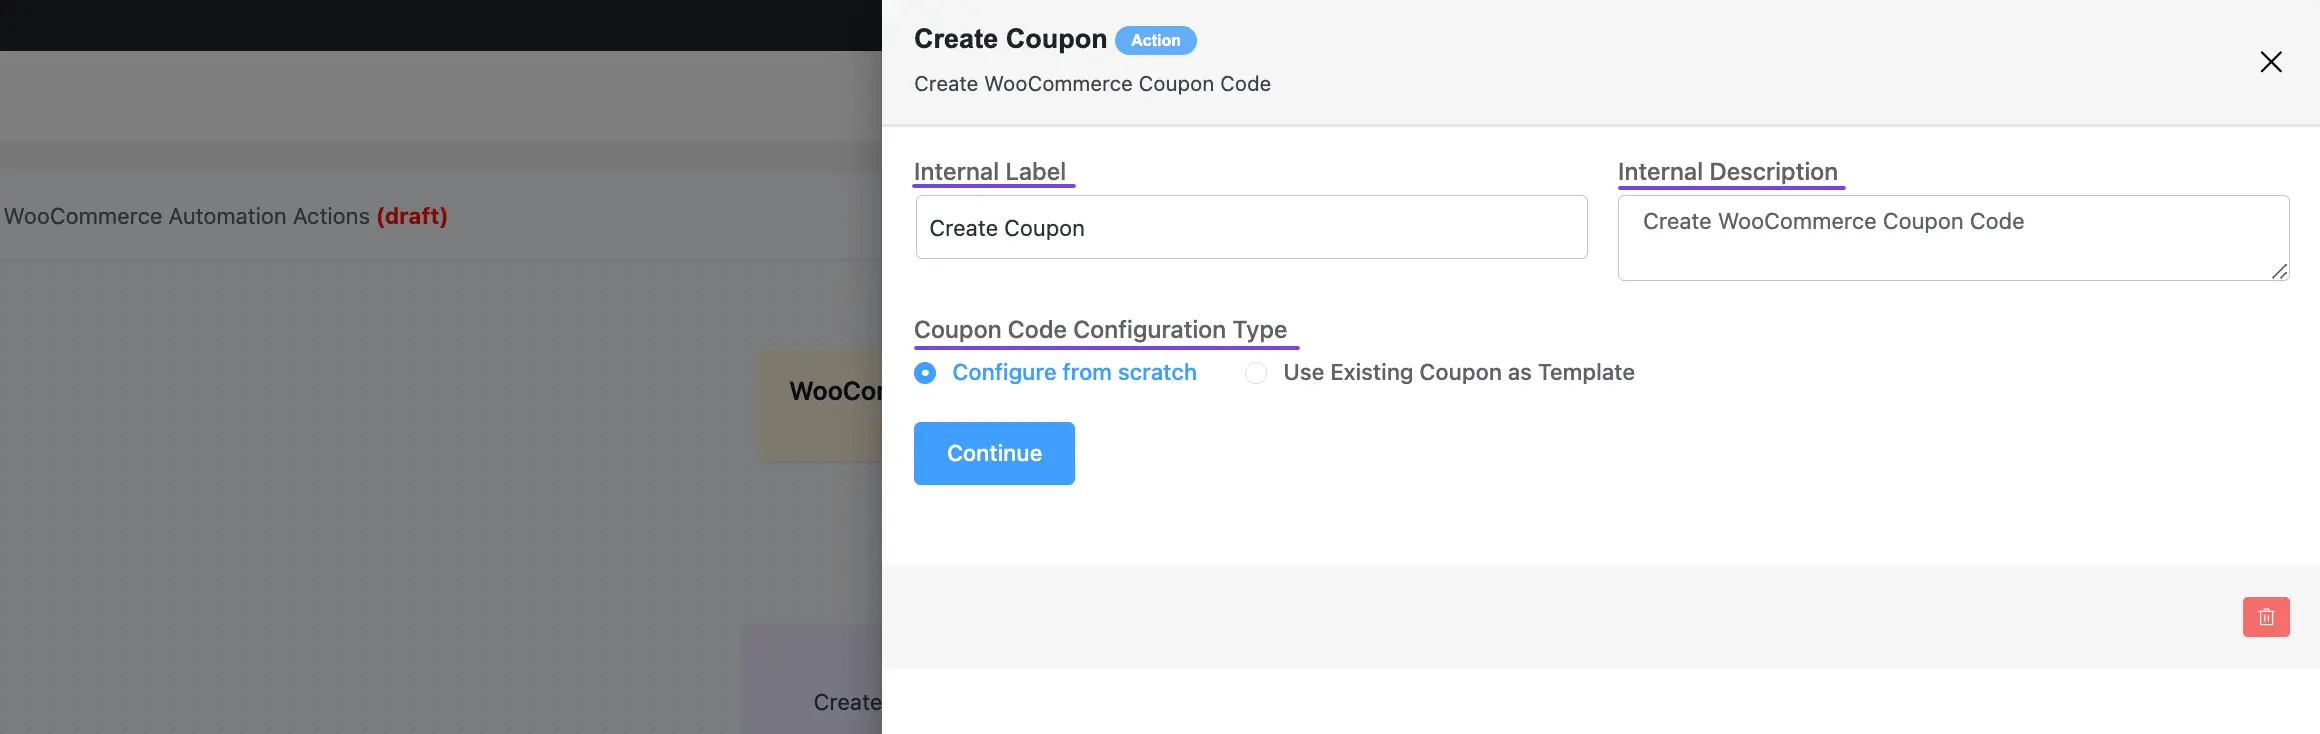
A brief explanation of the options in the screenshot is given below:
- Interval Label: Provide a Name for the Action so that you may find it later easily.
- Internal Description: Write a description for the Action that will be used as a Subtitle.
- Coupon Code Configuration Type: Here, you will find two ways to configure Coupon Code. These are:
1. Configure From Scratch
2. Use Existing Coupon as Template
Now, select the Type of Configuration you want for your Coupon Code and click the Continue button.
1. Configure From Scratch #
If you do not have any existing coupon to configure, you can easily create a coupon code from scratch by using this option.
To learn how to create coupon code from scratch, follow the steps with screenshots below –
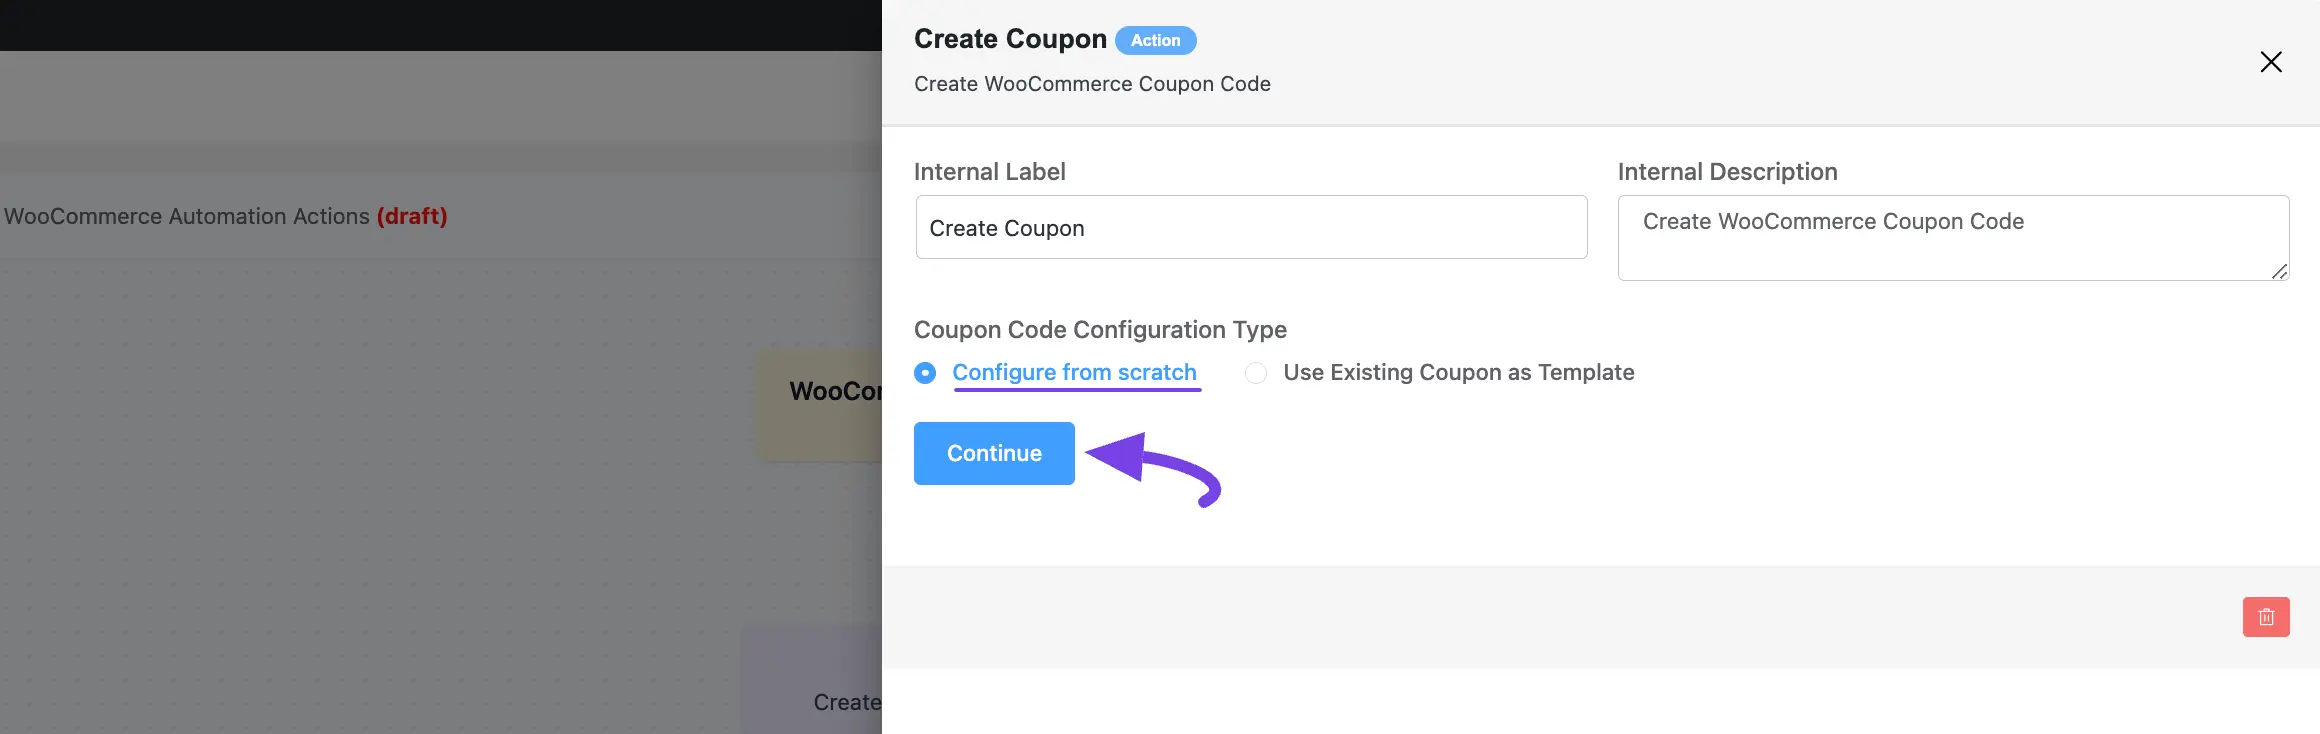
First, select the Configure from scratch option and click the Continue button.
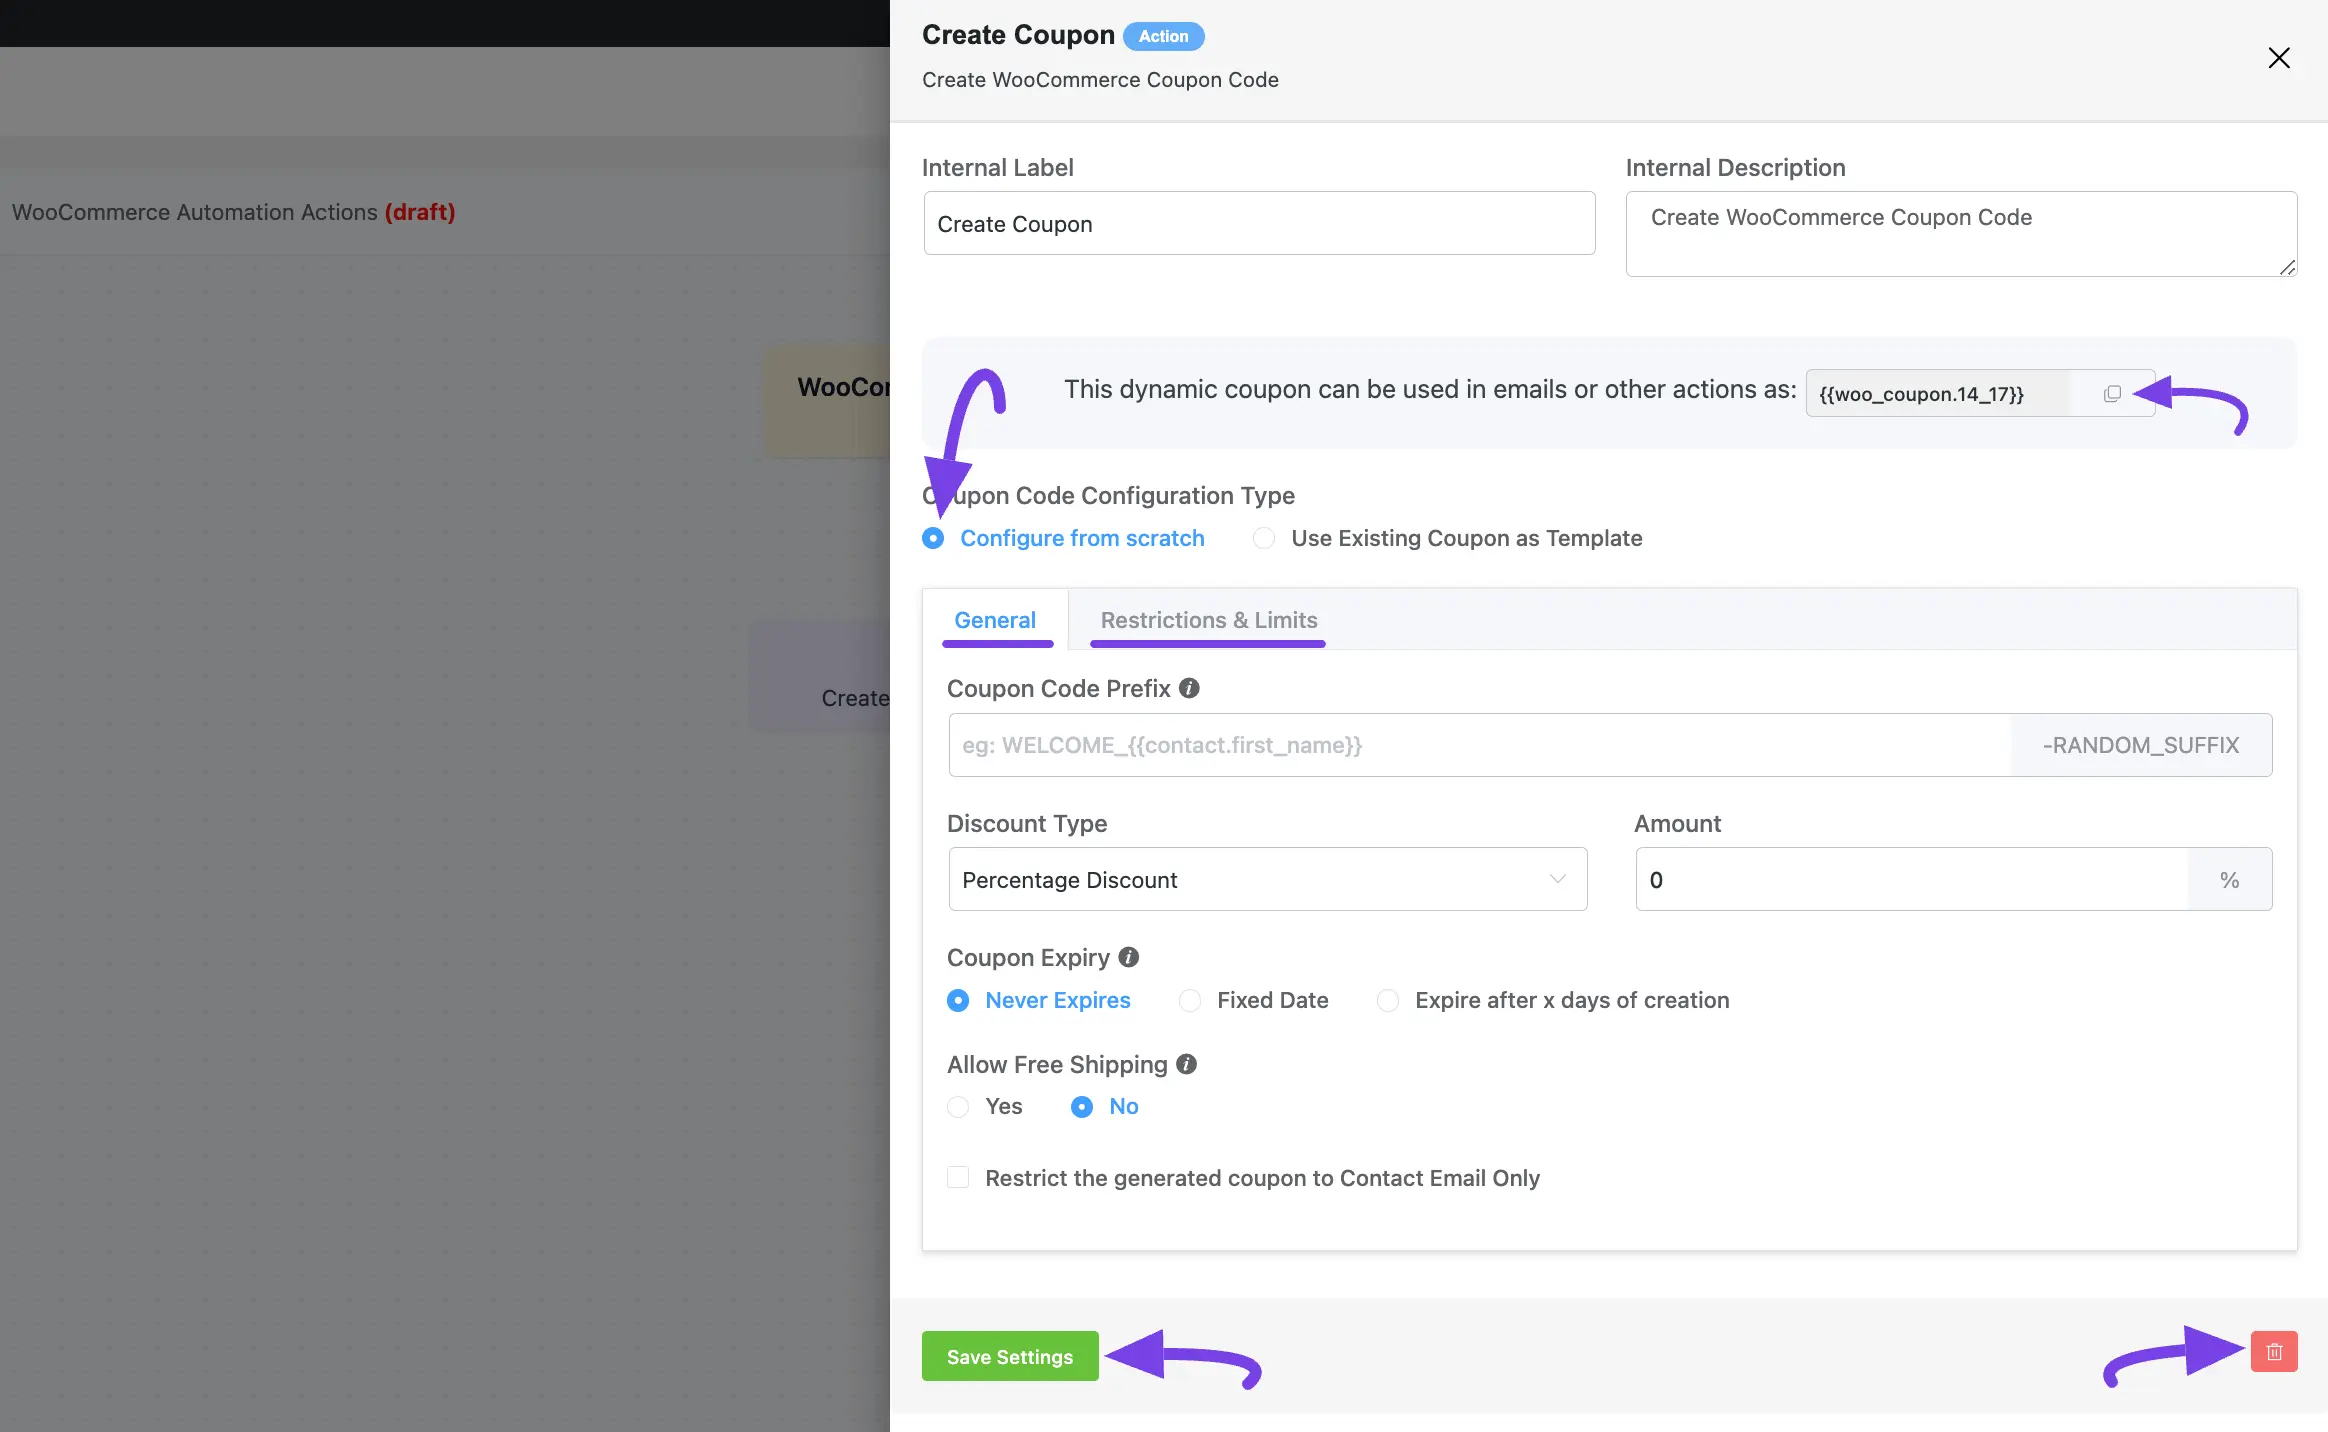
Once you click continue, it will generate a Dynamic Coupon Code that you can copy and use as a SmartCode in emails or other actions.
Also, you will get all the settings options under two tabs for creating a coupon. These are:
- General
- Restrictions & Limits
Once you are done, click the Save Settings button to save all your changes and create the coupon.
You can also Delete the action by clicking the Trash Icon if needed.
General Options #
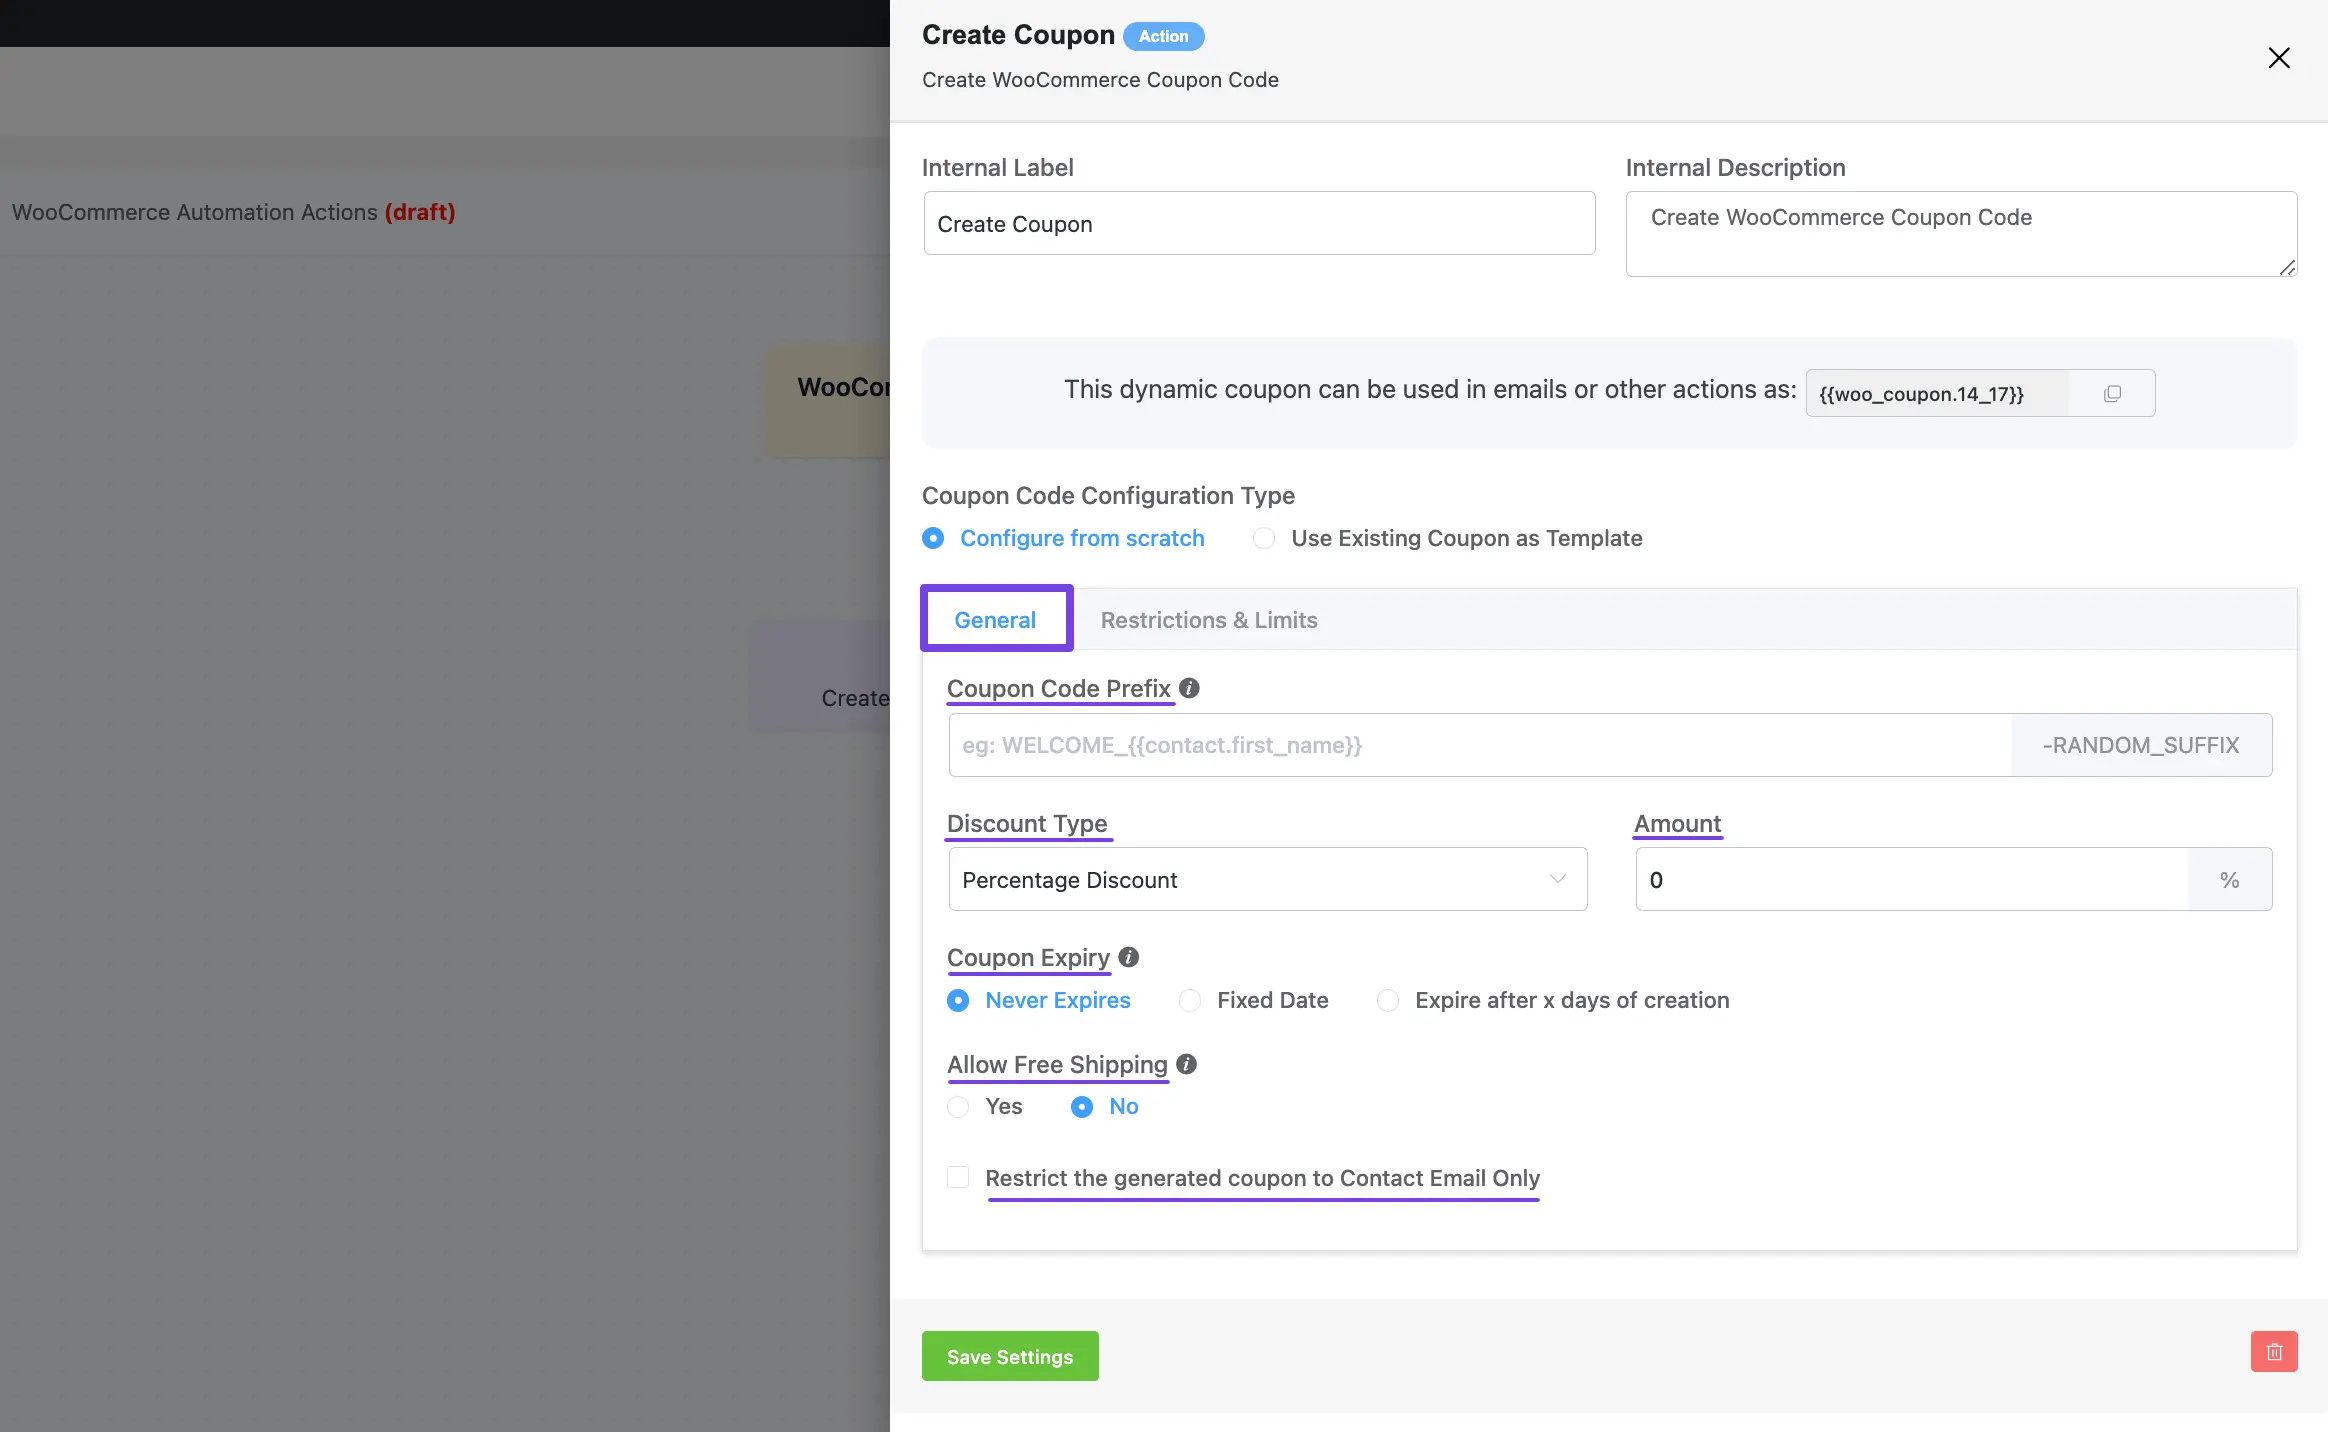
All the options under the General tab are briefly explained below –
- Coupon Code Prefix: FluentCRM will generate a random coupon code for each contact. Use a prefix to make something like ‘FluentCRM-XYZHS4’.
- Discount Type: In this option, you can select what type of Discount you want to include in your coupon. The discount can be based on Percentage, Fixed Cart, and Fixed Products.
- Amount: Here, you can set the Amount for your coupon based on the discount types. You can set the amount as Flat or Percentage.
- Coupon Expiry: With this option, you can choose if your coupon should expire or not. Also, can set a Fixed expiration date. Plus you can set a limit for the expiration period (e.g., if you set it to 10 days, the coupon will expire after 10 days of its creation).
- Allow Free Shipping: Use Yes if you want to allow free shipping with your coupon. In this case, a free shipping method must be enabled in your shipping zone and be set to require “a valid free shipping coupon“. Otherwise, keep it No if you do not want to allow free shipping.
- Restrict the generated coupon to Contact Email Only: Check the option if you want to restrict the use of the coupon to only those users who received the coupon via email and logged in using that email. If you leave it unchecked, anyone can use the service with the coupon code.
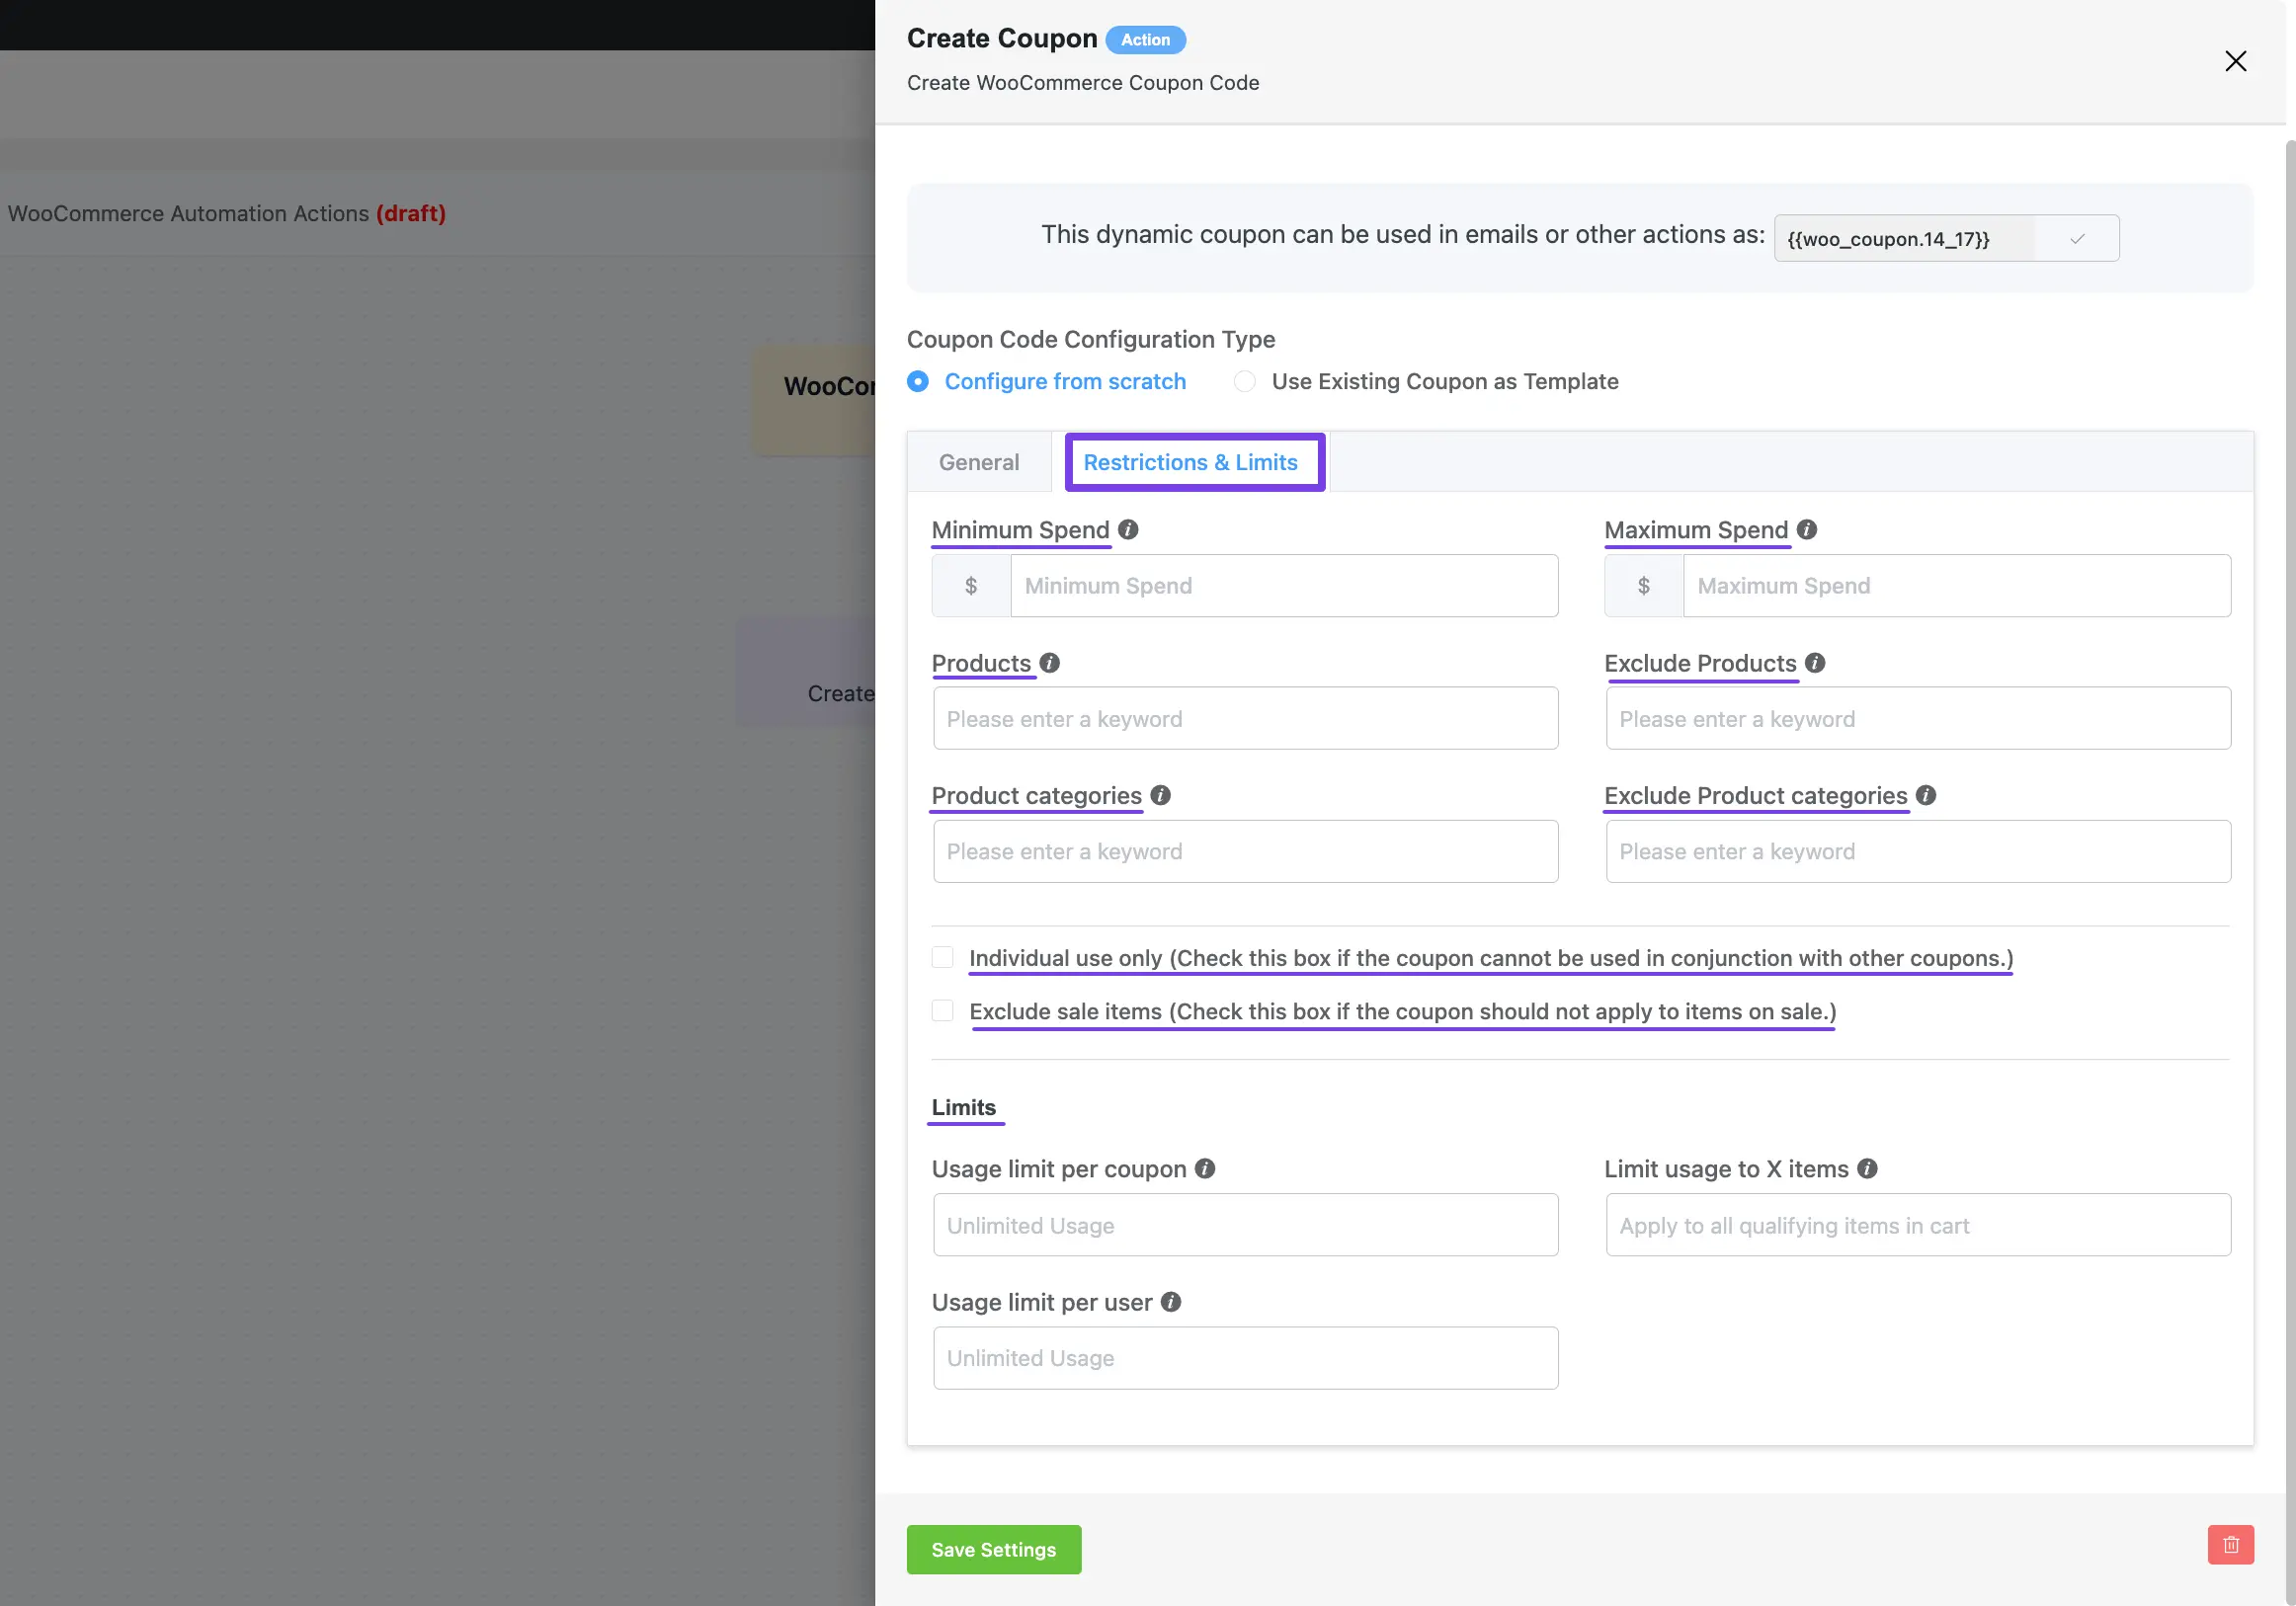
Restrictions & Limits #
All the options under the Restrictions & Limits tab are briefly explained below –
- Minimum Spend: This field grants you to set the minimum spend (subtotal) allowed to use the coupon.
- Maximum Spend: This field grants you to set the maximum spend (subtotal) allowed when using the coupon.
- Products: This field allows you to select the products where the coupon will be applied (i.e., selected products need to be in the cart for the “Fixed cart discount” to be applied.
- Exclude Products: This field allows you to select the products where the coupon will not be applied.
- Product categories: This field allows you to select the product categories where the coupon will be applied (i.e., selected product categories need to be in the cart for the “Fixed cart discount” to be applied).
- Exclude Product categories: Product categories that the coupon will not be applied to or need to be in the cart for the “Fixed cart discount” to be applied.
- Individual use only: Check this box if the coupon cannot be used with other coupons.
- Exclude sale items: Check this box if the coupon should not apply to items on sale
- Usage limit per coupon: Using this option, you can select how many times can this coupon be used before it is void.
- Limit usage to X items: Here, you can choose the maximum number of individual products to which this coupon can be applied for the product discounts. But, if you want to apply the coupon to all qualifying items in the cart, leave it blank.
- Usage limit per user: In this option, you can set how many times can a user use this coupon.
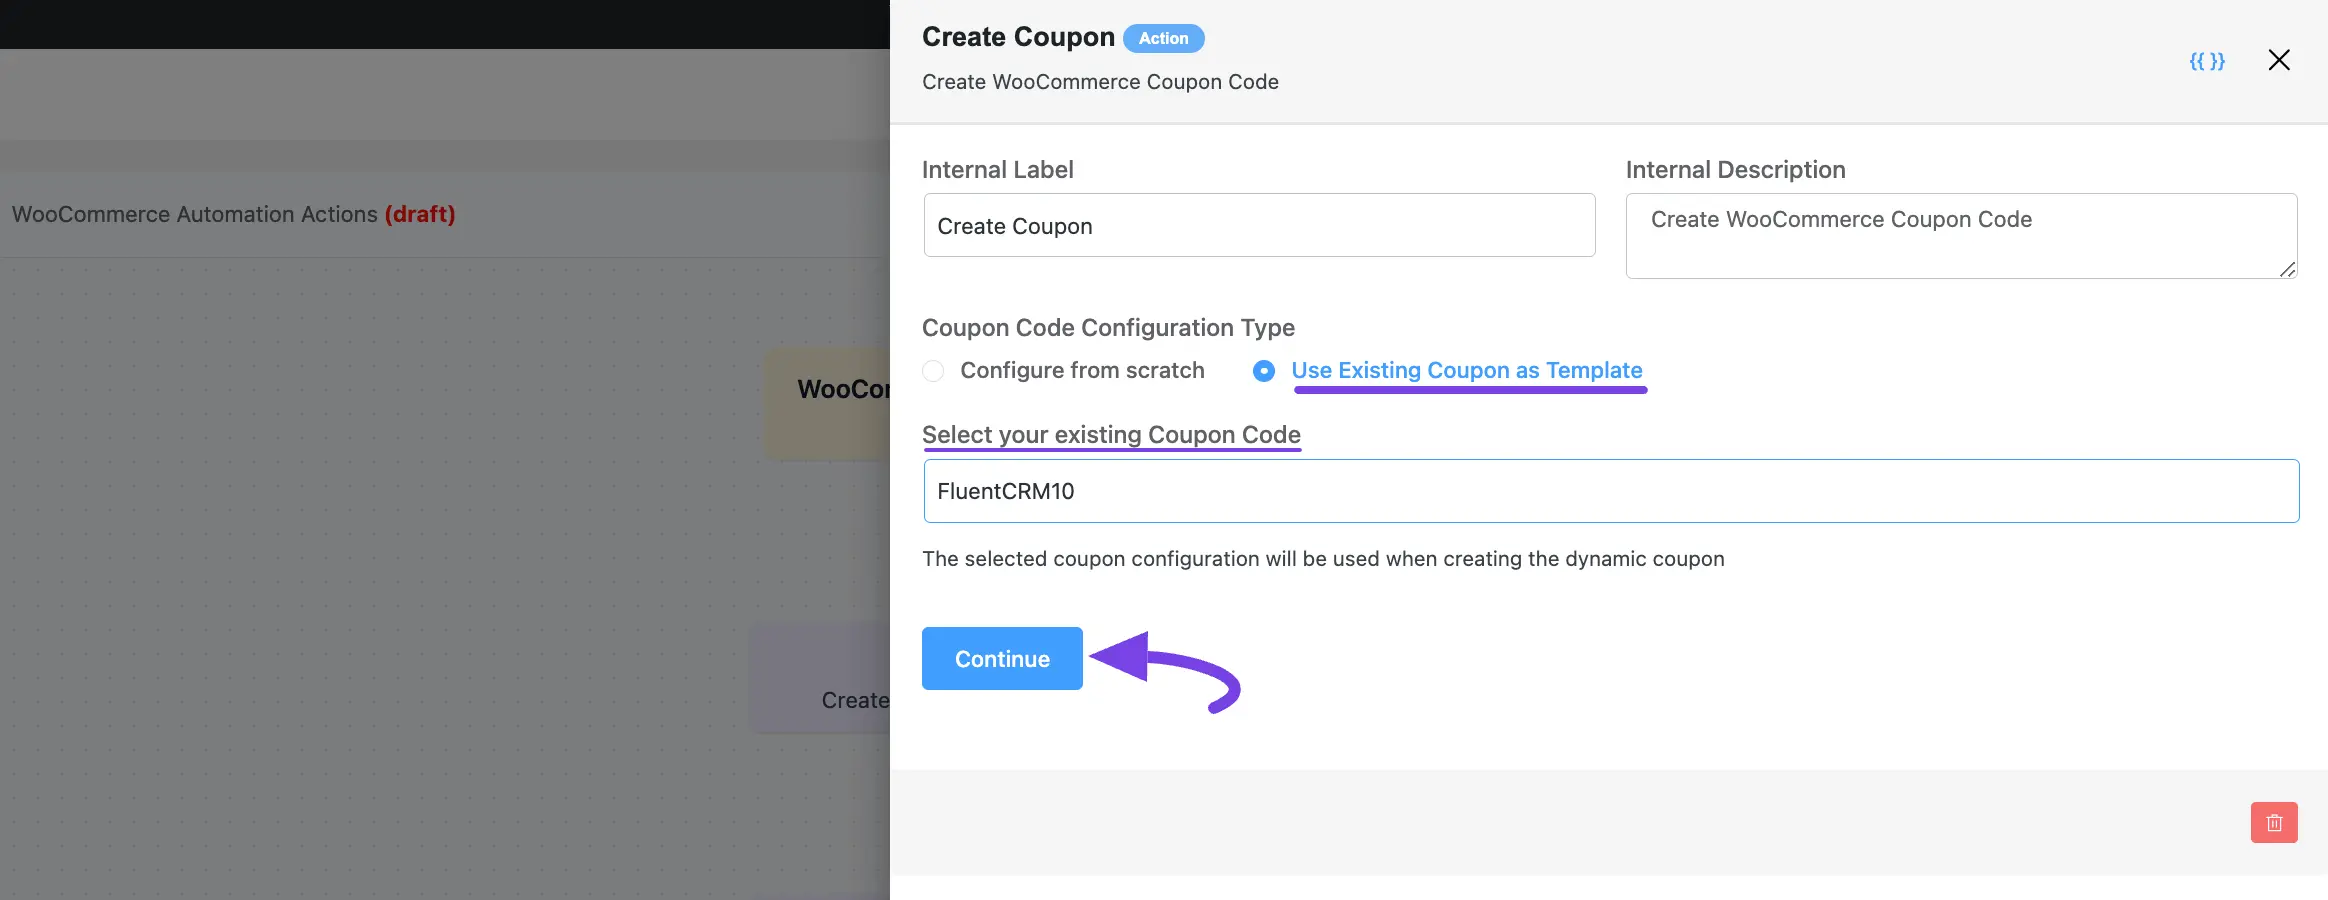
2. Use Existing Coupon as Template #
If you have any existing coupon, you can easily configure it by using this option.
To learn how to configure existing coupon code, follow the steps with screenshots below –
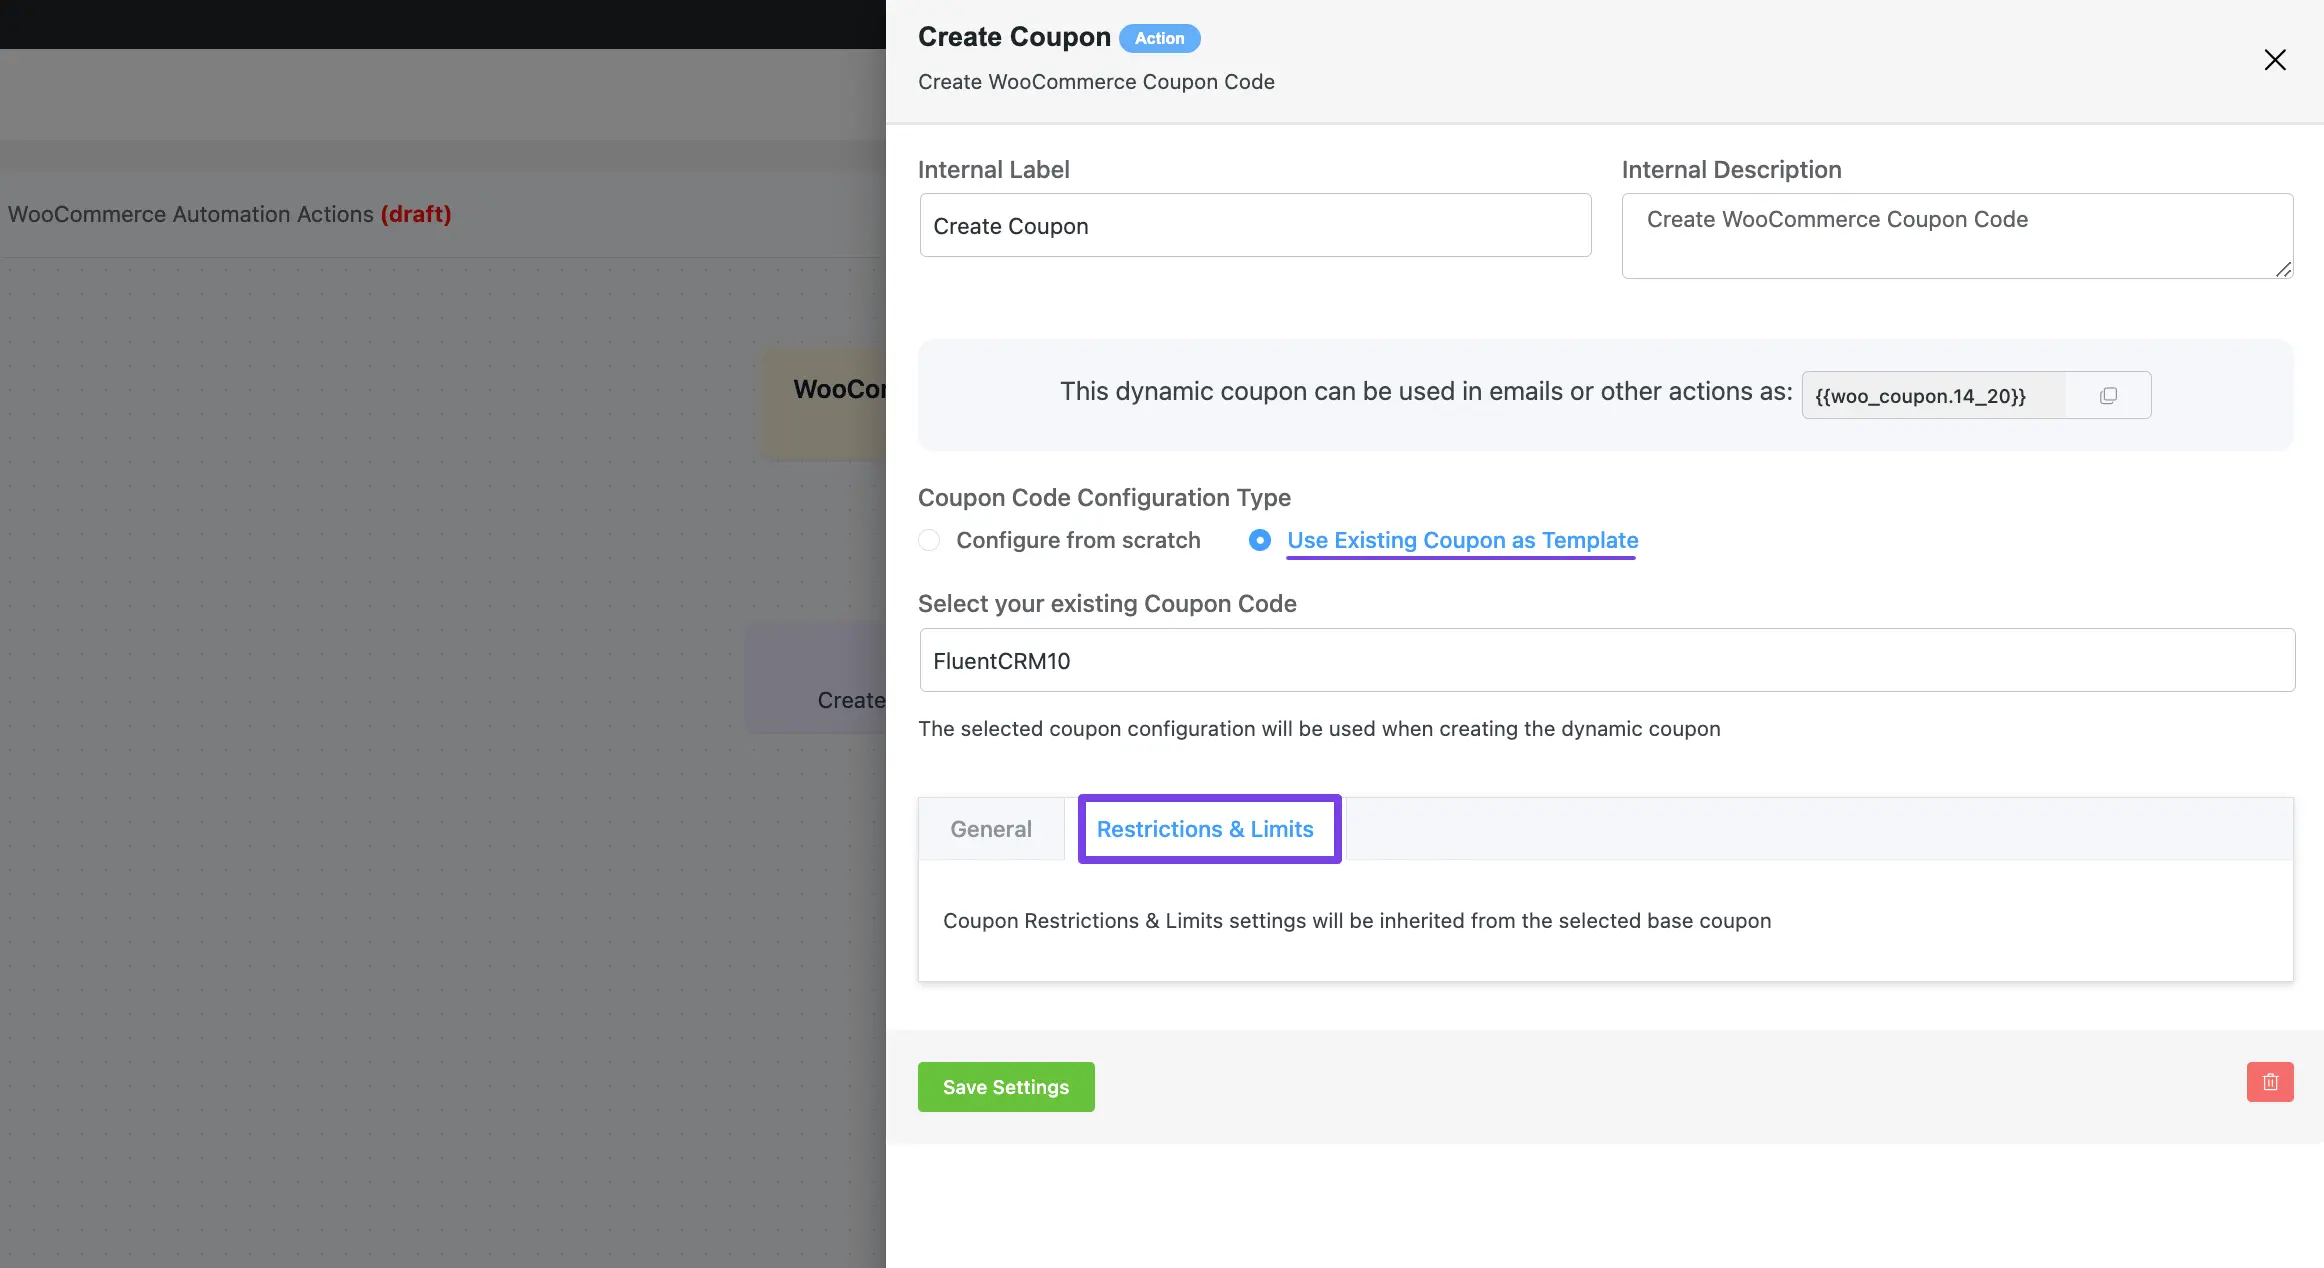
First, select the Use Existing Coupon as Template option, now choose your coupon from the Select your existing Coupon Code dropdown field, and click the Continue button.
Once you click continue, it will generate a Dynamic Coupon Code that you can copy and use as a SmartCode in emails or other actions.
Also, you will get two more settings options for customizing your coupon. These are:
- General
- Restrictions & Limits
Once you are done, click the Save Settings button to save all your changes and configure the coupon.
You can also Delete the action by clicking the Trash Icon if needed.
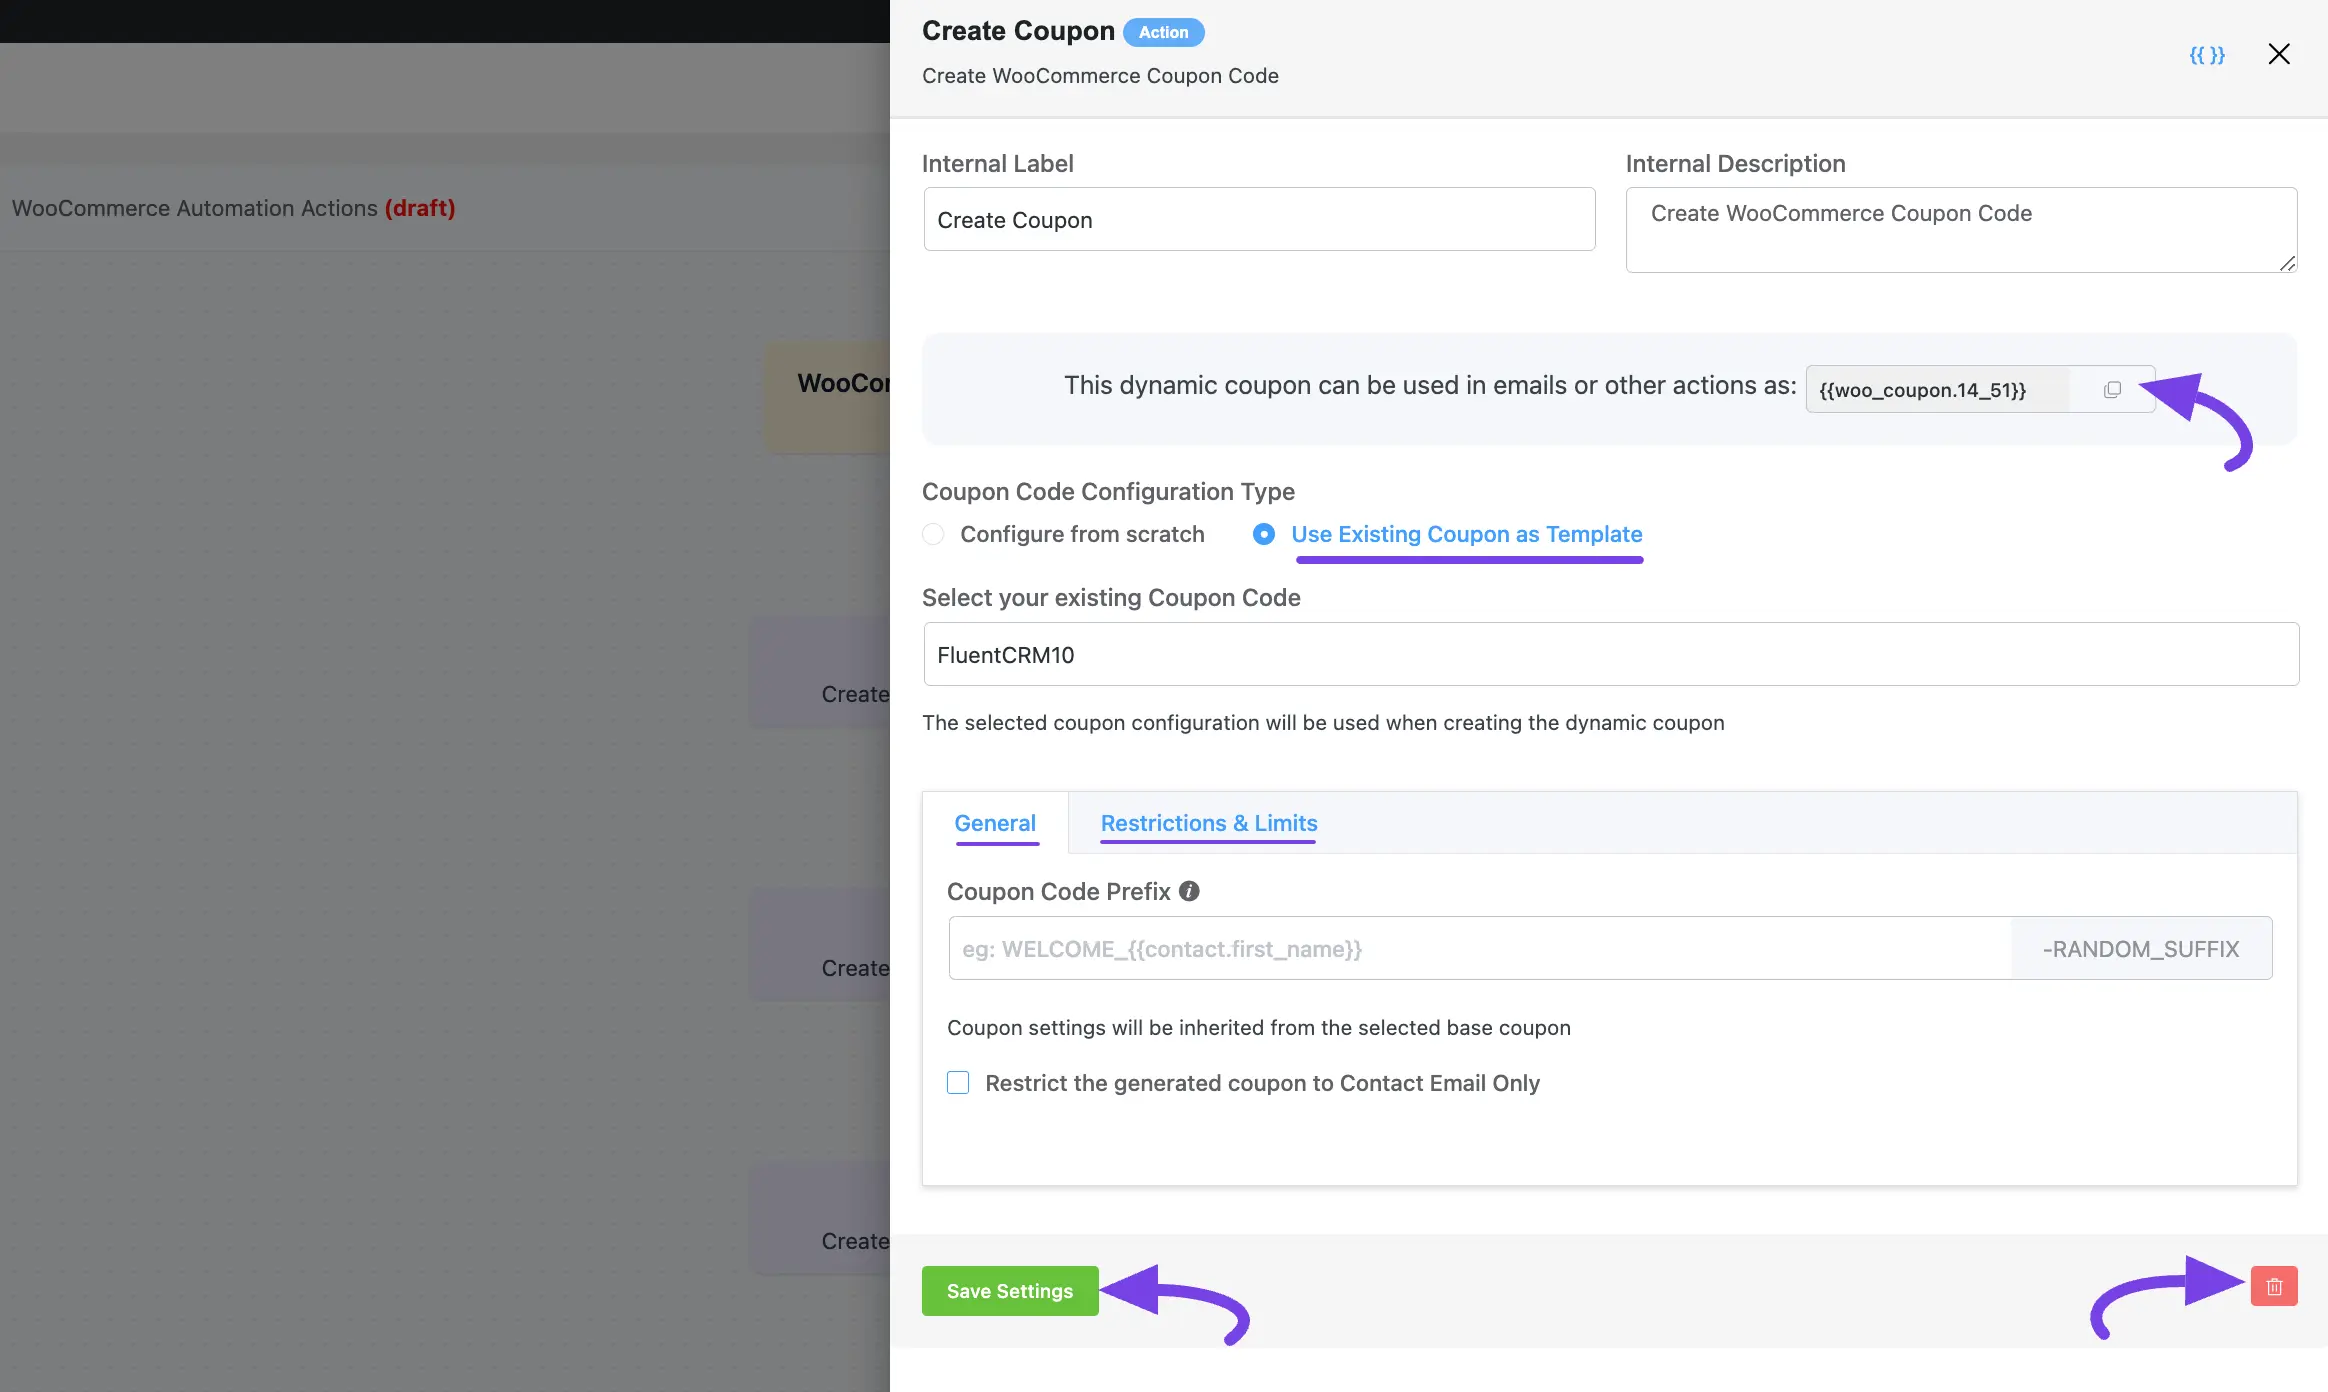
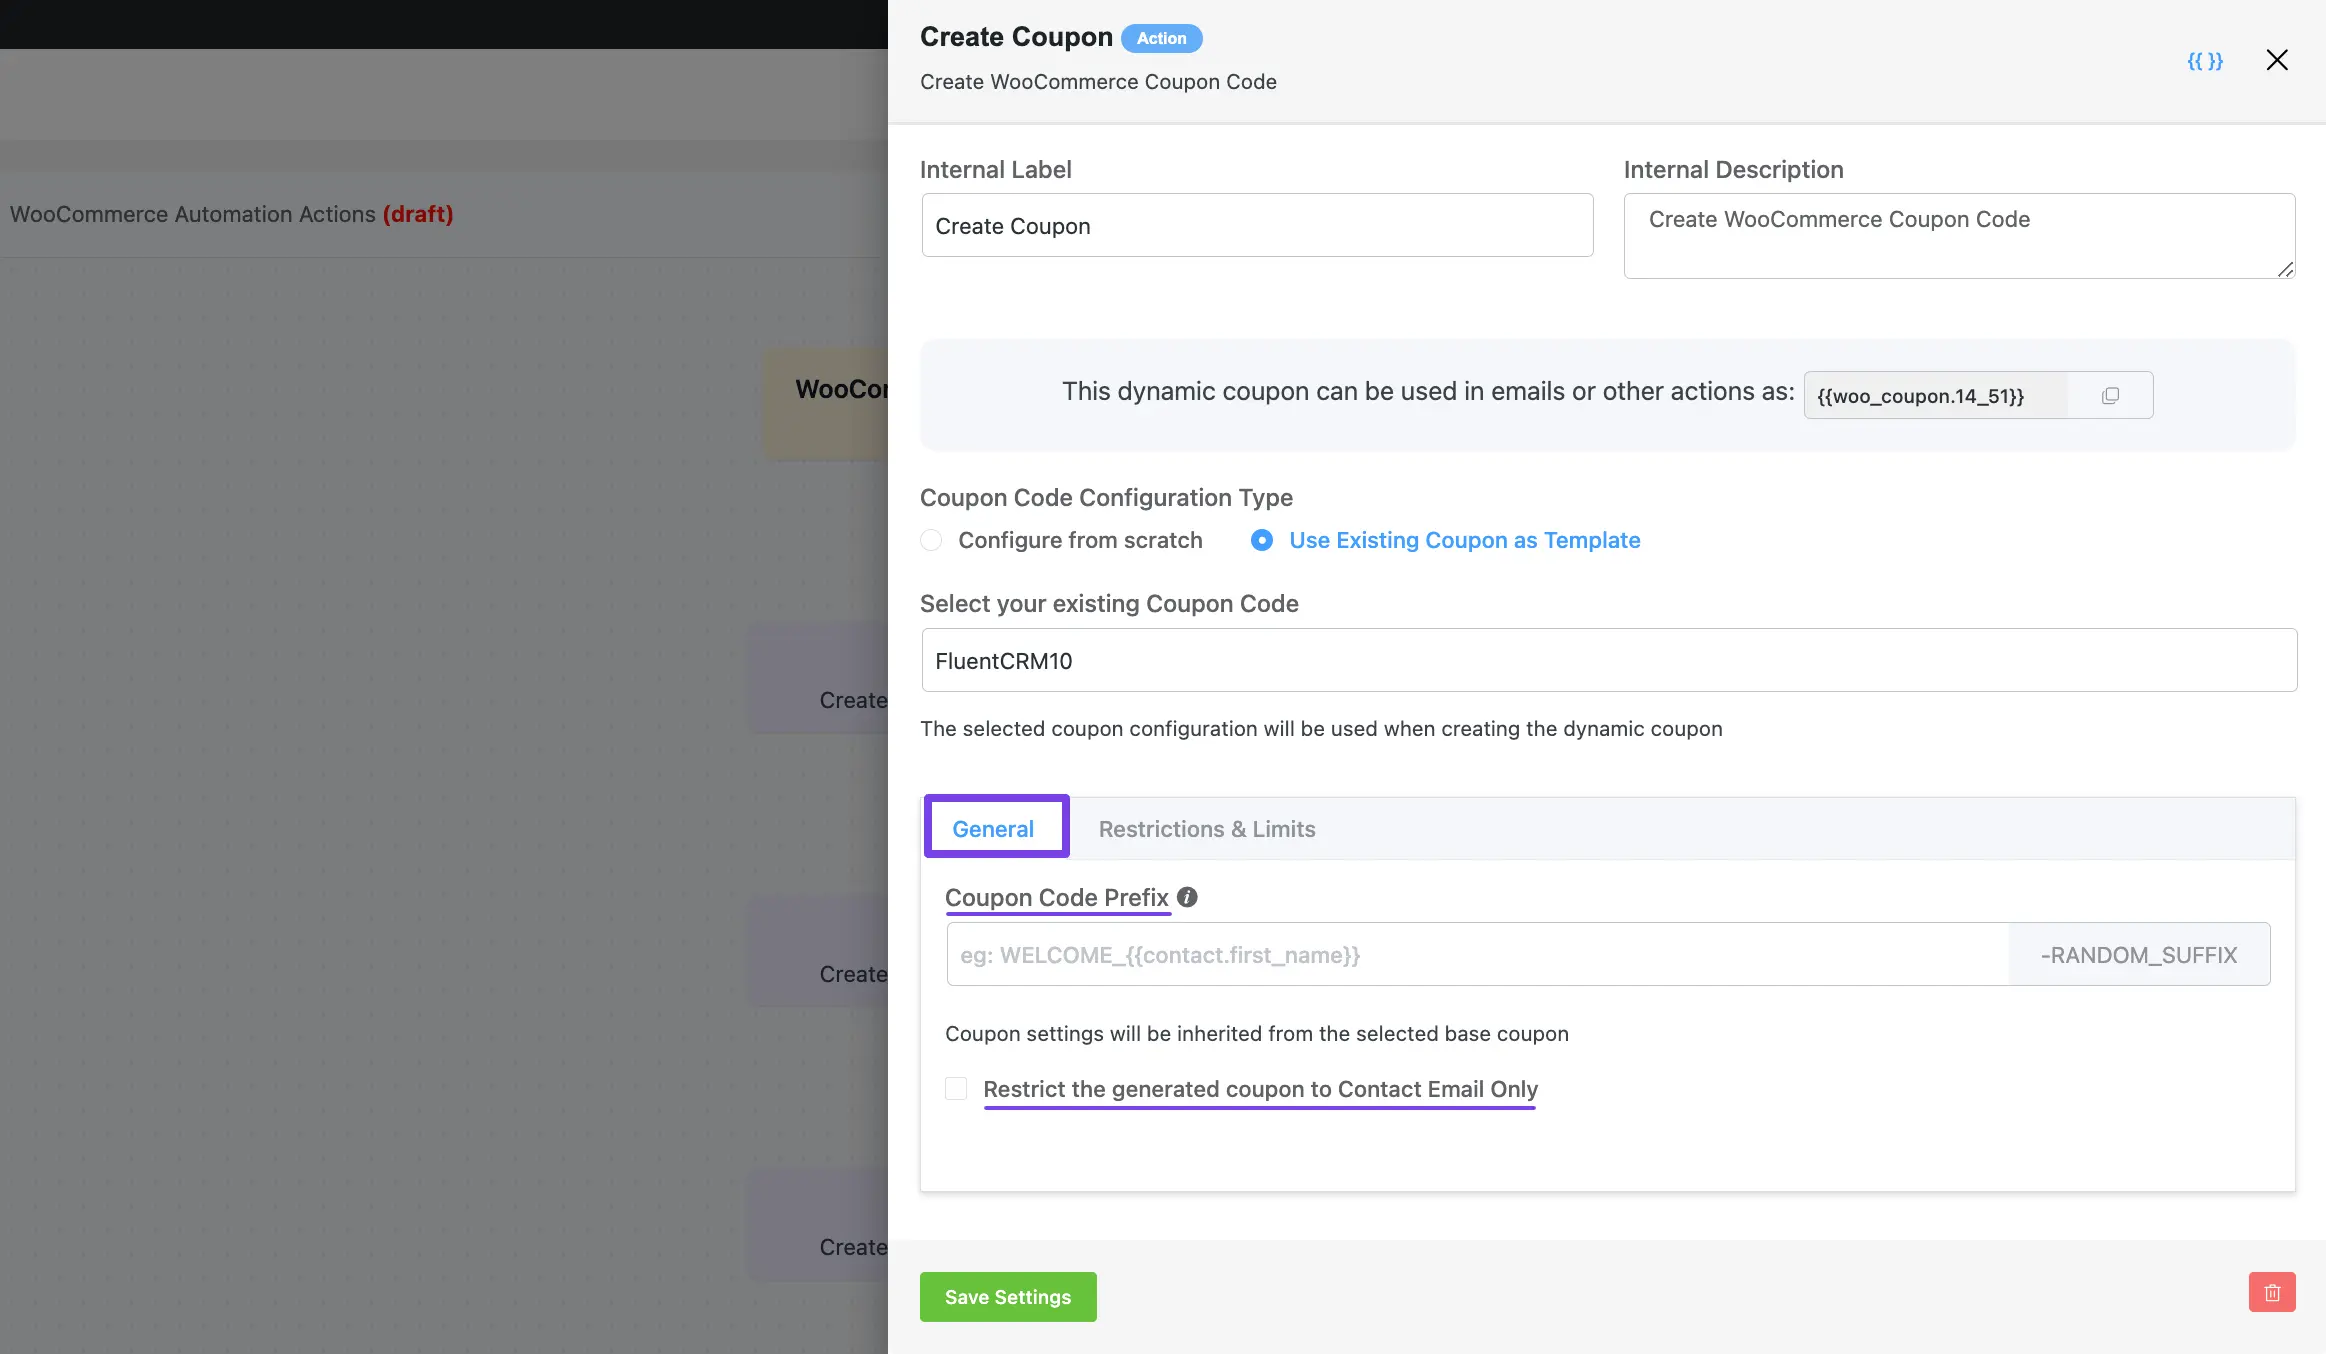
General Options #
The two options under the General tab are briefly explained below –
- Coupon Code Prefix: FluentCRM will generate a random coupon code for each contact. Use a prefix to make something like ‘FluentCRM-XYZHS4’.
- Restrict the generated coupon to Contact Email Only: Check the option if you want to restrict the use of the coupon to only those users who received the coupon via email and logged in using that email. If you leave it unchecked, anyone can use the service with the coupon code.
Restrictions & Limits #
All the restrictions & limit settings of the coupon will remain the same as your selected existing coupon settings that you choose for the configuration.
If you have any further questions, concerns, or suggestions, please do not hesitate to contact our @support team. Thank you.


WooCommerce coupon is not working in Birthday Automation. Coupon code get generated but when one wants to use in WooCommerce cart it says coupon doesn’t exist. Any tip? Or solution?
Hi Balendu, Not sure if any such issues exists. Can you please submit a support ticket: https://wpmanageninja.com/support