Fluent Forms integrates with FluentCRM to help you collect leads and gather valuable information about your prospects. The integration feed in Fluent Forms captures data from form submissions, and you’ll also have access to automation triggers that are based on user activities within the forms.
In this article, you’ll learn how to integrate FluentCRM with Fluent Forms and how it works.
No additional settings are required to integrate FluentCRM with Fluent Forms. Simply install and activate both plugins on your site.
Feed integration Settings for FluentCRM #
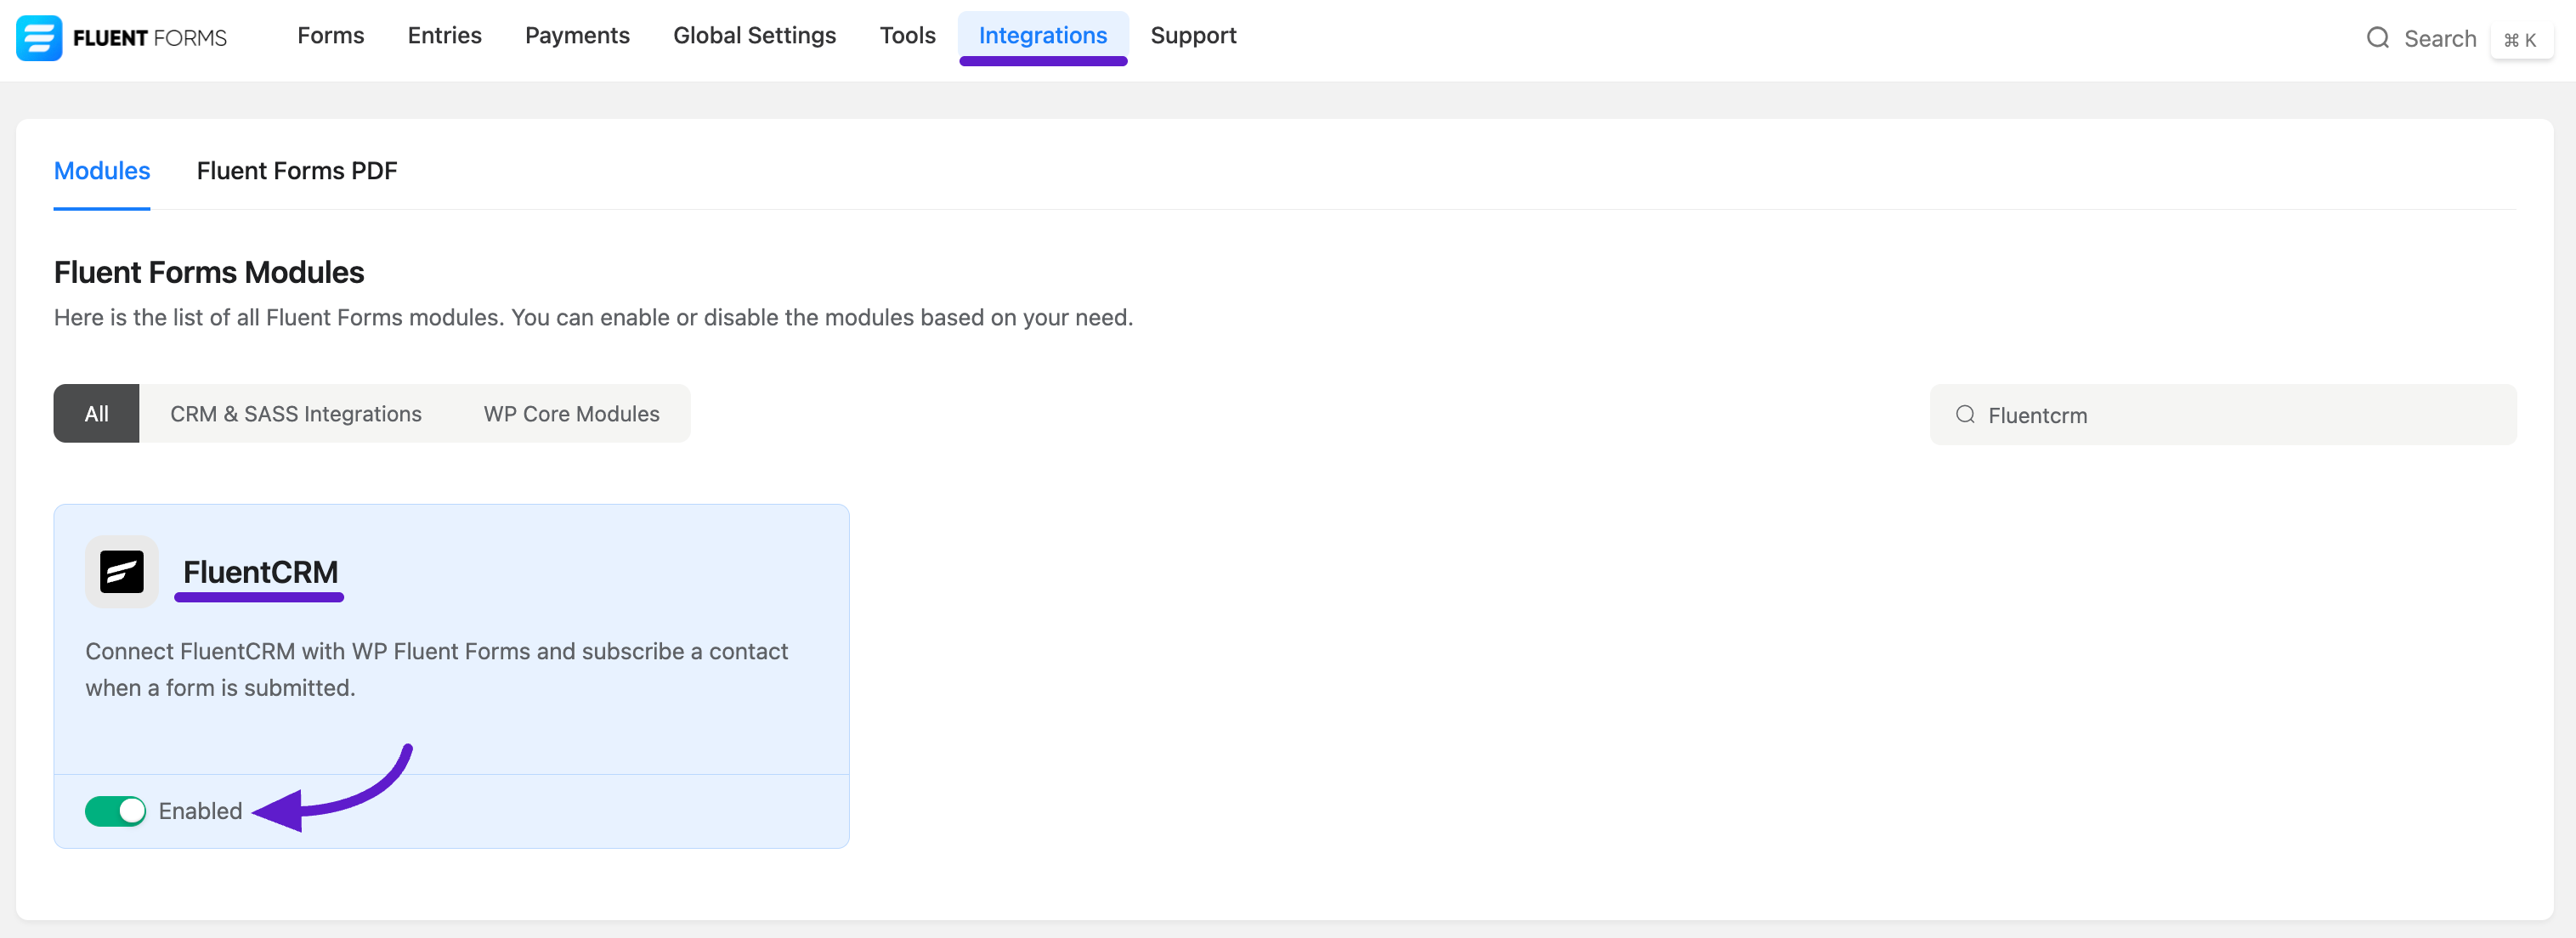
First, go to Integrations in the Fluent Forms navbar and search for FluentCRM. You’ll see the FluentCRM integration module simply toggle it to enable the FluentCRM module, which will activate the Feed Integration for FluentCRM in your forms.
Integration Feed for FluentCRM in Forms #
Go to Forms from the Fluent Forms navbar, and select the form you want to integrate with your FluentCRM.
If you do not have any existing forms, read Create a Form from Scratch or Create a Form using Templates documentation to create a new one.
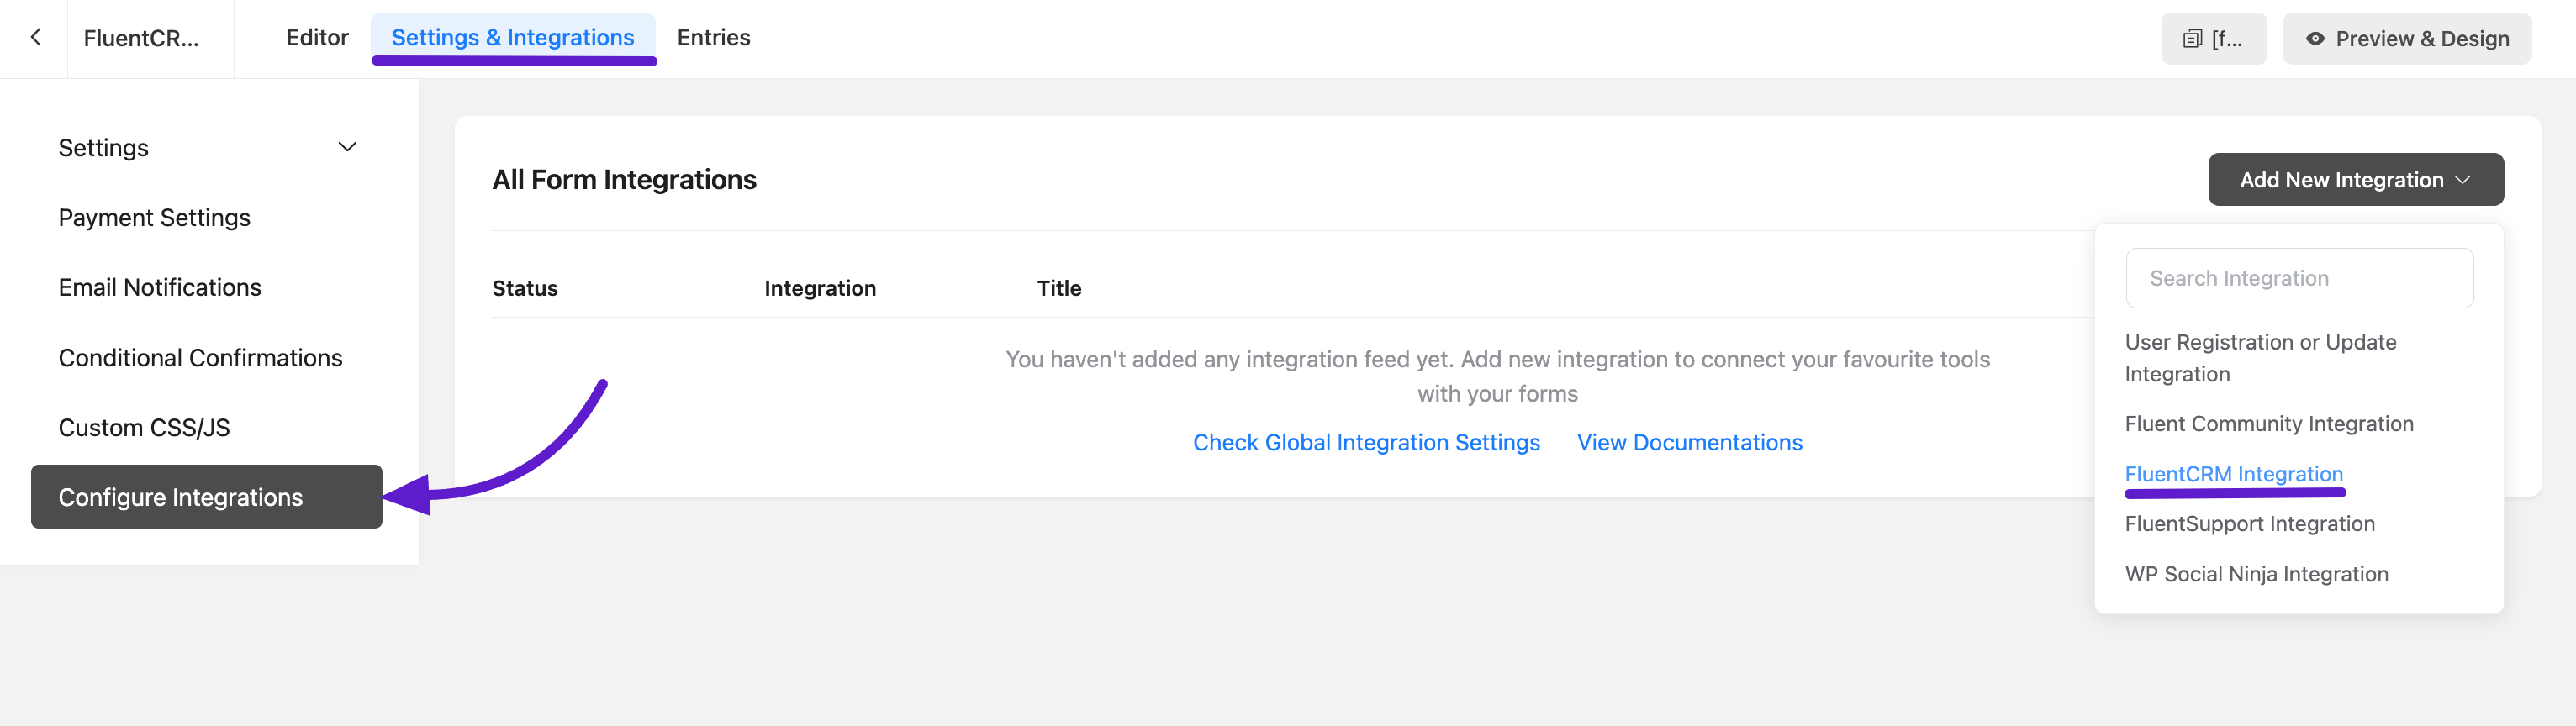
Now go to the Forms Settings and Integration tab from the top menu bar and select Configure Integration from the left sidebar. After that, you will see the Add New Integration button click on it here you will see the FluentCRM Integration Feed in the dropdown menu.
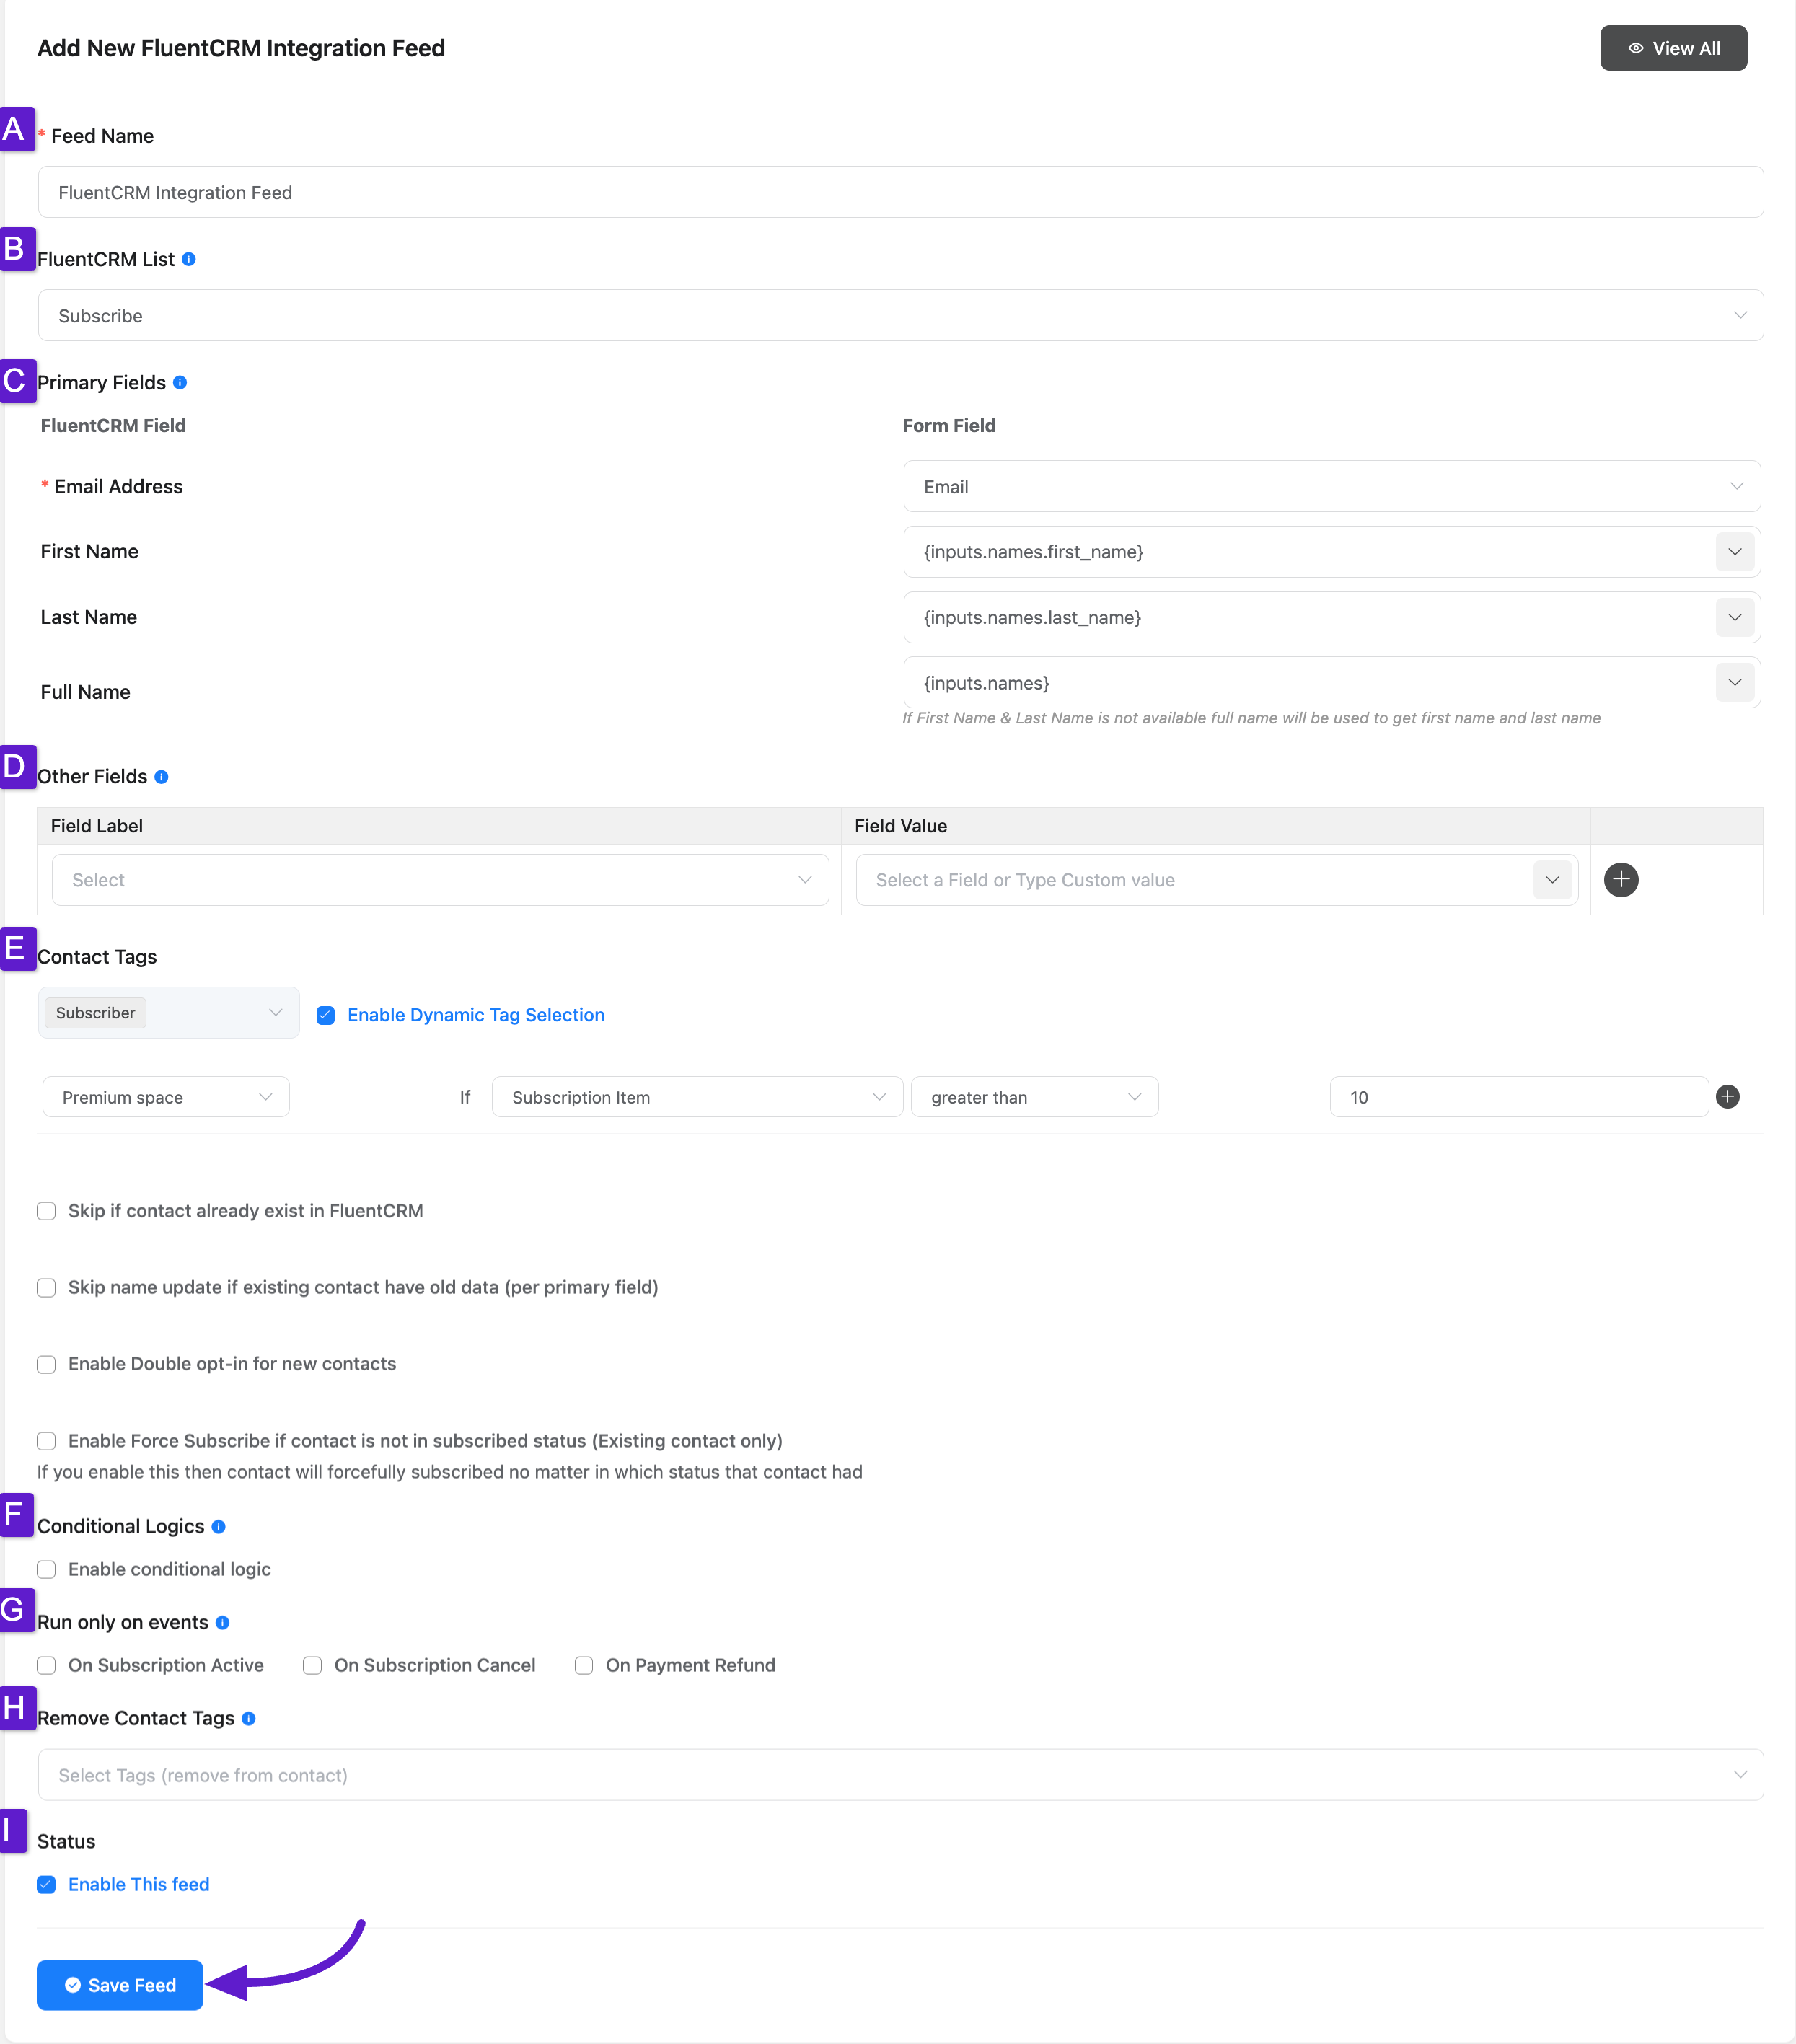
Configure FluentCRM Integration Feed #
A. Feed Name: Here you need to enter a name for your FluentCRM integration feed.
B. FluentCRM List: Select the FluentCRM contact list you wish to integrate with. You can also change this anytime if needed.
C. Primary Fields: Use all the fields under this option to properly link your FluentCRM fields with the Form Fields. You can easily select the value for the form fields based on the FluentCRM fields using the Shortcode.
D. Other fields: You can map additional fields to Fluent Forms fields. To add multiple fields Plus (+) Icon.
E. Contact Tag: Here select one or multiple FluentCRM tags for the contact from your FluentCRM Contact tags.
Enable Dynamic Tag Selection: To apply tags based on submission values, enable dynamic tags by checking the Enable Dynamic Tag Selection option.
Skip contact already exists in FluentCRM: If you want to prevent duplicate contact in FluentCRM then check the checkboxes of skip contact already exist in FluentCRM.
Skip name update if existing contact has old data: If you want to retain existing contact names even if new data is submitted then check the checkboxes of skip name update if existing contact have old data (per primary) options.
Enable Double Opt-In for a new Contact: Enable this option to send a double opt-in email for new contacts.
Enable Force subscribe if contact is not in subscribed status: Here check the checkboxes to enable this to subscribe existing contacts that are not already subscribed.
F. Conditional logic: If you want to allow FluentCRM integration conditionally based on your submission values then Enable Conditional Logic options. To know more about this conditional logic read the article.
G. Run Only on Events: You will get this option only in the Subscription form. You’ll find three conditions here. If you want this integration feed to run only when one of these events occurs, select the event to trigger the feed accordingly. The available conditions are:
- On Subscription Active
- On Subscription Cancel
- On Payment Refund
H. Remove Contact Tags: If you want to remove a contact’s tags in FluentCRM, select the desired tags from the dropdown list.
I. Status: Enable this feed option to activate the integration.
After configuring the integration, Click the Save Feed button to finalize your FluentCRM integration.
Automation Triggers for Fluent Forms #
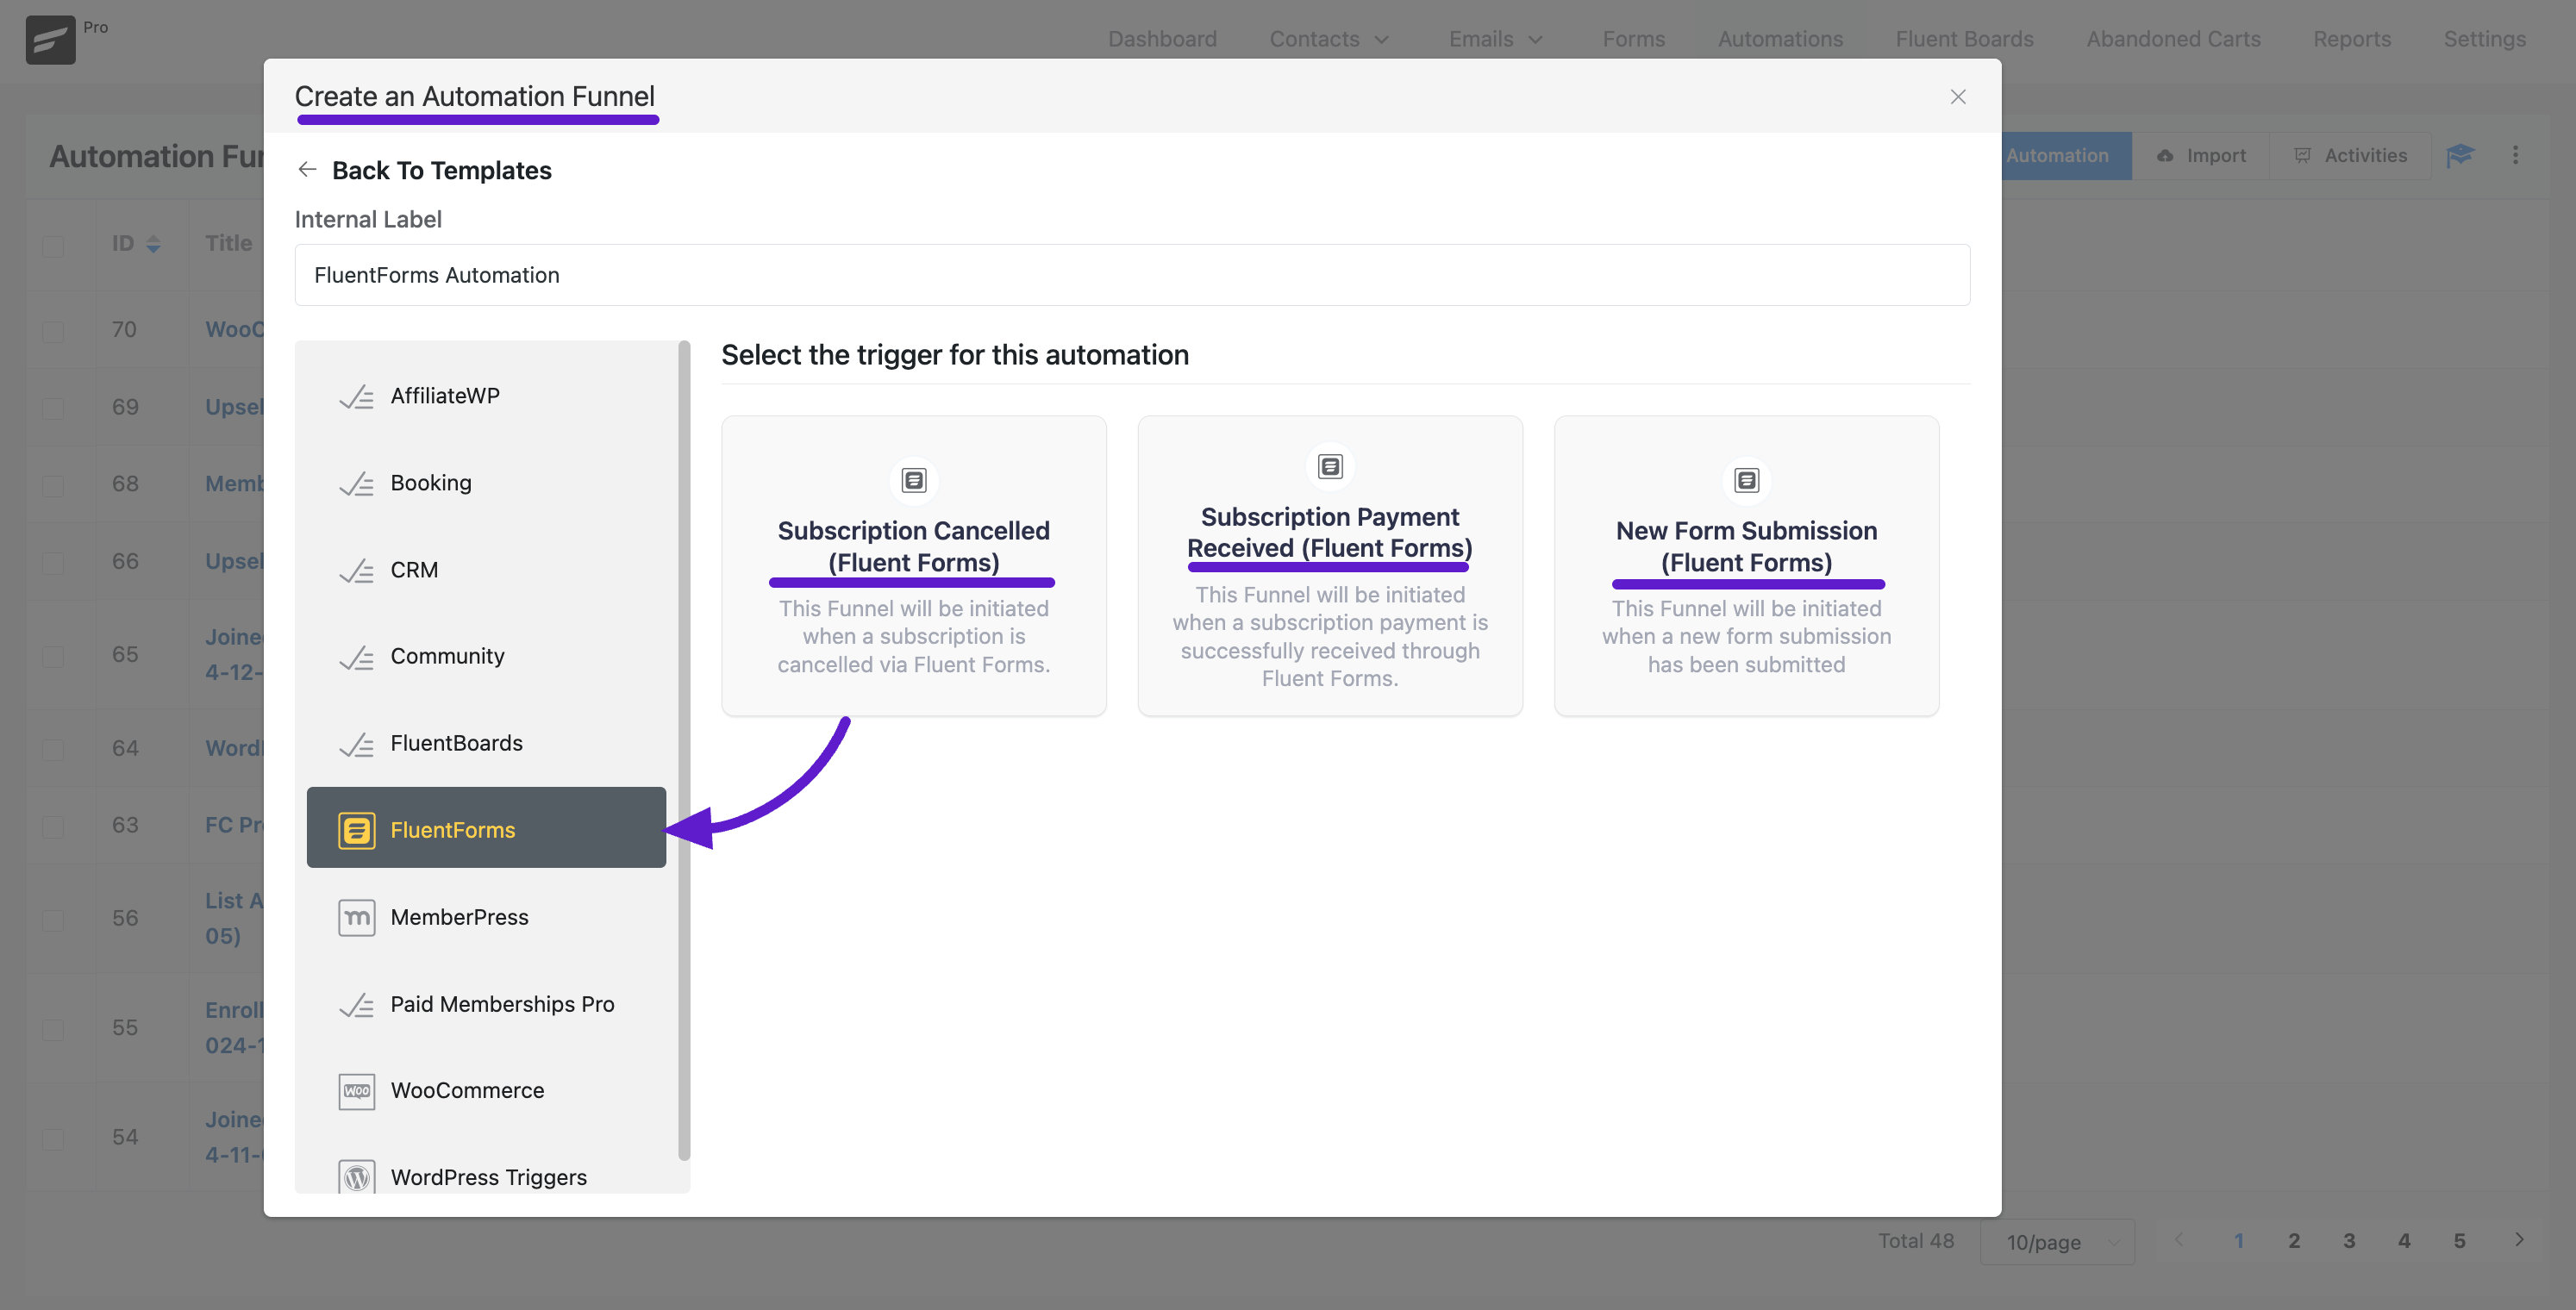
FluentCRM offers automation triggers for Fluent Forms, allowing you to automate actions based on user interactions. When you create a new automation in FluentCRM, you’ll find three automation triggers for Fluent Forms.
Go to FluentCRM and create a new automation. Select an Automation Trigger from the available Fluent Forms options then click the Continue button and build your automation funnel as needed.
If you want to know more about how to create an automation, check out our documentation for detailed steps
Available Automation Triggers #
- Subscription Canceled
This automation starts when a user cancels their subscription. It only applies to users who subscribed via Fluent Forms, and the cancellation must be done from the frontend by the user. If an admin cancels the subscription, this trigger won’t run. - Subscription Payment Received
This automation triggers when a user makes a subscription-based payment through Fluent Forms. - New Form Submission
This automation runs when a new form submission occurs.
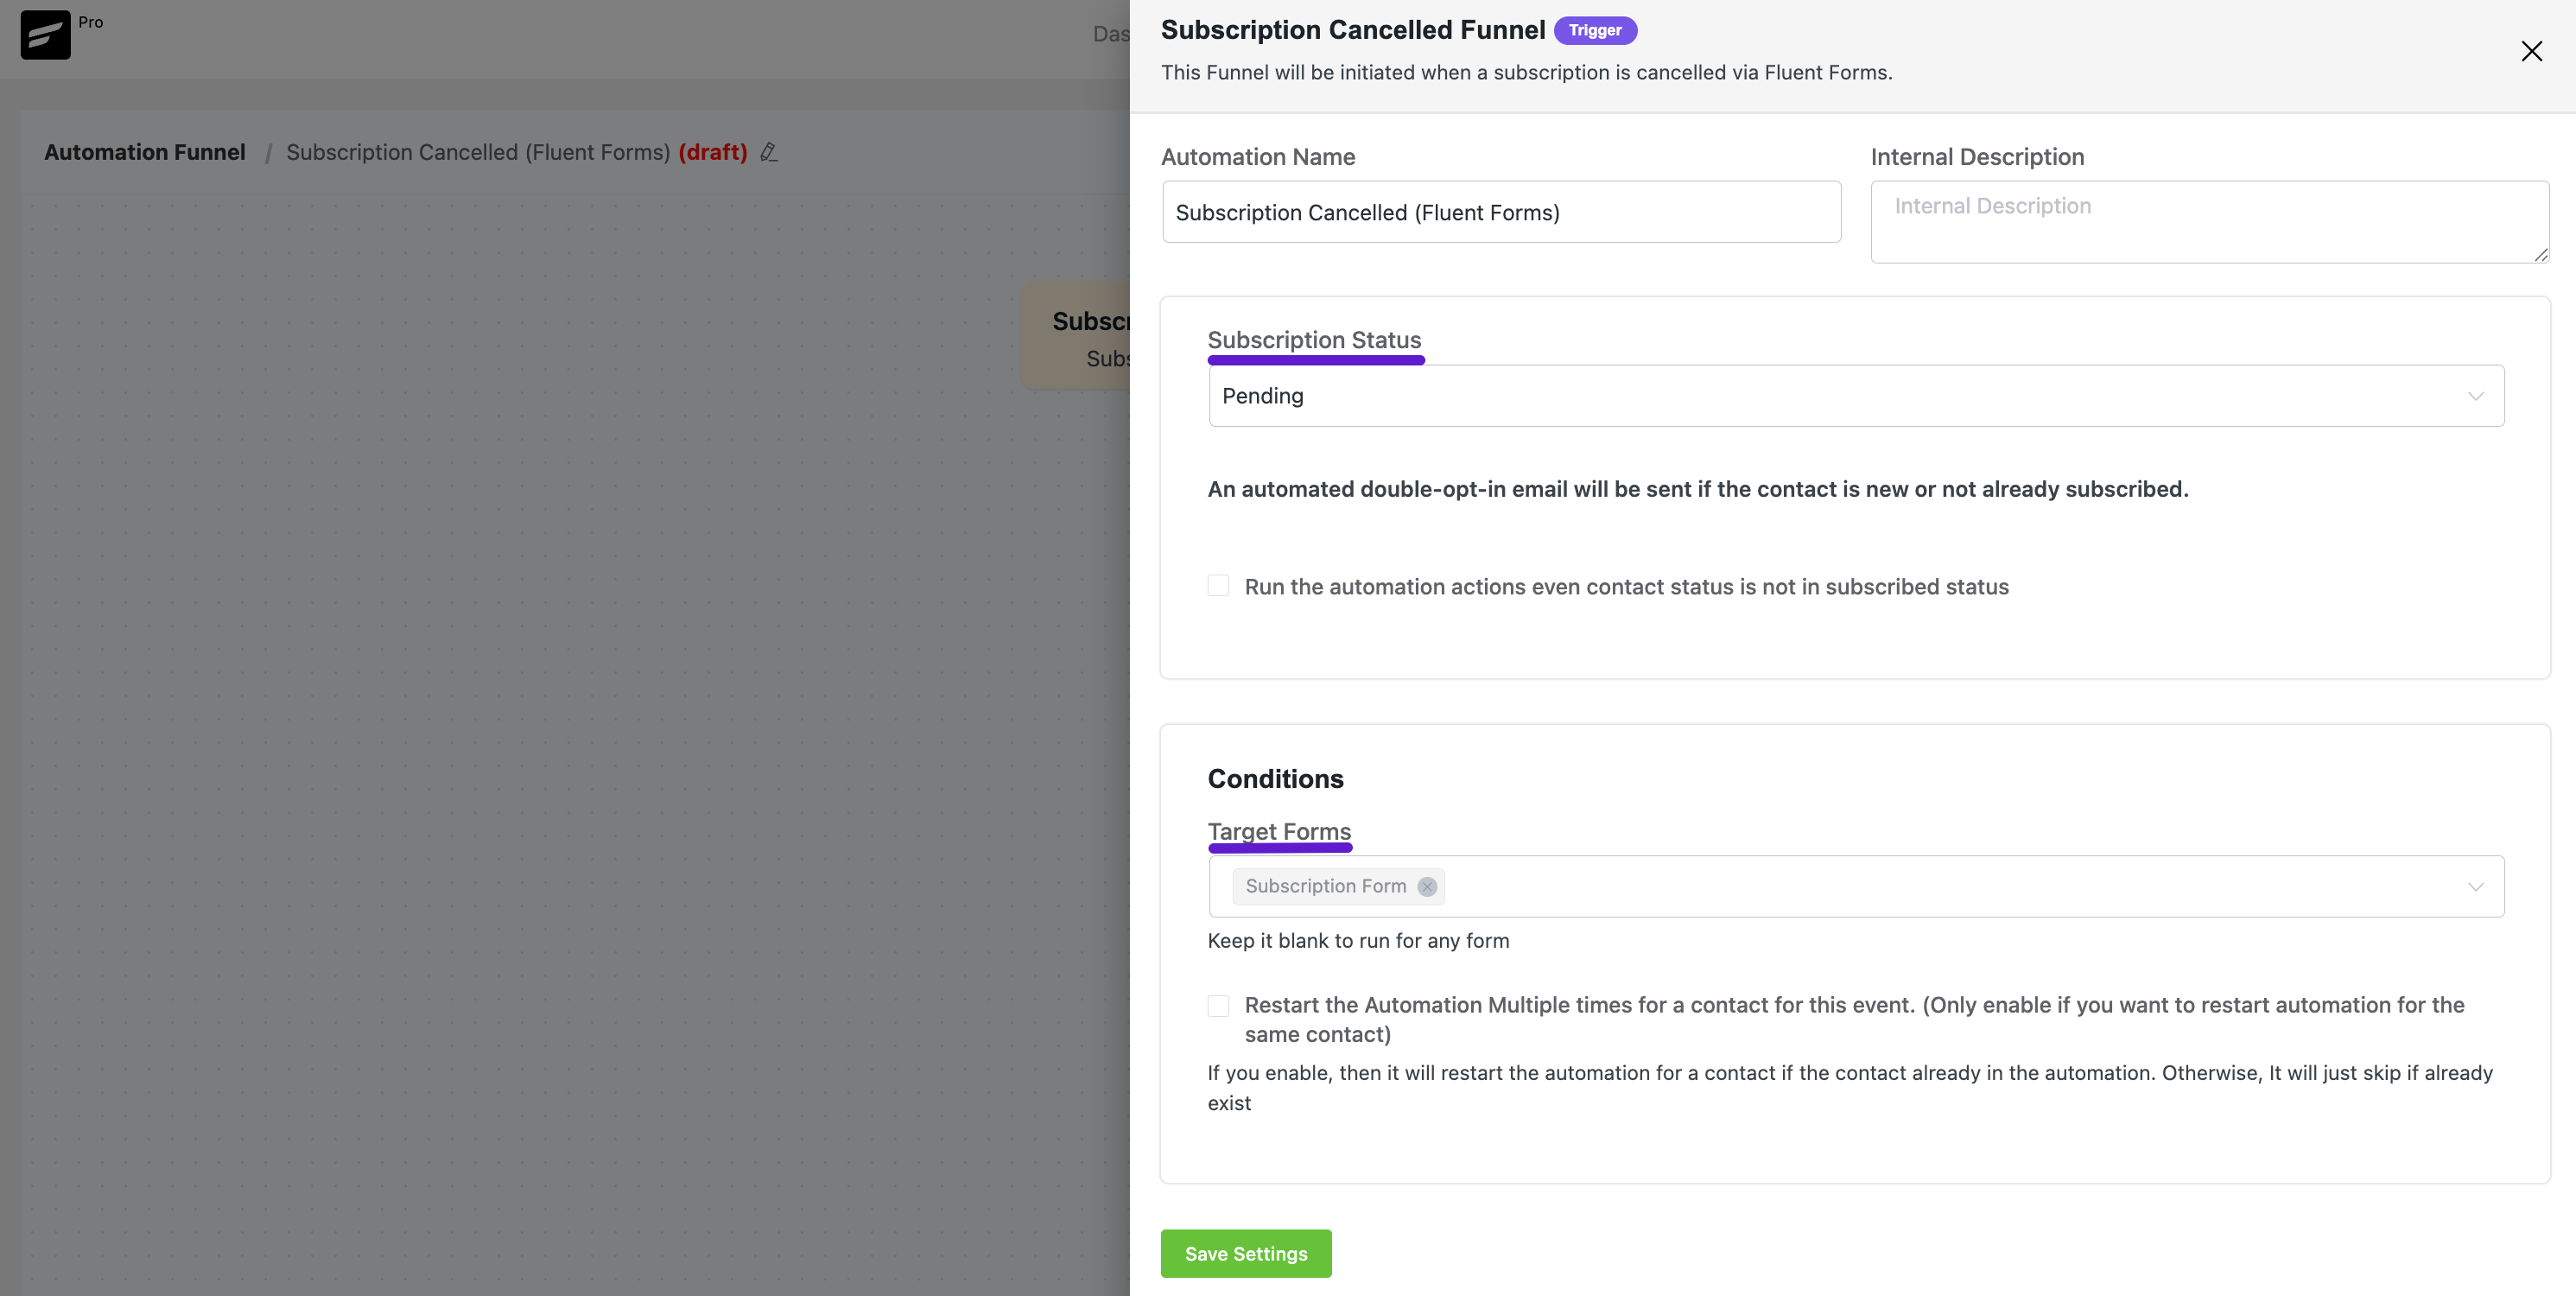
Subscription Canceled #
After selecting the Subscription Canceled automation trigger, a pop-up will appear where you need to provide some necessary details.
Next, choose the Subscription Status after this trigger action.
You can also specify if this automation should run for specific forms. To do this, select the desired forms from the Target Forms dropdown menu.
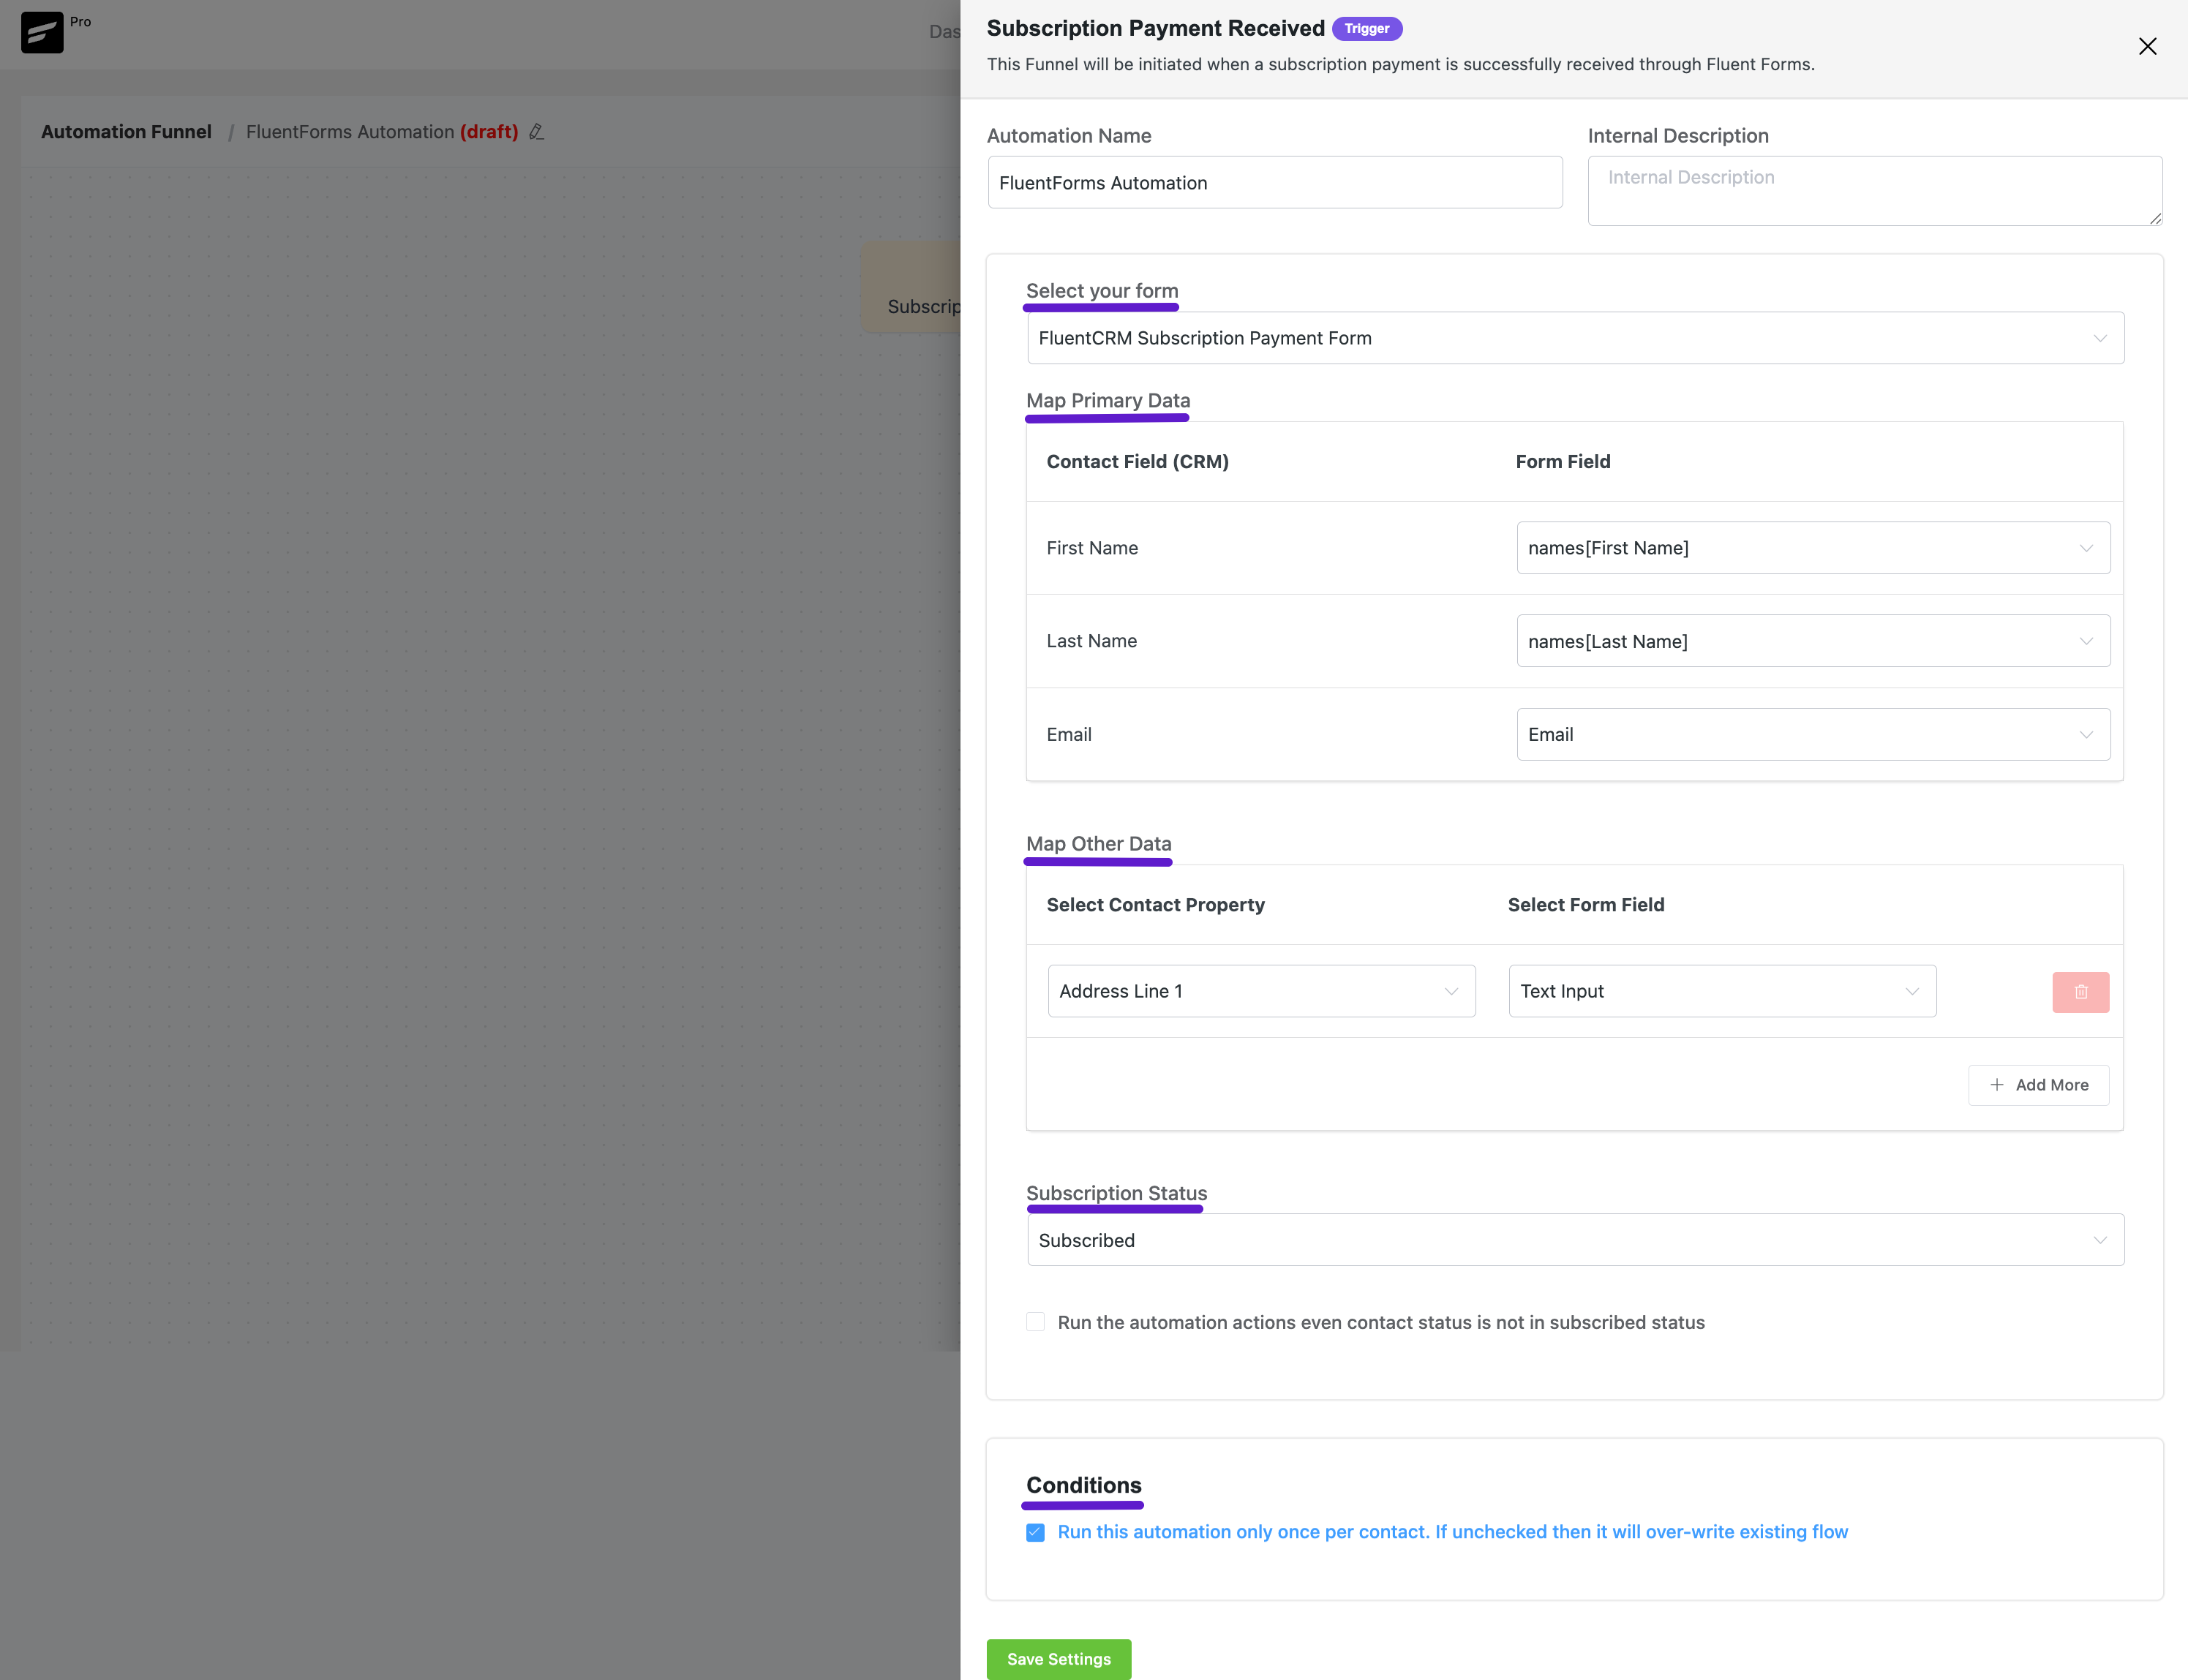
Subscription Payment Received #
After selecting the Subscription Payment Received automation trigger, a pop-up will appear where you need to enter the required details.
First, choose a form from the Select Your Form dropdown if you want this automation to run for a specific form.
Next, map your data to collect information from the form for automation.
Select the Subscription Status after this trigger action.
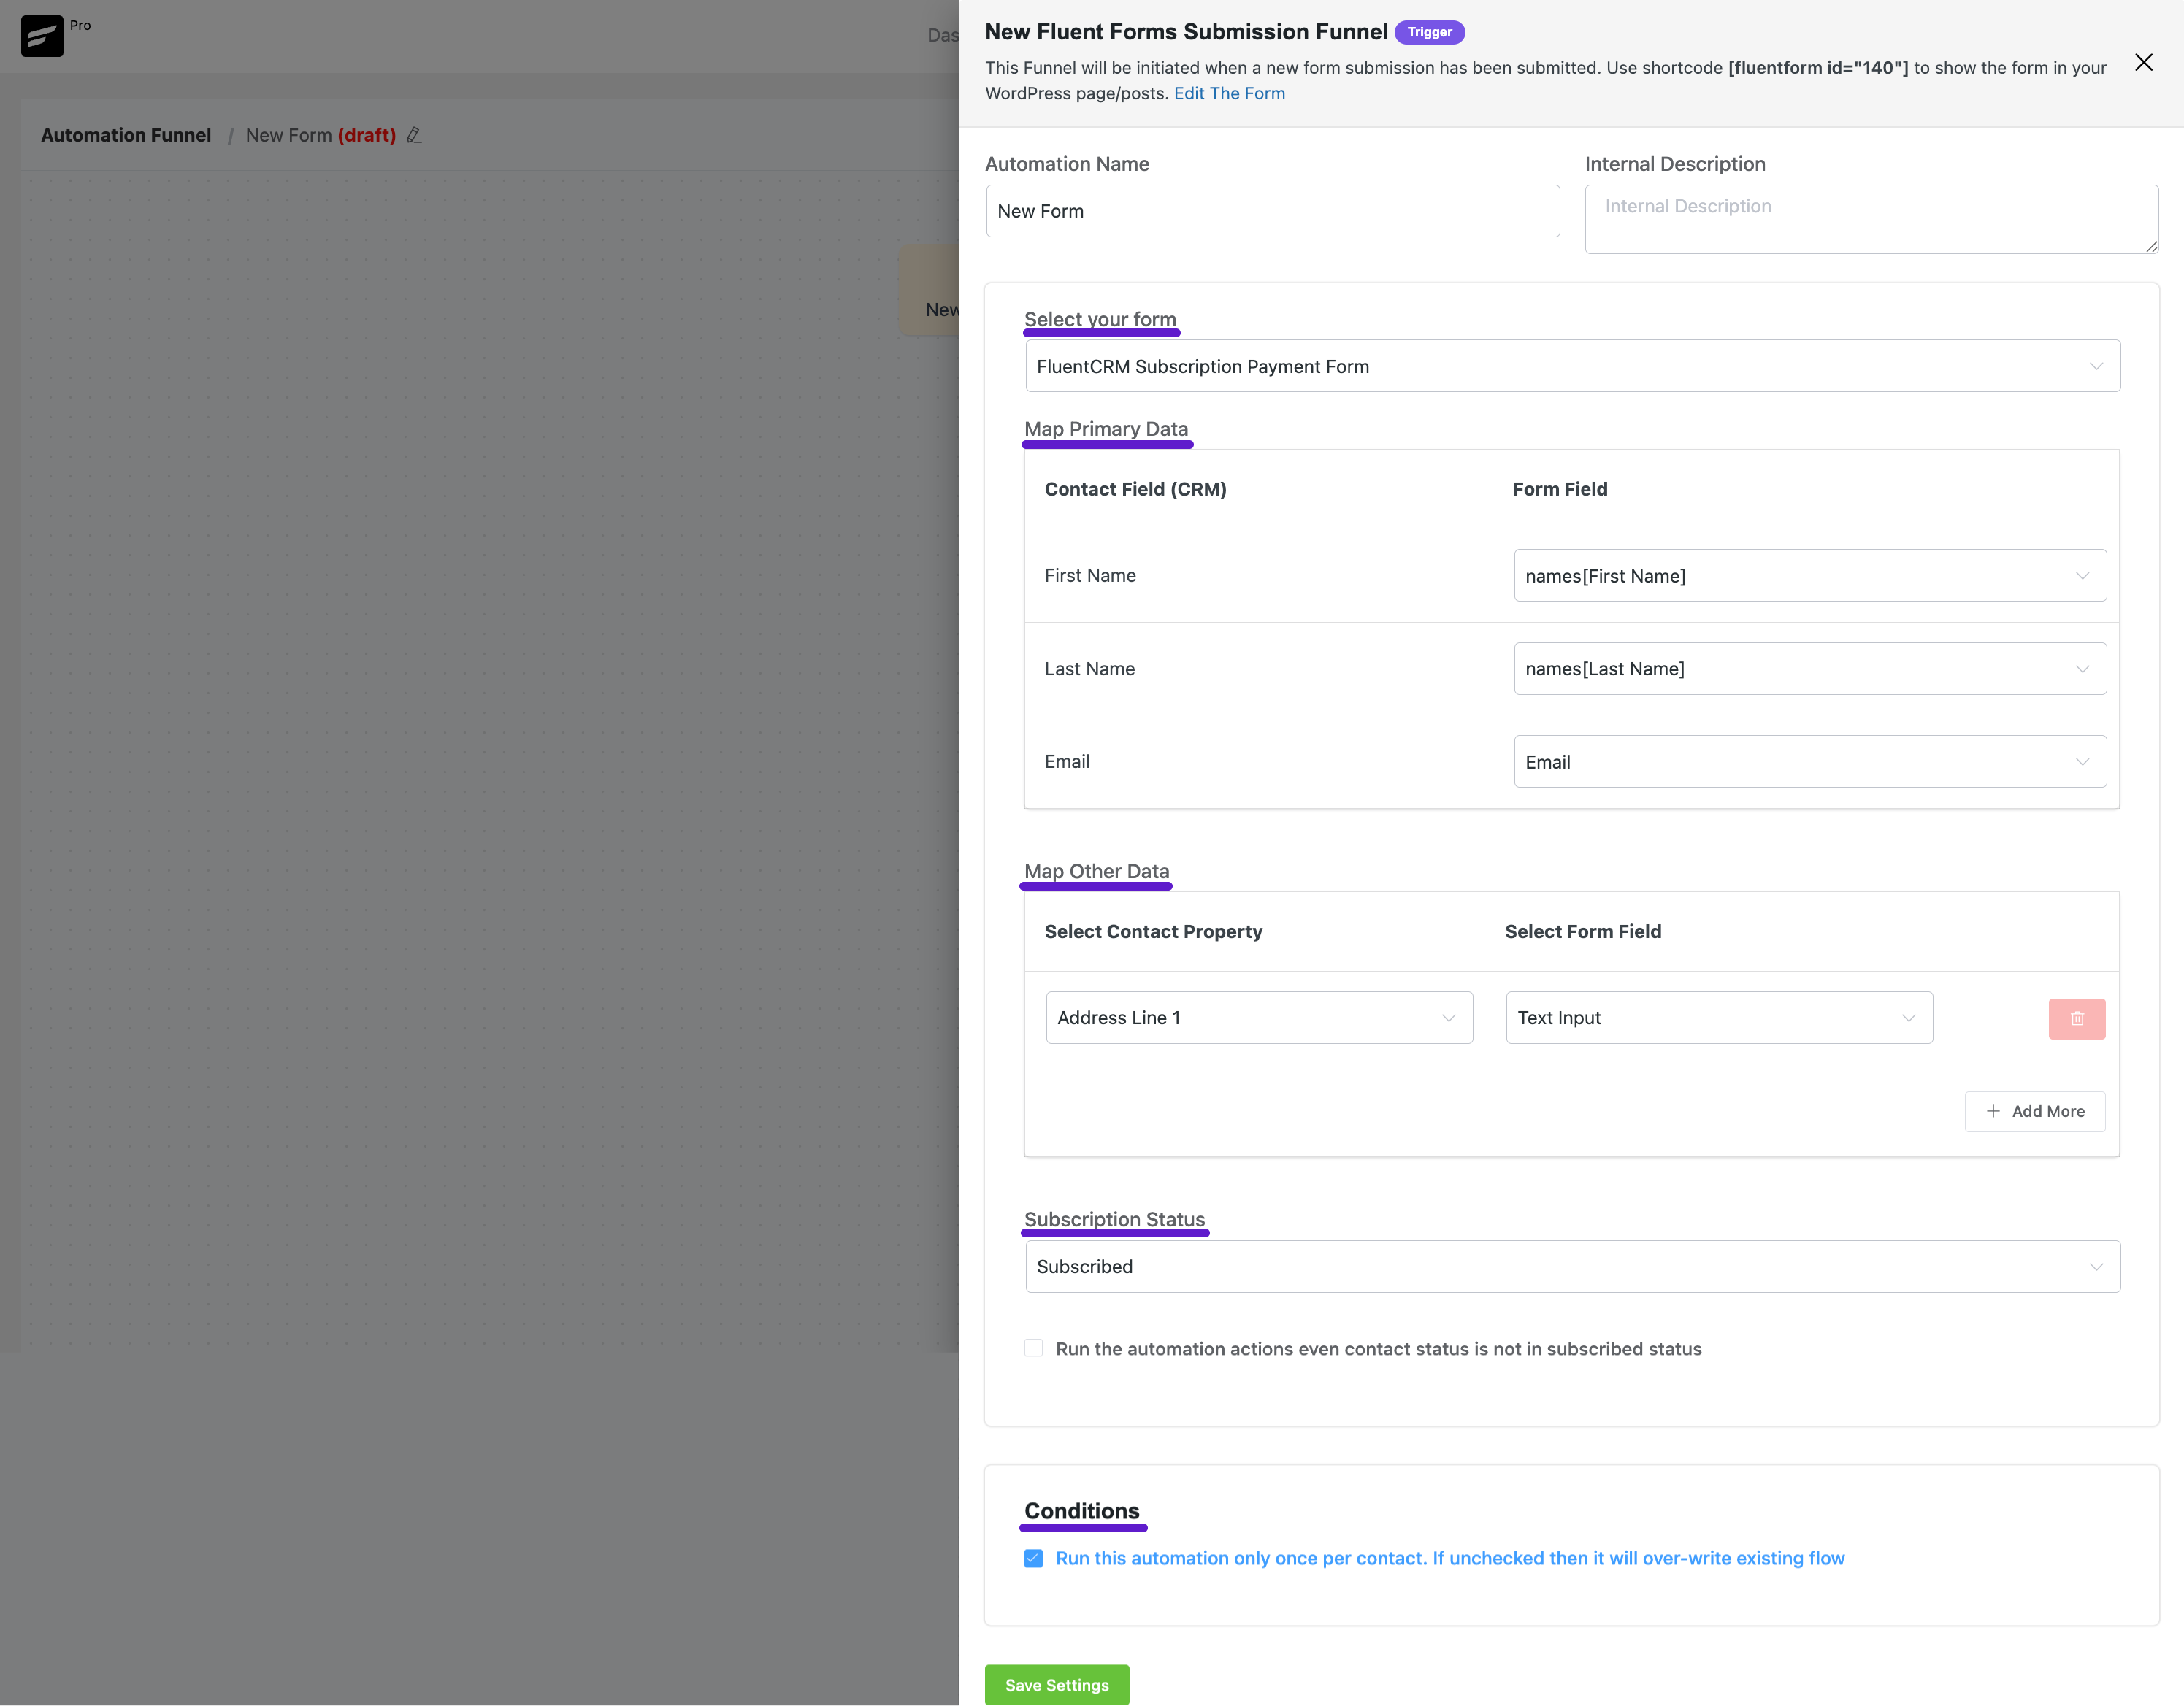
New Form Submission #
After selecting the New From Submission automation trigger, a pop-up will appear where you need to provide some necessary details.
Now choose a form from the Select Your Form dropdown if you want this automation to run for a specific form then map your data to collect information from the form for automation. Select the Subscription Status after this trigger action.
FluentForm Subscriptions Widget in Contact Profile #
A widget will appear in the FluentCRM contact’s profile for users who have subscribed via Fluent Forms.

If you have any further queries regarding this article please do not hesitate to contact our @support team.


how to update contact fields in fluent CRM from a form. I want to add the city of each contact from a Fluent form poll.
how update contact fields in fluent crm from a form?
what about how to move all the data from the other fields in fluent forms such as “check box, drop down, multiple choice, radio field etc”?
I may be making this more complex than it is, but I am wondering why do I need to get this complex?
> All I want to do is create a form to collect a lead and send them a link to a download.
1. I am looking at using FluentForms to create a form that pops up when the visitor clicks on a web link.
2. Then FluentCRM to collect the name, email address, and tag it as a recipient of the offer.
3. Then send a link to the given email address, which allows the user to download a free file.
THAT’s ALL!
But what I am reading – I need to get “Uncanny Automator” – Which REQUIRES that I create a USER ACCOUNT before I can do any of this.
Why? I DO NOT want to force the user to create a password for something this simple.
Is there simple way to do this?
Thanks,
Richard..
FluentCRM seems an awesome Tool, cant wait to test it for our B2B Hygiene Shop campaigns!