FluentAffiliate integrates with FluentCRM to bring your affiliate management data directly into your marketing automation hub. This powerful combination allows you to segment contacts based on their affiliate status and activities, and run targeted automations to engage, reward, and manage your affiliates effectively.
In this article, you’ll learn how the FluentCRM and FluentAffiliate integration works and what features are available.
No additional settings are required to integrate FluentCRM with FluentAffiliate. Simply install and activate both plugins on your WordPress site to get started.
Automation Triggers for FluentAffiliate #
FluentCRM offers automation triggers for FluentAffiliate, allowing you to automate actions based on key affiliate activities. When you create a new automation in FluentCRM, you’ll find a dedicated section for these triggers.
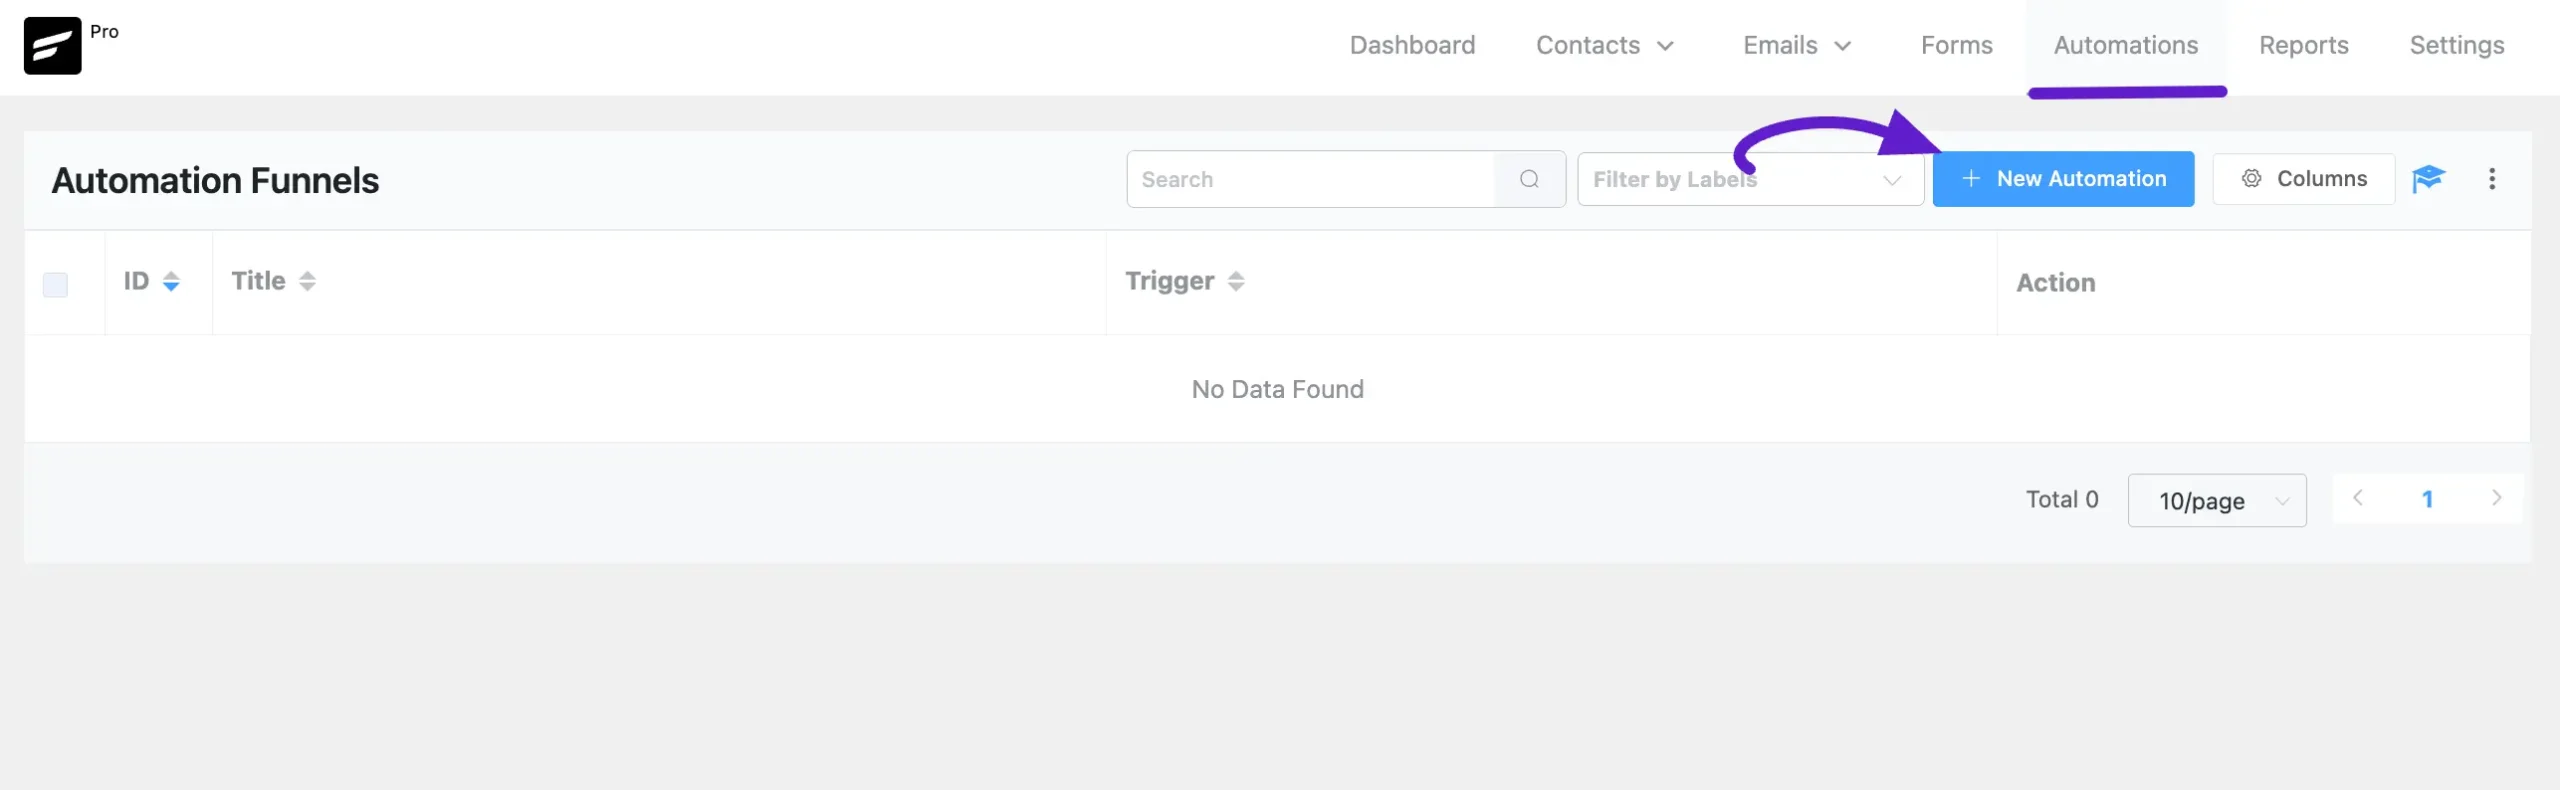
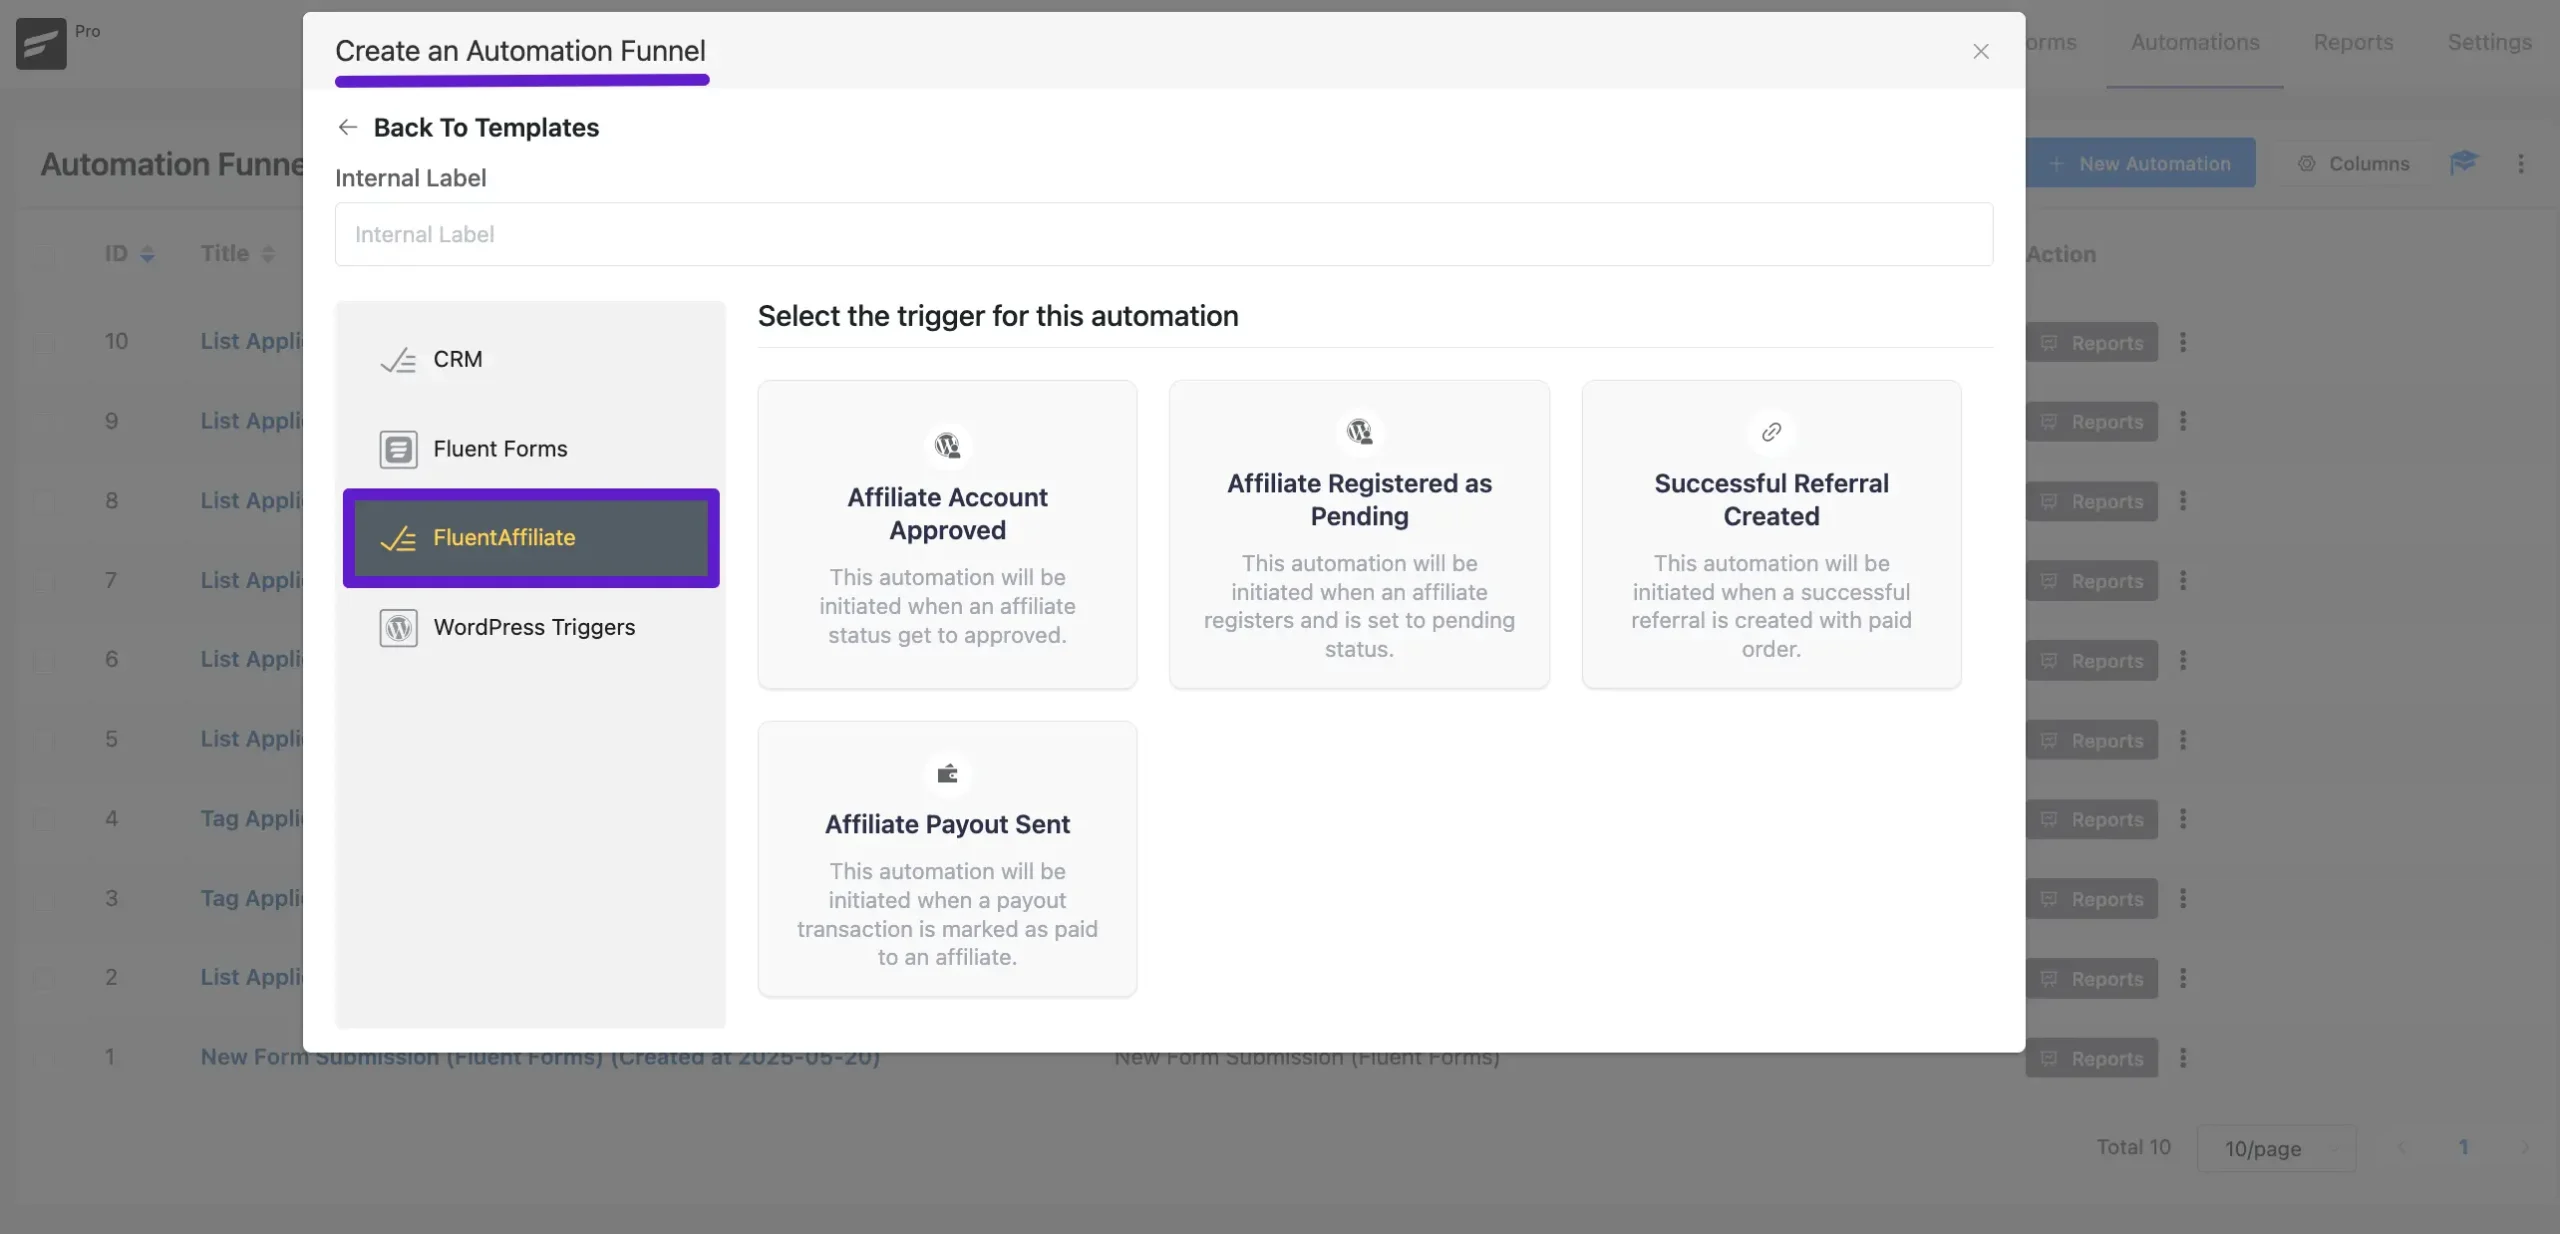
Go to FluentCRM → Automations and click the + New Automation button. Select an Automation Trigger from the available FluentAffiliate options, then click the Continue button to build your automation funnel as needed.
If you want to know more about how to create a complete automation, check out our documentation for detailed steps.
Available Automation Triggers #
Below are the triggers available for the FluentAffiliate integration. Each one can be used to start a unique automation funnel.
Affiliate Account Approved: This automation is initiated when an affiliate’s status is set to “Approved”. It’s perfect for sending a welcome email series, adding specific tags, or providing new affiliates with their essential resources.
Affiliate Registered as Pending: This automation starts when a new user registers as an affiliate and their account is set to “Pending” status. You can use this to automatically send an email confirming their application has been received and explaining the next steps.
Successful Referral Created: This automation is initiated when an affiliate’s referral leads to a successful, paid order. It is ideal for sending real-time notifications or congratulatory emails to your affiliates for each conversion they make.
Affiliate Payout Sent: This automation runs when a payout transaction for an affiliate is marked as “paid”. You can use this to send a payment confirmation email, add a tag indicating a recent payout, or thank them for their partnership.
Affiliate Account Approved #
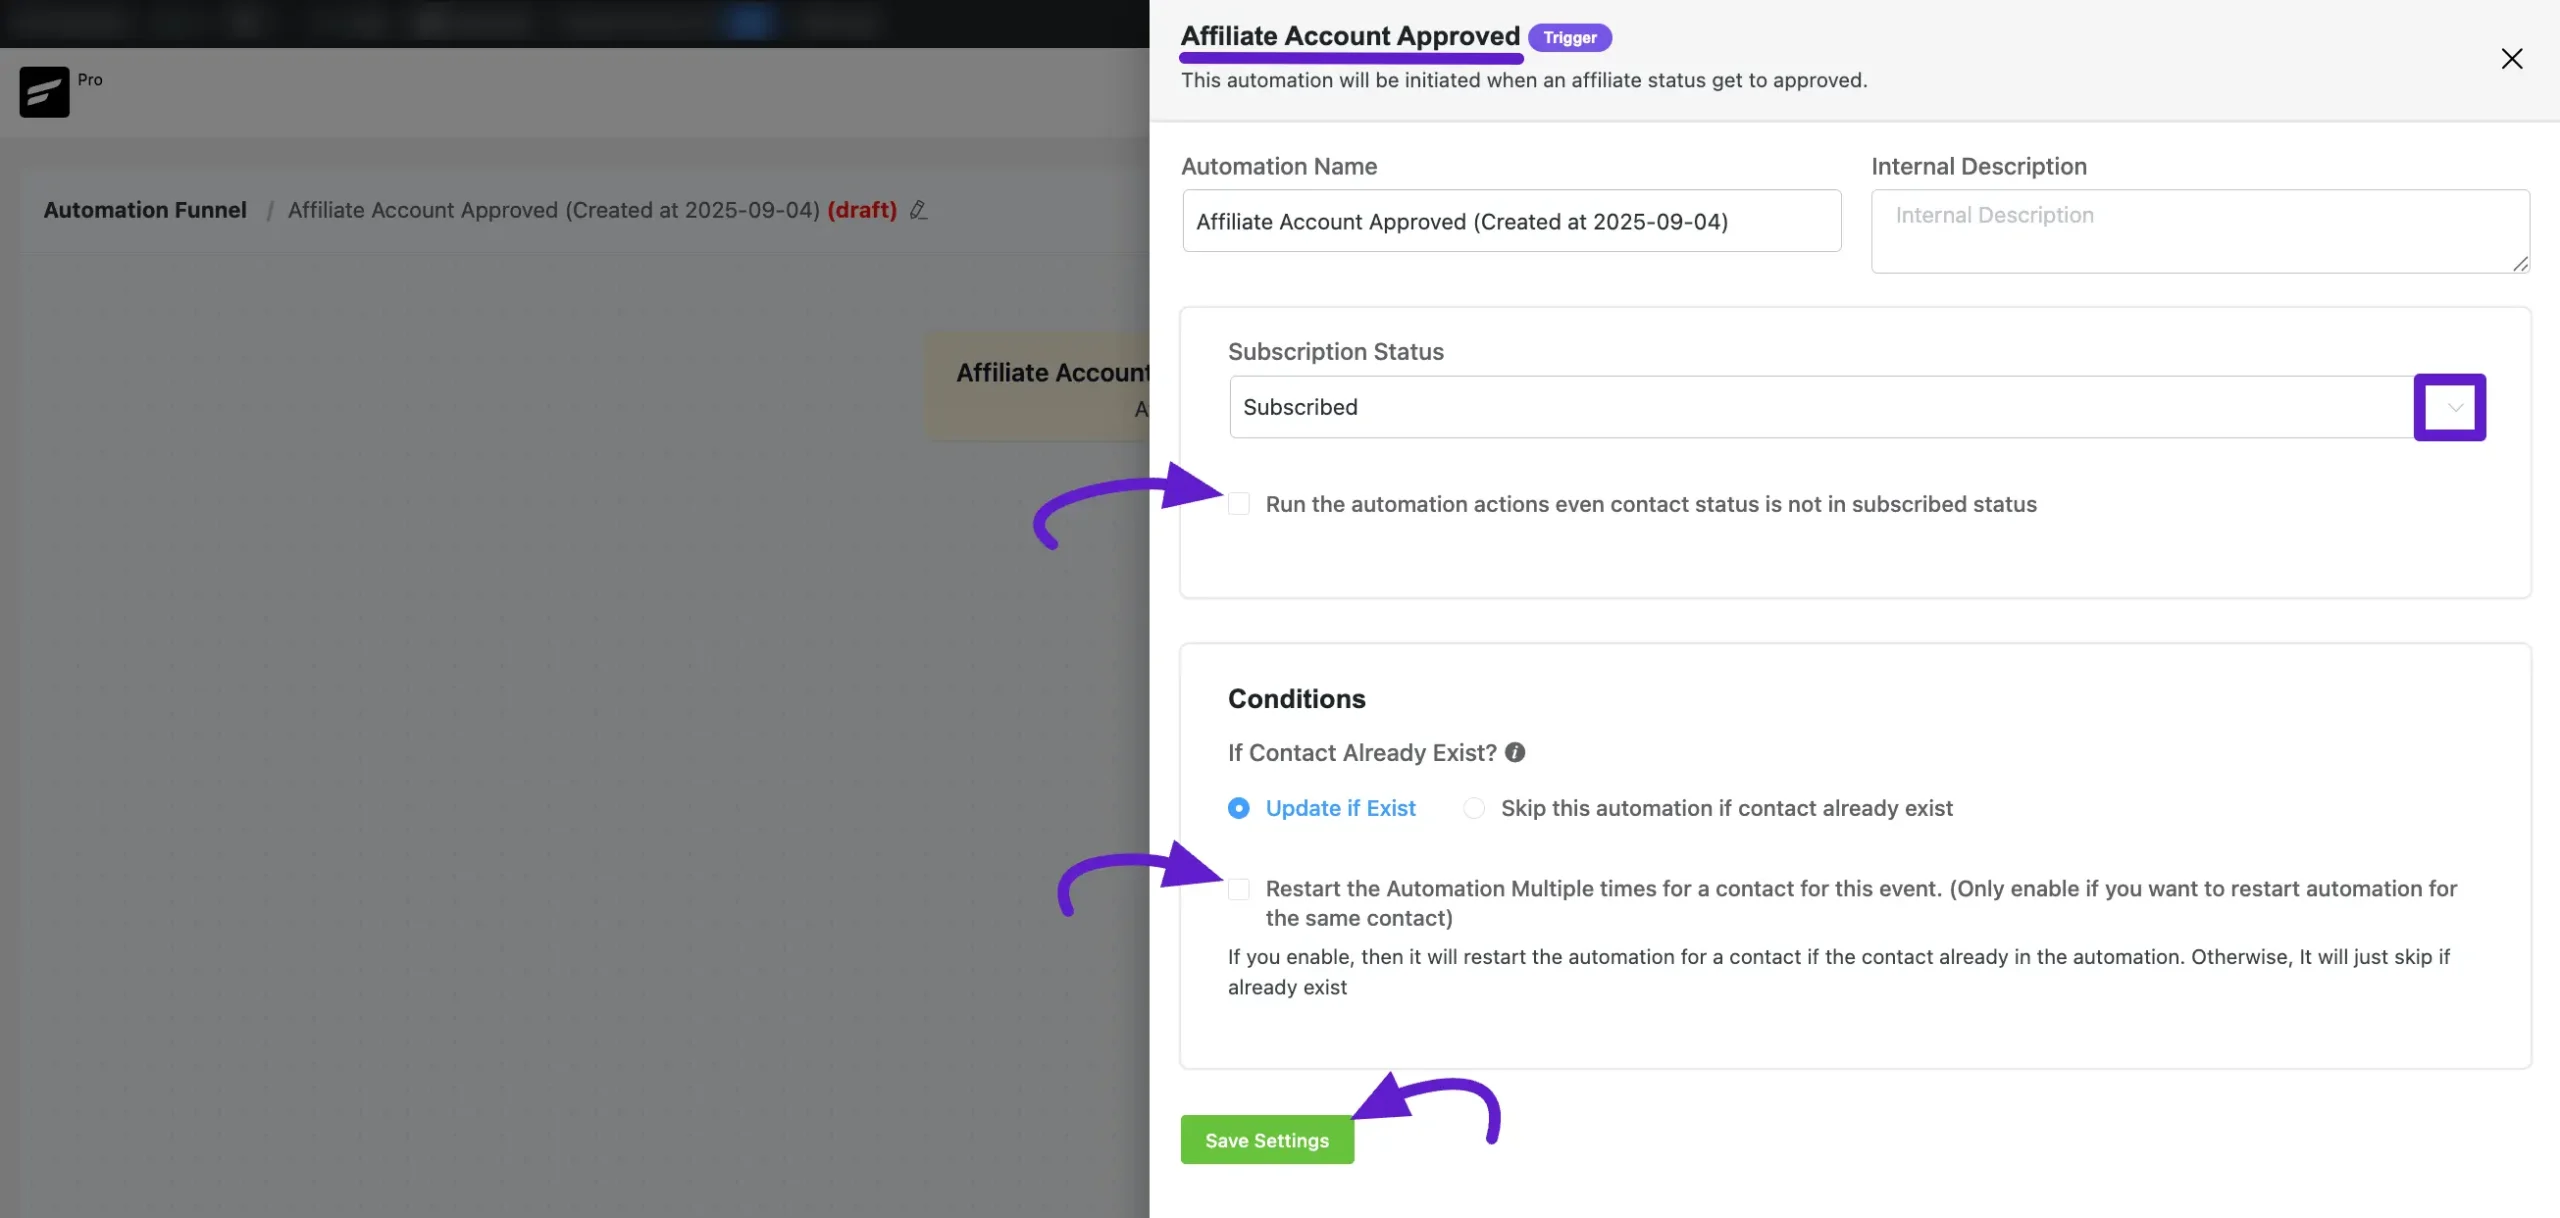
After selecting the Affiliate Account Approved trigger from the automation builder, a settings pop-up will appear where you can configure the trigger’s behavior.
First, you can set the Automation Name, which is the primary label for your funnel, and add an optional Internal Description for your own reference.
Next, configure the Subscription Status. By default, contacts entering this automation will be set to Subscribed. You can also check the box to Run the automation actions even contact status is not in subscribed status, if you need the automation to run for contacts with other statuses like “Pending” or “Unsubscribed“.
The Conditions section determines how the automation handles contacts who already exist in your FluentCRM database:
- Update if Exist: This is the default behavior. If an existing contact triggers this automation, their profile information will be updated.
- Skip this automation if contact already exist: Check this box to prevent the automation from running for any contact that is already in your database.
- Restart the Automation Multiple times for a contact for this event: Enable this option if you want a contact to be able to re-enter this automation every time the trigger event occurs. If this is disabled, a contact can only go through this specific automation funnel once.
Once you have configured the settings, click the Save Settings button to finalize the trigger and continue building your automation workflow.
The process of creating other automations (such as Affiliate Registered as Pending, Successful Referral Created, or Affiliate Payout Sent) is the same as setting up the Affiliate Account Approved automation. This means you can easily create any automation following the same steps.
Automation Actions for FluentAffiliate #
In addition to triggers that start an automation, the integration also provides specific actions you can use within an automation funnel.
Available Automation Actions #
Create Affiliate Account #
This action will create an affiliate account for any contact who reaches this step in an automation funnel. For example, you could have a trigger for when a customer makes their 5th purchase, and then use this action to automatically invite them to your affiliate program.
Important: A WordPress user account must already exist for the contact for this action to work successfully.
After adding the Create Affiliate Account action to your funnel, a settings panel will open. Here’s what each option does:
A. Internal Label & Description: These are for your reference inside the automation builder to help you identify and understand this step.
B. Affiliate Status: Set the initial status for the new affiliate account. You can choose to have them automatically Approved or set them as Pending for manual review.
C. Rate Type: Select the commission structure for this affiliate. You can use the Default rate from your main FluentAffiliate settings or specify a custom Percentage or Fixed Amount commission.
D. Rate Value: Enter the numerical value for the commission rate (e.g., enter ’15’ for a 15% commission if you selected Percentage).
E. Payment Email: Specify the email address to be used for sending payouts to this affiliate. You can use smartcodes (e.g., {{contact.email}}) to pull the contact’s email address automatically from the three-dots right side.
F. Note (Optional): Add any internal notes that you want to be stored with the affiliate’s profile in FluentAffiliate.
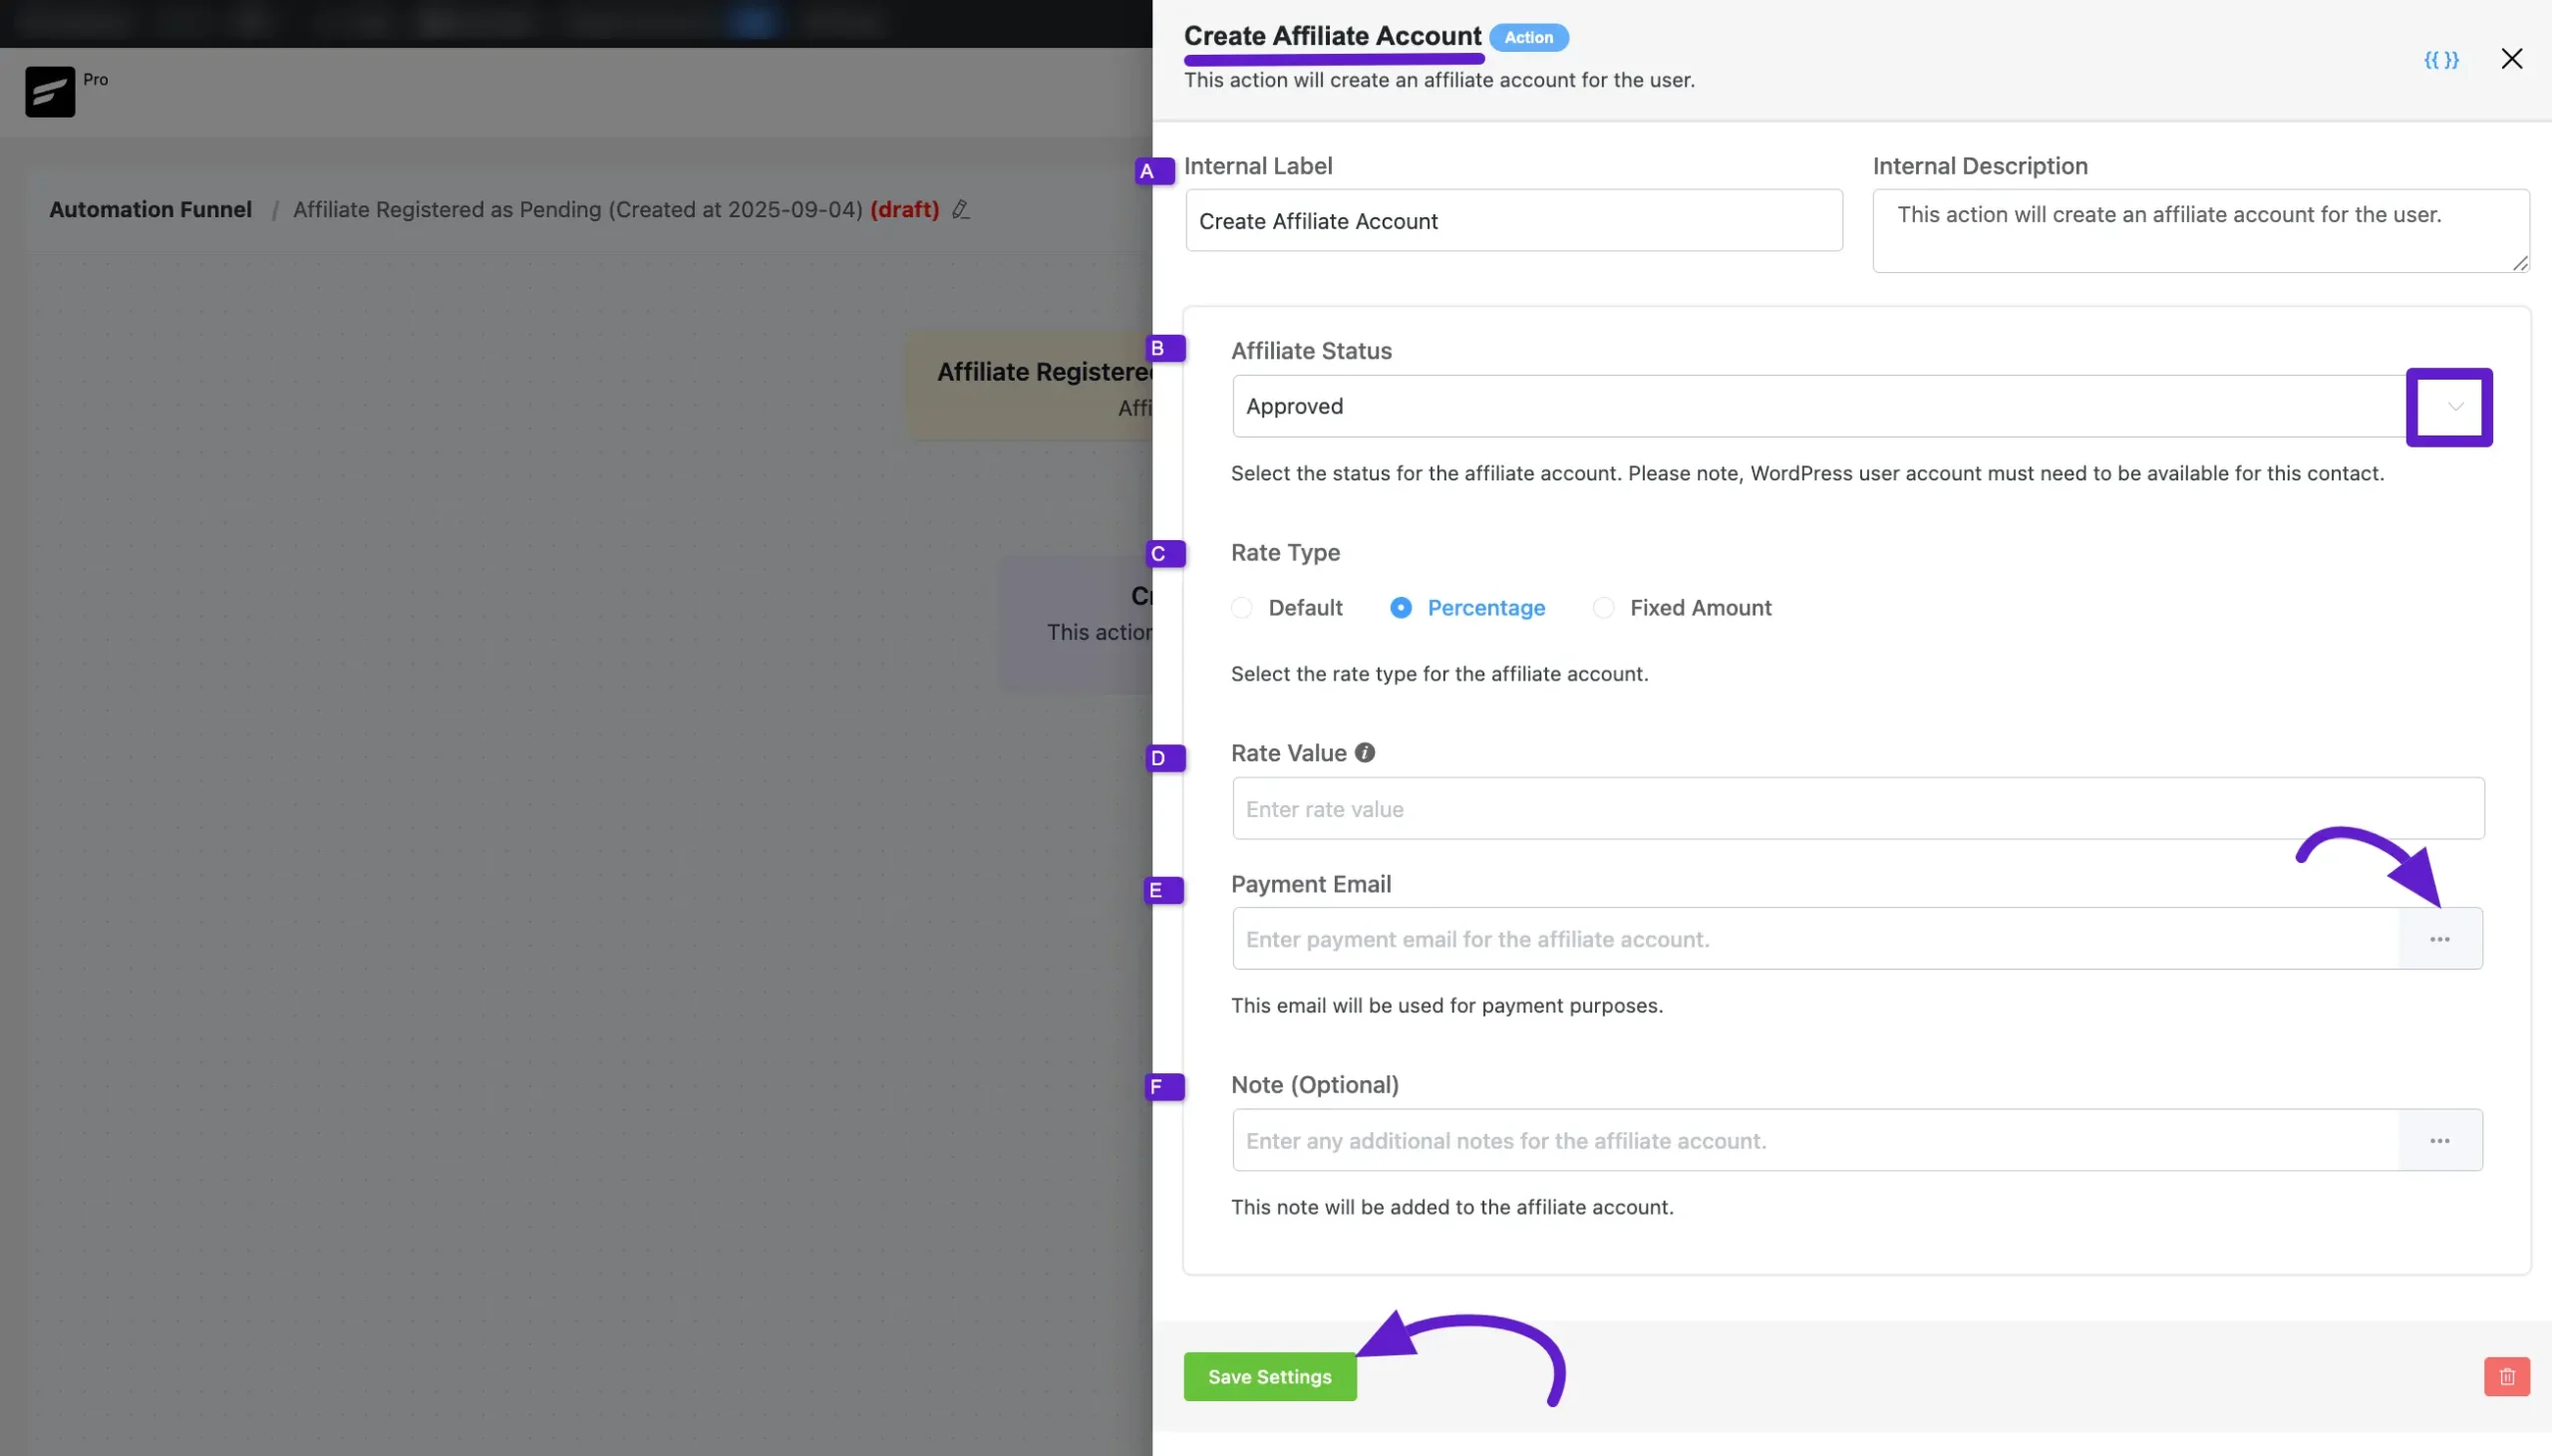
Once you have configured all the settings, click Save Settings to confirm the action’s configuration.
Contact Segmentation & Filtering with FluentAffiliate Data #
The integration allows you to filter and segment your contacts in FluentCRM based on their data in FluentAffiliate. This is useful for sending targeted email campaigns or for viewing specific groups of contacts.
You can find these filtering options in Advance Filters:
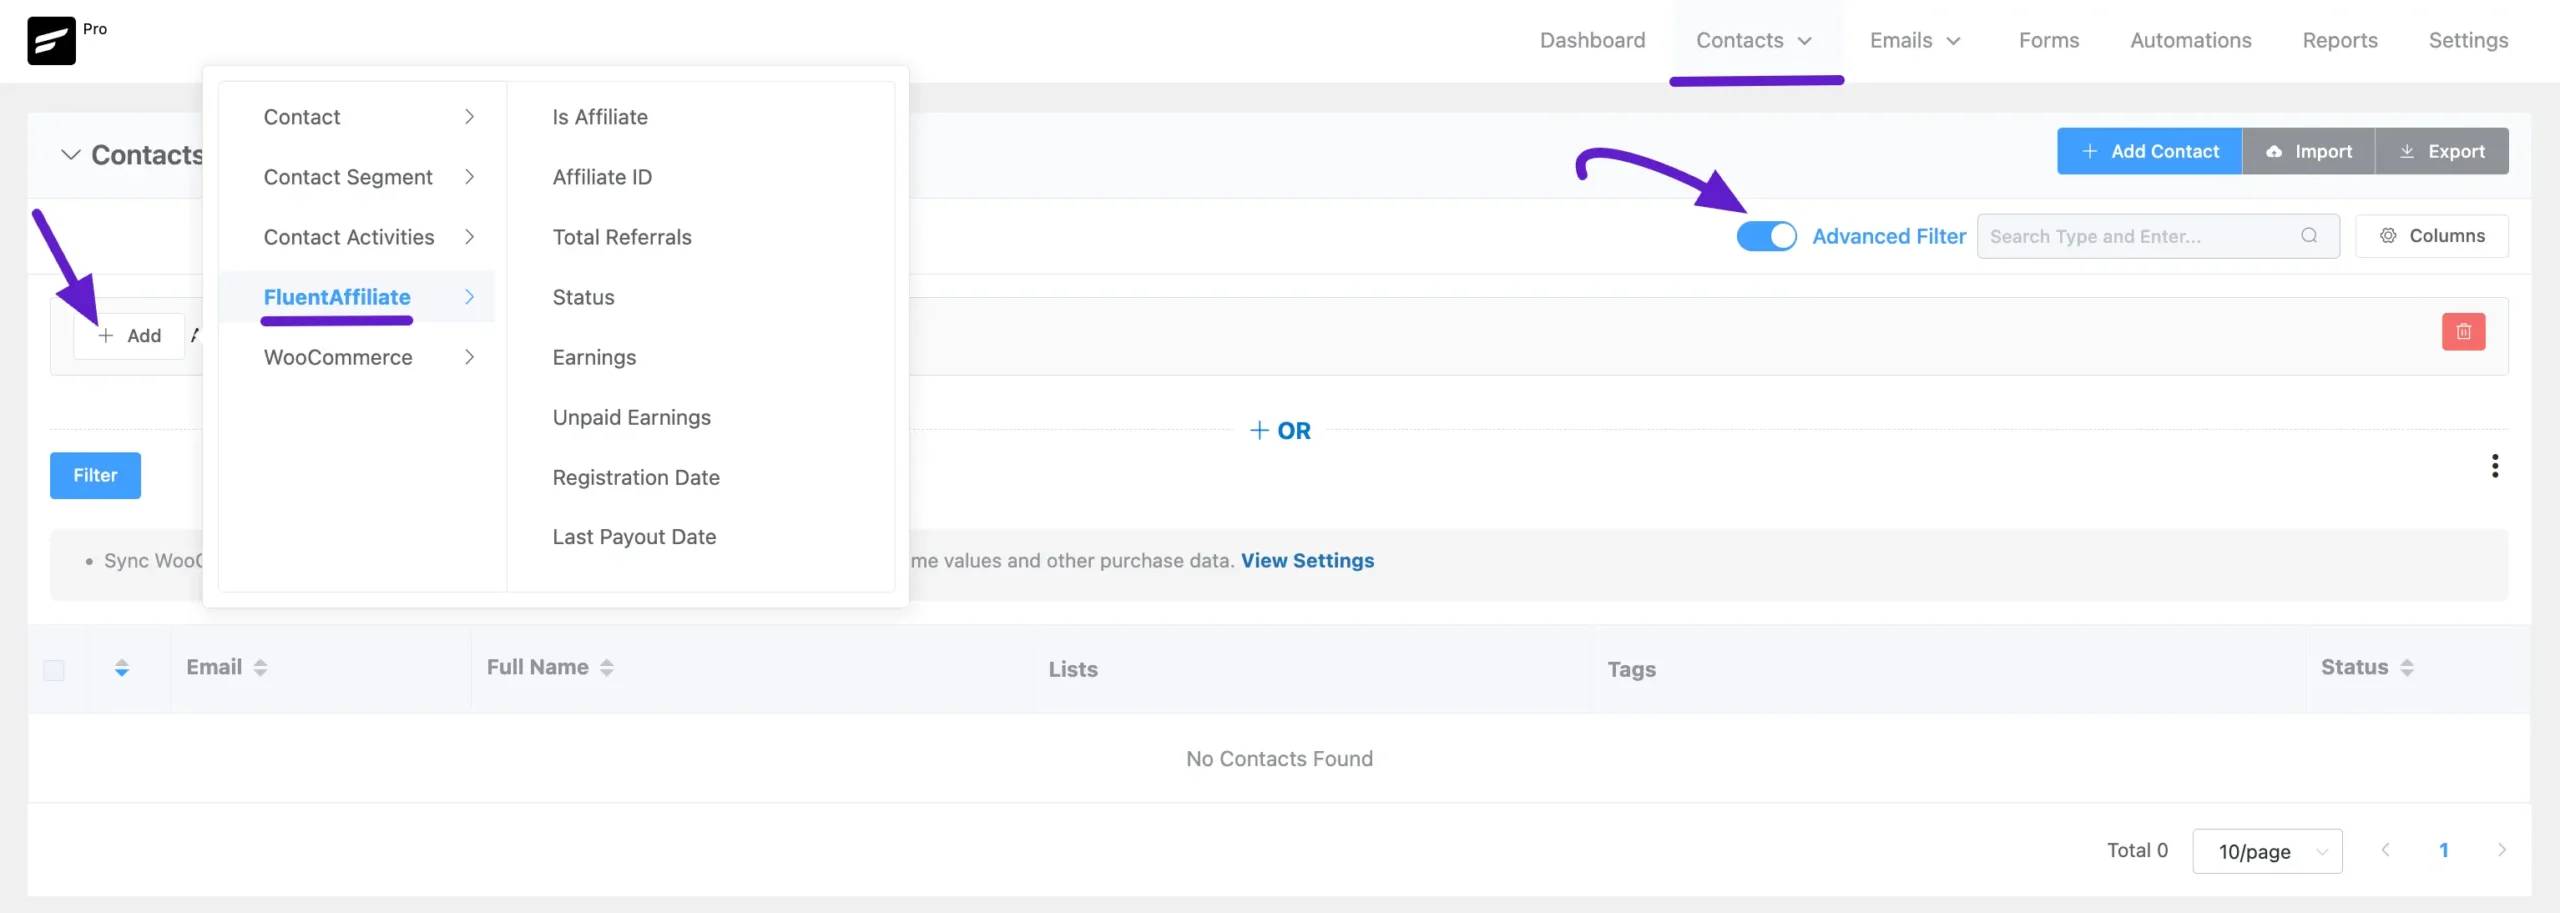
- In the main Contacts dashboard, by using the Advanced Filter. To access the Advanced Filter in FluentCRM, navigate to the Contacts section from the top menu bar. From there, enable the Advanced Filter by clicking the toggle button. Next, click the Add button and select FluentAffiliate. This will display all the available advanced filters. Simply choose the filters you need and configure them according to your requirements.
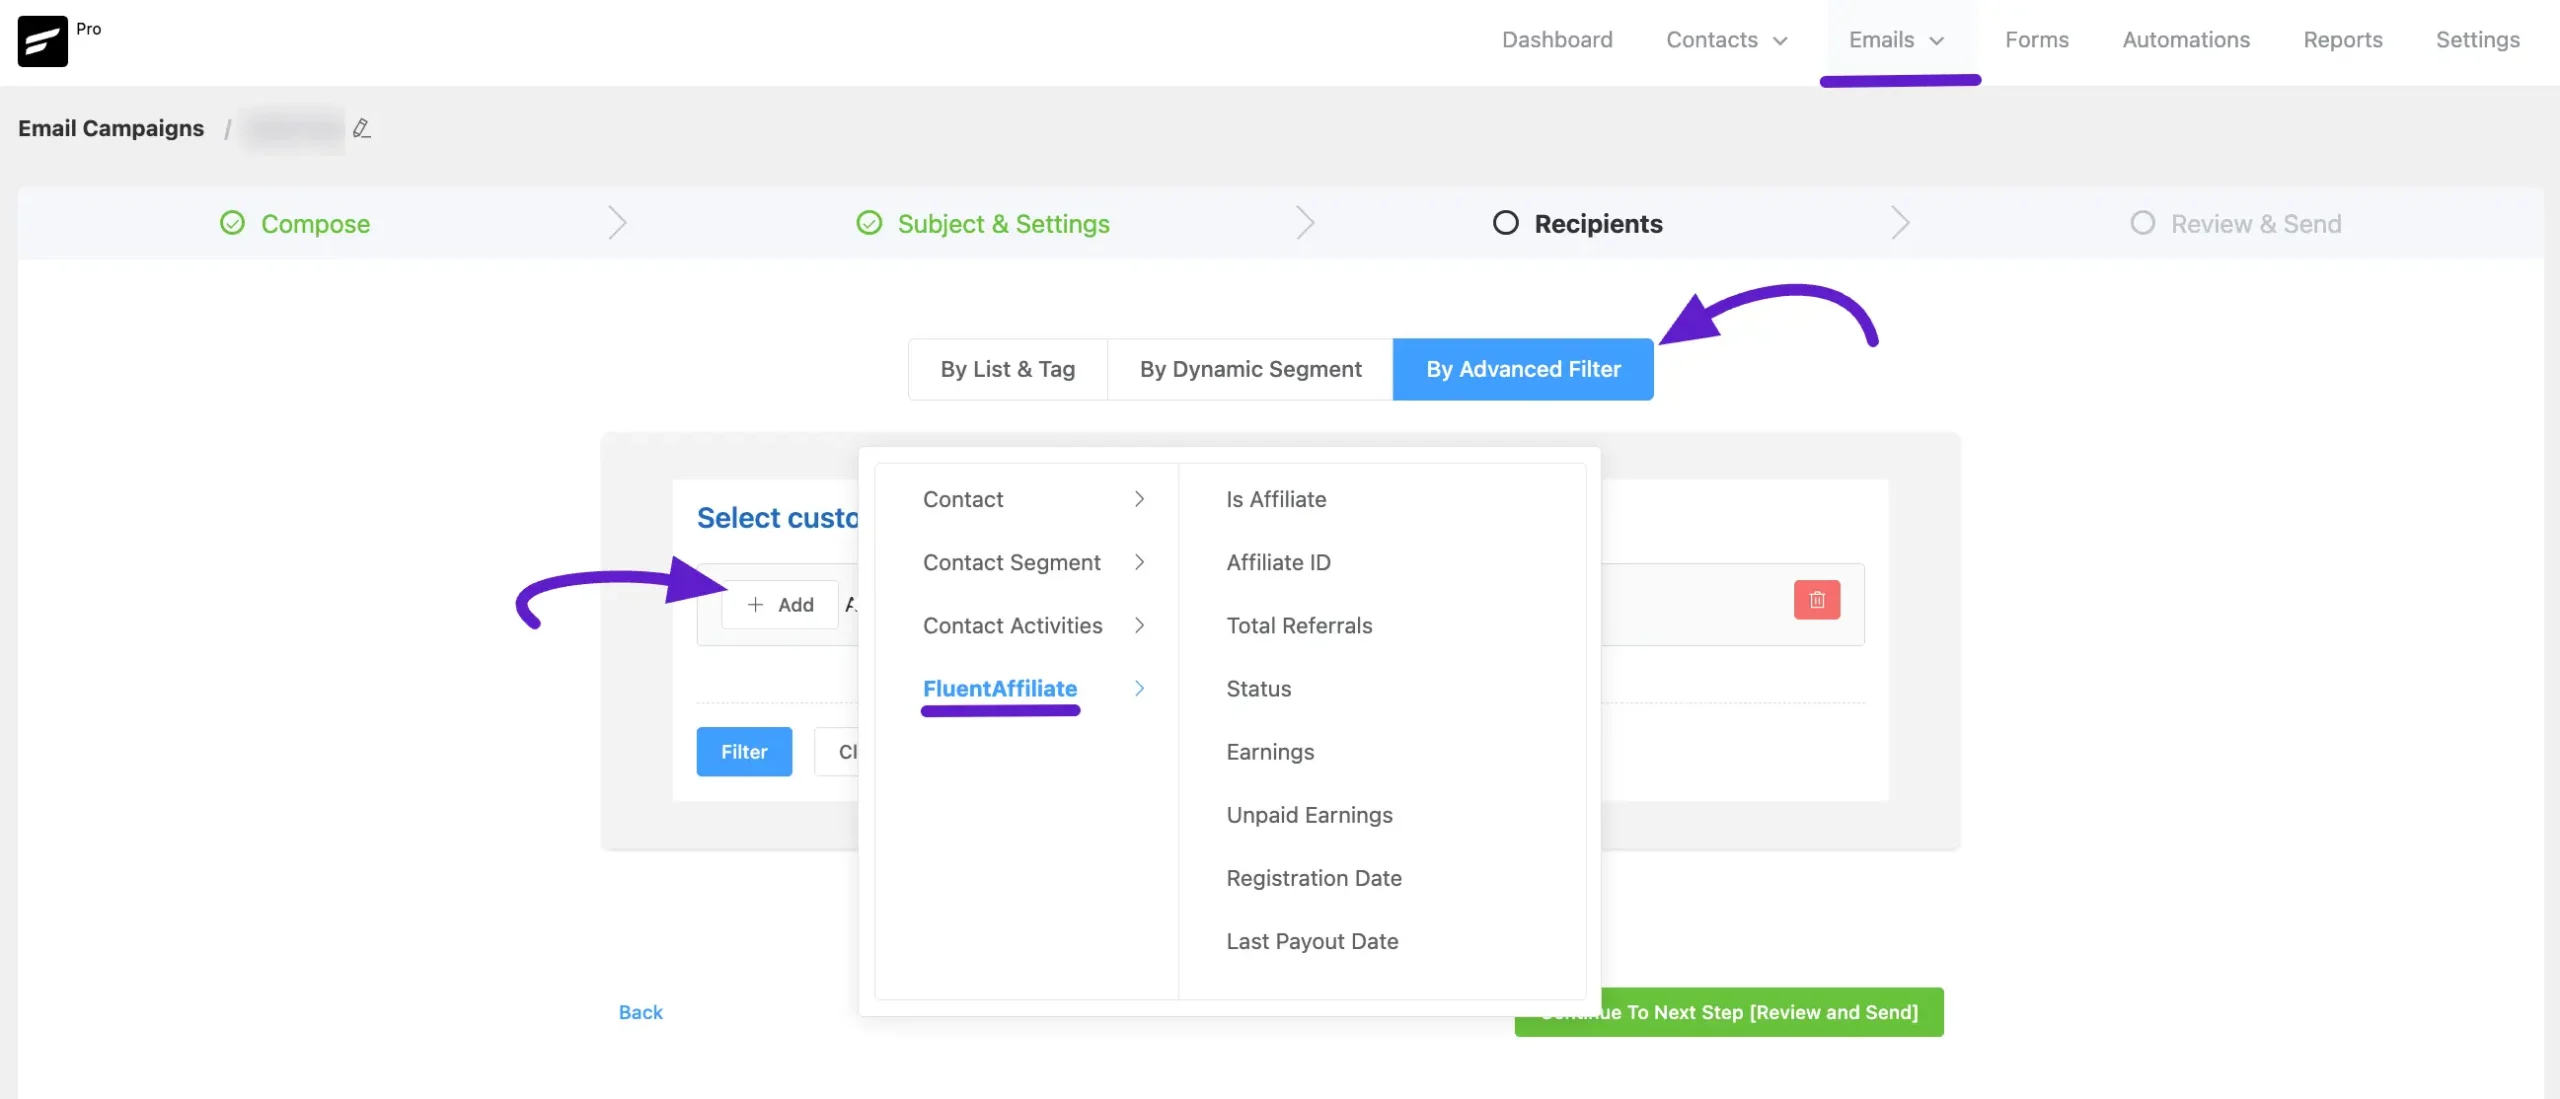
The available FluentAffiliate conditions for segmentation are:
- Is Affiliate: Filter contacts based on whether they are an affiliate or not.
- Affiliate ID: Find a specific contact by their unique Affiliate ID.
- Total Referrals: Segment contacts based on the number of referrals they have generated (e.g., more than 10, less than 5).
- Status: Filter affiliates by their current account status (e.g., Active, Pending, Rejected).
- Earnings: Segment contacts based on their total lifetime earnings.
- Unpaid Earnings: Filter contacts by their current unpaid earnings balance.
- Registration Date: Find affiliates who registered within a specific date range.
- Last Payout Date: Segment affiliates based on when they last received a payout.
- When setting up an Email Campaign and selecting the Recipients, you will find the Advanced Filter.
If you have any further queries regarding this article, please do not hesitate to contact our support team.


