FluentCart integrates seamlessly with FluentCRM, connecting your e-commerce data directly with your marketing automation platform. This powerful combination allows you to trigger automations based on customer purchase behavior, manage post-purchase follow-ups, and segment your contacts based on their order history for highly targeted campaigns.
In this article, you’ll learn how the FluentCRM and FluentCart integration works and what features are available.
No additional settings are required to integrate FluentCRM with FluentCart. Simply install and activate both plugins on your WordPress site to get started.
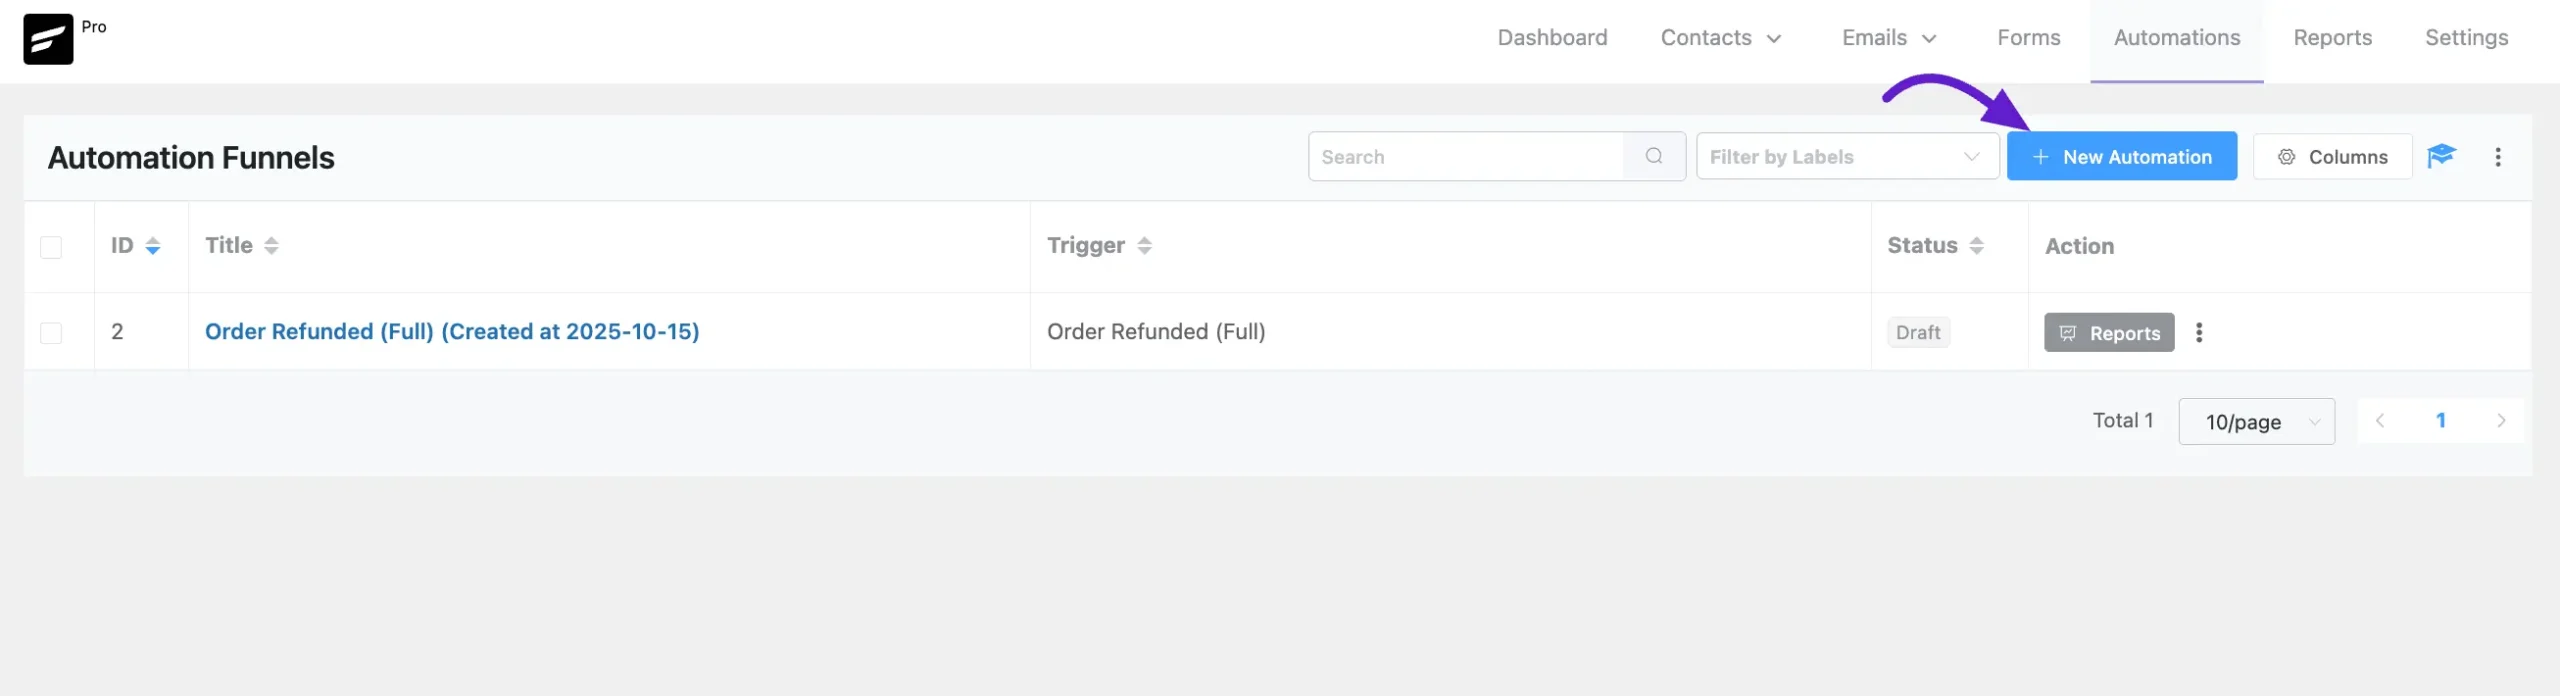
Automation Triggers for FluentCart #
FluentCRM provides a wide range of automation triggers for FluentCart, enabling you to launch automated workflows for key e-commerce events. When you create a new automation in FluentCRM, you’ll find a dedicated section for FluentCart triggers.
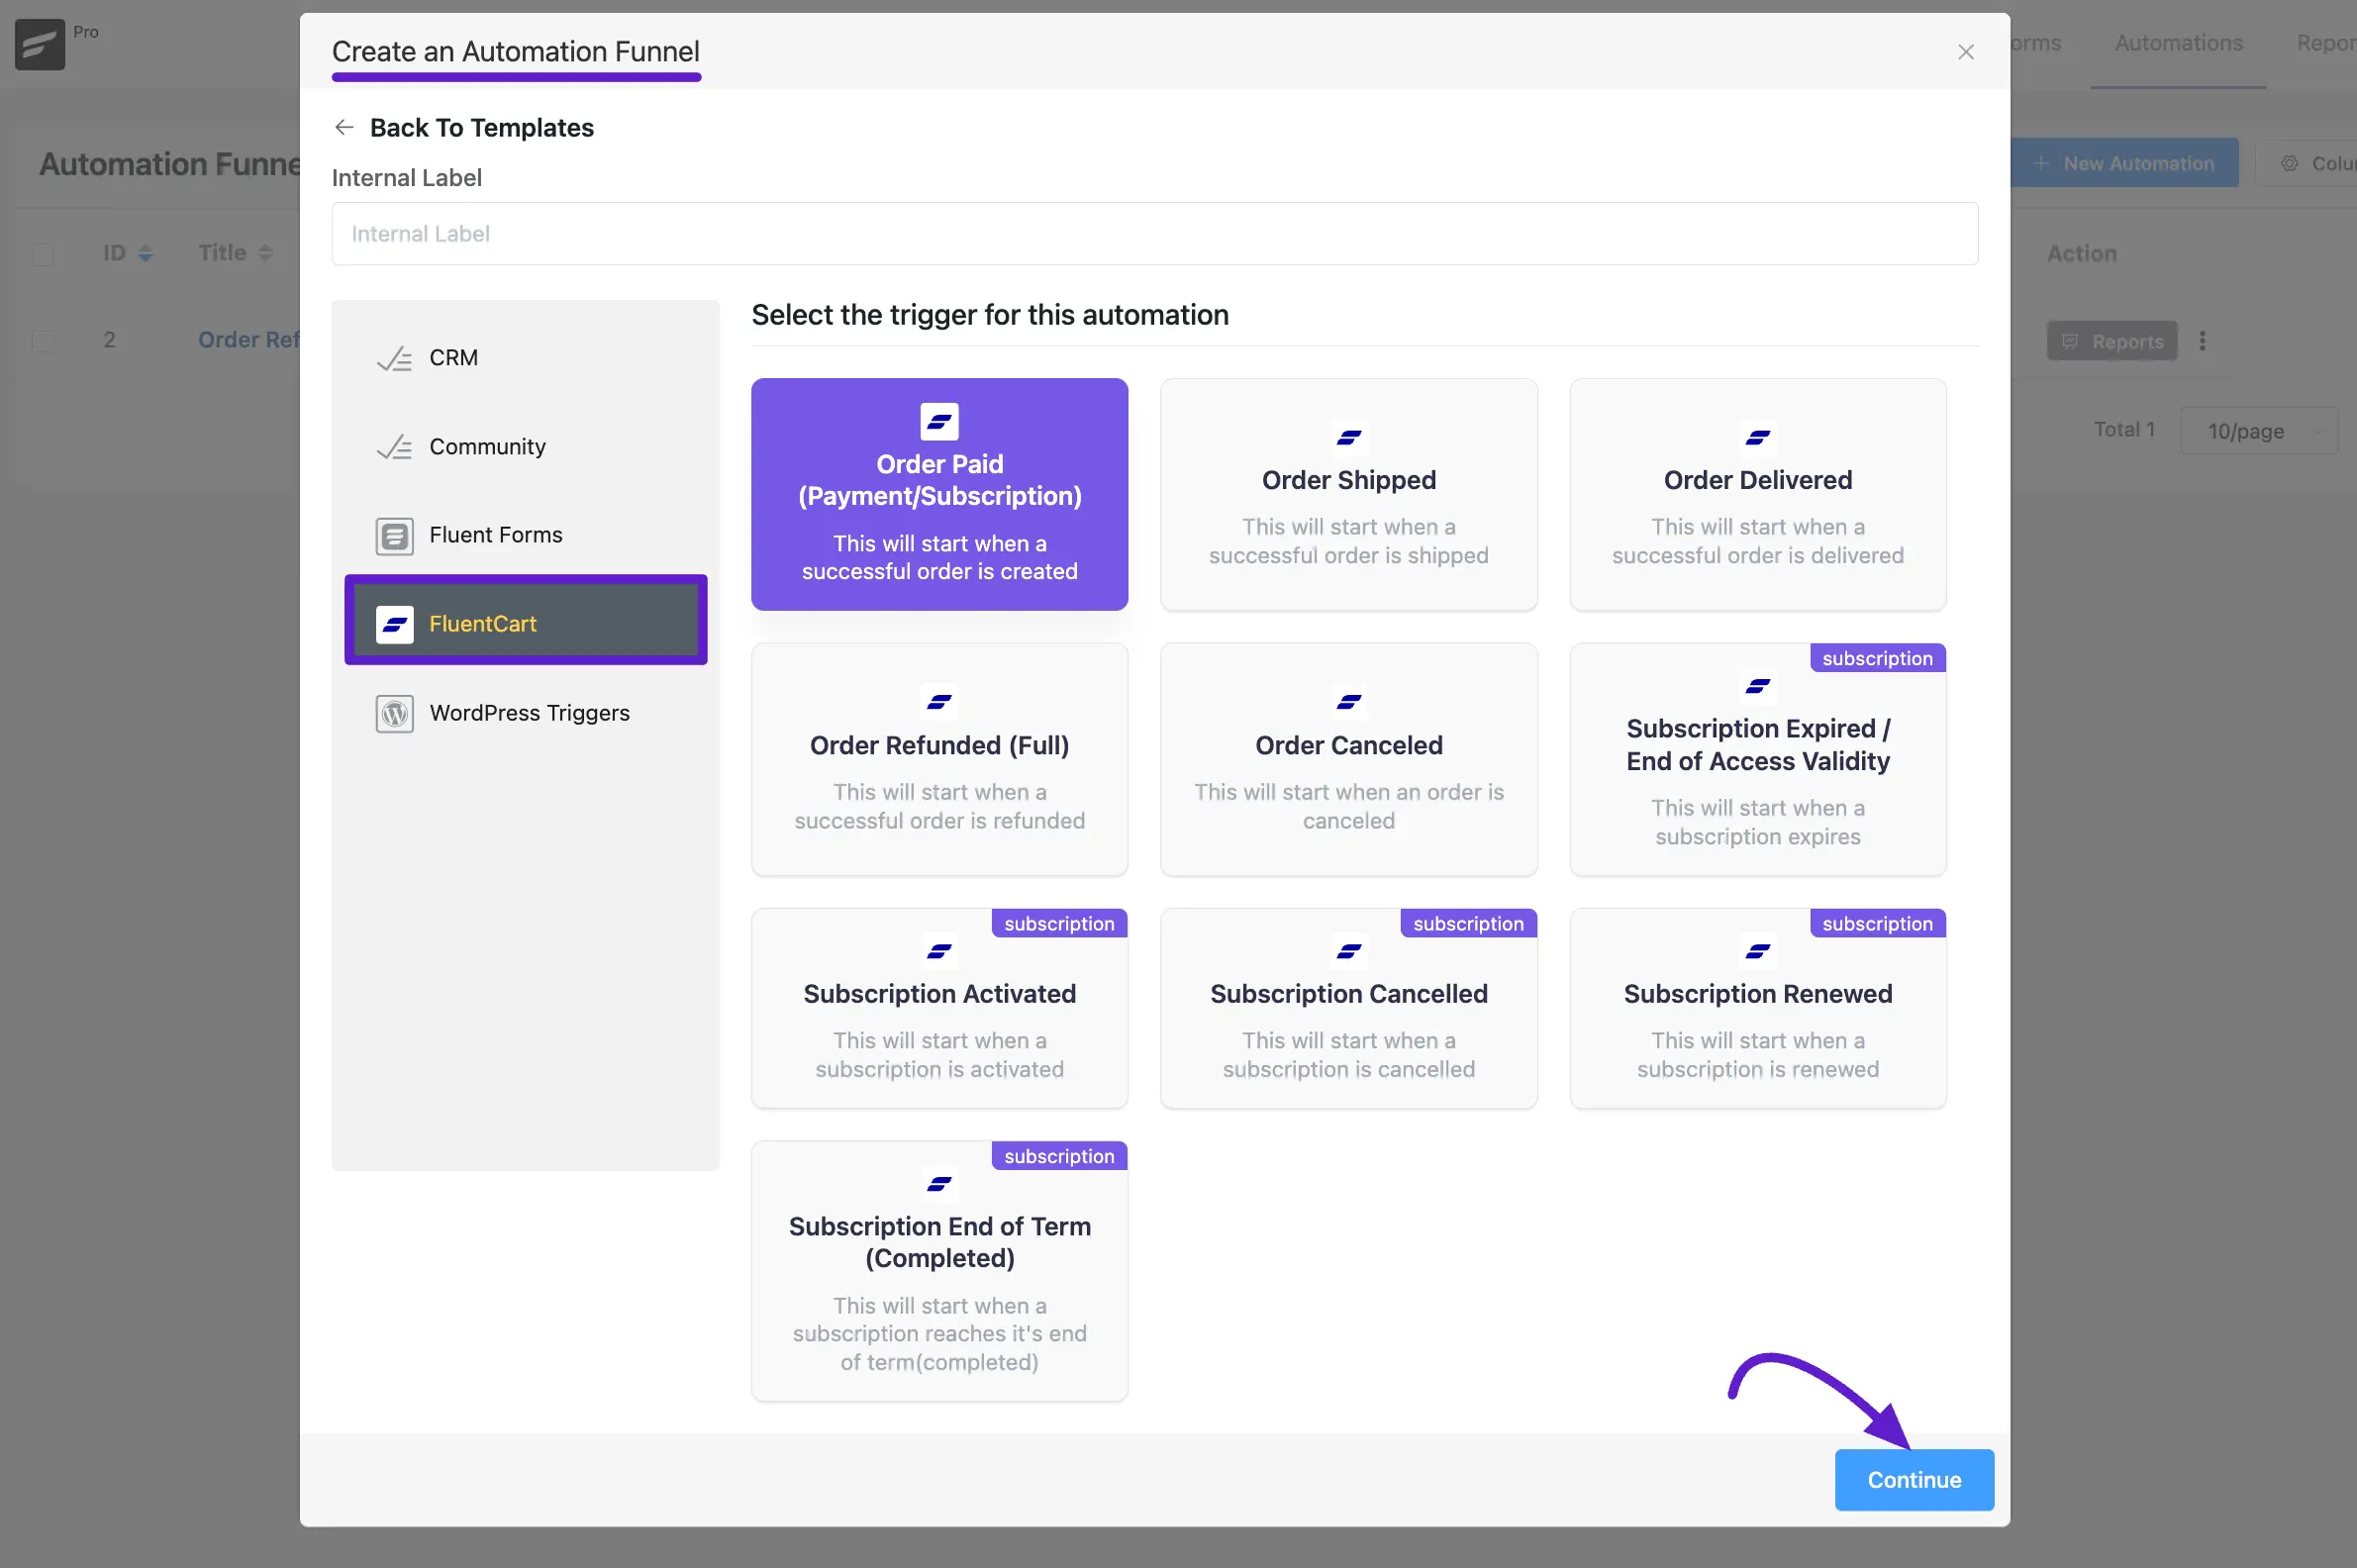
Go to FluentCRM → Automations and click the + New Automation button. Select an Automation Trigger from the available FluentAffiliate options, then click the Continue button to build your automation funnel as needed.
If you want to know more about how to create a complete automation, check out our documentation for detailed steps.
Available Automation Triggers #
Below are the triggers available for the FluentCart integration. Each one can be used to start a unique automation funnel.
- Order Paid (Payment/Subscription): This will start when a successful order is created. It’s perfect for sending order confirmation emails, starting a post-purchase follow-up sequence, or tagging customers based on what they bought.
- Order Shipped: This will start when a successful order is shipped. Use this to send shipping notification emails to your customers.
- Order Delivered: This will start when a successful order is delivered. Ideal for sending a follow-up email asking for a review or providing usage tips.
- Order Refunded (Full): This will start when a successful order is refunded. You can use this to tag the user, remove them from a list, and send an email to gather feedback on their experience.
- Order Canceled: This will start when an order is canceled. A great trigger for sending an email to understand why the customer canceled their order.
- Subscription Activated: This will start when a subscription is activated. Use this to begin a subscription onboarding email series.
- Subscription Canceled: This will start when a subscription is canceled. Perfect for triggering a survey or a special offer to win the customer back.
- Subscription Renewed: This will start when a subscription is renewed. A great opportunity to thank the customer for their loyalty.
- Subscription Expired / End of Access Validity: This will start when a subscription expires. Use this to trigger a final reminder or a last-chance offer to renew.
- Subscription End of Term (Completed): This will start when a subscription reaches its end of term/completion.
Order Paid (Payment/Subscription) #
After selecting the Order Paid (Payment/Subscription) trigger from the automation builder, a settings pop-up will appear where you can configure the trigger’s behavior.
First, you can set the Automation Name, which is the primary label for your funnel, and add an optional Internal Description for your own reference.
Next, configure the Subscription Status. By default, contacts entering this automation will be set to Subscribed. You can also check the box to Run the automation actions even contact status is not in subscribed status, if you need the automation to run for contacts with other statuses like “Pending”, “Transactional”, or “Unsubscribed“.
The Conditions section allows you to target the trigger with precision:
- Target Products: Start the automation only when specific products are purchased. Leave it blank to run for any product purchase.
- Or Target Product Categories: Alternatively, start the automation only when a product from a specific category is purchased. Leave it blank to run for any category.
- Restart the Automation Multiple times for a contact for this event: Enable this option if you want a contact to re-enter this automation every time they make a qualifying purchase. If this is disabled, a contact can only go through this specific automation funnel once.
Once you have configured the settings, click the Save Settings button to finalize the trigger and continue building your automation workflow.
The process of creating other automations is the same as setting up the Order Paid (Payment/Subscription) automation. This means you can easily create any e-commerce automation following the same steps.

Automation Actions for FluentCart #
After a FluentCart trigger starts an automation, you can use any of FluentCRM’s core action blocks to build a powerful and customized workflow. There are no specific “FluentCart” actions because the integration is designed to work seamlessly with all of FluentCRM’s native features.
For example, after an Order Paid trigger, you could:
- Use the Wait X Days/Hours action to delay a follow-up.
- Use Apply Tag to segment the customer based on the product they purchased.
- Use Send Custom Email to send a thank you note with related product suggestions.
- Use Add Notes & Activity to add a record of the purchase to the contact’s profile.
If you want to know more about automation actions, check out our documentation for detailed steps.
Contact Segmentation & Filtering with FluentCart Data #
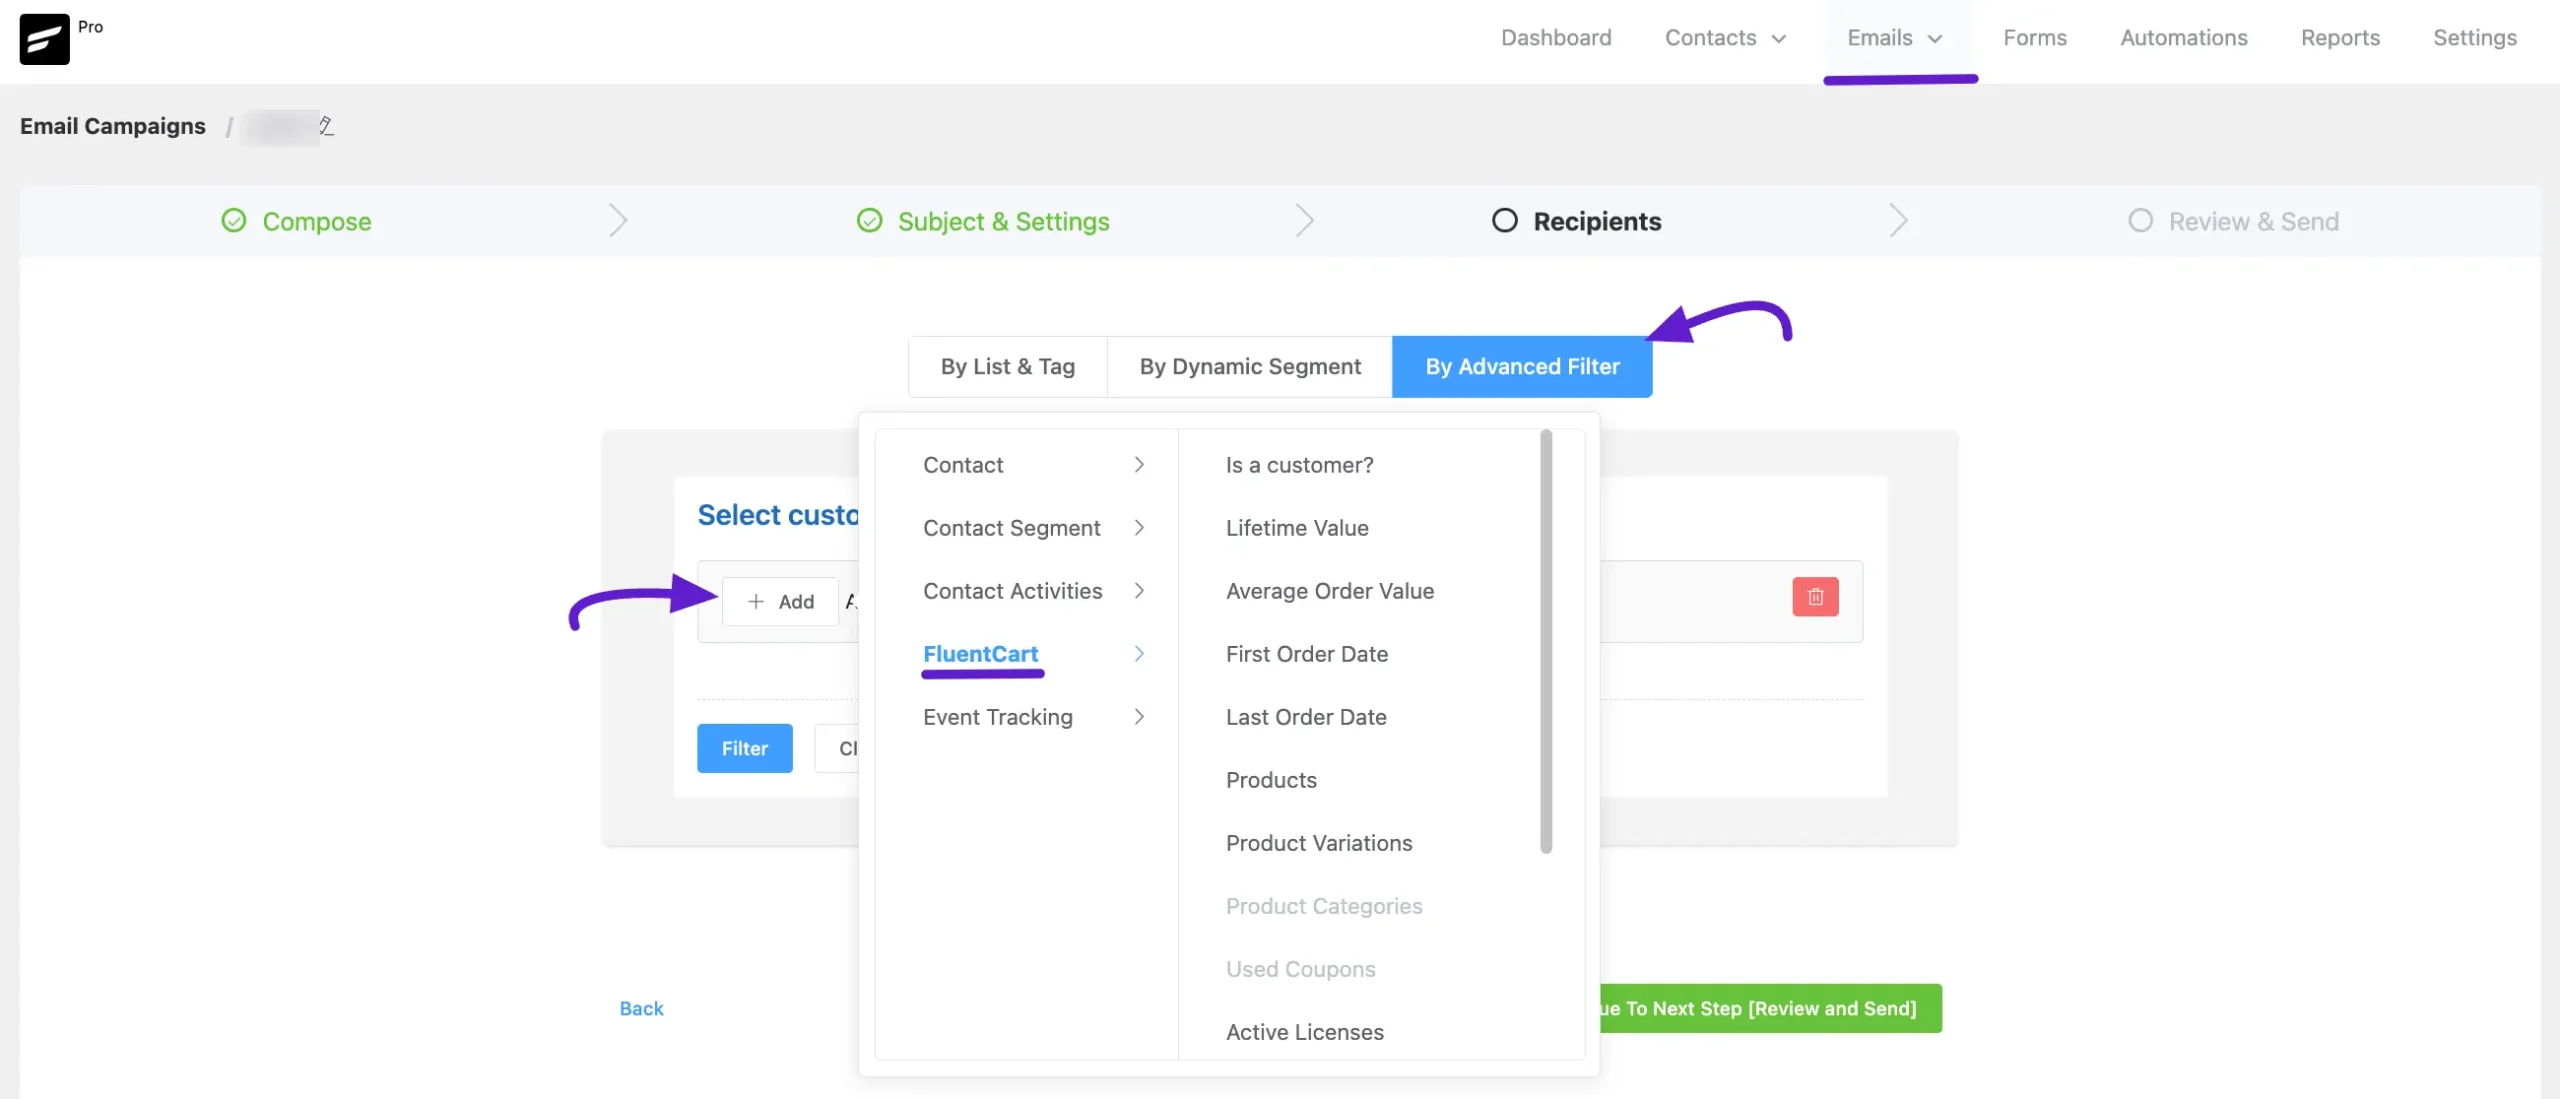
The integration allows you to filter and segment your contacts in FluentCRM based on their purchase history and data from FluentCart. This is useful for sending targeted email campaigns or for creating dynamic contact segments.
You can find these filtering options in Advanced Filters:
- In the main Contacts dashboard, enable the Advanced Filter by clicking the toggle button. Next, click the Add button and select FluentCart. This will display all the available advanced filters. Simply choose the filters you need and configure them according to your requirements.
The available FluentCart conditions for segmentation are:
- Is a customer?: Filter contacts based on whether they have ever made a purchase.
- Lifetime Value: Segment by the total amount a customer has spent.
- Average Order Value: Filter contacts based on their average purchase amount.
- First Order Date: Find customers who made their first purchase within a specific date range.
- Last Order Date: Segment customers based on when they last made a purchase.
- Products: Filter for customers who have purchased specific products.
- Product Variations: Filter based on specific product variations purchased.
- Product Categories: Segment customers who have bought items from certain categories.
- Used Coupons: Find all contacts who have used a specific coupon code.
- Active Licenses: Filter based on currently active licenses.
- Expired Licenses: Find contacts with expired licenses.
- Has any active license?: Segment contacts based on whether they have any active licenses or not.

2. These same advanced filters are also available when setting up the Recipients for an Email Campaign, allowing you to send highly targeted broadcasts to specific customer groups.
If you have any further queries regarding this article, please do not hesitate to contact our support team.


