FluentCommunity connects directly with FluentCRM, allowing your community data to be used inside your marketing automation workflows. You can trigger automations based on course enrollments, group members by their Space participation, and send targeted email campaigns to engage your community.
In this article, you’ll learn how the FluentCommunity and FluentCRM integration works and what features it offers.
Connecting FluentCRM with FluentCommunity #
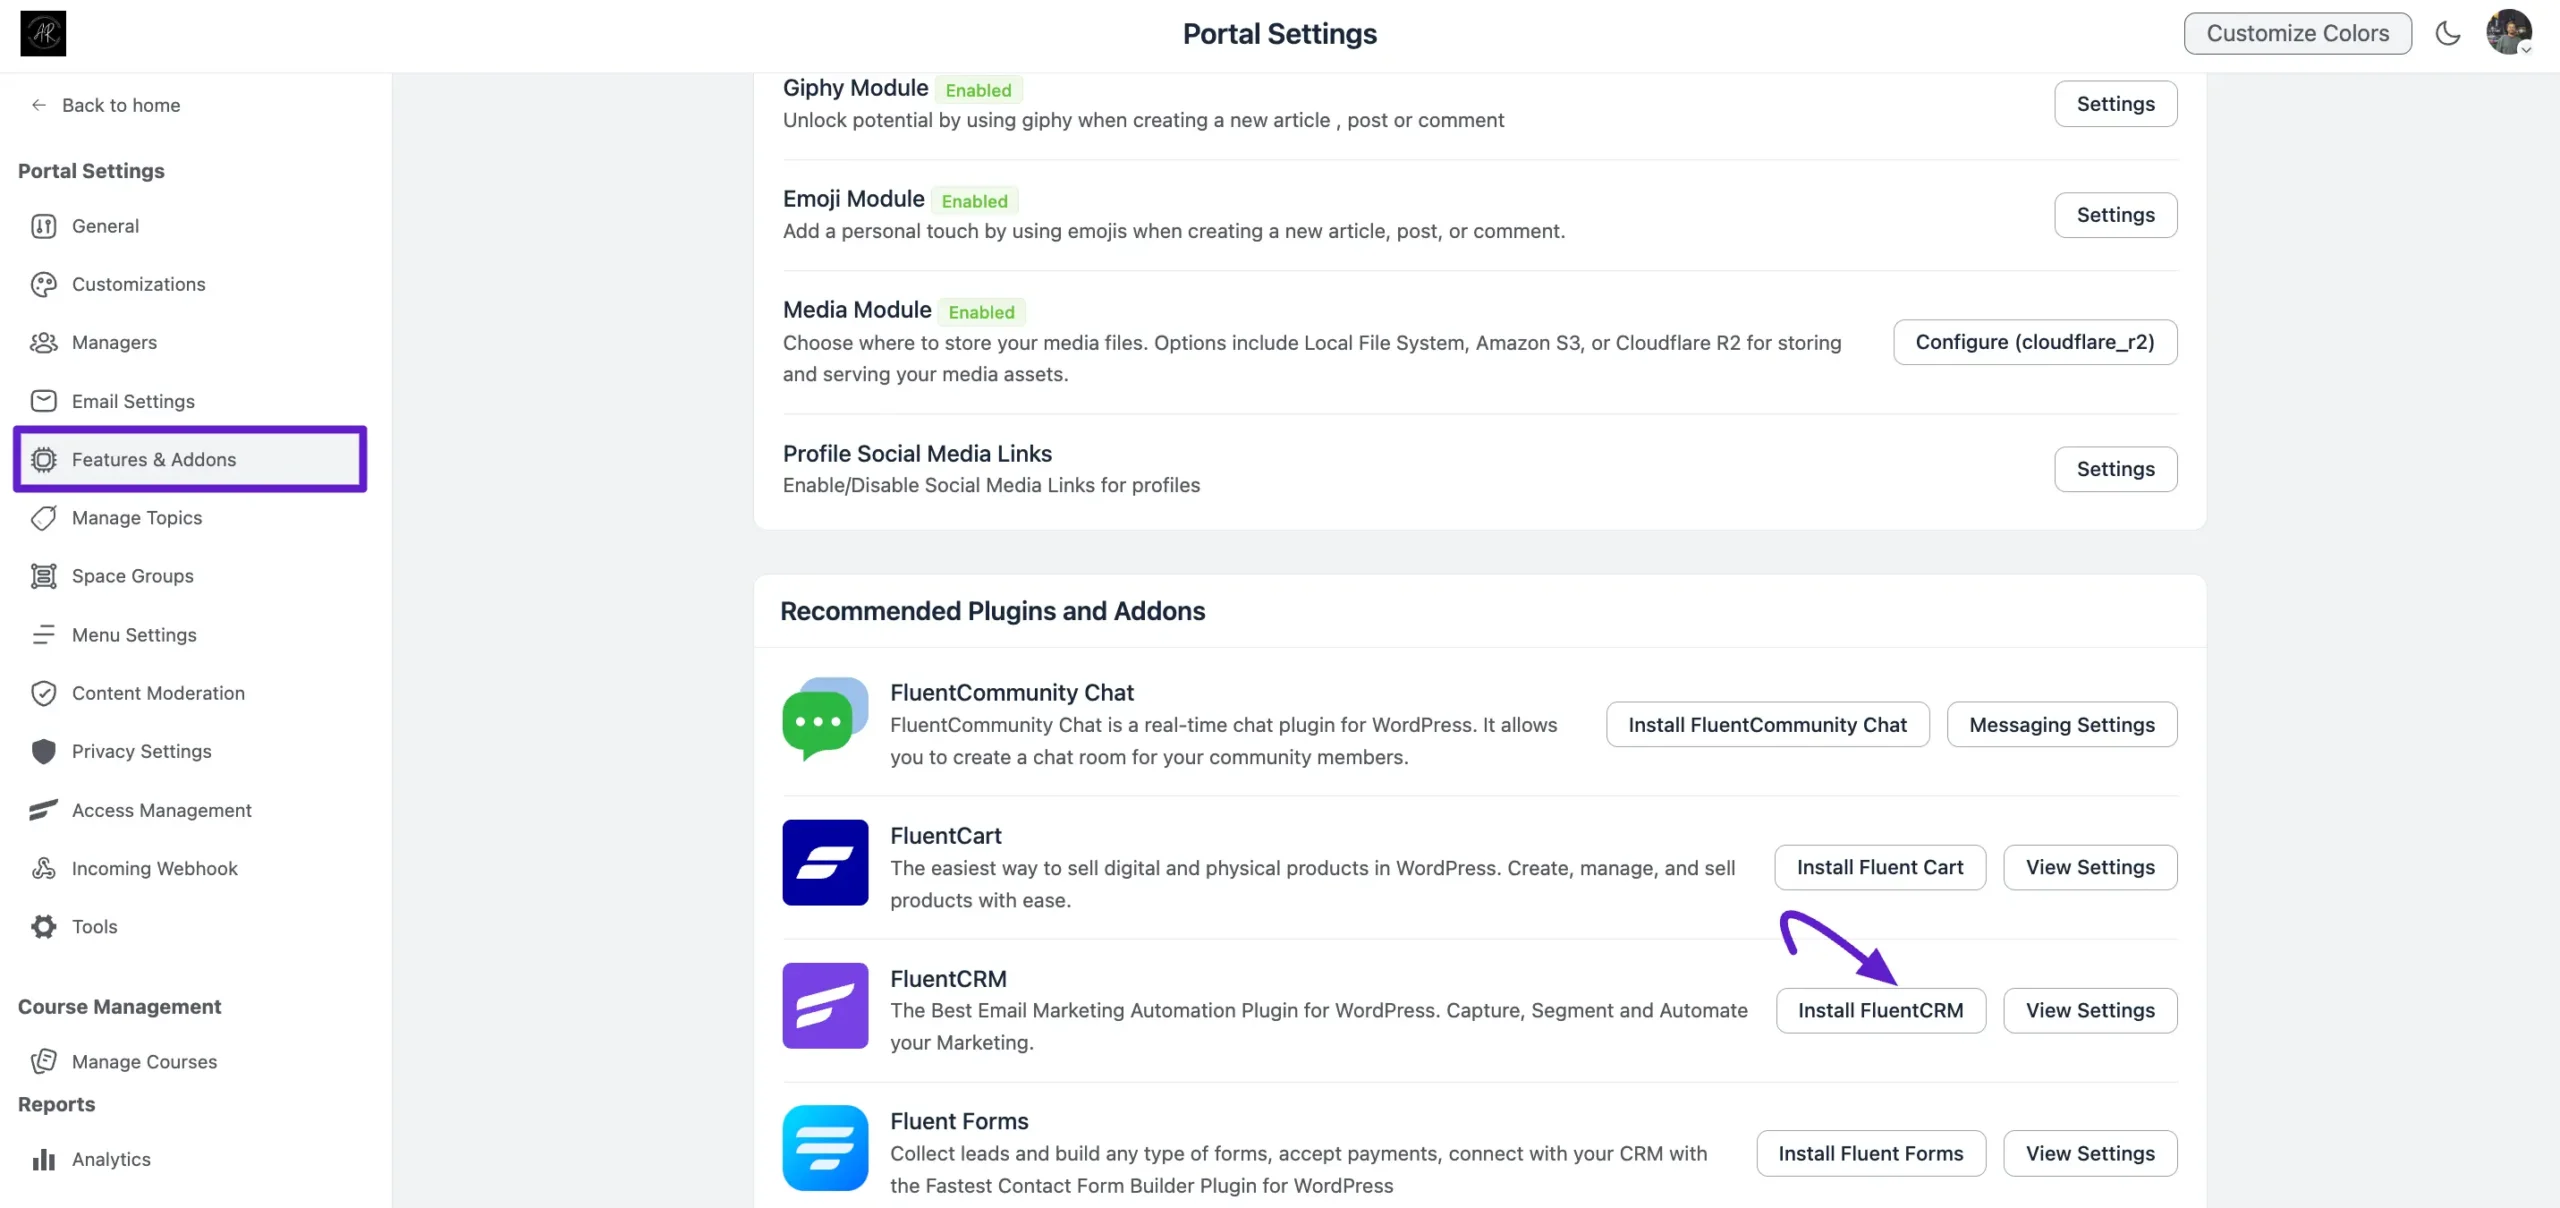
First, go to Settings in your FluentCommunity dashboard. Open the Features & Addons tab and locate the Recommended Plugins section. Then, click Install FluentCRM to automatically set up the integration.
Note: The free version of FluentCRM is sufficient to perform all automated tasks for FluentCommunity.
Automation Triggers for FluentCommunity #
FluentCRM offers dedicated automation triggers for FluentCommunity, allowing you to initiate workflows based on key member activities.
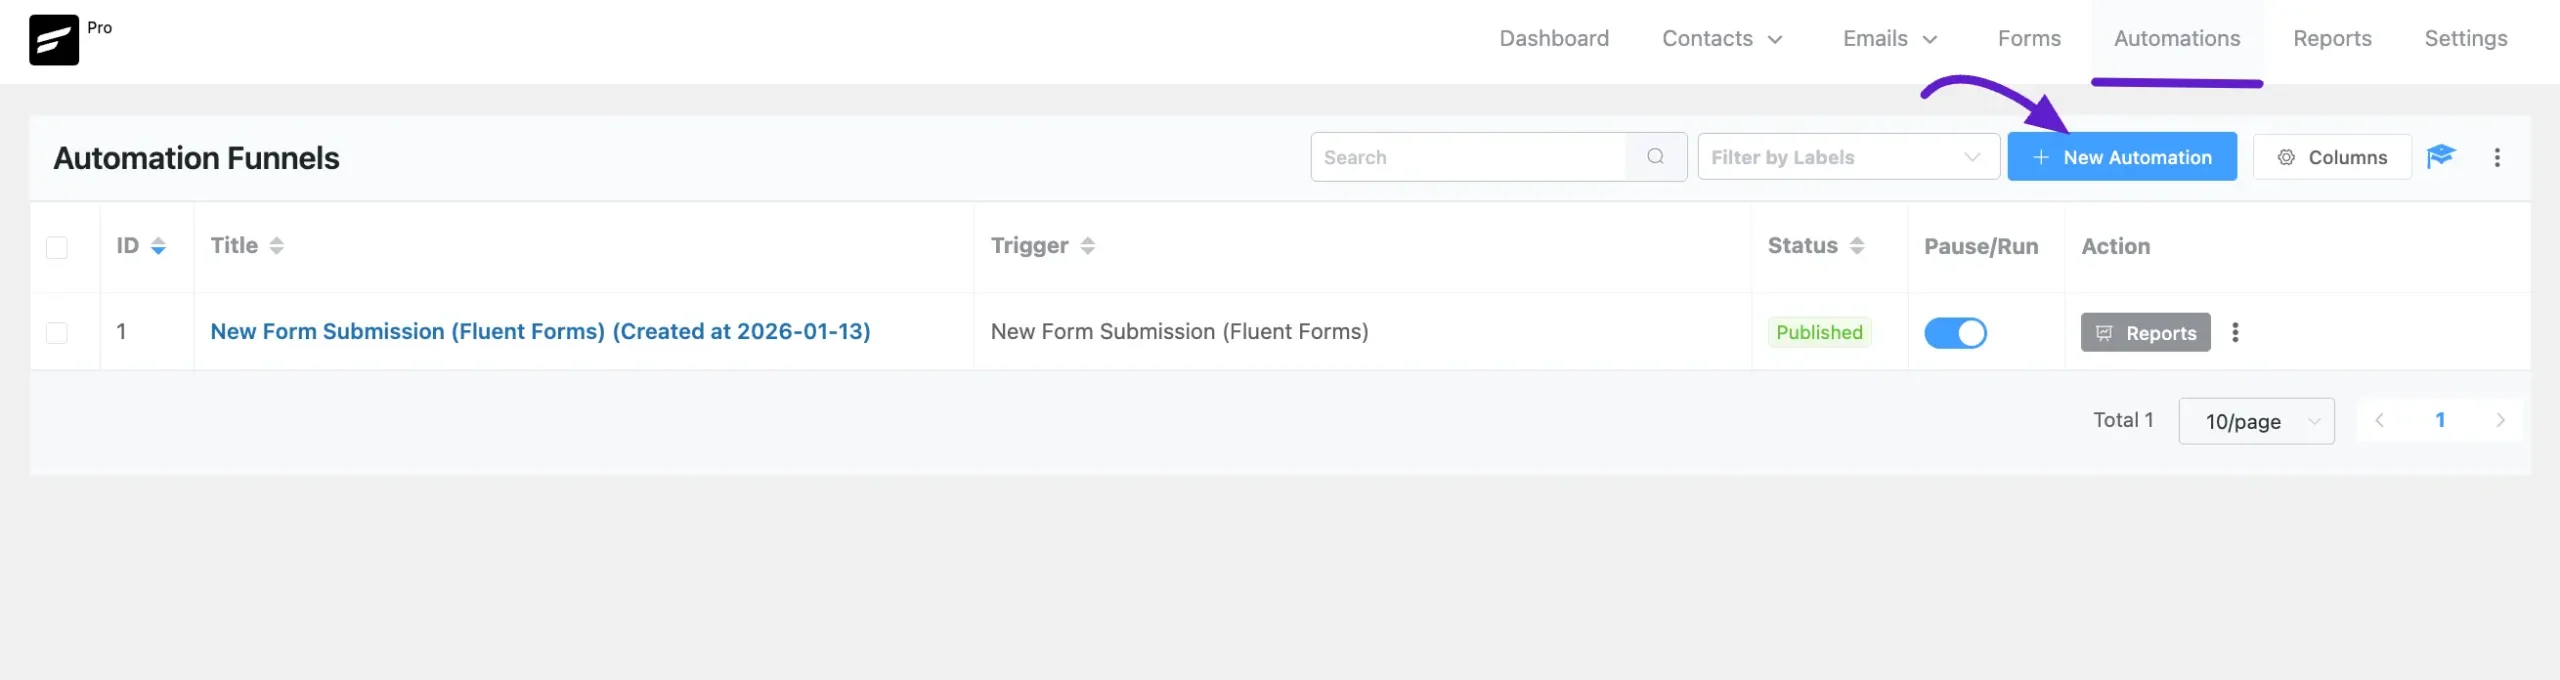
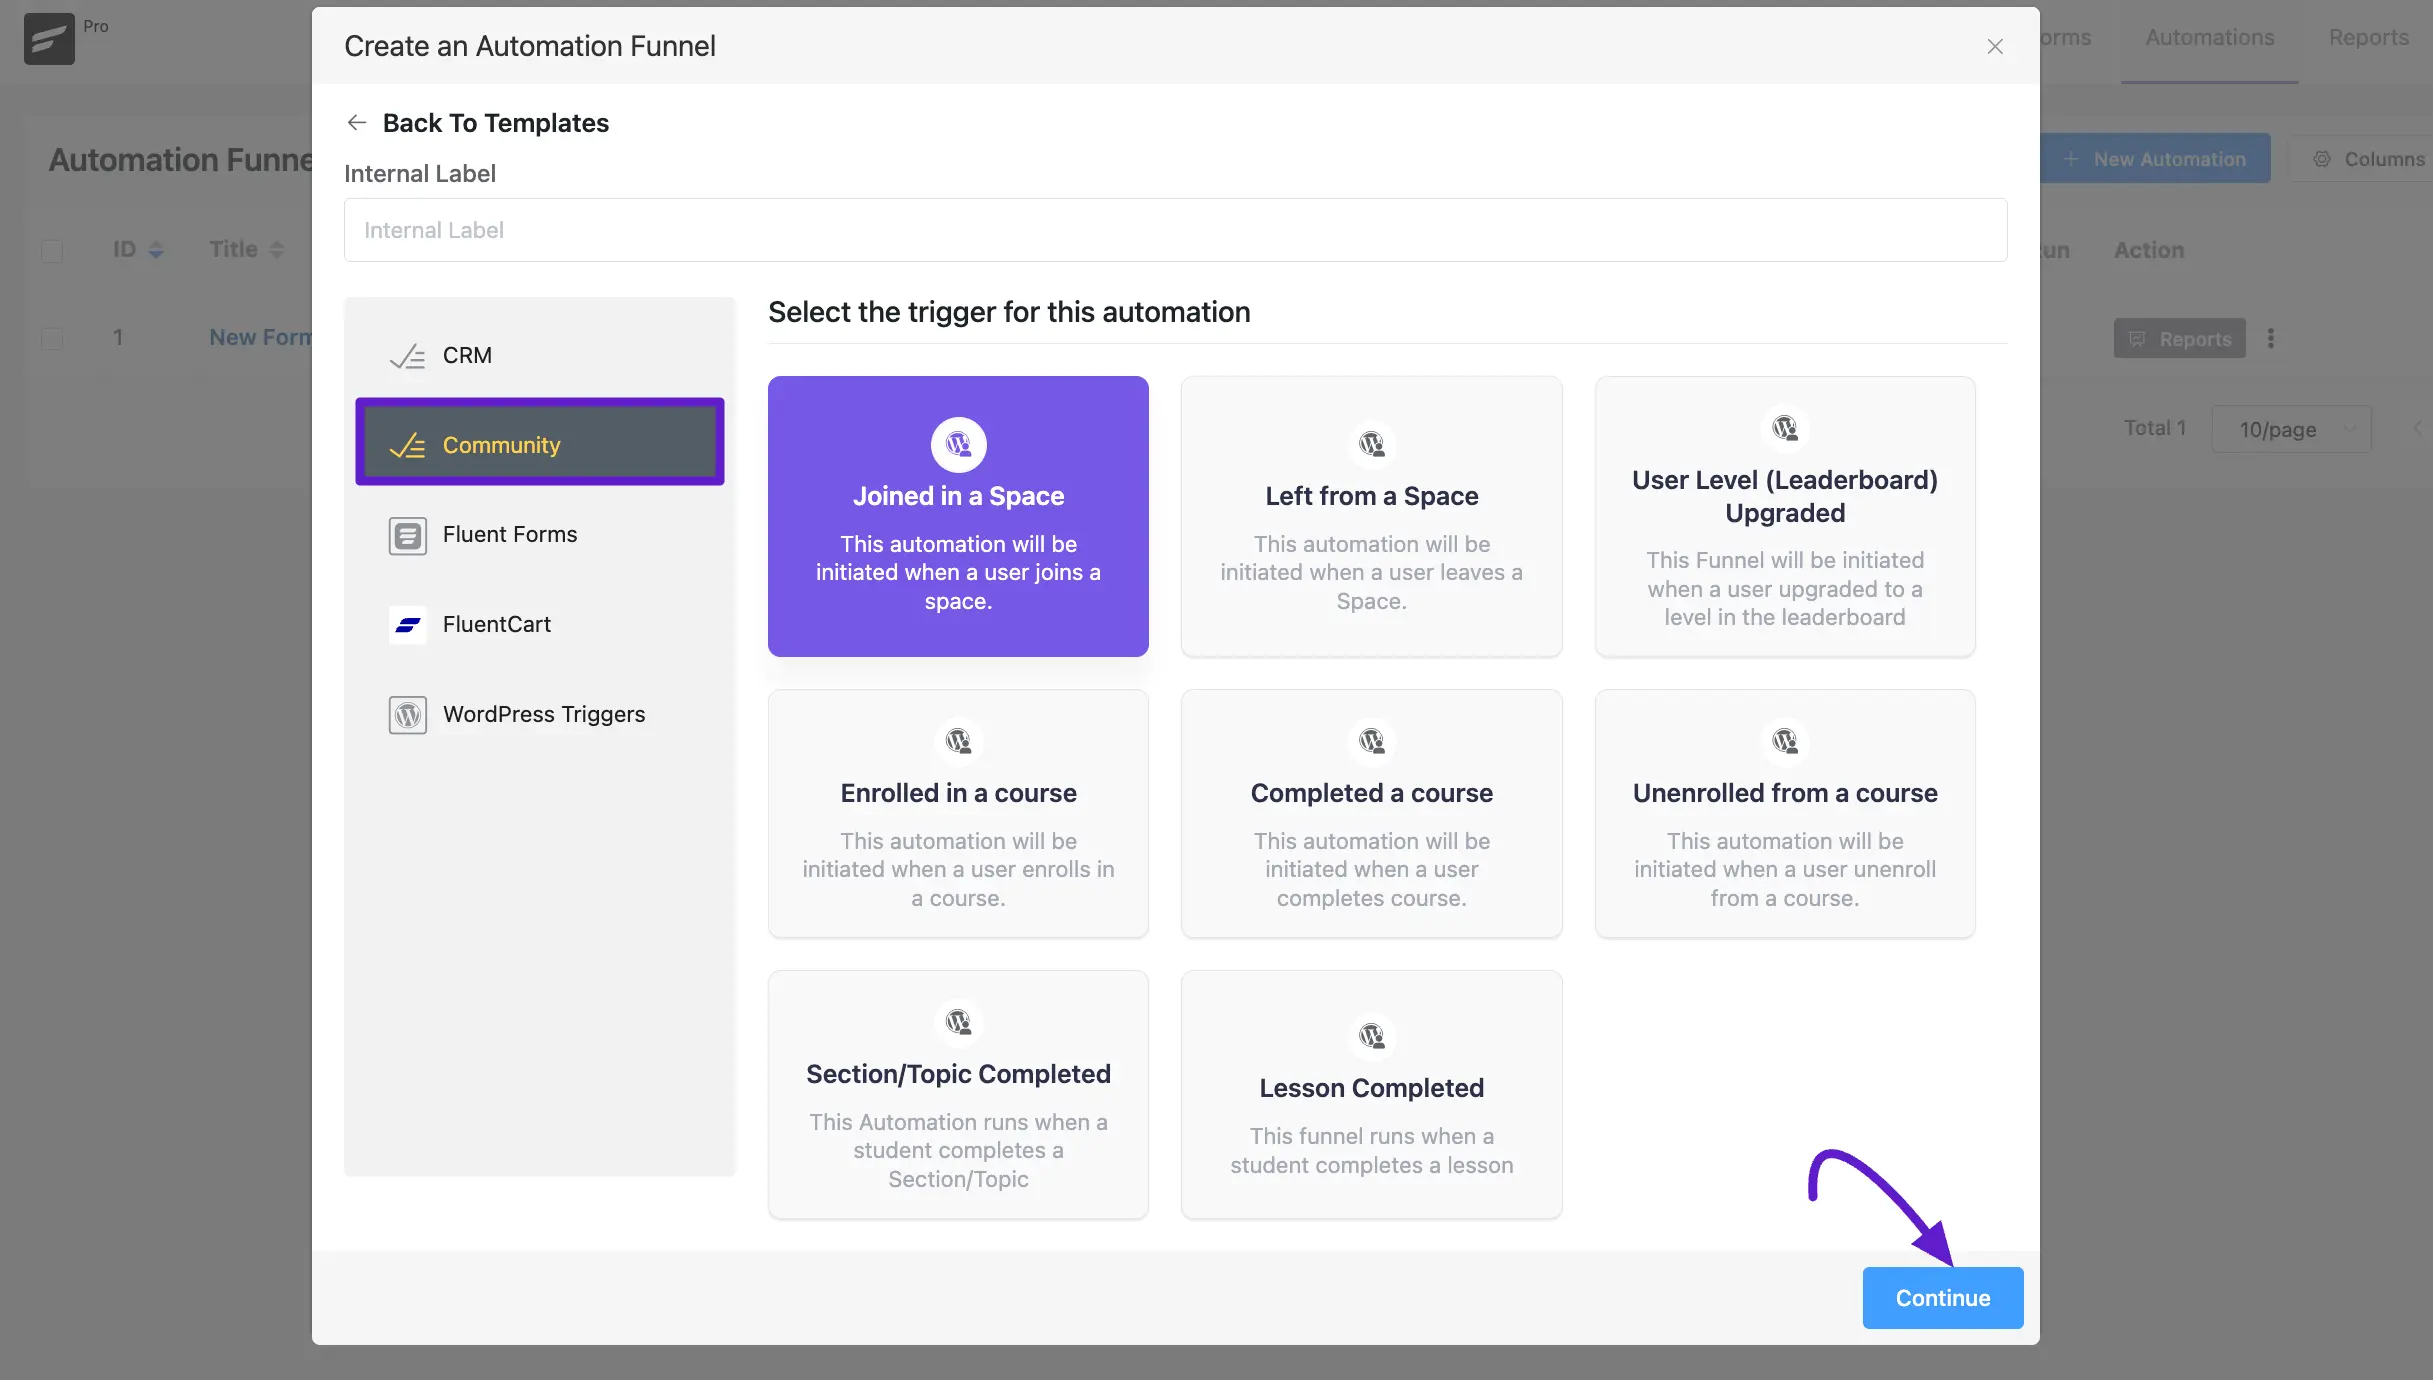
To access these, go to FluentCRM → Automations, click + New Automation, and select the Community category from the sidebar.
Available Automation Triggers #
- Joined in a Space: Triggered when a member joins a specific Space. Perfect for sending automated “Welcome” guides or specialized onboarding emails.
- Left from a Space: If you select this trigger, automation will start when a user leaves a Space in FluentCommunity.
- User Level (Leaderboard) Upgraded: Triggered when a member reaches a new level. Ideal for sending congratulatory messages, awarding badges, or unlocking special offers.
- Enrolled in a Course: If you select this trigger, automation will start when a user enrolls in a course in FluentCommunity.
- Completed a course: Triggered once a user finishes a course.
- Unenrolled from a Course: Initiated if a user unenrolls, helping you automate follow-ups or administrative cleanup.
- Section/Topic Completed: Runs when a student completes a specific section or topic within a course.
- Lesson Completed: Runs when a student completes an individual lesson.
Once you select your desired Trigger, click the Continue button. Also, you can give a Title to your Automation in the Internal Label field for easy referencing later. But if you leave it blank, the title will be automatically set based on your chosen trigger.
In addition to the triggers listed below, FluentCRM includes many more triggers. Click here to view the full list.
Automation Actions for FluentCommunity #
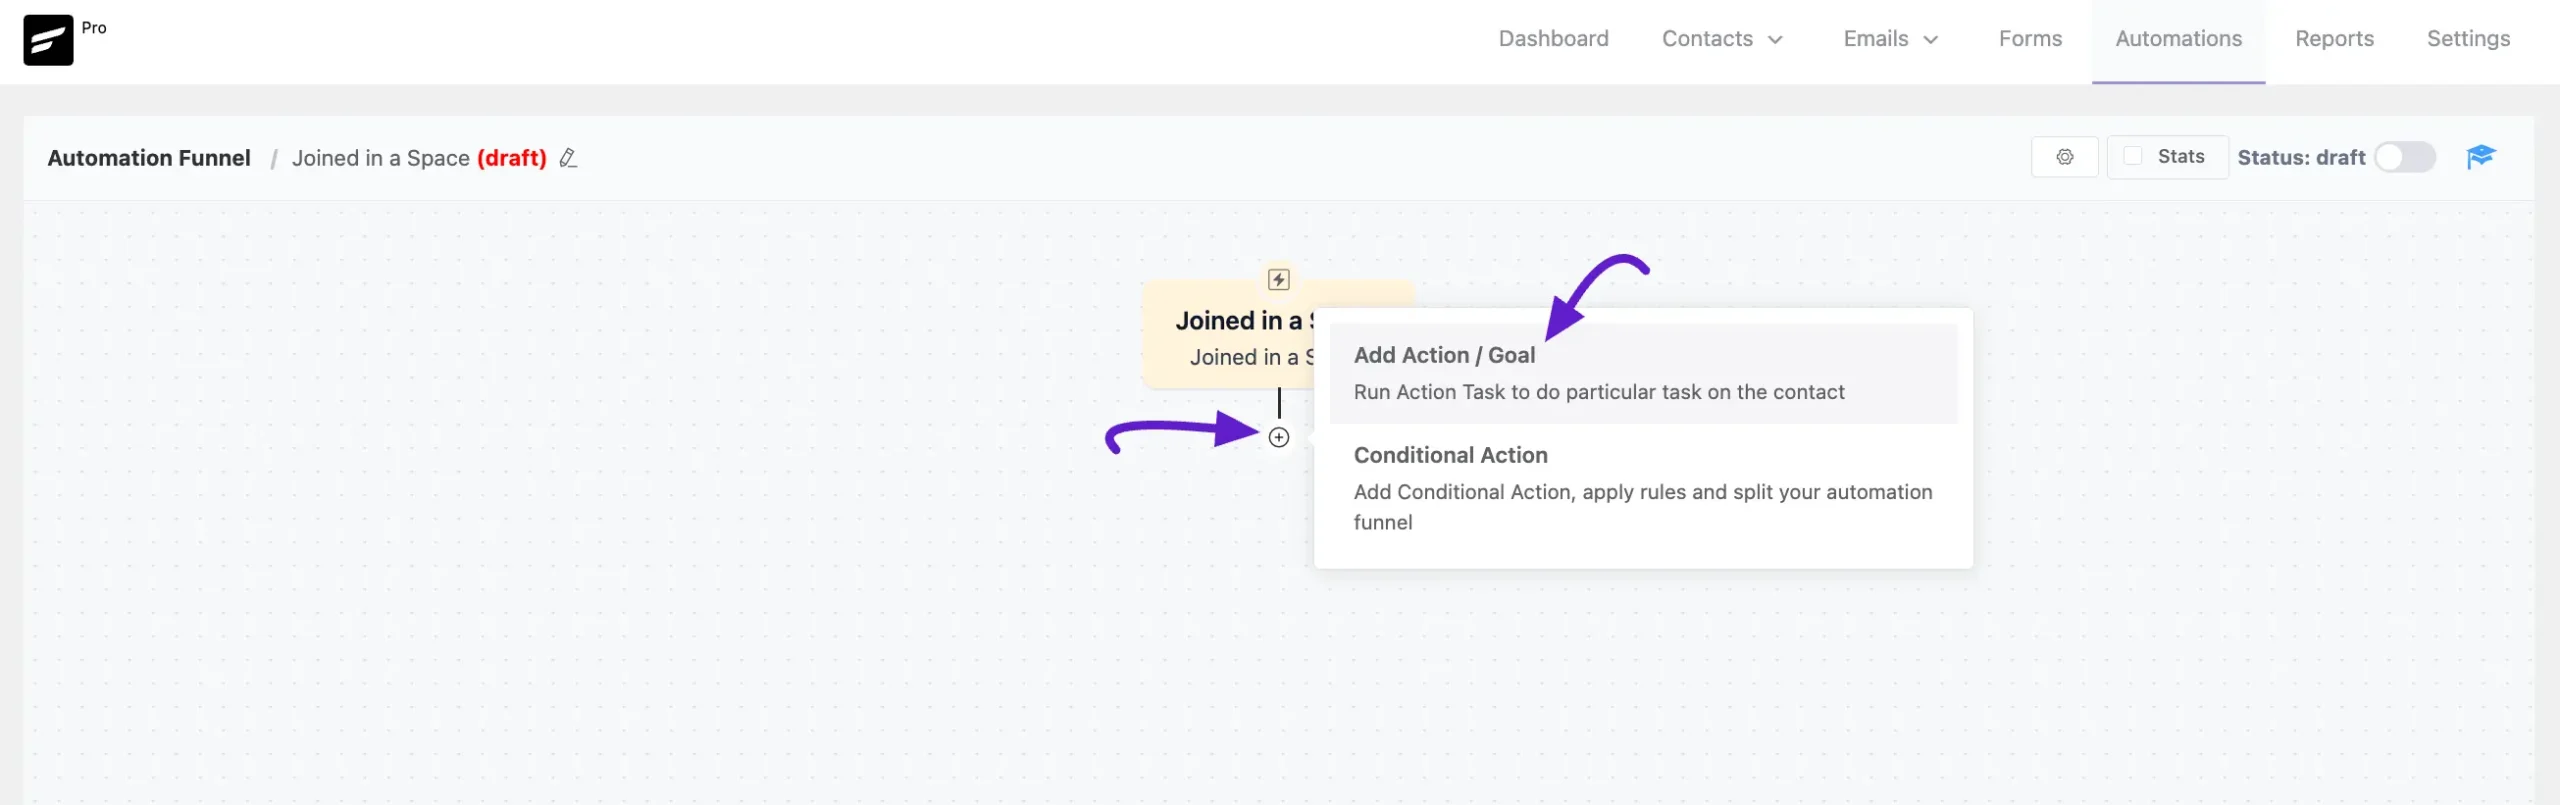
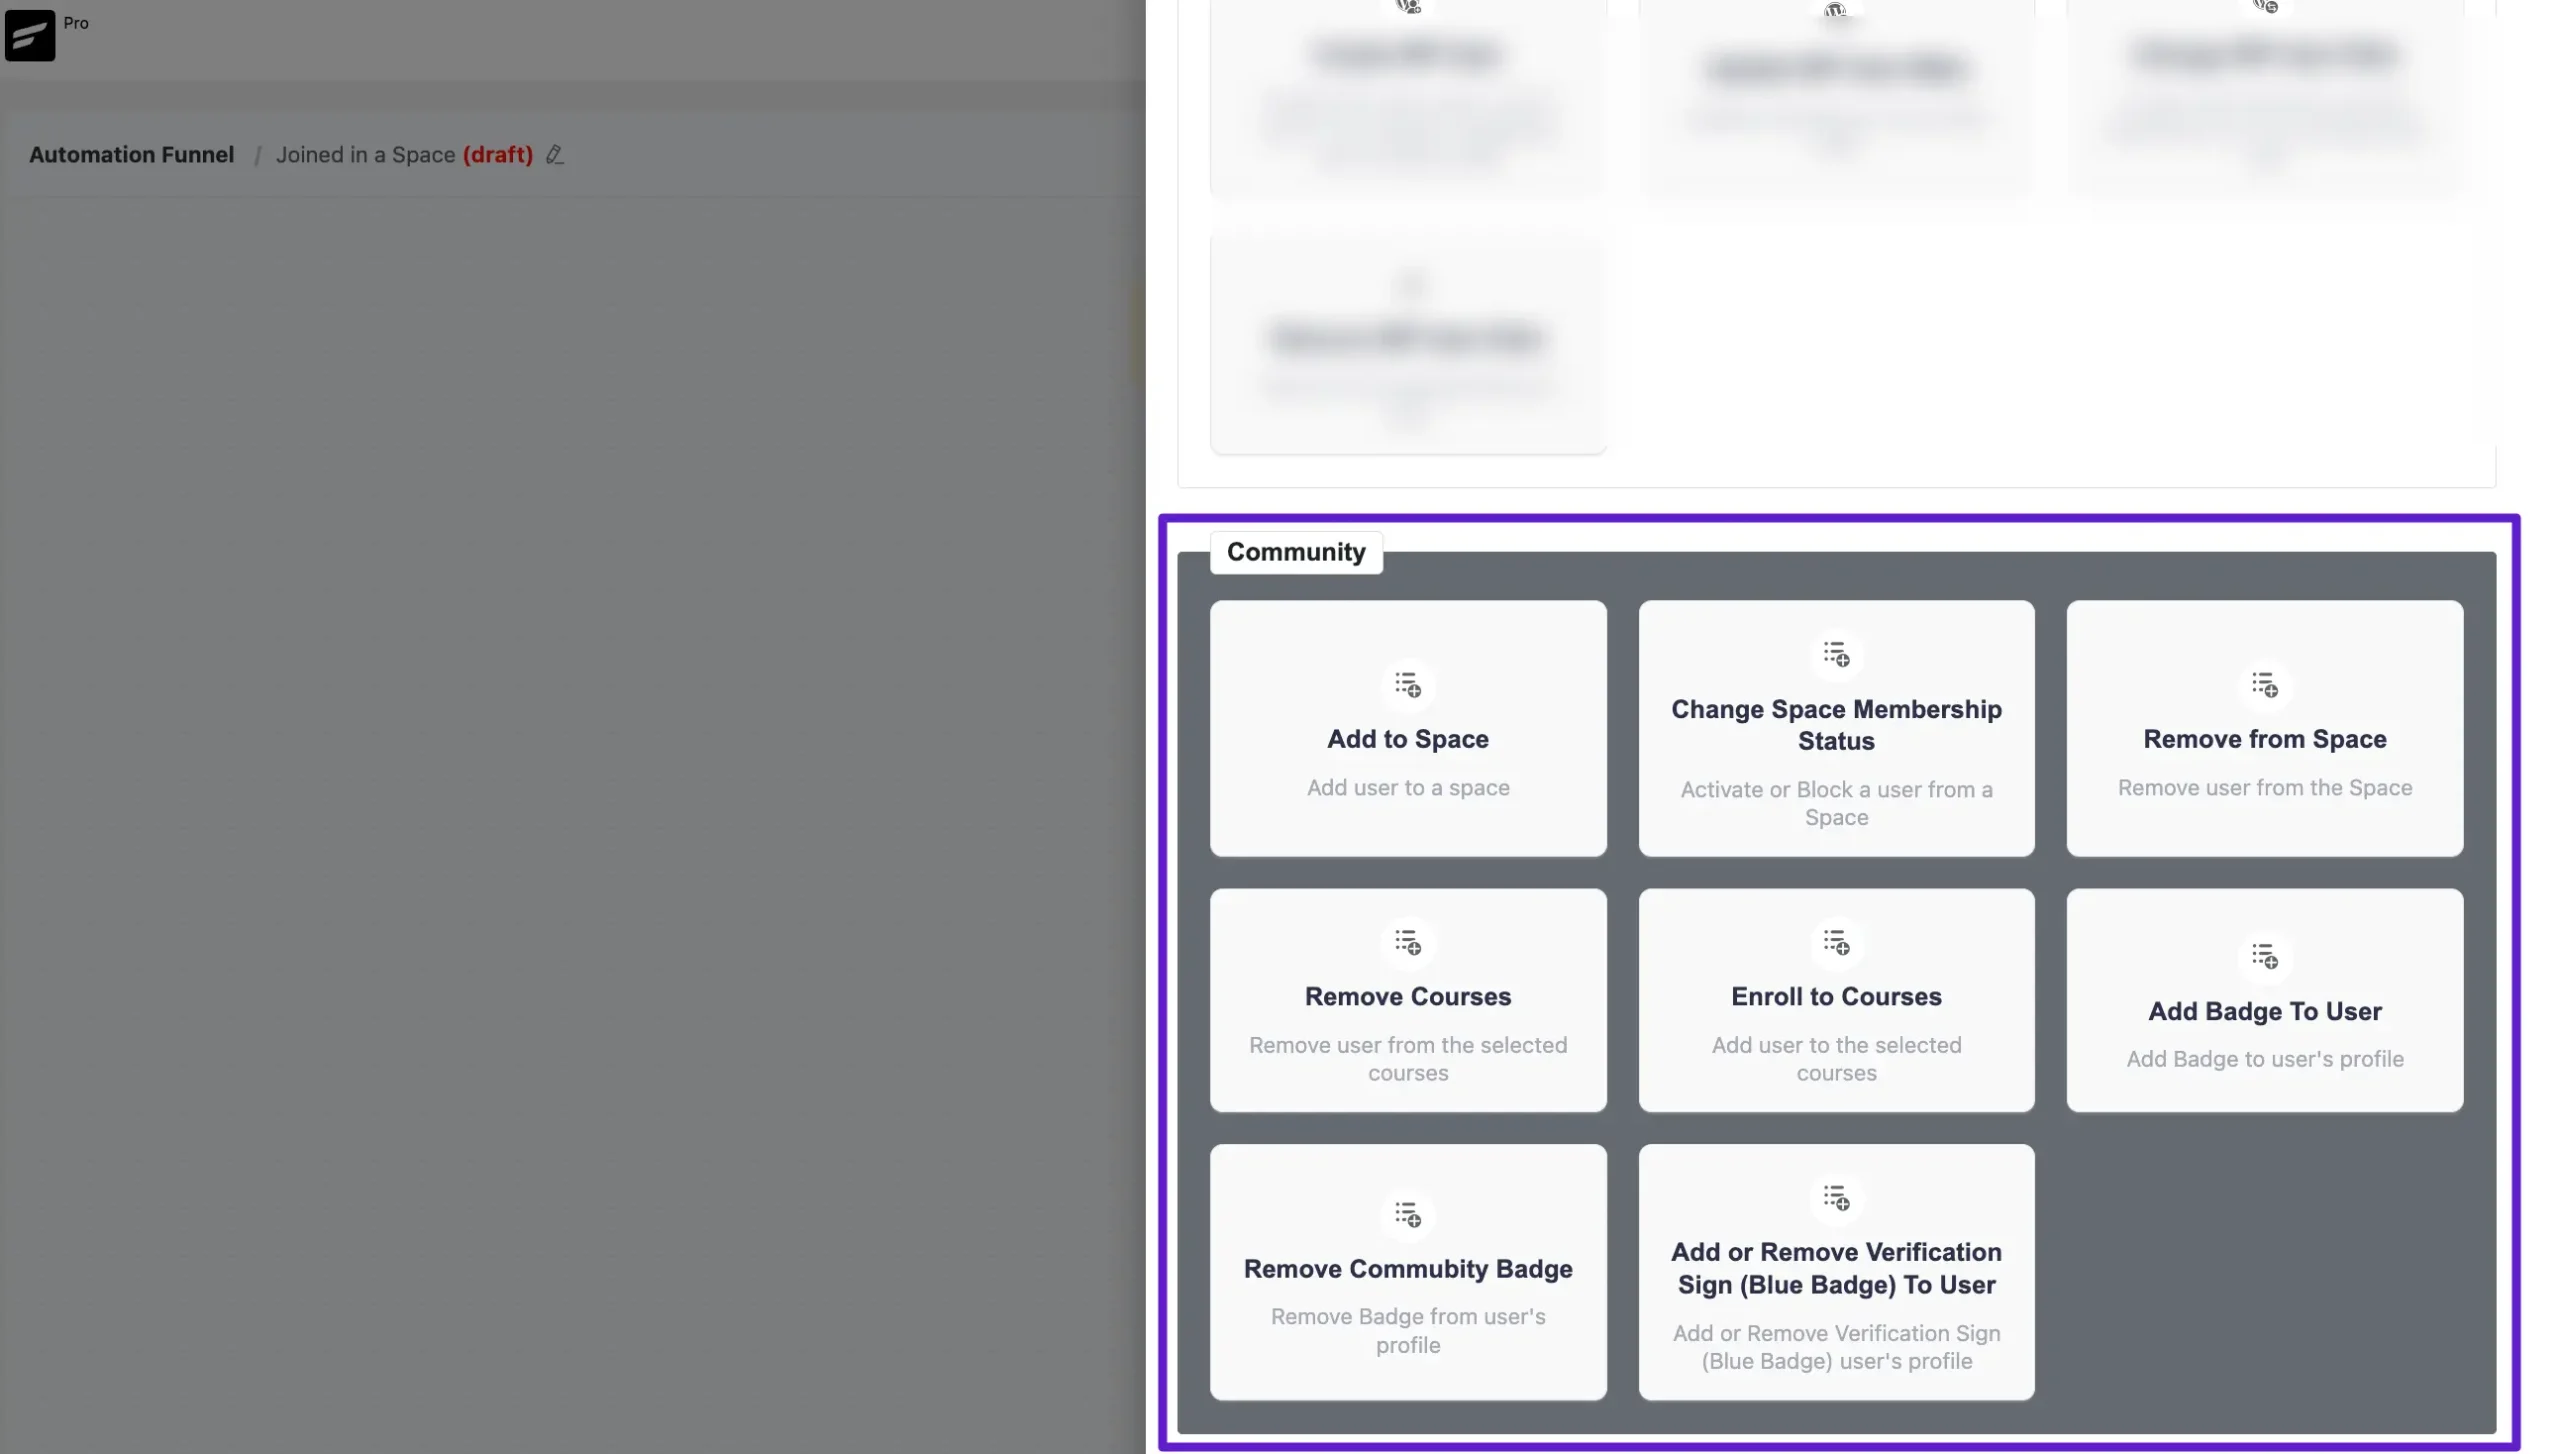
Click the Plus (+) icon, or hover over it and select Add Action / Goal, to see all available FluentCommunity actions.
Available Automation Actions #
- Add to Space: This action allows you to automatically add a user to a specific Space within your community.
- Change Space Membership Status: Use this to activate or block a user’s membership within a Space.
- Remove from Space: This action automatically removes a user from a designated Space.
- Remove Courses: This enables you to remove a user from specific selected courses.
- Enroll to Courses: This action automatically adds a user to your selected community courses.
- Add Badge To User: This allows you to award a specific badge to a user’s community profile as they progress through the funnel.
- Remove Community Badge: Use this action to remove a specific badge from a user’s profile.
- Add or Remove Verification Sign (Blue Badge) To User: This specific action allows you to grant or revoke the verification “Blue Badge” for a user’s profile.
Bulk Contact Management #
You can manage community access directly from your contact list without setting up a full automation.
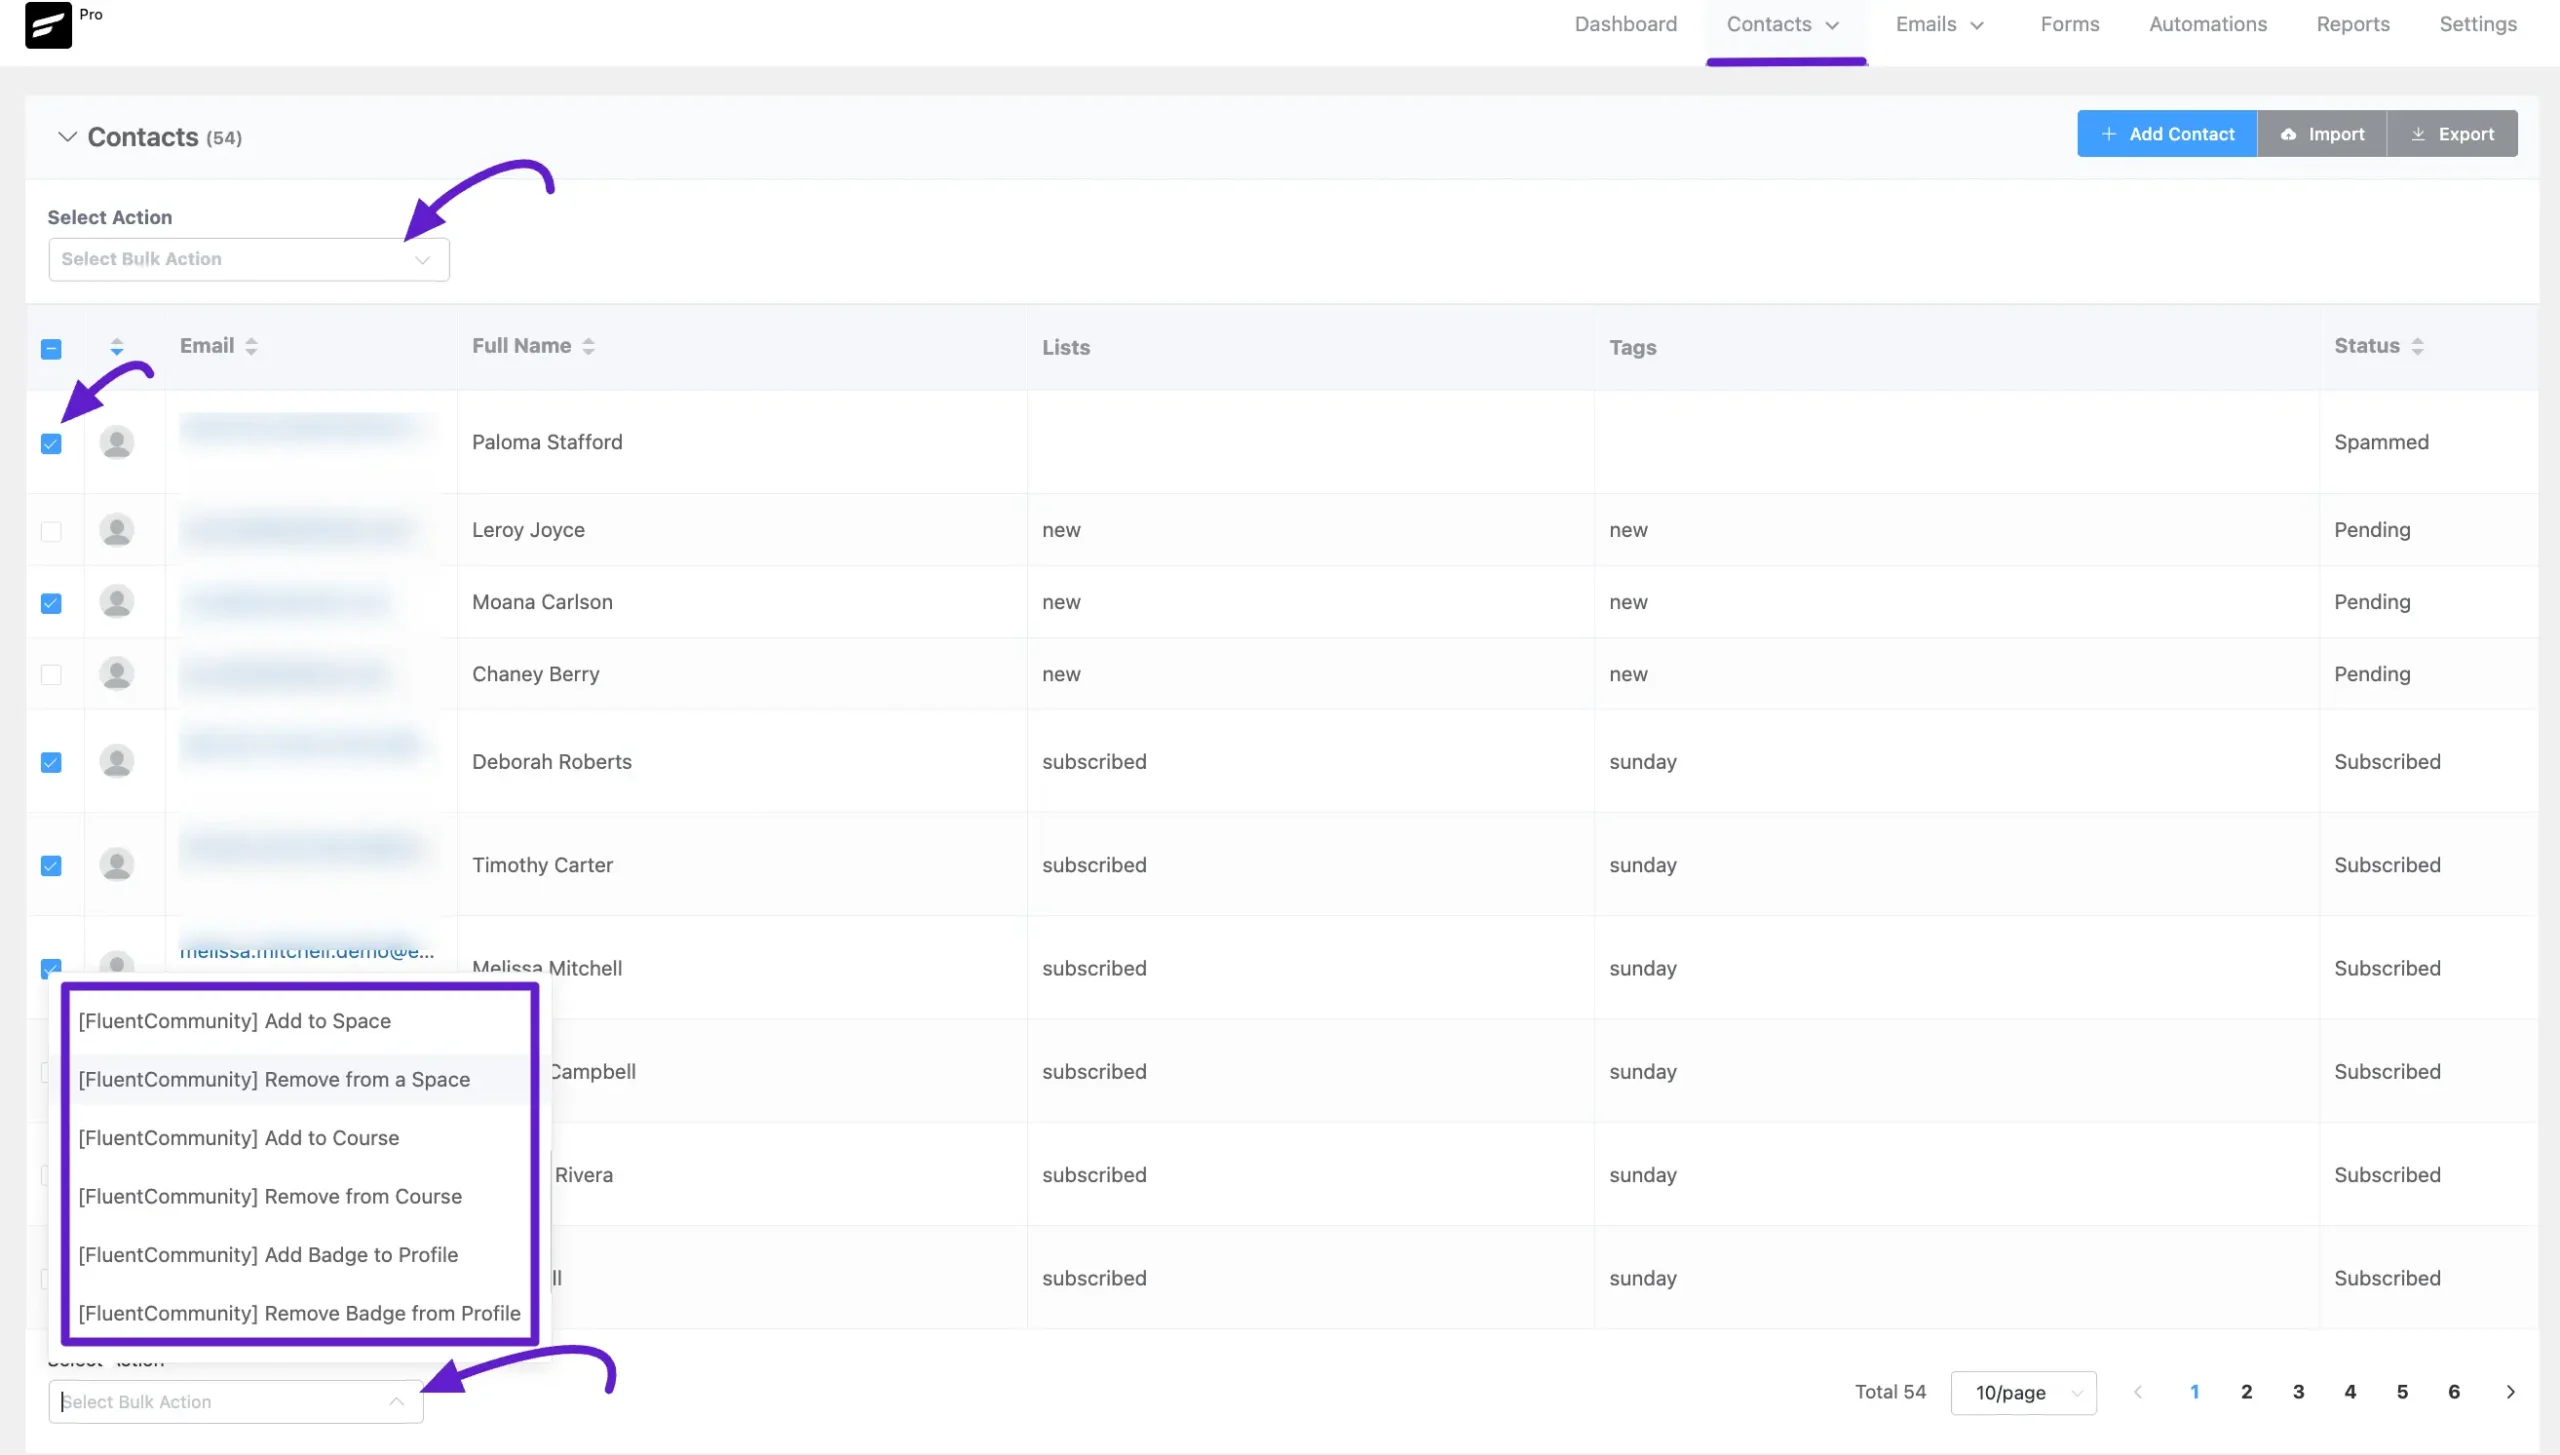
First, go to Contacts → All Contacts from the FluentCRM navigation menu. Next, select the contacts you want either individually by checking the boxes or all at once by clicking the checkbox before the Email column.
Then, open the Select Action dropdown and choose the FluentCommunity action you want to apply.
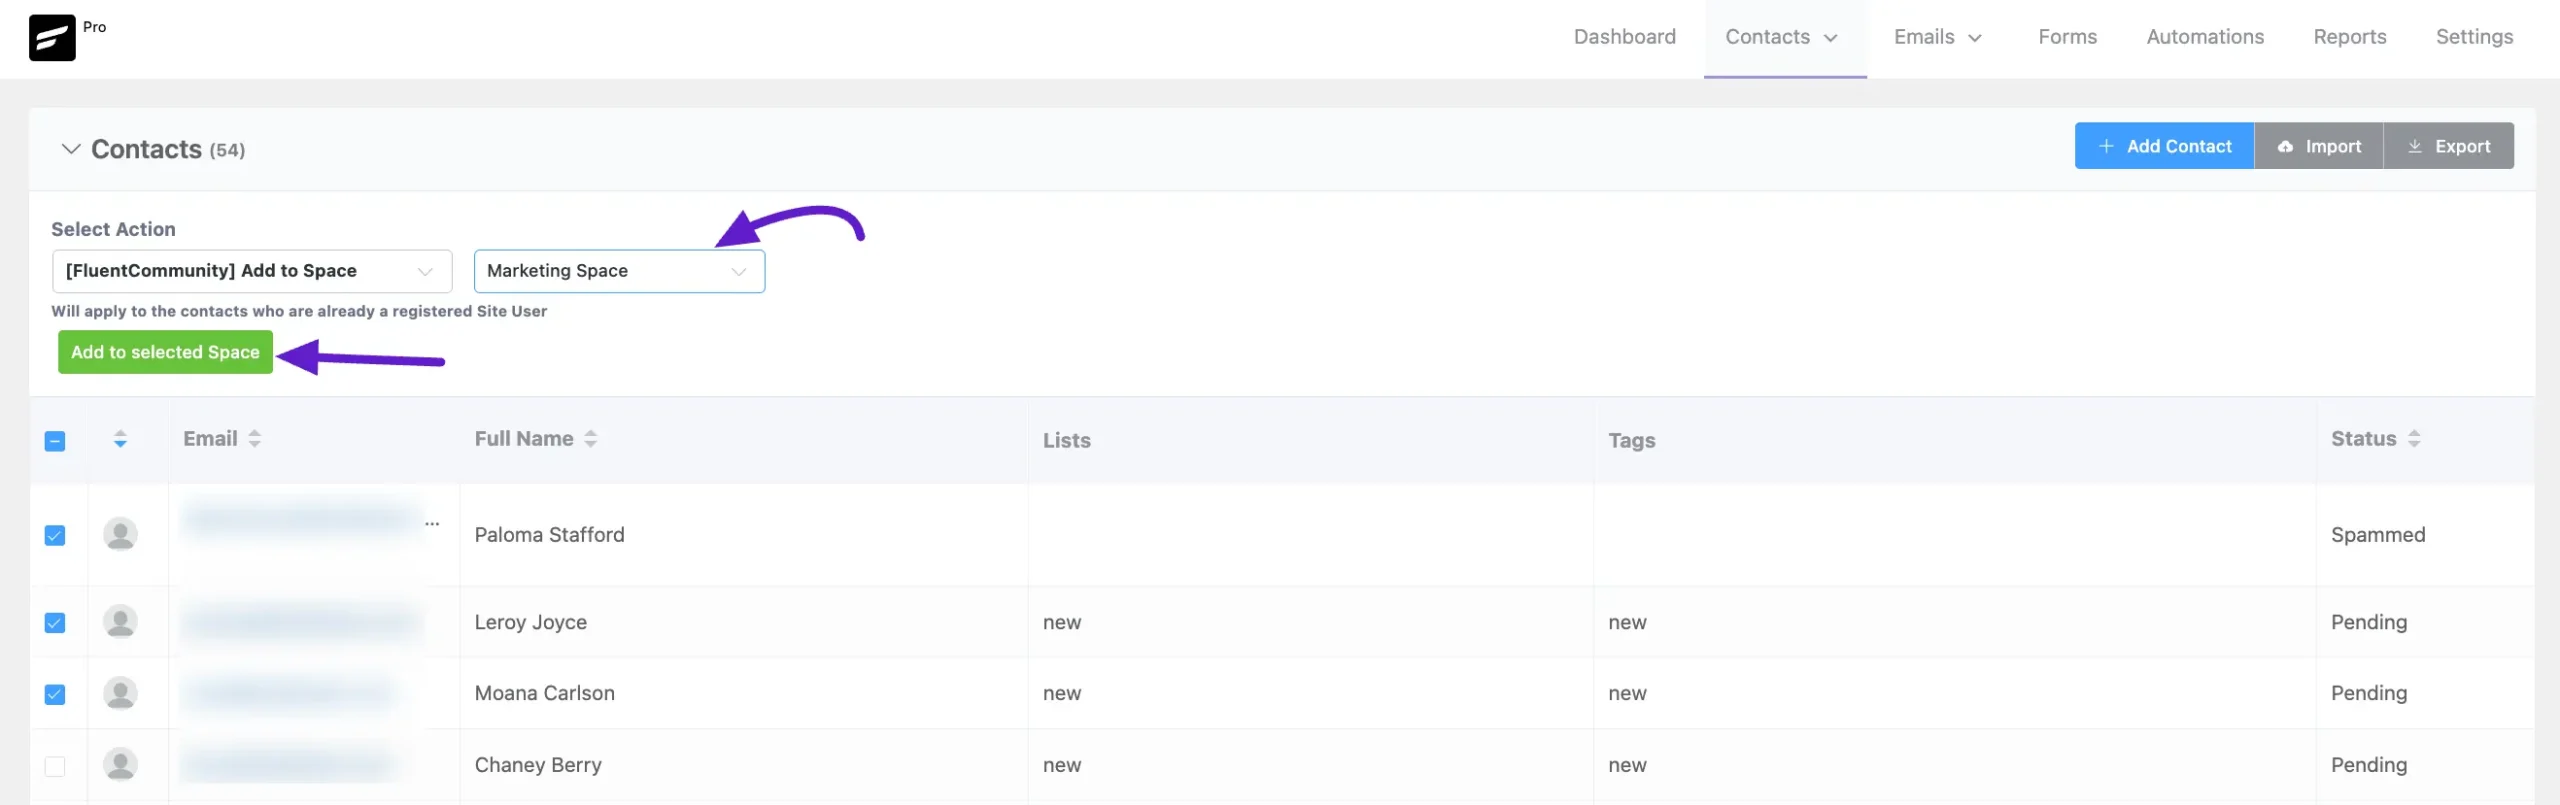
After selecting the desired action, select the desired Space/Course where you want to Add/Remove the contacts using the Dropdown list.
Finally, click the Add to Selected Space or Add to Selected Course button.
Targeted Email Campaigns #
The integration allows you to filter and segment your recipients in Email Campaigns based on their community engagement.
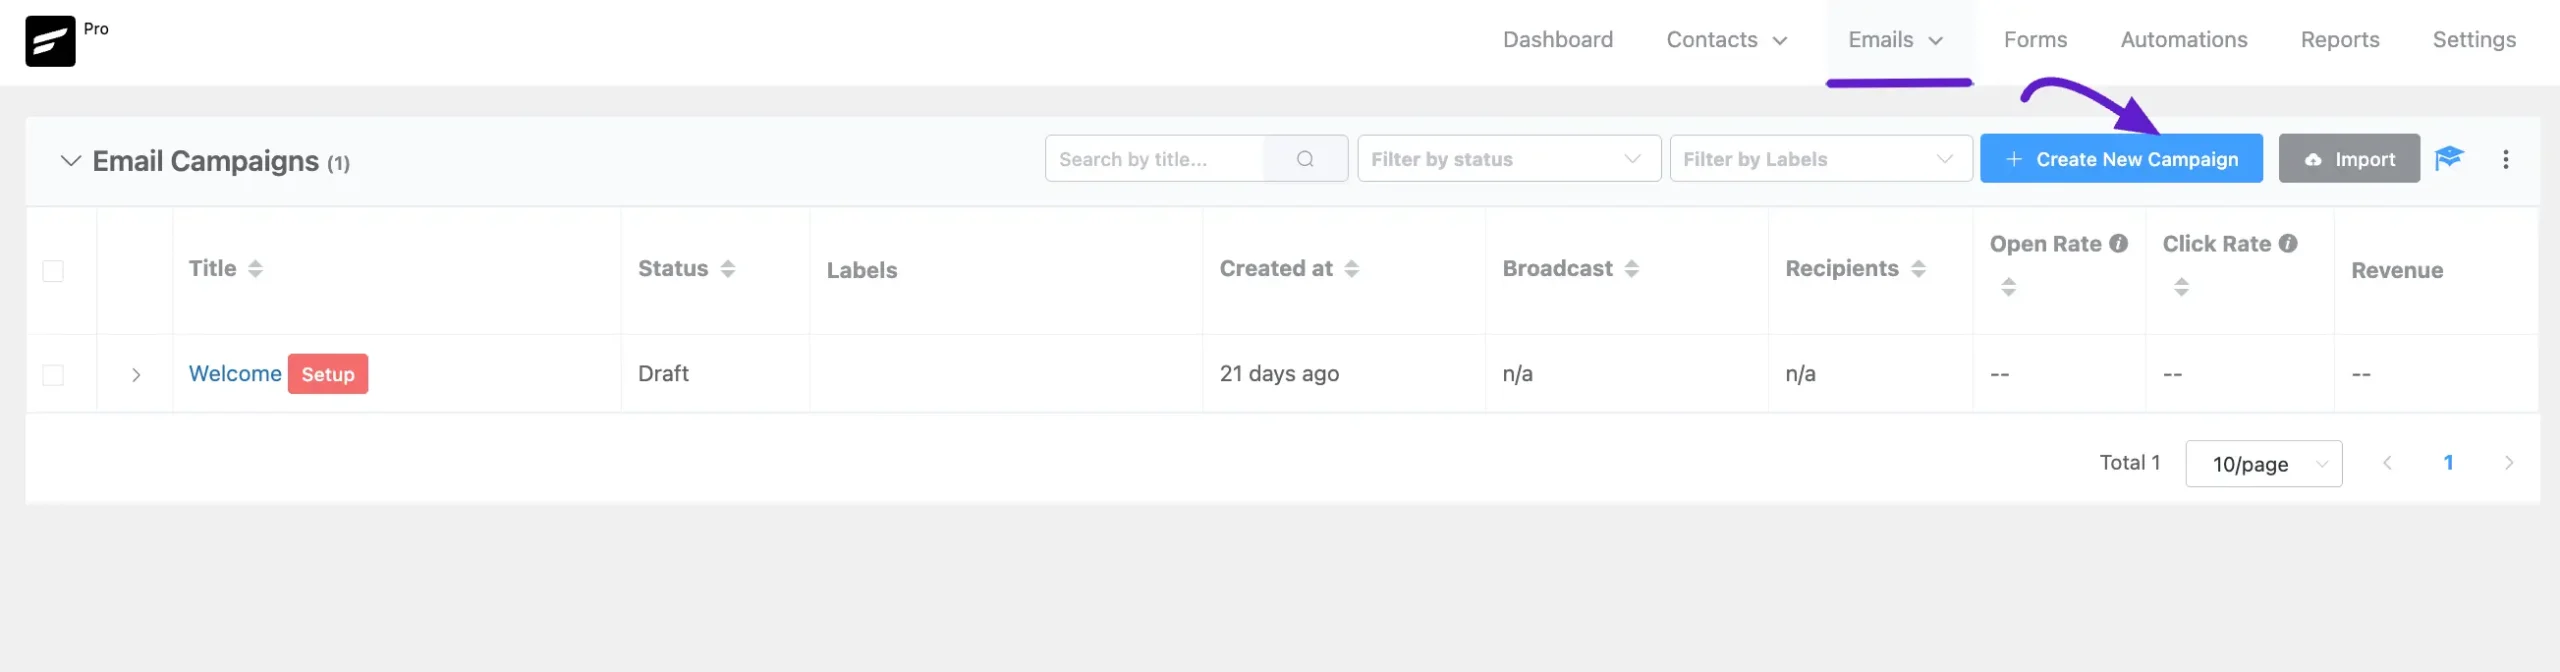
First, go to All Campaigns under the Emails section from the FluentCRM Navbar, and click the + Create New Campaign button.
To learn the detailed process of creating a new Email Campaign, read this Documentation.
Once you reach the Recipients section, you can select the recipients (i.e., FluentCommunity Users) for whom you want to run this email campaign in two different ways. These are:
- By List & Tag
- By Advanced Filter
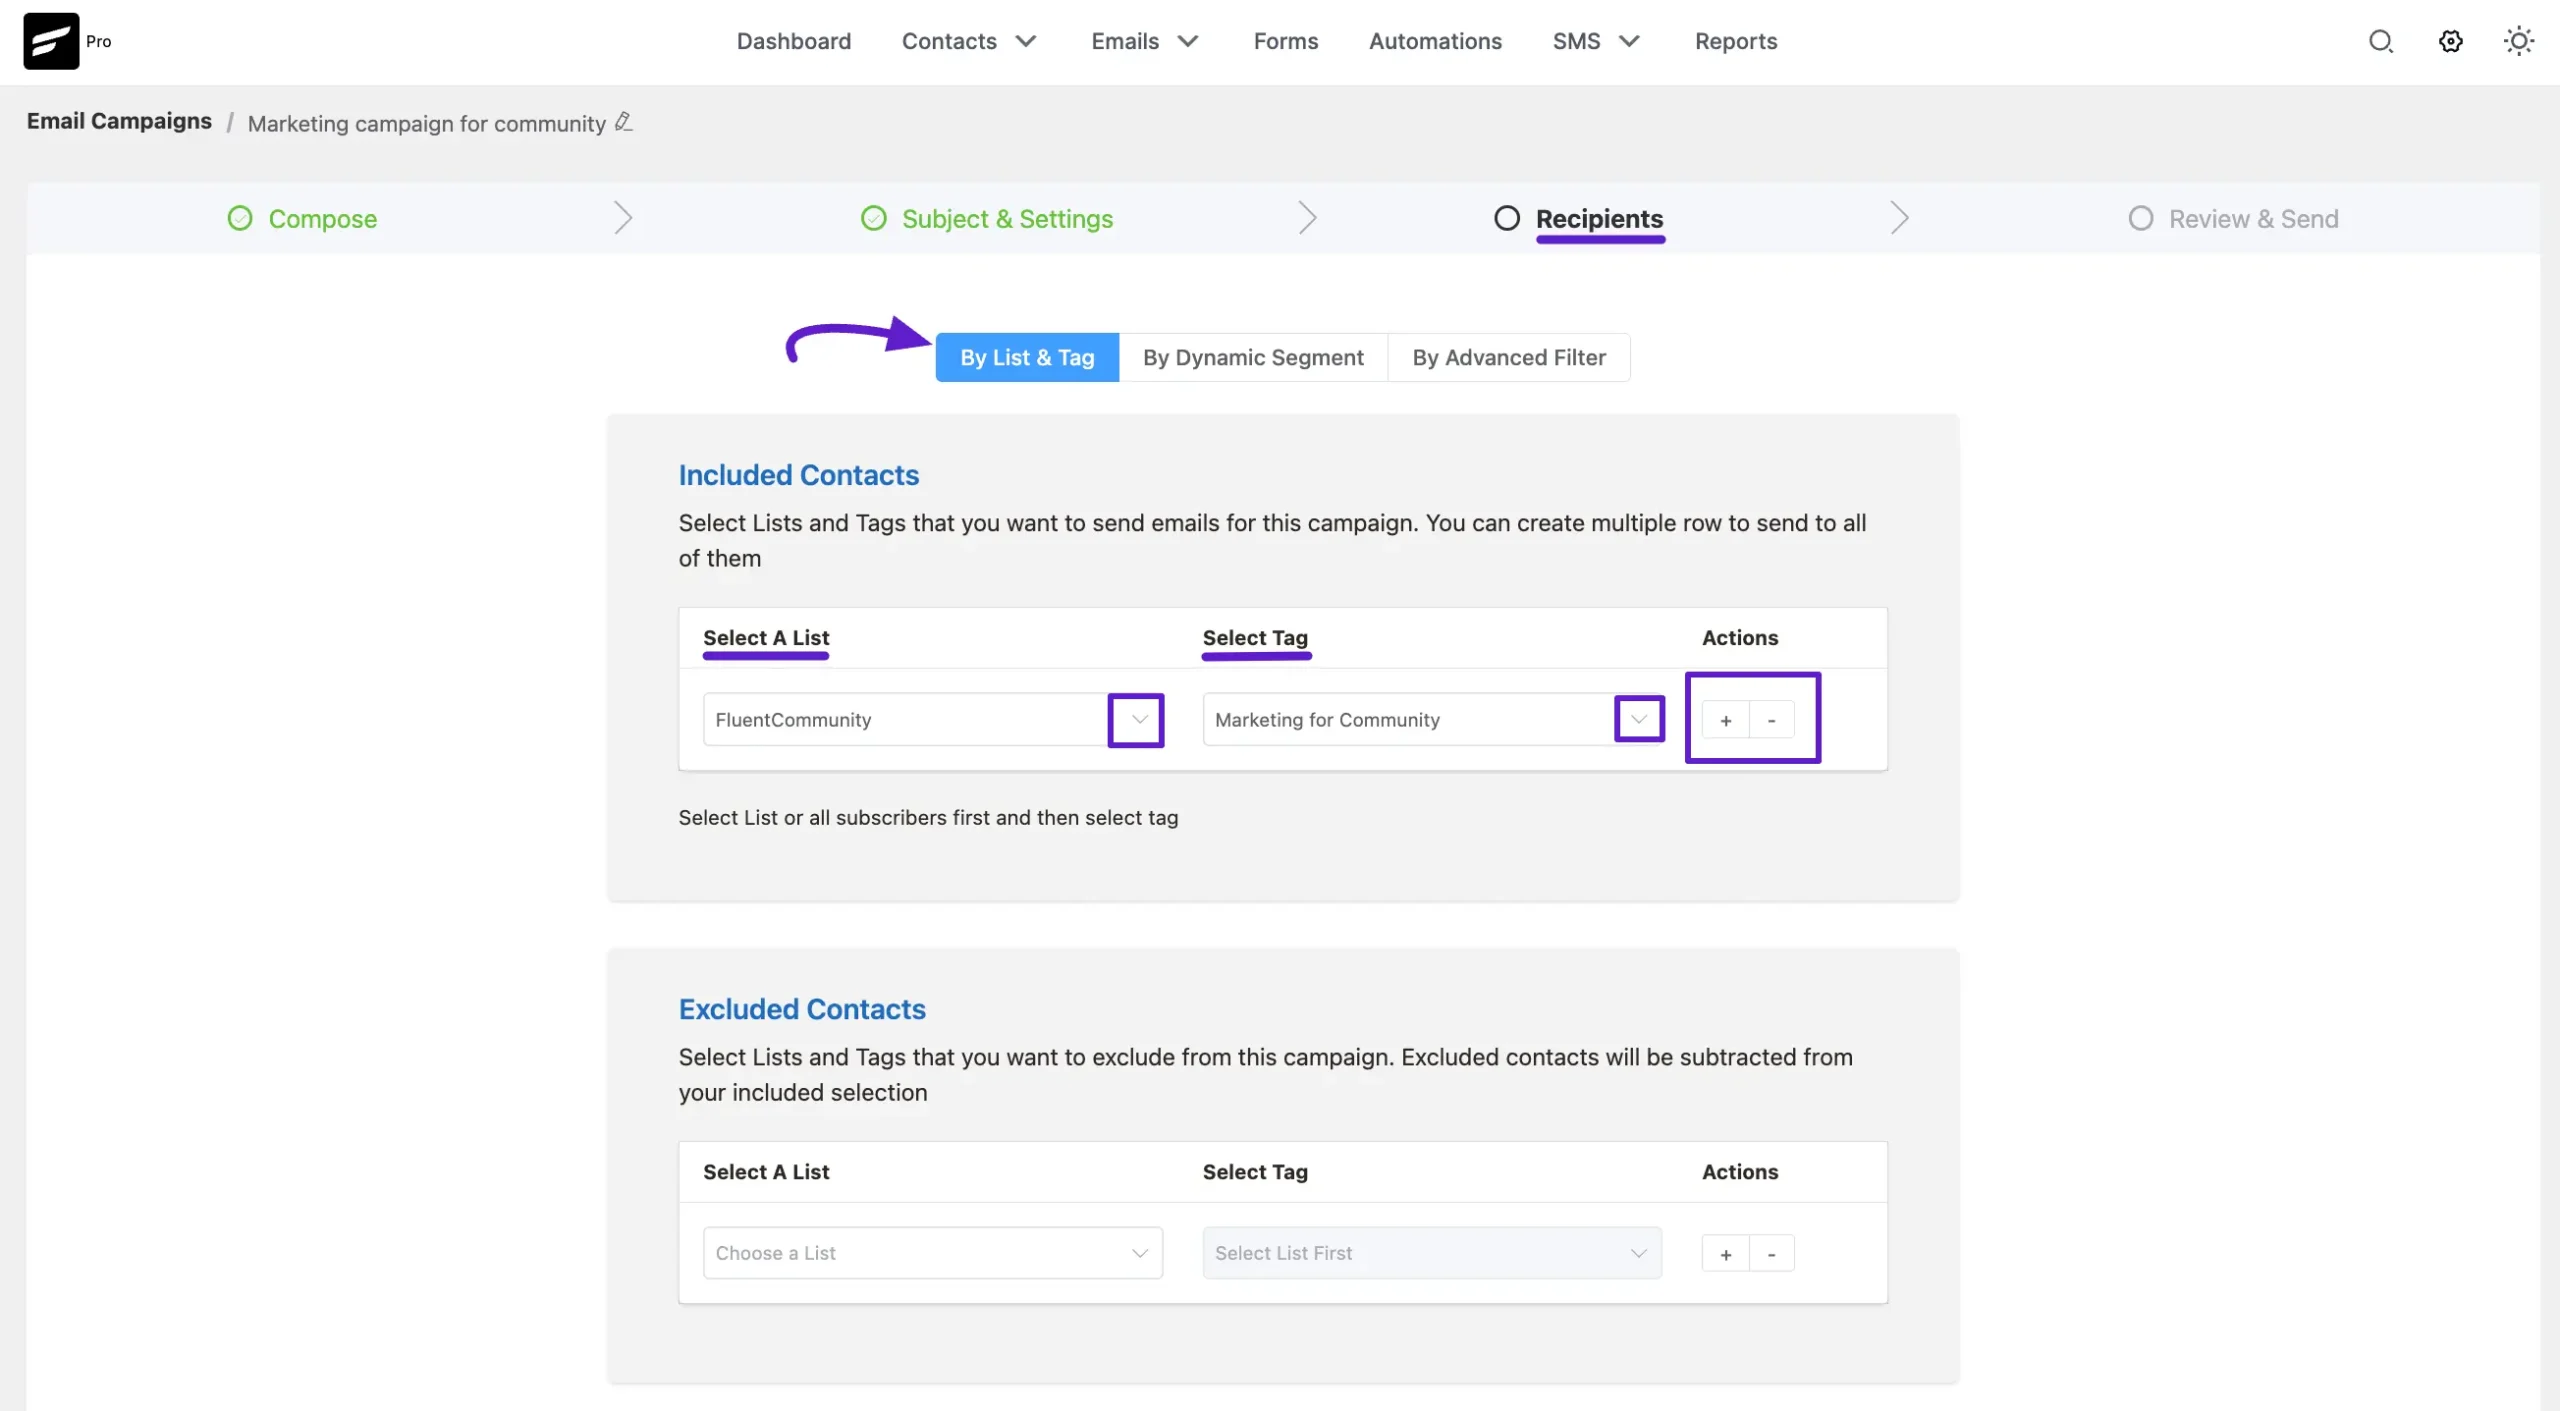
By List & Tag #
You can target community members by utilizing Automation to apply specific Lists or Tags based on their Community activity (e.g., tagging someone as “Power User” when they level up). Then, simply select those tags when creating your campaign.
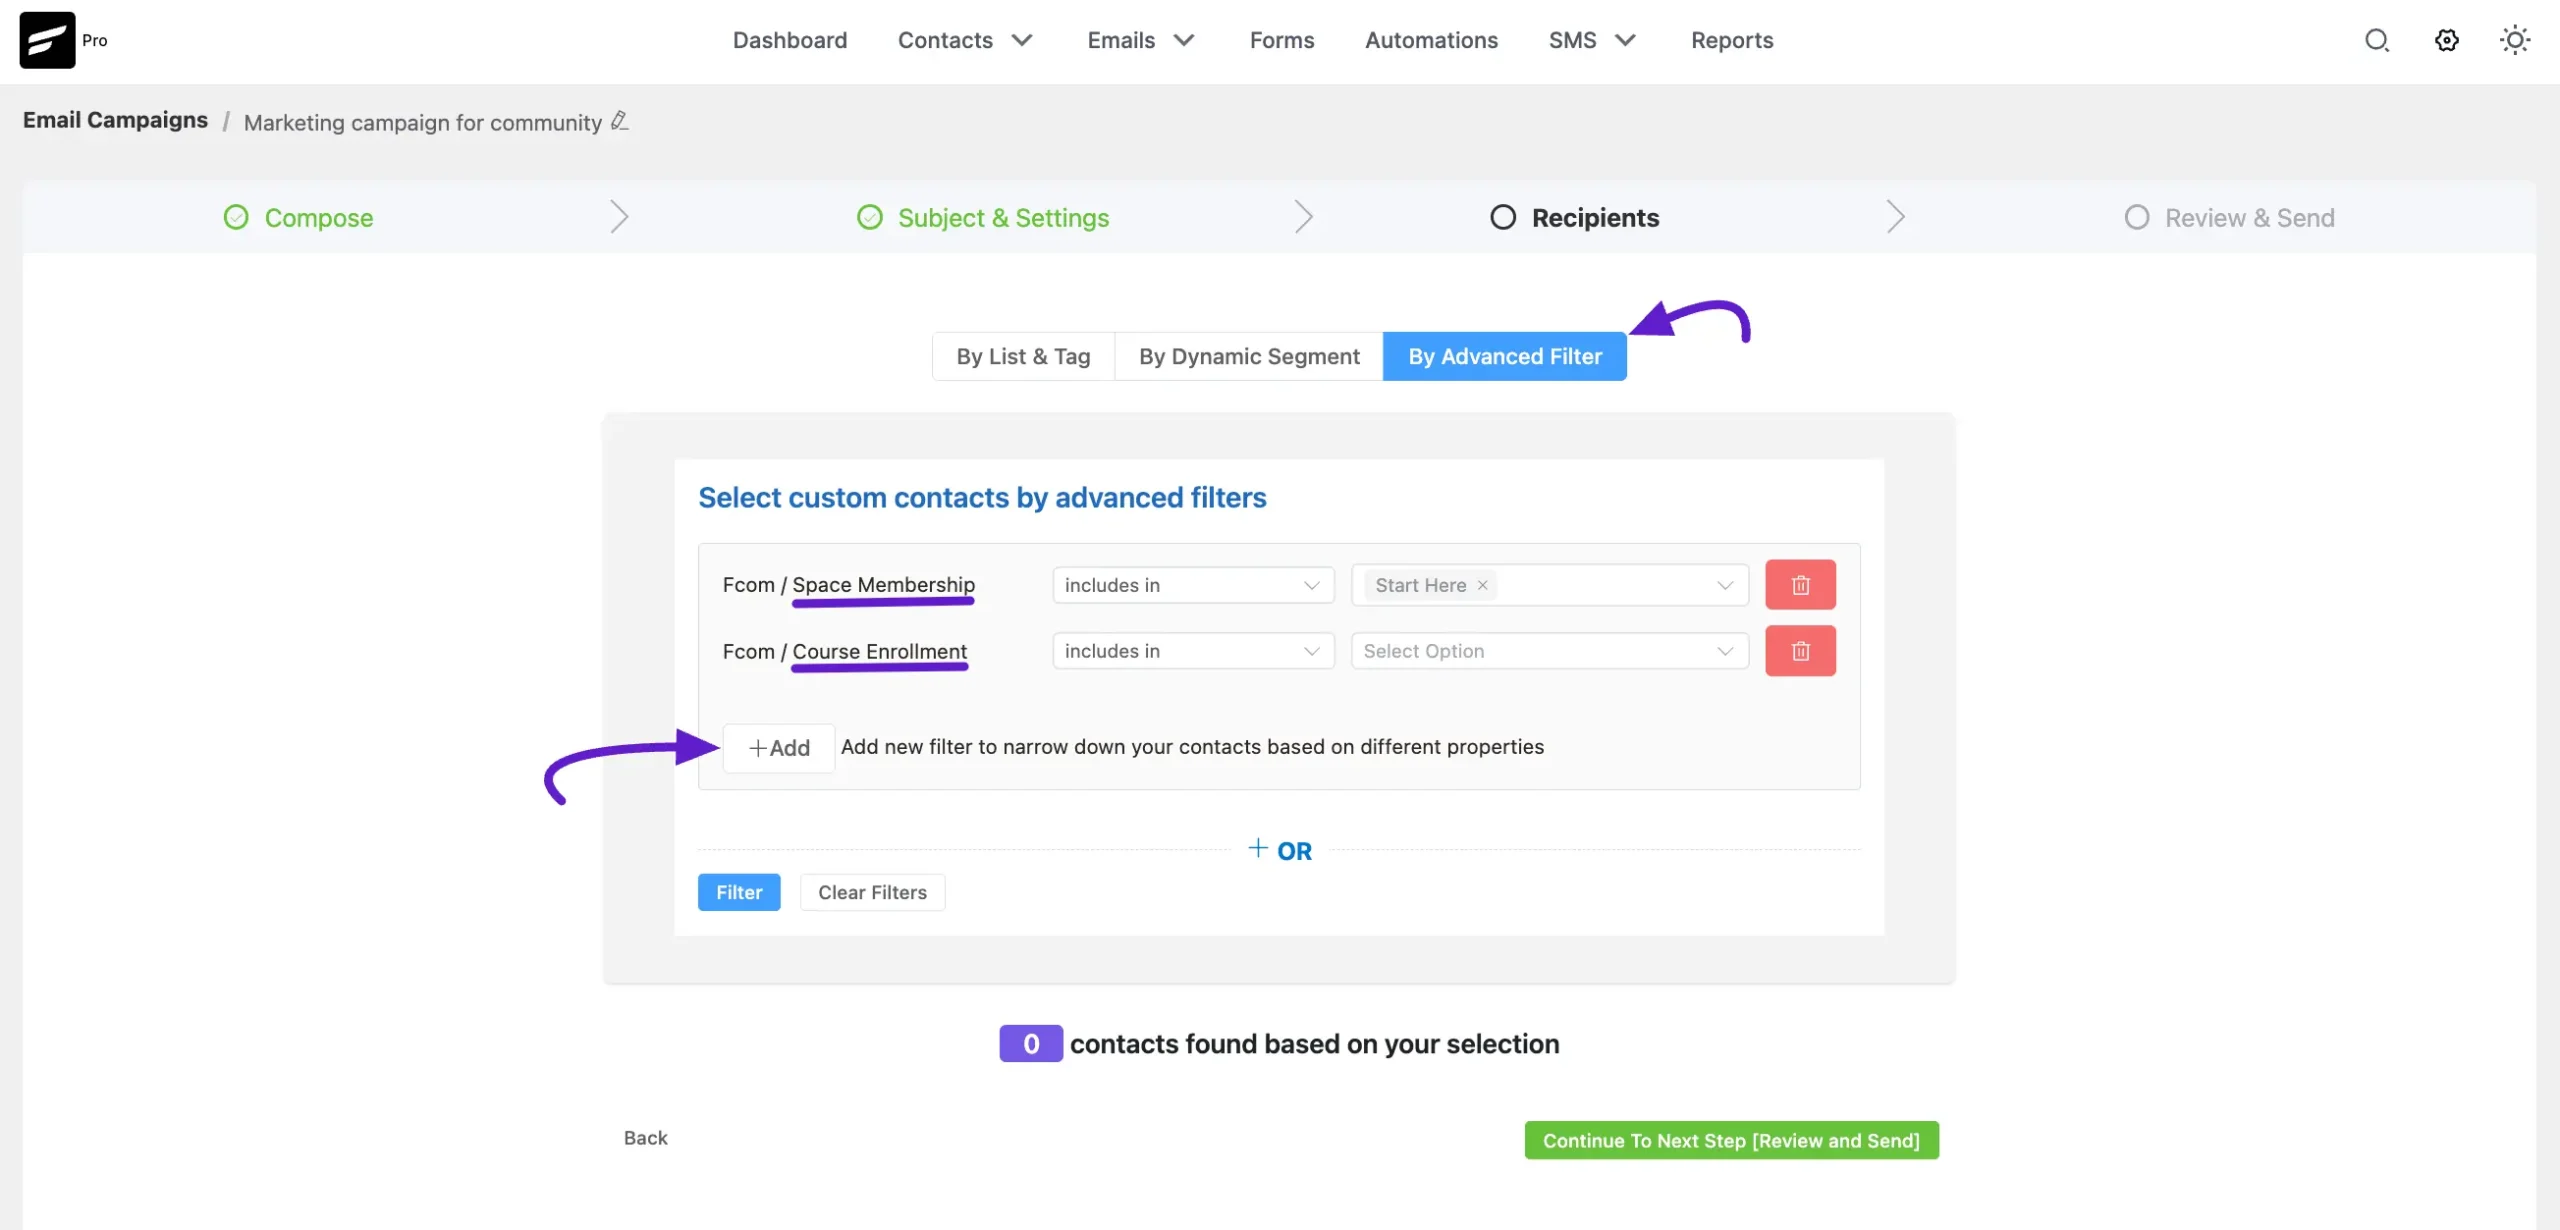
By Advanced Filter (Pro Feature) #
With FluentCRM Pro, you can target members even more precisely without manual tagging. Now, click on the + Add button to start the filtering where you will get two options Space Membership and Course Enrollment for FluentCommunity.
- Space Membership: Include or exclude members based on the specific Spaces they belong to.
- Course Enrollment: Target recipients based on whether they are enrolled in particular courses.
You can add more filters by clicking the +Add button, add filters against the existing filter by clicking the + OR button, and delete any existing filter by clicking the Trash Icon.
If you have any further questions or suggestions, please do not hesitate to reach out to our support team. We’re always here to help!


